Table of Contents
Advertisement
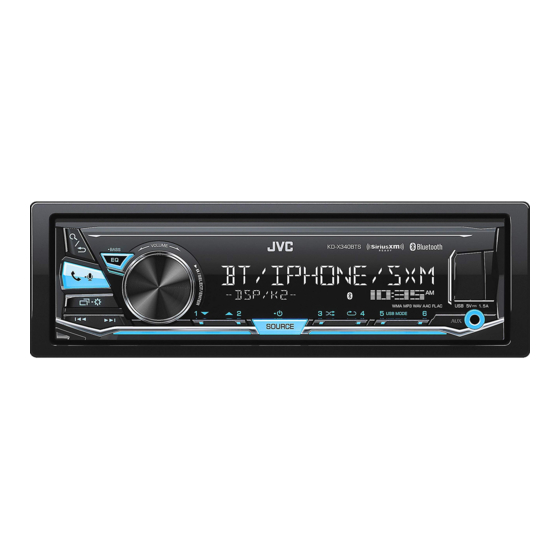
KD-X340BTS / KD-X240BT
DIGITAL MEDIA RECEIVER
INSTRUCTION MANUAL
RÉCEPTEUR MULTIMÉDIA NUMÉRIQUE
MANUEL D'INSTRUCTIONS
RECEPTOR DE MEDIOS DIGITALES
MANUAL DE INSTRUCCIONES
JS_JVC_KD_X340BTS_K_C.indd 1
For customer Use:
Enter below the Model No. and Serial No. which are
located on the top or bottom of the cabinet. Retain this
information for future reference.
Model No.
Serial No.
ENGLISH
FRANÇAIS
ESPAÑOL
B5A-1359-00 [K]
8/22/2016 3:22:16 PM
Advertisement
Table of Contents

Related Manuals for JVC Kd_X340BTS


Summary of Contents for JVC Kd_X340BTS
-
Page 1: Manual De Instrucciones
ENGLISH FRANÇAIS ESPAÑOL KD-X340BTS / KD-X240BT DIGITAL MEDIA RECEIVER INSTRUCTION MANUAL RÉCEPTEUR MULTIMÉDIA NUMÉRIQUE MANUEL D’INSTRUCTIONS RECEPTOR DE MEDIOS DIGITALES MANUAL DE INSTRUCCIONES For customer Use: Enter below the Model No. and Serial No. which are located on the top or bottom of the cabinet. Retain this information for future reference. - Page 2 Información acerca de la eliminación de equipos eléctricos y electrónicos al final de la vida FCC WARNING útil (aplicable a los países que hayan adoptado sistemas independientes de recogida de This equipment may generate or use radio frequency energy. Changes or modifications to this residuos) equipment may cause harmful interference unless the modifications are expressly approved in the Los productos con el símbolo de un contenedor con ruedas tachado no podrán ser...
- Page 3 IC (Industry Canada) Notice CAUTION This device complies with Industry Canada’s licence-exempt RSSs. This equipment complies with FCC/IC radiation exposure limits set forth for an uncontrolled environment and meets the FCC radio frequency (RF) Exposure Guidelines and RSS-102 of the IC radio Operation is subject to the following two conditions: (1) This device may not cause interference, and frequency (RF) Exposure rules.
-
Page 4: Software License Agreement
SOFTWARE LICENSE AGREEMENT Article 3 Conditions for Grant of License 1. When the User transfers the Product, it may also transfer the license to use the Licensed Software The software embedded in the Product (hereinafter the "Licensed Software") provided by Licensor is embedded in the Product (including any related materials, updates and upgrades) on condition that copyrighted to or sublicensable by the Licensor, and this Agreement provides for the terms and conditions no original, copies or related materials continue in the possession of the User, and that the User shall... - Page 5 Important Notice concerning the Software Article 8 Termination In case the User falls under any of the events described in the following items, the Licensor may immediately terminate this -jansson Agreement or claim that the User compensates for the damage incurred by the Licensor due to such event: (1) when the User violated any provision of this Agreement;...
-
Page 6: Table Of Contents
CONTENTS BEFORE USE BEFORE USE IMPORTANT • To ensure proper use, please read through this manual before using this product. It is especially important that you read and observe BASICS Warning and Caution in this manual. • Please keep the manual in a safe and accessible place for future reference. GETTING STARTED 1 Cancel the demonstration WARNING... -
Page 7: Basics
BASICS Faceplate Remote control (RM-RK52) This unit can be remotely controlled with an optionally Volume knob Display window purchased remote control. Remote sensor (Do not expose to bright sunlight.) Pull out the insulation sheet when using for Detach button the first time. Attach Detach How to reset... -
Page 8: Getting Started
Turn the volume knob to select [12H] or [24H], then press the knob. For details on how to update the firmware, visit To set the date <http://www.jvc.net/cs/car/>. Turn the volume knob to select [DATE SET], then press the knob. FACTORY RESET YES: Resets the settings to default (except the stored station). ;... -
Page 9: Radio
RADIO GETTING STARTED CLOCK TIME SYNC ON: The clock time is automatically set using the Clock Time (CT) data in FM Radio Broadcast Data System signal. ; OFF: Cancels. CLOCK ON: The clock time is shown on the display even DISPLAY when the unit is turned off. ; OFF: Cancels. “ST”... - Page 10 RADIO Other settings IF BAND AUTO: Increases the tuner selectivity to reduce interference noises from adjacent FM stations. (Stereo effect may be lost.) ; WIDE: Subjects to Press and hold interference noises from adjacent FM stations, but sound quality will not Turn the volume knob to select an item (see the following table), be degraded and the stereo effect will remain.
-
Page 11: Usb/Ipod/Android
When connecting an Android device, “Press [VIEW] to install JVC MUSIC PLAY APP” is shown. Follow the instructions Micro USB 2.0 cable * to install the application. You can also install the latest version of JVC MUSIC PLAY application on your Android device (commercially available) before connecting. - Page 12 (via USB input terminal). Preparation: • To return to the previous setting item, press Install the latest version of JVC Remote application on your device before • To cancel, press and hold connecting. For more information, visit <http://www.jvc.net/cs/car/>.
-
Page 13: Pandora
Pandora® Preparation: Create and store a new station Install the latest version of the Pandora application on your device (iPhone/iPod touch), then create an account and log in to Pandora. Press • Select [ON] for [PANDORA SRC] in [SOURCE SELECT]. ( 4) Turn the volume knob to select [NEW STATION], then press the knob. -
Page 14: Iheartradio
iHeartRadio® Preparation: On the faceplate On the remote control Install the latest version of iHeartAuto application on your device (iPhone/iPod touch), then create an account and log in to iHeartRadio. Playback/pause Press the volume knob. Press • Select [ON] for [IHEART SRC] in [SOURCE SELECT]. ( 4) Press T. -
Page 15: Siriusxm® Radio
SiriusXM® Radio (for KD-X340BTS) Only SiriusXM® brings you more of what you love Start listening to listen to, all in one place. Get over 140 channels, including commercial-free music plus the best sports, Press repeatedly to select SIRIUS XM. news, talk, comedy and entertainment. Welcome to the Press world of satellite radio. - Page 16 SiriusXM® Radio (for KD-X340BTS) Using SiriusXM tuner models later than SXV200: This unit can SiriusXM Replay™ assign a maximum of 18 SmartFavorites channels. Initially, all preset channels are assigned as SmartFavorites. While listening to a channel..Press the volume knob. •...
- Page 17 SiriusXM® Radio (for KD-X340BTS) TuneScan™ CODE SET 1 Press the volume knob to enter [NEW CODE]. 2 Turn the volume knob to select a number. You can get a short preview of the songs that you have missed on each of 3 Press to move to the entry position.
-
Page 18: Bluetooth
BLUETOOTH® BLUETOOTH — Connection Pair and connect a Bluetooth device for the first time Supported Bluetooth profiles Press to turn on the unit. – Hands-Free Profile (HFP) Search and select “KD-X3 BTS”/“KD-X2 BT” on the Bluetooth device. – Advanced Audio Distribution Profile (A2DP) “BT PAIRING”... - Page 19 – [AUTO PAIRING] is set to [ON]. ( 18) KD-X240BT: – JVC MUSIC PLAY application is installed on The buttons will blink in the blinking pattern you have selected in [RING ILLUMI]. ( 16) the Android device ( 7) and [AUTO MODE] is •...
- Page 20 BLUETOOTH® Default: XX On the faceplate On the remote control MIC GAIN LEVEL –10 to LEVEL +10 (LEVEL –04): The sensitivity of the While talking on the first incoming call... microphone increases as the number increased. Answer another incoming Press or the volume NR LEVEL LEVEL –05 to LEVEL+05 (LEVEL 00): Adjust the noise call and hold the current ( Not available )
- Page 21 BLUETOOTH® Make a call using voice recognition Make a call Press and hold to activate the connected You can make a call from the call history, phonebook, or dialing the number. Call by phone. voice is also possible if your mobile phone has the feature. Speak the name of the contact you want to call or Press to enter Bluetooth mode.
- Page 22 BLUETOOTH® Bluetooth mode settings Bluetooth compatibility check mode Press and hold You can check the connectivity of the supported Turn the volume knob to select an item (see the following table), then press the knob. profile between the Bluetooth device and the unit. Repeat step until the desired item is selected/activated or follow the instructions •...
- Page 23 BLUETOOTH® The connectivity result flashes on the display. BLUETOOTH — Audio “PAIRING OK” and/or “HANDS-FREE OK”* and/ While in BT AUDIO source, you or “AUD.STREAM OK”* and/or “PBAP OK”* can connect to five Bluetooth Compatible audio devices and switch Compatible with Hands-Free Profile (HFP) between these five devices.
- Page 24 ANDROID CONNECTED: You are able to use the application using the Preparation: Android smartphone connected via Bluetooth. Install the latest version of JVC Remote application on your device before ANDROID NOT CONNECTED: No Android device is connected to use the connecting. For more information, visit <http://www.jvc.net/cs/car/>.
-
Page 25: Aux
BLUETOOTH® Internet radio via Bluetooth Use a portable audio player You can listen to internet radio (Pandora and iHeartRadio) on the iPhone/ Connect a portable audio player (commercially available). iPod touch/Android device via Bluetooth on this unit. 3.5 mm (1/8") stereo mini plug with “L” •... -
Page 26: Audio Settings
AUDIO SETTINGS Default: XX EQ SETTING PRESET EQ Select a preset equalizer suitable to the music genre. • Select [USER] to use the settings made in [EASY EQ] or [PRO EQ]. FLAT/DRVN 3/DRVN 2/DRVN 1/HARD ROCK/HIP HOP/JAZZ/POP/ R&B/USER/CLASSICAL Select a preset equalizer EASY EQ Adjust your own sound settings. - Page 27 AUDIO SETTINGS LOUDNESS LEVEL 01/LEVEL 02: Boosts low or high frequencies to produce a well- SPEAKER SIZE Depending on the crossover type you have selected ( [X ' OVER balanced sound at low volume. ; OFF: Cancels TYPE]), 2-way crossover or 3-way crossover setting items will be shown.
- Page 28 AUDIO SETTINGS Connection via speaker leads Speaker output settings [SPK/PRE OUT] For connections without using an external amplifier. However, with this (Applicable only if [X ' OVER TYPE ] is set to [2-WAY]) ( 23) settings you can also enjoy the subwoofer output. ( 36, 37) Select the output setting for the speakers [SPK/PRE OUT], based on the speaker connection method.
- Page 29 AUDIO SETTINGS 2-way crossover setting items Crossover settings Below are the available setting items for 2-way crossover and 3-way SPEAKER SIZE crossover. FRONT SIZE 3.5"/4"/4.75"/5"/6.5"/6.75"/7"/4×6/5×7/6×8/ Caution 6×9/7×10 Select a crossover type according to how the speakers are connected. TWEETER SMALL/MIDDLE/LARGE/NONE (not connected) ( 36, 37) REAR * 3.5"/4"/4.75"/5"/6.5"/6.75"/7"/4×6/5×7/6×8/6×9/7×10/...
- Page 30 AUDIO SETTINGS 3-way crossover setting items Digital Time Alignment settings SPEAKER SIZE Digital Time Alignment sets the delay time of the speaker output to create a more suitable environment for your vehicle. TWEETER SMALL/MIDDLE/LARGE • For more information, 27, Determining the value for [DISTANCE] and MID RANGE 3.5"/4"/4.75"/5"/6.5"/6.75"/7"/4×6/5×7/6×8/6×9 [GAIN] of [DTA SETTINGS].
-
Page 31: Display Settings
DISPLAY SETTINGS AUDIO SETTINGS Determining the value for [DISTANCE] and [GAIN] of [DTA SETTINGS] If you specify the distance from the center of the currently set listening position to every speaker, the delay time will be automatically computed and set. 1 Determine the center of the currently set listening position as the reference point. -
Page 32: References
• COLOR 01 to COLOR 49 For: – Latest firmware updates and latest compatible item list • USER: The color you have created for [DAY COLOR] or – JVC original application [NIGHT COLOR] is shown. – Any other latest information •... - Page 33 REFERENCES • Via Bluetooth: Change the display information Made for Each time you press , the display information changes. – iPod touch (5th and 6th generation) • If the information is unavailable or not recorded, “NO TEXT”, “NO NAME”, or other –...
-
Page 34: Troubleshooting
TROUBLESHOOTING REFERENCES Source name Display information Symptom Remedy IHEARTRADIO Station name (Date/Clock) Song title (Artist) Song title (Date/ Sound cannot be heard. • Adjust the volume to the optimum level. Clock) Station name (Date/Clock) with music synchronisation* • Check the cords and connections. (back to the beginning) “MISWIRING CHECK Turn the power off, then check to be sure the terminals... - Page 35 ( 29) to insufficient network connectivity. Cannot playback at • Make sure JVC MUSIC PLAY APP is installed on the “THUMBS N/A” Registration of thumbs up/thumbs down is not allowed.
- Page 36 Reset the unit ( 3) Contact (USA only) Echo or noise occurs. • Adjust the microphone unit’s position. ( 14) Call: 1-800-252-5722 ( or ) visit: <http://www.jvc.com> • Check the [ECHO CANCEL] setting. ( 16) ENGLISH JS_JVC_KD_X340BTS_K_EN_3.indd 32 9/8/2016 10:36:07 AM...
-
Page 37: Specifications
SPECIFICATIONS FM Frequency Range 87.9 MHz — 107.9 MHz (200 kHz step) Frequency Response (±3 dB) 20 Hz — 20 kHz 87.5 MHz — 108.0 MHz (50 kHz step) Input Maximum Voltage 1 000 mV Usable Sensitivity (S/N = 26 dB) 8.2 dBf (0.71 μV/75 Ω) Input Impedance 30 kΩ Quieting Sensitivity (DIN S/N = 46 dB) 17.2 dBf (2.0 μV/75 Ω) Frequency Response (±3 dB) 30 Hz — 15 kHz Version Bluetooth 3.0 Signal-to-Noise Ratio (MONO) -
Page 38: Installation/Connection
INSTALLATION/CONNECTION SPECIFICATIONS Warning Operating Voltage 14.4 V • The unit can only be used with a 12 V DC power supply, negative ground. (10.5 V — 16 V allowable) • Disconnect the battery’s negative terminal before wiring and mounting. Maximum Current Consumption 10 A • Do not connect Battery wire (yellow) and Ignition wire (red) to the car chassis or Ground wire (black) to prevent a short circuit. - Page 39 INSTALLATION/CONNECTION Installing the unit (in-dash mounting) Part list for installation (A) Faceplate (B) Trim plate Do the required wiring. ( 36, 37) (C) Mounting sleeve (D) Wiring harness Hook on the top side Orientate the trim Dashboard of plate as illustrated your car before fitting.
- Page 40 Output We recommend installing the unit with a terminals commercially available custom wiring harness specific JVC Amplifier * ( 35) for your car and leave this job to professionals for your Signal cord (not supplied) safety. Consult your car audio dealer.
- Page 41 Output We recommend installing the unit with a terminals commercially available custom wiring harness specific JVC Amplifier * ( 35) for your car and leave this job to professionals for your Signal cord (not supplied) safety. Consult your car audio dealer.
- Page 42 HOWEVER CAUSED AND ON ANY THEORY OF LIABILITY, WHETHER IN CONTRACT, STRICT LIABILITY, use of such marks by JVC KENWOOD Corporation is under license. Other trademarks and trade names OR TORT (INCLUDING NEGLIGENCE OR OTHERWISE) ARISING IN ANY WAY OUT OF THE USE OF THIS are those of their respective owners.