Table of Contents
Advertisement
Quick Links
Advertisement
Table of Contents

Related Manuals for Grundig Digta x4015 DS


Summary of Contents for Grundig Digta x4015 DS
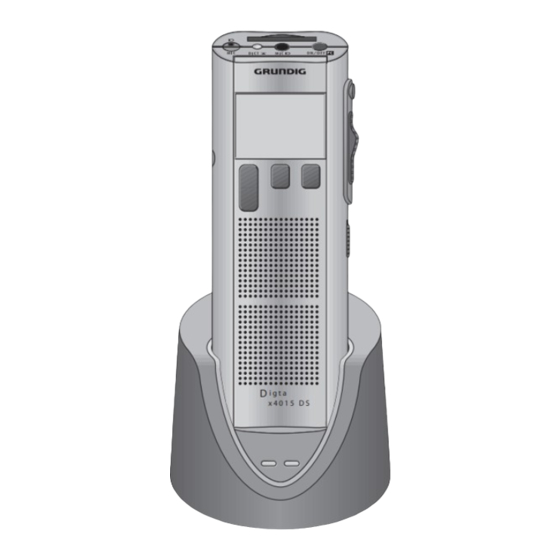
- Page 1 Digta x4015 DS English www.grundig-gbs.com...
-
Page 2: Table Of Contents
4 Safety 18 New dictation 4 Environmental protection 18 Recording pause 5 Scope of delivery 19 Ending recording Digta x4015 DS Classic 20 Editing a dictation 5 Accessories 21 The Info function and the Index 6 The Control Elements function... - Page 3 CONTENTS ________________________________________ 32 Functions In The Menu 58 Firmware Update 58 Carrying out a firmware update 32 Menu navigation 59 Enabling optional functions 33 Dictation status 34 Folder 60 DigtaScan 404 Barcode 35 Typist Reader 36 Dictation type 37 Group 60 Using barcodes 38 No./Ref.
-
Page 4: Notes
NOTES _____________________________________________ Your Digta x4015 DS is a digital portable dictation machine. It can be used with the software supplied as a single-station dicta- tion system. In addition, with the optional network license, you can connect it to a network (a local area network with several authors and typists). -
Page 5: Scope Of Delivery Digta X4015 Ds Classic
You find our latest accessories like mains/charging unit, plug in microphone and headphones on our website on the internet: www.grundig-gbs.com. The features indicated by Grundig apply only when using origi- nal Grundig accessories. Defects, due to the use of accessories which are not original... -
Page 6: The Control Elements
THE CONTROL ELEMENTS ___________________ Microphone Card slot On/off/PC mode button Recording indicator Socket for external micro- phone Fast forward Display Slide switch for recording, Function buttons: stop, play-back, fast rewind labeled in the bottom display line Safety lock Up/down button Menu/OK button Button for new dictation/ escape... - Page 7 THE CONTROL ELEMENTS ___________________ Earphone connection; impedance min.32 Ω Card ejection switch Battery-compartment cover PC/USB-Interface Power connection DC IN 3V – ---...
-
Page 8: The Display
THE DISPLAY _____________________________________ Selected folder Available recor- Free 0:37h ding time Operation with: – Battery » « Dictation number DICTOO1 0:06 – Rechargeable bat- Current function tery » « Record Pause (status line) – Power supply » « Current button Indication for voice function activation (va) and... -
Page 9: Preparations
PREPARATIONS _________________________________ Battery operation The dictation machine can be used for approximately 12 hours when the alkaline manganese batteries are fully charged. HOLD • Open the battery compartment. • Insert batteries (Mignon types, i.e. R6, UM3 or AA, 2 x 1,5 V). Make sure the polarity is correct. •... -
Page 10: Rechargeable Battery Operation
- to the DigtaStation 441 - so that it can be recharged. – Display for rechargeable battery operation » «. Inserting rechargeable batteries Only Grundig rechargeable batteries 462 may be charged inside the dictation machine using mains/charging unit 473. • Switch off the dictation machine. -
Page 11: Charging The Rechargeable Battery - Directly
Grundig rechargeable bat- teries and some other makes it is possible that part or even all of the dictation could be lost if original Grundig rechargeable batteries are not used. Rechargeable batteries from other manufacturers are identified by the dictation machine as non-rechargeable batteries, and shown in the display by the »... -
Page 12: Charging The Battery- Using The Digtastation
PREPARATIONS _________________________________ Charging the battery – using the DigtaStation 441* • Plug the jack of the power pack lead into the socket on the DigtaStation 441. • Plug the power pack into the mains socket. – The yellow indicator on the DigtaStation 441 lights up. •... - Page 13 PREPARATIONS _________________________________ Notes on Grundig rechargeable battery 462 New rechargeable batteries do not reach full capacity until they have been recharged several times. For this reason the operating time for new rechargeable batteries may be in rare cases less than three hours. When these batteries are fully charged, you can use the dictation machine up to 7 hours.
-
Page 14: Inserting Replaceable Memory Cards
_________________________________ Inserting replaceable memory cards (not supplied) You can use memory cards instead of the internal memory. Please use DigtaCards supplied as accessories by Grundig Business Systems. • Push the memory card into the slot with the side with the diagonal corner facing the direction shown on the back of the device. -
Page 15: Formatting Replaceable Memory Cards
PREPARATIONS _________________________________ New memory cards must be formatted before any writ- ing can be done. It is essential that the notes in the chapter "MENU FUNCTIONS - Format memory" be observed. Formatting replaceable memory cards Memory cards – including those which have been prefor- matted –... -
Page 16: Switching On
SWITCHING ON __________________________________ Switching on and off Initial switching on • Press the »ON/OFF« button until the red recording indi- cator has glowed and then gone off again. – The software is loaded. – You should then set date and time. •... -
Page 17: Recording
RECORDING ______________________________________ Saving dictations Dictations are stored on the internal memory (64 MB) of the dictation machine – if no memory card is in use. Free 0:37h If a memory card is inserted (DigtaCard), all dictations va c no dictations are recorded on it. -
Page 18: New Dictation
RECORDING ______________________________________ New dictation • Move the slide switch to » STOP «. Free 0:37h va c no dictations • Press the »NEW« button. – This display only appears, if there was not yet a MENU recorded dictation on the memory device. •... -
Page 19: Ending Recording
RECORDING ______________________________________ Ending recording Move the slide switch to » STOP «. • ►► • Press the » FFWD« button. Fast rewind or play-back during recording also ends the recording. Note: When recording is ended the date and the time are saved along with every dictation (displayed only on the PC). -
Page 20: Editing A Dictation
RECORDING ______________________________________ Editing a dictation When playing-back a dictation, you may speak a new text from the current dictation position, or add a recording to the end of the dictation. Note the memory which is available. It is displayed »Free-:--h« (in hours and minutes). •... -
Page 21: The Info Function And The Index Function
RECORDING ______________________________________ The Info function and the Index function* As an integral part of a dictation, you can dictate instructions ▬ ▲ = Info) for your typist and mark them, or set index marks = Index) for specific parts of the dictation. ▼... -
Page 22: Inserting A Section Of Dictation
RECORDING ______________________________________ Inserting a section of dictation • Move the slide switch to » « during play-back. STOP Free 0:37h va c • Press the »REC« button. DICTOO1 O:14 ..........– »Record Pause« appears in the display. Record Pause •... -
Page 23: Inserting An Index - During Recording
RECORDING ______________________________________ Inserting an index* – during recording You can also add an index during recording. • Press the Down button »i «. ▼ – »i« and the index number briefly appear in the dis- play. • Carry on dictating your text after the signal tone. Adding an index* –... -
Page 24: Dictating Using The Foot Control
RECORDING ______________________________________ Dictating using the foot control • Connect the foot control to the DigtaStation. • With the dictation machine switched on, plug it into the DigtaStation. Note: If the dictation machine is switched on or off in the Dig- taStation and the DigtaStation is connected via USB cable to the PC the dictation machine switches to PC mode. -
Page 25: Play-Back
PLAY-BACK _______________________________________ Selecting a dictation and playing-back • Move the slide switch to » STOP «. • Select the desired dictation using the up/down button »DICT + _ «. Free 0:37h va c DICT001 O:26 ........► • Move the slide switch to » PLAY«. -
Page 26: Fast Play-Back
PLAY-BACK _______________________________________ Fast play-back • Press the » 1.5 « button during play-back. ►► Free 0:37h – The dictation will be played back with about 1,5 times va c DICTOO1 O:14 the normal speed............. Play-back • Press the » 1.0 «... -
Page 27: Deleting Dictations
DELETING DICTATIONS ________________________ Deleting an entire dictation • Move the slide switch to » STOP «. Free 0:37h va c • Select the desired dictation with the up-down button DICT001 O:26 ........»DICT + _ «. DICT + - MENU •... -
Page 28: Deleting An Info Or An Index
DELETING DICTATIONS ________________________ ► • Move the slide switch to » PLAY«. At the start of the Free 0:37h va c part to be deleted, move the slide switch to » STOP « DICTOO2 O:14 ............ -
Page 29: The Menu
THE MENU ________________________________________ Overview of the functions in the menu • Press the »MENU« button. Free 0:37h va c You may select with the up-down button »▲« or »▼« DICT001 O:03 ........the following functions: DICT + - MENU – Delete Described in the ”Deleting dicta- tions"... -
Page 30: Overview Of The Menu Settings
THE MENU ________________________________________ – Author Selects the author for new dicta- tions. – Format Formats the internal memory or inserted memory card. Note: This deletes all data. – Settings See the following chapter. Overview of the menu settings • Press the MENU« button and then use the up-down Priority button »▲«... - Page 31 THE MENU ________________________________________ – Audio signals Switches the signal tones on/off. – Illumination Switches the display lighting on/off. – Foot control Selects the functions of the foot con- trol for recording and play-back. – Time, Date Sets the date and time (timestamp for dictations).
-
Page 32: Functions In The Menu
FUNCTIONS IN THE MENU ____________________ Menu navigation Use the up-down button »▲« or »▼« to select the desired ► Delete menu item. Dictation status Activate the menu item with »OK«. Folder The current function/setting appears on a dark back- ▼ ▲ ground. -
Page 33: Dictation Status
FUNCTIONS IN THE MENU ____________________ Dictation status* The "Created" status and the date and the time are saved in the dictation for every new dictation. The first time the dictation is ended, it is assigned the status of "Dictated". This status and the date and the time are saved in the dictation. -
Page 34: Folder
FUNCTIONS IN THE MENU ____________________ Folder The »Folder« function enables you to store your dicta- tions in three folders, A, B and C, allowing you to sepa- rate business and private dictations, for example. As an expansion* three more folders (D, E and F) are possible. -
Page 35: Typist
FUNCTIONS IN THE MENU ____________________ Typist The »Typist« function is used to select the typist who will receive your dictation. You may select from ten "typists". Use the up or down button »▲« »▼« to select the • menu item »Typist«. Folder •... -
Page 36: Dictation Type
FUNCTIONS IN THE MENU ____________________ Dictation type »Dictation type« is used to select the form to be used for the dictation: i.e. fax, letter, or report. Use the up or down button »▲« »▼« to select the • menu item »Dictation type«. Folder Typist •... -
Page 37: Group
FUNCTIONS IN THE MENU ____________________ Group The »Group« function is used to assign your dictation to a specific group or department. Use the up »▲« or down »▼« button to select the • Typist »Group« menu item. Dictation type ► Group •... -
Page 38: No./Ref
FUNCTIONS IN THE MENU ____________________ No./Ref. The »No./Ref.« function is used to enter up to 16 characters for the dictation; examples include file or patient numbers. Use the up »▲« or down »▼« button to select the • »No./Ref.« menu item. Dictation type Group •... -
Page 39: Priority
FUNCTIONS IN THE MENU ____________________ Priority* The »Priority« function is used to select what priority new dictations should have. The priority is displayed in the status line. Use the up »▲« or down »▼« button to select the • Group »Priority«... -
Page 40: Author
FUNCTIONS IN THE MENU ____________________ Author* The »Autor« function is used to select which author is making the dictation. Use the up-down button »▲« or »▼« to select the • Nro./Ref. »Author« menu item. Pri o ri t y ► •... -
Page 41: Format
FUNCTIONS IN THE MENU ____________________ Format The »Format« function is used to format the internal memory or the external memory card. All existing data is deleted. Use the up-down button »▲« or »▼« to select the • »Format« menu item. Pri o ri t y Author •... -
Page 42: Settings In The Menu
SETTINGS IN THE MENU ______________________ Play-back* Use the »Play-back« setting to select the function of the middle function button. You can select whether the middle function button changes the speed during play-back or sets an index. Use the Up/Down button »▲« or »▼« to select the •... -
Page 43: Voice Activation
SETTINGS IN THE MENU ______________________ Voice Activation If the »Voice activ.« function is activated, recording is inter- rupted when pauses during speaking. Recording will be resumed when speaking again. (»Voice Activ.« - „voice activiation”) Use the up-down button »▲« or »▼« to select the •... -
Page 44: Pc Microphone
SETTINGS IN THE MENU ______________________ PC microphone The »PC microphone« function enables you to do a speaker training with a voice recognition system or to cre- ate a direct dictation. You can use the dictation machine as a microphone by connecting the earphones socket of the dictation machine to the microphone input of the PC sound card with a standard cable with two 3.5 mm mono jack plugs. -
Page 45: Power Off
SETTINGS IN THE MENU ______________________ Power off Using the »Power off« function you can determine whether the device switches off automatically after a few minutes or must be switched off manually. Use the up-down button »▲« or »▼« to select the •... -
Page 46: Audio Signals
SETTINGS IN THE MENU ______________________ Audio signals The »Audio signals« function enables you to turn the acknowledgement and signal tones on and off. Use the up-down button »▲« or »▼« to select the • »Settings« menu item and press the »OK« button. Use the up-down button »▲«... -
Page 47: Illumination
SETTINGS IN THE MENU ______________________ Illumination The »Illumination« function enables you to turn the display lighting on and off. Use the up-down button »▲« or »▼« to select the • »Settings« menu item and then press the »OK« button. Use the up-down button »▲« or »▼« to select the »Illu- •... -
Page 48: Foot Control
SETTINGS IN THE MENU ______________________ Foot control* The »Foot control« function allows you to select whether the foot control is used for transcription station mode or hands-free dictating. Use the up-down button »▲« or »▼« to select the • »Settings« menu item and then press the »OK« button. Use the up-down button »▲«... -
Page 49: Foot Control Assignment During Play-Back
SETTINGS IN THE MENU ______________________ Foot control assignment during play-back* The pedals on the foot control are designed for tran- scription station operation. Left pedal – Rewind; Middle pedal – Fast forward; Right pedal – Start/stop play-back. Play-back with foot control •... -
Page 50: Time, Date
SETTINGS IN THE MENU ______________________ Time, date Each dictation is created with the time and date of starting and ending it. Use the up-down button »▲« or »▼« to select the • »Settings« menu item and then press the »OK« button. Use the up-down button »▲«... -
Page 51: Dictation Counter
SETTINGS IN THE MENU ______________________ Dictation counter Using the »Dictation counter« function, you can reset the dictation counter. The dictation counter is able to count till 999. You should not reset the counter too often to avoid conflicts with dictations having the same name and being stored on the PC. -
Page 52: Version
SETTINGS IN THE MENU ______________________ Version Using the »Version« function, you can display the version of the machine's software (firmware). Use the up-down button »▲« or »▼« to select the • »Settings« menu item and confirm with the »OK« but- ton. -
Page 53: Factory Setting
SETTINGS IN THE MENU ______________________ Factory setting Using the »Factory setting« function, you can restore the factory settings of the machine. Use the Up/Down button »▲« or »▼« to select the • »Settings« menu item and then press the »OK« button. •... - Page 54 SETTINGS IN THE MENU ______________________ Individual preallocation for typist, dictation type, group and No./Ref. - deleted; All dictations are deleted; Internal memory or memory card is formatted; Note: All enabled functions are retained.
-
Page 55: Communication With The Pc
Voice Mails via your mail system. If you use the Grundig Business Systems network solution in your business organization, you are a mobile network user with Digta and the PC software with network license. All addresses of your authors and typists are available for sending your dicta- tions. -
Page 56: Connecting And Separating The Dictation Machine And The Pc
COMMUNCATION WITH THE PC _____________ Connecting and separating the dictation machine and the PC Connecting the dictation machine to the PC • Press the »ON/OFF« button to switch off the dictation machine. • Use the USB cable to connect the dictation machine directly to the USB interface on the PC. -
Page 57: Connecting Via The Digtastation To The Pc
COMMUNICATION WITH THE PC _____________ Connecting via the DigtaStation to the PC • Plug the jack of the power pack lead into the socket on the DigtaStation 441. • Plug the power pack into the mains socket. – The yellow indicator on the DigtaStation 441 lights up. •... -
Page 58: Firmware Update
– The dictation machine is identified by the PC as a removable disk. • You can find two „.hex“-files (gh4021.hex and updatelo.hex) at the www.grundig-gbs.com website under Service/Download/Firmware/fw4021.zip as well as in the »Firmware\Digta4021« folder on the CD provided. Copy these two files to the »SYSTEM« folder of your dictation machine drive (removable disk). -
Page 59: Enabling Optional Functions
FIRMWARE UPDATE ____________________________ • Then disconnect the dictation machine from the PC and switch it on. • Confirm »LOAD UPDATE?« with »YES«. • Wait for the loading process to be completed. Note: Do not interrupt the loading process for any reason. This could make the dictation machine inoperative. -
Page 60: Digtascan 404 Barcode Reader
DIGTASCAN 404 BARCODE READER _______ Using barcodes You can scan a barcode for each new dictation. The detected codes are stored in the header of a DSS file in the “Topic” field, and thus displayed in the accompanying note of the dictation. Other programs which evaluate the DSS header (for example a database system), can classify the dictations using scanned barcodes. -
Page 61: Plugging In
DIGTASCAN 404 BARCODE READER _______ Plugging in Both mechanically and electrically, the DigtaScan connec- tion is designed in the same way as a memory card. Note: Only plug in or unplug the DigtaScan when the portable dictation machine is switched off. •... -
Page 62: Unplugging
DIGTASCAN 404 BARCODE READER _______ Unplugging • Remove the locking screw (if present). • Press the latch on the back of the DigtaScan. The Digta Scan is unlocked and you can now pull it out of the memory card slot. Note: The DigtaScan is latched securely to the housing. -
Page 63: Switching The Digtascan On And Off
DIGTASCAN 404 BARCODE READER _______ Switching the DigtaScan on and off • The DigtaScan must be inserted and latched into the portable dictation machine. Only when the DigtaScan is plugged in the associated menu items are available on the dictation machine. •... -
Page 64: Scanning A Barcode For A New Dictation
DIGTASCAN 404 BARCODE READER _______ Scanning a barcode for a new dictation The DigtaScan must be connected to the portable dicta- tion machine, enabled and configured for the barcodes you are using. • Switch on the portable dictation machine. • Move the slide switch to »... -
Page 65: Displaying A Barcode For A Dictation
DIGTASCAN 404 BARCODE READER _______ Note: If the machine cannot read a code, it emits a double signal and displays the message »No barcode found«. Confirm No barcode the error message with »OK«. You can now repeat the found scan procedure by pressing »SCAN« or cancel it and con- tinue dictating without barcodes by pressing »ESC«. -
Page 66: Scanning A Barcode For An Existing Dictation
DIGTASCAN 404 BARCODE READER _______ Scanning a barcode for an existing dictation • Switch on the dictation machine. • Move the slide switch to » «. STOP Free 0:37h va c DICT005 O:26 Use the Up/Down button »DICT + _ « to select the dicta- ........ -
Page 67: Searching For A Dictation Belonging To A Barcode
DIGTASCAN 404 BARCODE READER _______ Searching for a dictation belonging to a barcode • Switch on the portable dictation machine. • Move the slide switch to » «. STOP • Press the »MENU« button. Delete ► Barcode readerr Use the Up/Down button »▲« or »▼« to select the •... -
Page 68: Deleting A Barcode From A Dictation
DIGTASCAN 404 BARCODE READER _______ Deleting a barcode from a dictation • Move the slide switch to » STOP «. Use the Up/Down button »DICT + _ « to select the dicta- • Delete tion whose barcode is to be deleted. ►... -
Page 69: Configuring The Digtascan Barcode Reader
If the table is not supplied with your DigtaScan or you need codes it does not contain, please visit our Internet download centre: http://www.grundig-gbs.com Our Internet site also lists our Customer Service address and hotline number. - Page 70 DIGTASCAN 404 BARCODE READER _______ Preparing settings You can change the symbology settings (see also: "Default symbologies) as follows: • Print out the required programming codes from the programming code table. – There are usually two programming codes displayed for the usable barcode symbologies; the upper for acti- vation (ENABLE) and the lower for deactivation (DIS- ABLE).
- Page 71 DIGTASCAN 404 BARCODE READER _______ Setting the DigtaScan barcode reader • The DigtaScan must be plugged in and latched into the portable dictation machine (see also chapter "Plugging in, unplugging"). – Only when the DigtaScan is plugged in the associated menu items on the dictation machine are available.
-
Page 72: Restoring The Factory Settings
DIGTASCAN 404 BARCODE READER _______ Restoring the factory settings You can restore the DigtaScan’s default settings. If you do so, all barcode symbologies are disabled except for EAN-13. • The DigtaScan must be plugged in and latched into the portable dictation machine (see also chapter "Plugging in, unplugging"). -
Page 73: Rfid Reader Digtarfid
RFID READER DIGTARFID 414 _______________ Using RFID codes RFID-Codes are located on RFID labels (TAG). You can scan a RFID code for each new dictation. The detected codes are stored in the header of the DSS file in the "Topic" field, and thus displayed in the accompanying note of the dictation. -
Page 74: Turning The Rfid Reader On And Off
RFID READER DIGTARFID 414 _______________ Turning the RFID reader on and off • The RFID reader must be plugged into the portable dic- tation machine and locked. – Only when the RFID reader is plugged in, the associ- ated menu items on the dictation machine are avail- able. -
Page 75: Scanning A Rfid Code For A New Dictation
RFID READER DIGTARFID 414 _______________ Scanning a RFID code for a new dictation The RFID reader is connected to the portable dictation machine and activated. • Switch on the portable dictation machine. • Move the slide switch to » «. STOP •... -
Page 76: Additional Functions
RFID READER DIGTARFID 414 _______________ Notes: A maximum of 32 digits (two lines) of the scanned RFID code can be displayed. RFID codes that you have scanned and included in dic- tations with »OK« are stored in the "Topic" field in the new dictation's accompanying note.