Table of Contents
Advertisement
Quick Links
Advertisement
Table of Contents

Related Manuals for Grundig Digta 4015


Summary of Contents for Grundig Digta 4015
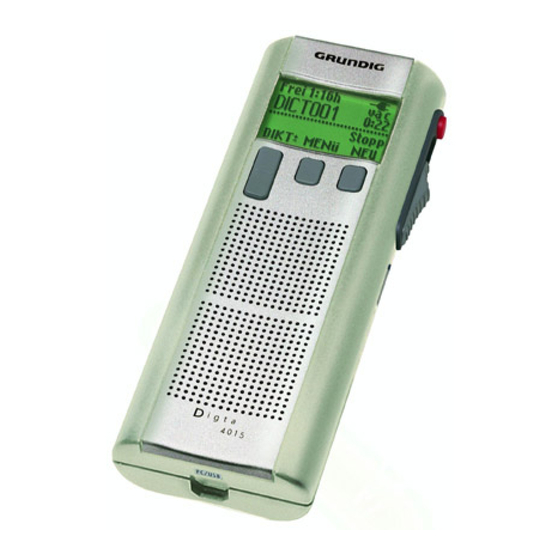
- Page 1 Digta 4015 ENGLISH www.grundig-gbs.com...
-
Page 2: Table Of Contents
11 Inserting rechargeable batteries 23 Deleting Dictations 12 Charging the rechargeable 23 Deleting an entire dictation battery 23 Deleting a part of a 13 Notes on Grundig rechargeable dictation battery 462 24 Deleting info 14 Inserting the MultiMedia Card or SecureDigital Card... - Page 3 CONTENTS _____________________________________________ 27 Functions in the menu 27 Menu navigation 27 Dictation status 28 Folder 29 Typist 30 Dictation type 31 Group 32 No./Ref. 33 Priority 34 Author 35 Format memory 36 Settings in the menu 36 Voice Activation 36 Microphone sensitivity 37 PC microphone 38 Power off 38 Illumination...
-
Page 4: Notes
NOTES ___________________________________________________ Your Digta 4015 is a digital portable dictation machine. It can be used as a single-station dictation system with the Steno.trans soft- ware supplied. In addition to this it can connect to your network (local areanetwork with several authors and transcribers) using the StenoNet.mail software. -
Page 5: Scope Of Delivery
The features indicated by Grundig apply only when using origi- nal Grundig accessories. Defects due to the use of accessories which are not original Grundig accessoires or which do not comply with the legal regula- tions or the corresponding standards lead automatically to the expiration of any guarantee rights. -
Page 6: Multimediacard Or Securedigital Card
___________________________________________________ MultiMediaCard or SecureDigital Card (not included) Use fast MultiMediaCards/SecureDigital cards (MMC/SD) available from Grundig Business Systems. If you use MultiMediaCards/SecureDigital cards with insufficient write speed, the message »Card not supported!« appears in the display. Make absolutely sure that the electrical contacts at the bottom side of the MultiMediaCard/SecureDigital Card are not exposed to strong mechanical stress. -
Page 7: The Control Elements
THE CONTROL ELEMENTS _______________________ Card slot Microphone On/off/PC mode button Recording indicator Socket for external microphone Recording on/off Display Slide switch for recording, Function buttons: play-back, stop, labeled in the bottom fast forward and rewind display line Up/down button Safety lock Menu/OK button Button for new dictation/ escape... - Page 8 THE CONTROL ELEMENTS _______________________ Power connection 3 V – - - - / 0.35 A 0,35 A Earphone connection 0,35 A impedance min. 32 Ω Card-ejection switch HOLD Battery-compartment cover USB interface...
-
Page 9: The Display
THE DISPLAY __________________________________________ Selected folder Available Free 0:37h recording time Operation with: DICTOO1 – Battery » « O:O6 Dictation number – Rechargeable battery » « Record Pause Current function – Power supply (status line) » « INFO Current button Indication for voice activation (va) and function microphone sensitivity... -
Page 10: Preparations
PREPARATIONS ______________________________________ Battery operation The dictation machine can be used for approximately 12 hours when the alkaline manganese batteries are fully charged. • Open the battery compartment. HOLD • Insert batteries (Mignon types, e.g. R6, UM3 or AA, 2 x 1.5 V). Make certain the polarity is correct. •... -
Page 11: Rechargeable Battery Operation
– Display for operation with rechargeable batteries» «. Inserting rechargeable batteries Only Grundig rechargeable batteries 462 may be charged inside the dictation machine using mains/charging units 472/473. • Switch off the dictation machine. • Open the battery compartment. -
Page 12: Charging The Rechargeable Battery
The dictating machine gives an optical and audible war- ning of weak rechargeable batteries. This is however only the case when using Grundig 462 rechargeable batteries. When using Grundig 462 rechargeable batteries there is also the guarantee that if the batteries may become com- pletely drained the current task will be stopped in good time, and the dictation saved. -
Page 13: Notes On Grundig Rechargeable Battery 462
PREPARATIONS ______________________________________ Notes on Grundig rechargeable battery 462 New rechargeable batteries do not reach full capacity until they have been recharged several times. For this reason the operating time for new rechargeable batteries is a maximum of 3 hours. When these batteries are fully charged, you can use the dictation machine up to 7 hours. -
Page 14: Inserting The Multimedia
1. This time also varies depending on the brand of the memory card in use. Use fast MultiMediaCards/SecureDigital cards (MMC/SD) available from Grundig Business Systems. -
Page 15: Formatting The Multimedia
PREPARATIONS ______________________________________ Formatting the MultiMediaCard or SecureDigital Cards (MMC/SD) Memory cards – including those which have been preformat- ted – must first be formatted with the dictation machine prior to initial writing. If an error message appears after a non-formatted memory card is inserted, acknowledge this with the »OK«... -
Page 16: Switching On
SWITCHING ON ____________________________________ Switching on and off Initial switching on • Press the »ON/OFF« button until » « appears in the display. – The software is loaded. – A menu with language selection appears in the display. • Select a language using the up-down buttons » « or »... -
Page 17: Recording
RECORDING __________________________________________ Saving dictations Dictations are stored in the internal memory of the dicta- tion machine (32 MB) – if you are not using a memory Free 0:37h card. va c no dictations If a MultiMedia or SecureDigital Card is inserted, all dic- MMC/SD tations are stored on this card. -
Page 18: New Dictation
RECORDING __________________________________________ New dictation • Push the slide switch to » STOP«. Free 0:37h va c no dictations • Press the »NEW« button. – A new dictation with the next highest number is created, MENU display: »DICT002«, for example. The date and the time are saved along with every dictation (displayed only on the PC). -
Page 19: Info Function
RECORDING __________________________________________ Info function You can dictate and mark information for your transcriber as an integral part of your dictation. The transcriber can listen to all information separately from the letter text before starting transcription. • Press the red recording button » – «... -
Page 20: Inserting Part Of A Dictation Or Info Message
RECORDING __________________________________________ Note: If the dictation machine is switched off during a dictation using the »ON/OFF« button, you will skip to the end of the dictation when switching the machine on again with the »ON/OFF« button and then pressing the recording button »... -
Page 21: Hearing A Dictation
HEARING A DICTATION _________________________ Selecting a dictation and playing-back • Push the slide switch to » STOP«. • Select the desired dictation using the up/down button Free 0:37h »DICT + _ «. DICTOO1 O:26 • Set the slide switch to » START«. DICT + - MENU –... -
Page 22: Fast Forward And Rewind
HEARING A DICTATION _________________________ Fast forward and rewind • Set the slide switch to » REW.« or » F.FWD«. Free 0:37h va c – »Fast Forward« appears in the display for fast for- DICTOO1 O:26 ward, »Rewind« appears for rewind. Fast Forward Searching for info •... -
Page 23: Deleting Dictations
DELETING DICTATIONS ___________________________ Deleting an entire dictation • Push the slide switch to » STOP«. Free 0:37h va c DICTOO1 • Select the desired dictation using the up/down button O:26 »DICT + _ «. DICT + - MENU • Press the »Menu« button. –... -
Page 24: Deleting Info
DELETING DICTATIONS ___________________________ • Push the slide switch to » START«. Free 0:37h va c At the start of the part to be deleted, slide the slide switch DICTOO2 O:14 ..........to »... -
Page 25: The Menu
THE MENU _____________________________________________ Overview of the f unctions in the menu Press the »MENU« button. Free 0:37h va c You can select with the up-down button » « or » « DICTOO1 O:26 following functions: DICT + - MENU – Delete Described in the “Deleting dictations”... -
Page 26: Overview Of The Menu Settings
THE MENU _____________________________________________ Overview of the menu settings • Press the »MENU« button and then use the up-down Priority button » « or » « to select the »Settings« menu item Format memory and confirm with »OK«. Settings You can select the following settings: –... -
Page 27: Functions In The Menu
FUNCTIONS IN THE MENU _____________________ Menu navigation Use the up-down button » « or » « to highlight the desired Delete menu item. Dictation status Activate the menu item with »OK«. Folder The current function/setting appears on a dark background. Use the up-down button »... -
Page 28: Folder
FUNCTIONS IN THE MENU _____________________ • Using the up-down button » « or » « select the Delete »Dictation status« menu item. Dictation status Folder • Click the »OK« button. • Using the up-down button » « or » « select »Post- poned«. -
Page 29: Typist
FUNCTIONS IN THE MENU _____________________ Typist The »Typist« function is used to select the transcriber who will receive your dictation. select from “transcribers”. • Use the up or down button » « » « to select the Folder »Typist« menu item. Typist Dictation type •... -
Page 30: Dictation Type
FUNCTIONS IN THE MENU _____________________ Dictation type »Dictation type« is used to select the format to be used for the dictation: fax, letter, or report. • Use the up or down button » « » « to select the Folder »Dictation type«... -
Page 31: Group
FUNCTIONS IN THE MENU _____________________ Group The »Group« function is used to assign your dictation to a specific group or department. • Use the up or down button » « » « to select the Typist »Group« menu item. Dictation type Group •... -
Page 32: No./Ref
FUNCTIONS IN THE MENU _____________________ No./Ref. The »No./Ref.« function is used to enter up to 16 characters for the dictation; examples include file or patient numbers. • Use the up or down button » « » « to select the Dictation type »No./Ref.«... -
Page 33: Priority
FUNCTIONS IN THE MENU _____________________ Priority The »Priority« function is used to select what priority the new dictation should have. • Using the up-down button » « or » « select the Group »Priority« menu item. No./Ref. Priority • Press the »OK« button. •... -
Page 34: Author
FUNCTIONS IN THE MENU _____________________ Author The »Author« function is used to select which author is making the dictation. You can only select this function if it has been enabled. Please ask your specialist dealer. • Use the up-down button » « or » « to select the No./Ref. -
Page 35: Format Memory
FUNCTIONS IN THE MENU _____________________ Format memory The »Format memory« function enables you to format the internal memory or the MultiMediaCard/SecureDigital Card (MMC/SD). All data will be deleted. • Use the up-down button » « or » « to select the Priority »Format memory«... -
Page 36: Settings In The Menu
SETTINGS IN THE MENU ________________________ Voice Activation If the »Voice activ.« function is activated, recording is inter- rupted when making pauses when speaking. Recording will be resumed when speaking again. (»Voice activ.« – voice activation) • Use the up-down button » « or » « to select the »Settings«... -
Page 37: Pc Microphone
SETTINGS IN THE MENU ________________________ PC microphone The »PC microphone« function enables you to do the spea- ker training with a voice recognition system or to create a direct dictation. You can use the dictation device as a micro- phone by connecting the earphones socket of the dictation device to the microphone input of the PC sound card with a standard cable with a 3.5 mm mono jack plug. -
Page 38: Power Off
SETTINGS IN THE MENU ________________________ Power off Using the »Power off« function, you can determine whether the machine switches off automatically after a few minutes, or must be switched off manually. • Use the up-down button » « or » « to select the »Settings«... -
Page 39: Time, Date
SETTINGS IN THE MENU ________________________ Time, date The time and date of starting and ending a dictation are specified for each dictation. • Use the up-down button » « or » « to select the »Settings« menu item and then press the »OK« button. •... -
Page 40: Dictation Counter
SETTINGS IN THE MENU ________________________ Dictation counter Using the »Dictation counter« function, you can reset the dictation counter. The dictation counter is able to count till 999. You should not reset the counter too often to avoid conflicts with dictations having the same name and being stored on the PC. -
Page 41: Version
FUNCTIONS IN THE MENU _____________________ Version Using the »Version« function, you can display the version of the machine’s software. • Use the up-down button » « or » « to select the »Settings« menu item and then press the »OK« button. •... -
Page 42: Reset All
FUNCTIONS IN THE MENU _____________________ Reset all Using the »Reset all« function, you can restore the factory settings of the machine. • Use the up-down button » « or » « to select the Dictation counter »Settings« menu item and then press the »OK« button. Version Reset all •... -
Page 43: Language
FUNCTIONS IN THE MENU _____________________ Language Using the »Language« function you can select the language for all display functions. • Use the up-down button » « or » « to select the »Settings« menu item and then press the »OK« button. •... -
Page 44: Communication With The Pc
For e-mail connection: MAPI-compatible mail system (such as Microsoft Outlook) The Windows NT operating system does not support a USB port. To be able to use the digital dictation machine with WinNT, you need the optional “Grundig USB Driver for WinNT”. -
Page 45: Connectiong The Dictation Machine With The Pc And Disconneting It
COMMUNICATION WITH THE PC ___________ Connecting the dictation machine with the PC and disconnecting it • Connect the dictation machine via the USB interface with the PC. • Use the »ON/OFF« button to switch the dictation machine on. – During data transfer the red recording indicator is blinking. -
Page 46: Firmware Update
MediaCard/SecureDigital Card which was included with the equipment). • You can find the ».hex«-files (gh4015.hex and updatelo.hex) at »www.grundig-gbs.com« under Service/Download/Firmware as well as in the »Digta4015« folder on the CD provided. Copy these two files to the »SYSTEM« folder in the dictation machine drive (removable disk). - Page 47 FIRMWARE UPDATE _______________________________ • Then, from the task bar, select the function for removing removable disks, as otherwise the transfer may not be complete. Notes: Do not use low batteries to copy the firmware. Importing a firmware file which was damaged during transfer could render the dictation machine inoperative.