Advertisement
Models
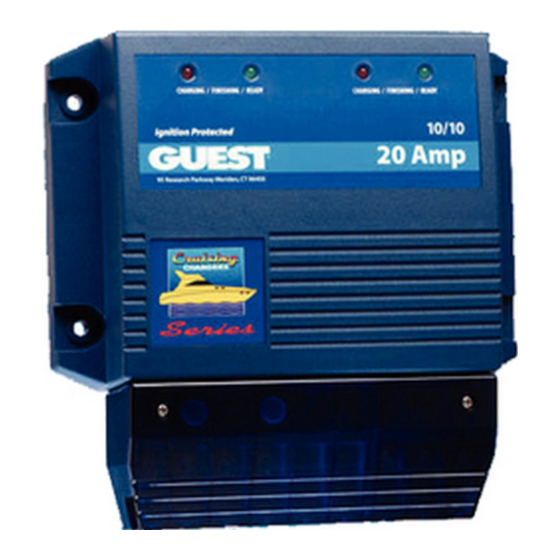
2614A
2614A-230
2621A
2621A-230
2622A
2622A-230
* : See Section 3 diagrams for specific connection instructions
IMPORTANT NOTICE
This manual contains important safety and operating instructions for the charger. Read
the entire manual before using. Also read all instructions and cautions for and on the
charger, batteries and equipment in the vicinity of the batteries.
Cruising Charger Series
OWNER'S MANUAL
ON BOARD BATTERY CHARGERS
DC Amperage No. Of Banks Volts
5,10 Amps
5,5,10 Amps
10,10 Amps
2 Bank
3 Banks
2 Bank
R
12/12
12/12/12
12/12
Advertisement
Table of Contents

Related Manuals for Guest 2614A


Summary of Contents for Guest 2614A
- Page 1 Cruising Charger Series OWNER’S MANUAL ON BOARD BATTERY CHARGERS Models DC Amperage No. Of Banks Volts 2614A 5,10 Amps 2 Bank 12/12 2614A-230 2621A 5,5,10 Amps 3 Banks 12/12/12 2621A-230 2622A 10,10 Amps 2 Bank 12/12 2622A-230 * : See Section 3 diagrams for specific connection instructions IMPORTANT NOTICE This manual contains important safety and operating instructions for the charger.
-
Page 2: Introducing The Charger
Each output produces 12 Volts DC at a full 5 Amps or 10 Amps (model specific), while using much less AC current than other charger types. Unlike automotive “trickle” chargers, the 2614A, 2621A, and 2622A will not boil off the electrolytes in properly installed and maintained batteries. The red and green LED’s, mounted on the charger face let you know the unit is recharging and maintaining your batteries. - Page 3 Remove all personal metal items such as rings, bracelets, necklaces, and watches when working near a lead-acid battery. A battery can produce short circuit currents high enough to weld a ring or the like to metal, causing a severe burn. Preparing to Charge Precautions Before charging a battery with the charger, read the following precautions: Do NOT operate the charger if the cables or an LED is damaged.
-
Page 4: Installing The Charger
2. INSTALLING THE CHARGER AC Connection and Grounding Precautions: DANGER DO NOT OPERATE THIS CHARGER WITH A TWO BLADED ADAPTER PLUG OR EXTENSION CORD. DOING SO CAN RESULT IN SERIOUS PERSONAL INJURY. DO NOT ATTEMPT TO WIRE THE BATTERY CHARGER USING AN ELECTRICALLY ENERGIZED LINE CORD. - Page 5 3. For 230 Vac chargers, the AC and DC wiring method is identical to 115 Vac chargers. Note: US Color Code is Black = Line, White = Neutral, Green or Non Insulated = Earth Ground. Euro color coding is Brown = Line; Blue = Neutral; Green, Green/Yellow or Non Insulated = Earth Ground.
- Page 6 DC positive output per ABYC standards If the Guest Cruising Series charger does not come equipped with circuit breakers, an inline fuse must be installed in series with each DC positive output cable to the battery.
- Page 7 Diagram 1. Standard Connections for a 2614A (5/10 Amps) used with 2 independent 12V Batteries 2614A Connection Warnings: Do not connect the outputs of the 2614A in series or in parallel while charger is AC powered ON. Charge separate batteries only.
- Page 8 2621A Connections Output Output Output Circuit Input Amps Model Banks Input Volts Volts Amps Breakers 115VAC 2621A 12/12/12 5/5/10 5 Amp 50/60Hz 230VAC 2621A-230 12/12/12 5/5/10 2.5 Amp 50/60Hz Diagram 2. Standard Connections for a 2621A (5/5/10 Amps) used with 3 independent 12V Batteries Diagram 3.
- Page 9 2621A Connection Warnings: Do not connect output 3 (10 amp) of the 2621A in series or in parallel with output 1 or output 2 while charger is AC powered ON. Charge separate batteries only. While charger is AC powered on, battery switch must be set to “OFF”, “1”, or “2”, not “both”.
- Page 10 2622A Connections Output Output Output Circuit Input Amps Model Banks Input Volts Volts Amps Breakers 115VAC 2622A 12/12 10/10 5 Amp 50/60Hz 230VAC 2622A-230 12/12 10/10 2.5 Amp 50/60Hz Diagram 4. Standard Connections for a 2622A (10/10 Amps) used with 2 independent 12V Batteries 2622A Connection Warnings: Output 1 and output 2 may be connected in parallel or in series at any time.
- Page 11 4. OPERATING THE CHARGER – 10 (or 5/5) amp output The LED Function Chart describes the charging process for any 10 (or 5/5) Amp output. Display Operating condition When the red LED is on, it indicates that your batteries are discharged and is recharging them at the "Charging"...
- Page 12 OPERATING THE CHARGER – 5 amp output The LED Function Chart describes the charging process for any individual 5 Amp output. Display Operating condition When the red LED is on, it indicates that your batteries are discharged and is recharging them at the "Charging" rate (stage 1). This charging rate is 5 Amps.
-
Page 13: Troubleshooting
1. No AC power available at the 1. Connect AC power or reset the LED’s turn on charger AC breaker on the main panel when the AC 2. Charger failure 2. Return charger to the Guest power is applied. Service Dept. -
Page 14: Maintaining The Charger
No other maintenance on the charger is required. 7. SPECIFICATIONS Output Output Output Circuit Input Amps Model Banks Input Volts Volts Amps Breakers 115VAC 2614A 12/12 5/10 3.75 Amp 50/60Hz 230VAC 2614A-230 12/12 5/10 2.5 Amp 50/60Hz 115VAC 2621A 12/12/12... - Page 15 ---Connect the equipment into an outlet on a circuit different from that to which the receiver is connected. LIMITED WARRANTY For two (2) years from the date of purchase, The Guest Co. will, at its discretion, repair or replace for the original consumer, free of charge, any parts found defective in material or workmanship.