
Related Manuals for NEFF U16E74.3AU


Summary of Contents for NEFF U16E74.3AU
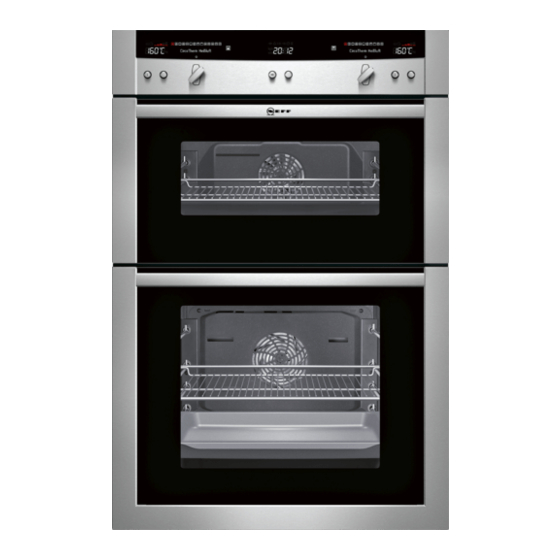
- Page 1 [en] Instruction manual Double oven U16E74.3AU Distributed in Australia by SAMPFORD IXL telephone 1300 727 421...
-
Page 3: Table Of Contents
Preset operation................12 Setting the clock ................12 Additional information on products, accessories, replacement Rapid heat up ................... 12 parts and services can be found at www.neff- Checking, correcting or deleting settings ........12 international.com and in the online shop www.neff- eshop.com Childproof lock .................13... -
Page 4: Important Safety Information
: Important safety information Read these instructions carefully. Only then element and catch fire. Do not place will you be able to operate your appliance greaseproof paper loosely over safely and correctly. Retain the instruction accessories during preheating. Always manual and installation instructions for weight down the greaseproof paper with a future use or for subsequent owners. -
Page 5: Causes Of Damage
The cable insulation on electrical Causes of damage ■ appliances may melt when touching hot Caution! parts of the appliance. Never bring Accessories, foil, greaseproof paper or ovenware on the ■ electrical appliance cables into contact cooking compartment floor: do not place accessories on the with hot parts of the appliance. -
Page 6: Your New Appliance
Your new appliance In this section, you will find information on the control panel ■ the operating modes ■ the NeffLight® ■ Control panel Control element Clock function button Selects the required clock function or Rapid heat up (see section: Electronic clock) Rotary selector Makes settings within a clock function or activates Rapid heat up (see section: Elec- tronic clock) -
Page 7: Nefflight
Operating mode Application Slow cooking For tender pieces of meat that are to be cooked medium/rare or medium Steam cooking For gentle preparation of vegetables, meat and fish é Dough proving For preparing yeast dough and yoghurt ê EasyClean® Makes cleaning the cooking compartment easier >... -
Page 8: Inserting Accessories
Shelf positions Insert grid for roasting and grilling The individual shelf units can be inserted into your preferred shelf positions. This simple insertion system allows flexible and Note: The wire insert is always used quick handling when changing shelves. together with the universal pan. In this combination, the wire insert is Note: Do not use shelf height 2 when baking and roasting placed in the universal pan. -
Page 9: Before Using The Appliance For The First Time
Before using the appliance for the first time In this section, you can read about have been insufficient for you, you can amend the clock time later. how to set the language ■ ‹ ‹‹ flashes in the clock display. how to set the time ■... -
Page 10: Switching Off The Appliance
Changing the basic settings Operating mode Default temper- Temperature ature in °C range in °C Your appliance has various basic settings, which are preset at the factory. You can, however, change these basic settings as Defrost setting Fixed setting required. Top/bottom heating 50 - 275 The basic settings for both ovens can be activated using the... -
Page 11: Electronic Clock
Electronic clock Clock display In this section, you can read about how to set the timer ■ how to switch your appliance off automatically (cooking time ■ and end of operation) how to switch your appliance on and off automatically (preset ■... -
Page 12: Preset Operation
Set the end of operation using the rotary selector Setting the clock (e.g. o'clock). ‚ƒ „‹ You can only change the clock when no other clock function is The setting is applied automatically. The clock is then active. displayed again. Press the clock function button repeatedly until symbols light up. -
Page 13: Childproof Lock
Childproof lock In this section, you can read about Locking the appliance permanently how to lock your appliance Switch off the appliance. ■ how to lock your appliance permanently Press and hold the ± info button for 3 seconds to go to the ■... -
Page 14: Baking On One Level
Baking on one level Place the lower baking tin to the left (figure A) and the upper baking tin to the right (figure B) on the wire rack. If you are baking on one level with CircoTherm®, always place a round tin in the centre of the wire rack (figure A) and always place a loaf tin diagonally (figure B). -
Page 15: Baking Table For Ready-Made Products
Meal Oven Setting Level Temperature in °C Time in minutes Jam tarts 190 200* 15 - 20 õ 200 210* 15 - 20 õ 190 210* 15 25 ô 1 + 3 190 200* 20 25 õ... -
Page 16: Tips And Tricks
The details given in the table are guidelines and apply to the When baking on several levels, only use the CircoTherm® universal pan. or Bread-baking operating modes. ë We recommend that you set the lower of the specified Observe the notes in the table about preheating. temperatures the first time. -
Page 17: Roasting And Braising
The cake is unevenly browned in the bak- Check the shelf height. ing tin Check the temperature. Make sure that your baking tin is not placed directly in front of the air outlets in the rear panel of the cooking compartment. Check that the baking tin is in the correct position on the wire rack. - Page 18 The values for cooking time apply to 0.5 - 2 kg of food. For Cooking time and temperature The cooking time and temperature depend on the size, height, greater weights, reduce the temperature and increase the type and quality of the food and the roasting dish. cooking time.
-
Page 19: Tips And Tricks
Meal Oven Setting Level Temperature in °C Time, min. per 500 g + add. time Complete meal with beef 1 + 3 30 + 25* õ * + time for Yorkshire pudding Casseroles Oven Setting Level Temperature in °C Time, min. per 500 g + add. -
Page 20: Grilling Table
Turn the grilling items half to two-thirds of the way through the Note: Always use the universal pan in the standard position grilling time. (not the other way up). You can influence the grilling result by changing the position of the wire rack. -
Page 21: Circotherm® Eco
Meal Oven Setting Level Temperature in °C Time in minutes Sausages, 2 - 4 cm thick 12 16** õ ‚Ÿ£ 14 18** ô ‚Ÿ£ Gammon Steaks, 1 - 2 cm thick side: 9 - 12 õ ‚Ÿ£ side: 5 - 7 side: 10 - 12 ô... -
Page 22: Steam Cooking
Accessories Level Temperature in °C Cooking time in Dishes using CircoTherm® eco “ minutes Apple tart Wire rack + plate ø 20 cm or 190 - 200 65 - 75 pie tin Scones Baking tray 180 - 190 20 - 25 Biscuits Baking tray 170 - 190... -
Page 23: Yeast Dough
Yeast dough Yoghurt Remove accessories and hook-in racks, telescopic shelves Caution! or separate fitting systems. Damage to the enamel surfaces from pouring cold water into ■ the hot cooking compartment. Do not poor cold water into Heat 1 litre of long-life milk (3.5 % fat) or fresh pasteurised the hot cooking compartment. -
Page 24: Tips And Tricks
When a signal sounds and "In operation" appears on the text Searing in Low-tem- display, place the meat on the glass or porcelain plate in the minutes perature cooking compartment. cooking in Take out the meat at the end of the cooking time and switch minutes off the appliance. -
Page 25: Cleaning And Care
Defrost the frozen food for 25 - 45 minutes, depending on ô Top oven type and size. Switch on the defrost setting. Remove the frozen food from the cooking compartment and Defrost the frozen food for 25 - 45 minutes, depending on let it thaw for 30 - 45 minutes. -
Page 26: Cleaning Self-Cleaning Surfaces In The Cooking Compartment
Appliance part Cleaning agent/aid Self-cleaning surfaces (rough surfaces) Please see the notes in section: Self-cleaning surfaces Door seal Hot soapy water Hook-in rack/telescopic shelf Hot soapy water Accessories Soak in hot soapy water, clean with a brush and sponge or wash in the dishwasher. Keeping the appliance clean Starting oven cleaning To avoid getting the cooking compartment dirty,... -
Page 27: Removing And Fitting The Appliance Door
With both hands, grip the door on the left and right-hand side, close the door a little more and pull it out (figure B). Cleaning up and switching off Do not leave the remaining water in the cooking compartment for a long time (e.g. overnight). Fitting the appliance door Open the appliance door and remove the remaining water Insert the hinges in the left and right-hand holders (figure C). -
Page 28: Cleaning The Door Panels - Top Oven Õ
Removing the intermediate panel Note: Before removing, make a note of the position in which the intermediate panel is fitted, so that you do not refit it the wrong way round later. Release and remove the retainer (figure C). Lift the intermediate panel slightly and take it out (fig D). Refit the appliance door. -
Page 29: Cleaning The Cooking Compartment Ceiling
Cleaning the cooking compartment ceiling The grill element can be folded down to allow quick and easy cleaning of the cooking compartment ceiling. Risk of burning due to hot components in the cooking compartment! Wait until the cooking compartment has cooled down. Pull the grill element retaining bracket towards the front and push it upwards until you hear the grill element disengage (figure A). -
Page 30: Cleaning The Telescopic Shelves
Cleaning the telescopic shelves You can unhook the telescopic shelves for easier cleaning. Risk of burning due to hot components in the cooking compartment! Wait until the cooking compartment has cooled down. Removing the telescopic shelves Hold the flat spring (Fig. A). Move the telescopic shelf upwards at the front and unhook it to the side. -
Page 31: Replacing The Oven Light Bulb
Problem Possible cause Remedial action Electronically controlled functions are mal- Energy surges (e.g. lightning strike) Reset the function concerned functioning Once you have switched on an operating The appliance has not cooled down fully Wait until the appliance has cooled down, then switch on the operating mode again mode, appears on the temperature... -
Page 32: Changing The Door Seal
Changing the door seal If the door seal is defective, it must be replaced. Replacement seals for your appliance can be obtained from the after-sales service. The door seal is attached in four places (figure A). When replacing it, disconnect and attach the hooks at all four points (figure B). -
Page 33: Test Dishes
Test dishes These tables have been produced for test institutes to facilitate Please note the information in the tables about preheating. The the inspection and testing of the various appliances. table values do not include Rapid heat up. Test dishes tested to standard EN 50304/EN 60350 (2009) Note: For baking, use the lower of the temperatures indicated and IEC 60350. - Page 36 Constructa Neff Vertriebs-GmbH Carl-Wery-Straße 34 D-81739 München *9000724628* 9000724628 930701...