Table of Contents
Advertisement
Quick Links
Advertisement
Table of Contents

Related Manuals for NEFF U14M42.3GB


Summary of Contents for NEFF U14M42.3GB
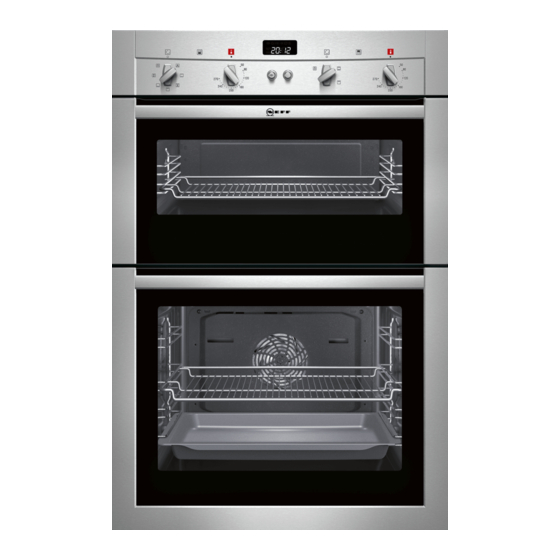
- Page 1 [en] Instruction manual Double oven U14M42.3GB...
-
Page 3: Table Of Contents
Produktinfo Your accessories ................ 7 Accessories ..................7 Additional information on products, accessories, replacement Inserting accessories .................7 parts and services can be found at www.neff- Shelf positions ..................7 international.com and in the online shop www.neff- eshop.com Optional accessories .................7 Before using the appliance for the first time ......8 Setting the clock .................8... -
Page 4: Important Safety Information
: Important safety information Read these instructions carefully. Only then A draught is created when the appliance ■ will you be able to operate your appliance door is opened. Greaseproof paper may safely and correctly. Retain the instruction come into contact with the heating manual and installation instructions for element and catch fire. -
Page 5: Causes Of Damage
Risk of electric shock! Causes of damage Incorrect repairs are dangerous. Repairs Caution! ■ may only be carried out by one of our Accessories, foil, greaseproof paper or ovenware on the ■ trained after-sales engineers. If the cooking compartment floor: do not place accessories on the cooking compartment floor. -
Page 6: Your New Appliance
Your new appliance In this section, you will find information on the control panel ■ the operating modes ■ Control panel %RWWRP 7HPSHUDWXUH 7HPSHUDWXUH RYHQ LQGLFDWRU ODPS (OHFWURQLF FORFN RYHQ LQGLFDWRU ODPS 2SHUDWLQJ PRGH 7HPSHUDWXUH 5RWDU\ VHOHFWRU 2SHUDWLQJ PRGH 7HPSHUDWXUH VHOHFWRU VHOHFWRU VHOHFWRU... -
Page 7: Your Accessories
Your accessories In this section, you will find information on When inserting the baking tray or the universal pan, check that the lug (a) is in the rear part of the of the accessory Your accessories ■ ■ that the sloping edge of the accessory faces towards the the correct way to insert the accessories into the cooking ■... -
Page 8: Before Using The Appliance For The First Time
Optional accessories Order no. Baking tray, non-stick Z1343X0 Roasting tray, enamelled, two-piece Z1512X0 Retrofit kit, CLOU® 1x Z1701X2 CLOU® 3x telescopic shelf Z1742X2 CLOU® 4x telescopic shelf with full exten- Z1755X2 sion Before using the appliance for the first time In this section, you can read about How to set the clock after connecting up your appliance ■... -
Page 9: Electronic Clock
Electronic clock Clock display In this section, you can read about how to set the timer ■ how to switch your appliance off automatically (cooking time ■ and end of operation) how to switch your appliance on and off automatically (preset ■... -
Page 10: End Of Operation
Once the cooking time has elapsed, the bottom oven switches Press the clock function button repeatedly until the off automatically. symbols light up. Set the cooking time with the rotary selector Turn the operating mode and temperature selector back to (e.g. -
Page 11: Baking On One Level
Baking on one level Place the lower baking tin to the left (figure A) and the upper baking tin to the right (figure B) on the wire rack. If you are baking on one level with CircoTherm®, always place a round tin in the centre of the wire rack (figure A) and always place a loaf tin diagonally (figure B). -
Page 12: Baking Table For Ready-Made Products
Meal Oven Setting Level Temperature in °C Time in minutes Jam tarts 190 200* 15 - 20 õ 200 210* 15 - 20 õ 190 210* 15 25 ô 1 + 3 190 200* 20 25 õ... -
Page 13: Tips And Tricks
We recommend that you set the lower of the specified If you are baking on more than one level, only use temperatures the first time. Lower temperatures will generally CircoTherm operating mode. allow more even browning. Observe the notes in the table about preheating. Meal Oven Setting... -
Page 14: Roasting And Braising
Frozen products are not browned evenly Check whether the frozen product is unevenly pre-browned before baking. This uneven after baking browning will remain after the baking time. Several cakes on one level are unevenly Check the position of the baking tins on the wire rack. browned Frozen products are not browned, not Remove ice from frozen products before baking. - Page 15 Meal Oven Setting Level Temperature in °C Time, min. per 500 g + add. time Beef Slow roast joint 40 + 40 õ 40 + 40 õ Top side / top rump 30 + 25 õ 30 + 25 õ Lamb 30 + 25 õ...
-
Page 16: Tips And Tricks
Casseroles Oven Setting Level Temperature in °C Time, min. per 500 g + add. time Diced meat (beef, pork, lamb, chicken) 40 + 80 õ 140* 40 + 80 õ Braising steak 45 + 80 õ 140* 45 + 80 õ... -
Page 17: Grilling Table
Grilling table You should set the lower of the specified temperatures the first time. A lower temperature will generally provide more even The details given in the table are guidelines and apply to the browning. enamelled universal pan with wire insert. The values may vary The values refer to food placed in the oven when it is cold and depending on the type and amount of items to be grilled. -
Page 18: Defrosting
Meal Oven Setting Level Temperature in °C Time in minutes Chicken Drumsticks side: 15 - 17 õ side: 10 - 13 side: 16 - 20 ô side: 12 - 15 Breast (boneless) side: 12 - 15 õ side: 7 - 10 side: 13 - 15 ô... -
Page 19: Cleaning And Care
Heat 1 litre of long-life milk (3.5 % fat) or fresh pasteurised Switch on the appliance. milk to 40 °C Main oven: Set the operating mode selector to õ CircoTherm® and preheat for 5 minutes at 50 °C. Bring 1 litre of fresh milk to the boil once and allow to cool down to 40 °C. -
Page 20: Self-Cleaning Surfaces
Appliance part Cleaning agent/aid Door seal Hot soapy water Hook-in rack/telescopic shelf Hot soapy water Accessories Soak in hot soapy water, clean with a brush and sponge or wash in the dishwasher. Keeping the appliance clean To avoid getting the cooking compartment dirty, clean the cooking compartment after each use, as dirt will ■... -
Page 21: Cleaning The Hook-In Racks
Removing the door panel Fitting the door panel Note: Before removing, make a note of which way round the Insert the door panel at an angle towards the back into both door panel is fitted, so that it is not refitted the wrong way brackets as far as it will go. -
Page 22: Replacing The Oven Light Bulb
circuit breaker or remove the fuse from your household fuse Risk of electric shock! box. Work on the appliance electronics may only be performed by ■ a specialist. Always disconnect the appliance from the power supply ■ when work is carried out on the electronics. Switch off the Problem Possible cause Remedial action... -
Page 23: Test Dishes
telephone number of the after-sales service in the space below Please find the contact data of all countries in the enclosed to save time should it be required. customer service list. To book an engineer visit and product advice 0844 8928989 E no. - Page 24 Constructa Neff Vertriebs-GmbH Carl-Wery-Straße 34 D-81739 München *9000735712* 9000735712 920511...