Table of Contents
Advertisement
Quick Links
1-888-340-0482
Monday-Friday
8:30-5:30 Central Time
Keys Fitness Products, L.P.
4009 Distribution Dr.
Suite 250
Garland, Texas 75041
OWNER'S MANUAL
Keys Fitness Products, L.P.
P.O. Box 551239
Dallas, Texas 75355-1239
QUESTIONS?
Call Our Toll Free
Keys Fitness Helpline
1-888-340-0482
CAUTION!
Please read the precautions and
instructions in this manual before
using this equipment. Please save
this manual for future reference.
Advertisement
Table of Contents

Summary of Contents for Keys Fitness Alliance 920U
- Page 1 1-888-340-0482 Monday-Friday 8:30-5:30 Central Time Keys Fitness Products, L.P. 4009 Distribution Dr. Suite 250 Garland, Texas 75041 OWNER’S MANUAL Keys Fitness Products, L.P. Please read the precautions and P.O. Box 551239 instructions in this manual before using this equipment. Please save Dallas, Texas 75355-1239 this manual for future reference.
-
Page 2: Limited Warranty
Please contact a Keys Fitness customer service representative for specifics on wear items. This Limited Warranty becomes VALID ONLY if the product is purchased through a Keys Fitness authorized dealer unless otherwise authorized by Keys Fitness in writing. -
Page 3: Before You Start
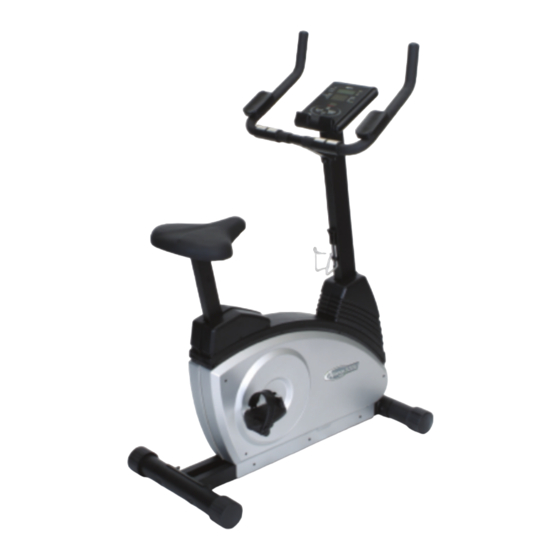
This is especially important for persons over the age of 35 and/or persons with pre-existing health problems. Keys Fitness Products LP assumes no respon- sibility for personal injury or property damage sustained by or through the use of this product. - Page 4 Assembly of Alliance 920 Upright Bike REMOVE ALL SECURITY TAPE AND WRAPPING BEFORE BEGINNING. 1. Attach foot tubes (4) to the frame by using the carriage bolts (44), flat washers (50) and cap nuts (45) provided. Make sure the foot tube with wheels is assembled onto the front of the unit.
- Page 5 3. Attach pedals (30, 31). Axles of pedals are branded "L" and “R.” The pedal marked “R” goes on the right hand side of the bike and the one marked “L” on the left hand side. Tighten the left pedal by turning counter-clockwise and the right pedal by turning clockwise.
- Page 6 6. Connect the computer cable at the top of the console tube (2) 5. Load your console with the batteries provided. Batteries are 4 to the console (5). Both computer cable connections have “AA” size. white ends. Feed the pulse wires from the console (5) down into the console tube (2) and out the rear hole in the handlebar area.
- Page 7 7. Attach the pulse wires in the handlebar (10) to the wires from the console (5). Connect the handlebar (10) to the console tube with the locknuts (49), flat washers (50) and screws (55) 8. You have completed the assembly of your new Alliance bike. provided.
- Page 8 920U EXPLODED VIEW 920U PARTS LIST # PART # PART FRAME 32 LEFT CRANK CONSOLE TUBE 33 RIGHT CRANK 2-1 BOTTLE RACK 34 LOCKING KNOB SEAT POST 35 6004 PRECISE BEARING FOOT TUBE 36 608 PRECISE BEARING CONSOLE 37 EYEBOLT PULLEY 38 SPRING GENERATOR...
- Page 9 920U Display Instructions Your Alliance 920U is equipped with a programmable monitor to help you track your progress and motivate you to reach your fit- ness goals. In order to set your programmable monitor, you must begin pedaling. 1. Key Functions: a.
-
Page 10: "Quick Start" Mode
3. Indicator: a. TIME b. CALORIES d. SPEED e. RPM f. SCAN g. MANUAL h. CONSTANT POWER i. INTERVAL j. HILLS k. PLATEAU l. MOUNTAIN m. HRC n. FITNESS TEST 4. Operation Process: A. “QUICK START” MODE: 1. Press RESET key, all LED of the console turns on for 2 seconds. 2. -
Page 11: Start Mode
1. Step 1-4 is similar to B, but “FITNESS TEST” program also requires age and sex of user. 5. Press ENTER key, (W2) displays “ENTER AGE” and (W1) displays preset age of last operation. 6. Set age of the exerciser by keys. -
Page 12: Target Heart Rate Zone
Check your pulse recovery rate – If your pulse is over 100 bpm five minutes after you stop exercising, or if it’s higher than normal the morning after exercising, your exertion may have been too strenuous for your current fitness level. Rest and reduce the intensity next time.


