
Related Manuals for DeLonghi DE91PYROS


Summary of Contents for DeLonghi DE91PYROS
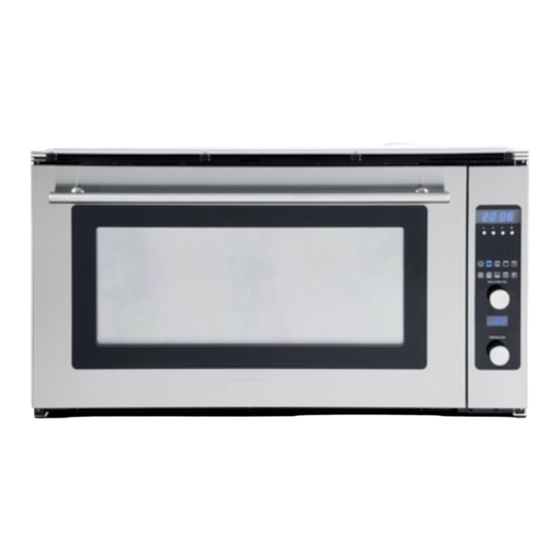
- Page 1 INSTALLATION and SERVICE INSTRUCTIONS USE and CARE INSTRUCTIONS DE91PYROS MULTIFUNCTION OVEN PYROLYTIC distributed by DèLonghi Pty Ltd...
-
Page 2: Product Label
Dear Customer, Thank you for having purchased and given your preference to our product. The safety precautions and recommendations reported below are for your own safety and that of others. They will also provide a means by which to make full use of the features offered by your appliance. -
Page 3: Using The Oven For The First Time
IMPORTANT PRECAUTIONS AND RECOMMENDATIONS FOR USE OF ELECTRICAL APPLIANCES Use of any electrical appliance implies the necessity to follow a series of fundamen- tal rules. In particular: Never touch the appliance with wet hands or feet; Do not operate the appliance barefooted; The appliance is not intended for use by young children or infirm persons without supervision;... -
Page 4: Important Precautions And Recommendations
IMPORTANT PRECAUTIONS AND RECOMMENDATIONS After having unpacked the appliance, check to ensure that it is not damaged. In case of doubt, do not use it and consult your supplier or a professionally qualified technician. Packing elements (i.e. plastic bags, polystyrene foam, nails, packing straps, etc.) should not be left around within easy reach of children, as these may cause serious injuries. - Page 5 Clean the oven regularly and do not allow fat or oils to build up in the oven base or tray. Remove spillages as soon as they occur. Do not stand on the open oven door. Always stand back from the appliance when opening the oven door to allow steam and hot air to escape before removing the food.
-
Page 6: Electrical Requirements
INSTALLATION CAUTION: This appliance must be installed in accordance with these installation instructions. This appliance shall only be serviced by authorized personnel. This appliance is to be installed only by an authorised person. Incorrect installation, for which the manufacturer accepts no responsibil- ity, may cause personal injury of damage. -
Page 7: Replacing The Power Supply Cable
REPAIRS REPLACING THE POWER SUPPLY CABLE Unhook the terminal board cover by inserting a screwdriver into the two hooks A (fig. 2). Open the cable gland by unscrewing screw F (fig. 3), unscrew the terminal screws and remove the cable. The new supply cable, of suitable type and section, is connected to the terminal board following the diagram of fig. -
Page 8: Electric Diagram
ELECTRIC DIAGRAM... - Page 9 FITTING REQUIREMENTS • The appliance should be installed by a QUALIFIED INSTALLATION TECHNICIAN. • The appliance must be installed in compliance with regulations in force. • The walls surrounding the oven must be made of heat-resistant material. WARNING: Taking care NOT to lift the oven by the door handle. The oven can be fitted in standard units, width 90 cm and depth 60 cm.
-
Page 10: Fixing The Oven
FIXING THE OVEN Introduce the oven into the furniture opening and fix it with 4 screws (not supplied) as figure 7. It is essential that the oven rests on a surface which will support its weight, as the screw fixing is only complementary. Figure 7 Figure 8 IMPORTANT: When handling the... - Page 11 Figure 9 Oven Door Lower Trim Air Flow IMPORTANT: To avoid damage to the lower trim please note the following instructions. The lower trim is designed to allow for good air circulation and the correct opening of the oven door. To ensure the trim is not damaged due to the appliance being placed on the floor, the appliance should be suitably supported as in above illustrations.
-
Page 12: The Control Panel
USE and CARE THE CONTROL PANEL Figure 10 Clock indicator (see ‘Setting the clock Cooking time indicator and first use’) (see ‘Automatic cooking’) Timer indicator Stop time indicator (see ‘Using the timer’) (see ‘Automatic cooking’) Cancel Scroll Select Function indicators (see ‘Oven functions’) Function dial (see ‘Using your oven’) -
Page 13: Setting The Clock
SETTING THE CLOCK You will need to set the clock to make full use of your oven. Figures 11 1. Ensure the power supply to the oven is on. 2. Select the clock by pressing the right scroll button twice. •... - Page 14 FIRST USE - Conditioning the oven It is important to condition your oven before using it for cooking and baking. Conditioning will burn off any manufacturing residues and ensure that you get the best results right from the start. 1. Make sure you have set the clock. 2.
-
Page 15: Using Your Oven
USING YOUR OVEN Figure 13 1. Slide in the shelf. The oven shelf is Safety catch provided with a security block to pre- vent accidental extraction. It must be inserted operating as per figure 13. The oven trays shall be placed above the shelves. -
Page 16: Oven Functions
OVEN FUNCTIONS Selecting this will turn the oven off. BAKE This is the traditional method of baking. It is best to bake on only one shelf at a time in this function. Ideal for large cakes and dishes that bake for several hours. FAN BAKE Ideal for dishes like lasagne that need to brown on top and also single trays of small cakes or biscuits that bake in less than an hour. -
Page 17: Self Clean
PASTRY BAKE Excellent for sweet and savoury pastry foods, for moist breads and brownies and cookies that you want extra chewy. WARM Use this function to keep cooked food hot and to warm plates and serving dishes. To reheat food from cold, use a cooking function at 150°C, then switch to Warm set between 70-90°C only when the food is piping hot. -
Page 18: Using The Self Clean Function
USING THE SELF CLEAN FUNCTION • This convenient pyrolytic Self Clean function takes care of the mess and grime that is traditionally associated with oven cleaning. The extremely high temperature dur- ing a Self Clean cycle burns off and breaks down stubborn soil and grease deposits. All that remains is a clean oven cavity with a little grey ash which you can easily remove. - Page 19 For instructions, see ‘Care and clean- Figure 17 ing’. Important! If soiling is left on the glass, it will become burnt on during the Self Clean cycle, making it very difficult to remove. 2. Close the oven door firmly (Fig. 17). Figures 18 3.
- Page 20 When a Self Clean cycle has finished The oven will: • emit a long tone • automatically turn off • automatically unlock the door. In a few seconds, the display will show the time of day. You need to: 1. wait for the oven to cool down completely 2.
-
Page 21: Using The Rotisserie
USING THE ROTISSERIE Figure 22 Rotate the fork screws Fork 1. Secure the meat (fig. 22). to loosen and tighten Important! Take care, the forks are sharp! Handle When securing the meat, ensure that: • the skewer goes through the cen- Skewer tre of the meat •... - Page 22 Figure 26 5. Select the Rotisserie function (fig. 26). • The skewer will start rotating. • Check that the meat does not touch the grill tray or the grill ele- ment at the top of the oven. 6. Set the temperature (fig. 26). •...
-
Page 23: Using The Timer
USING THE TIMER • You can use the timer at any time, even if you are not using the oven. • If the time is more than an hour, the display will count down in minutes (hr:min). If it is less than an hour, it will count down in seconds (min:sec). •... -
Page 24: Automatic Cooking
AUTOMATIC COOKING • You can set the oven to automatically turn on later, cook for a preset time (cook- ing time), then automatically turn off at a preset stop time. See the example and instructions below (steps 1 to 7). •... - Page 25 Set the stop time Figures 29 (figures 29) 4a. Press the right scroll button once to scroll to the stop time indicator. 4b. Press the select button to confirm. 5a. Press the right scroll button to set the time you would like your food to be ready by (ie the stop time).
-
Page 26: Baking Chart
BAKING CHART Please note: • The settings in the following chart are guidelines only. Follow the instructions in your recipe or on food packaging and be prepared to adjust the oven settings and baking times to achieve the best possible results for you. •... -
Page 27: User Preference Settings
USER PREFERENCE SETTINGS You can set your oven to: • display the temperature in degrees Celsius or Fahrenheit • give audio feedback (tones and beeps) or operate quietly • display time as 12-hr or 24-hr • operate with the display off •... -
Page 28: Temperature Scale
Figures 32 5. Press the right scroll button to scroll through the options for that particular setting. Refer to the table below. Setting Default option Alternative option(s) TEMPERATURE SCALE CELSIUS FAHRENHEIT Select between degrees Celsius or Fahrenheit. AUDIO FEEDBACK BEEPS/TONES ON BEEPS/TONES OFF Turn the beeps and tones on or off.* TIME SCALE &... -
Page 29: Sabbath Setting
SABBATH SETTING This setting is designed for religious faiths that observe a ‘no work’ requirement on the Sabbath. While your oven is in Sabbath setting • The display and indicators will be unlit, the buttons will be unresponsive. • No tones or beeps will sound. •... - Page 30 Figures 35 5a. Press the right scroll button to scroll to the Sabbath setting (figures 35). 5b. Press the select button to select the Sabbath setting. The default option is ‘Sabbath off’. • The display will flash. 6a. Press the right scroll button to scroll to the ‘Sabbath on’...
-
Page 31: Cleaning And Maintenance
CLEANING and MAINTENANCE GENERAL ADVICE Before you begin cleaning, you must ensure that the appliance is switched off. It is advisable to clean when the appliance is cold and especially when cleaning the enamelled parts. Avoid leaving alkaline or acidic substances (lemon juice, vinegar, etc.) on the surfaces. -
Page 32: Stainless Steel Surface
STAINLESS STEEL SURFACE CAUTION: The stainless steel front surfaces (control panel, oven door) used in this oven are protected with a Special Lacquer to reduce finger-print marks. To avoid damaging this lacquer, do not clean the stainless steel with abrasive cleaners or abrasive cloths or scouring pads. -
Page 33: Replacing The Oven Lamps
REPLACING THE OVEN LAMPS WARNING: Ensure the appliance is switched off before replacing the lamp to avoid the possibility of electric shock. Let the oven cavity and the heating elements to cool down; Switch off the electrical supply; Remove the protective cover A (fig. 36); Unscrew and replace the bulb B with a new one suitable for high temperatures (300 °C) having the following specifications: 230-240V 50 Hz, E14 and same power (check watt power as stamped in the bulb itself) of the replaced... - Page 34 REMOVING AND REPLACING THE INNER DOOR GLASS PANES FOR CLEANING If you wish to clean inner panes of glass of the door, make sure you follow the precautions and instructions very carefully. Replacing the glass panes and the door incorrectly may result in damage to the oven and may void your warranty.
-
Page 35: Removing The Door
REMOVING THE DOOR Figure 37a Make sure you have prepared enough space for resting the door and its glass panes on a clean, flat surface. 1. Open the door to its full extent (fig. 37a). 2. Open the levers on the left and right hinges to their full extent, as shown in fig. - Page 36 REMOVE THE INNER GLASS RETAINER 1. Press down on both tabs to release the glass retainer (fig. 38). 2. Remove the glass retainer. Figure 38 REMOVE THE INNER GLASS PANE Lift and remove the inner pane (D) slightly, as shown in the figure 39. Figure 39 D D D...
- Page 37 REMOVE THE FIRST MIDDLE GLASS PANE Lift and remove the first middle pane (C) slightly, as shown in the figure 40. Figure 40 C C C REMOVE THE SECOND MIDDLE GLASS PANE Lift and remove the second middle pane (B) slightly, as shown in the figure 41. Figure 41 B B B...
- Page 38 AFTER CLEANING, REPLACE THE GLASS PANES When replacing the glass panes, makes sure that: •you replace all the three panes correctly, as shown. Each pane must be in the posi- tion described below in order to fit into the door and to ensure that the oven oper- ates safely and correctly •you take extra care not to bump the edges of the glass against any object or surface •you do not force any of the panes into place.
- Page 39 REPLACE THE SECOND MIDDLE GLASS PANE Take the other middle pane and hold it firmly. Insert it in the next pair of grooves, push it slightly towards yourself (fig. 44) and gently lower into place (fig. 45). Figure 44 C C C Figure 45 C C C...
- Page 40 REPLACE THE INNER GLASS PANE Take the inner pane, holding it with the angle-cut corner orientated as shown in figure 46. Insert it in the uppermost pair of grooves, push it slightly towards yourself and gently lower into place. Important! Make sure that the angle-cut corner of the inner pane is at the bottom of the oven door, on the left-hand side.
- Page 41 REPLACE THE GLASS RETAINER 1. Position the glass retainer, as shown in the figure 47. It should sit on the bottom edge of the outer glass. Check that the clamps M of the glass retainer are not deformed or damaged. 2.
- Page 42 REFIT THE DOOR 1. Hold the door firmly (fig. 48). 2. Insert the hinge tongues into the slots, making sure that the notches on both sides drop into place as shown in the figure 49. 3. Open the door to its full extent. 4.
-
Page 43: Troubleshooting
TROUBLESHOOTING If there is a problem, check the chart below to see if you can fix it. If the problem cannot be fixed or persists, call your Authorised Repairer or Customer Care. Problem Possible causes What to do General Check that the mains power supply (wall switch) The oven does not work. - Page 44 Problem Possible causes What to do General To quit the ‘Display off’ option, The oven is set to ‘Display press and hold the cancel off’ option. button until the display shows the time of day. The oven is heating but the display is dark.
- Page 45 Problem Possible causes What to do Self Clean function During a Self Clean This is normal: the oven’ s cooling fans operate at their cycle, the oven is highest speed. louder than usual. The display shows The door has not been Make sure you close the door properly closed.
-
Page 46: Alert Codes
ALERT CODES If there is a problem, the oven will: • automatically suspend all oven functions • beep five times • display an alert code. IMPORTANT! Do not turn off the mains power supply to the oven (wall switch) if you get an alert code, unless the instructions in the chart following specifically instruct you to. - Page 47 Should you still require assistance please contact our Customer Service Centre for your nearest Authorised Delonghi Service Agent. Descriptions and illustrations in this booklet are given as simply indicative. The manufacturer reserves the right, considering the characteristics of the models described here, at any time and without notice, to make eventual...
- Page 48 Cod. 1103725 - ß4...