
Related Manuals for DeLonghi DE904PSC


Summary of Contents for DeLonghi DE904PSC
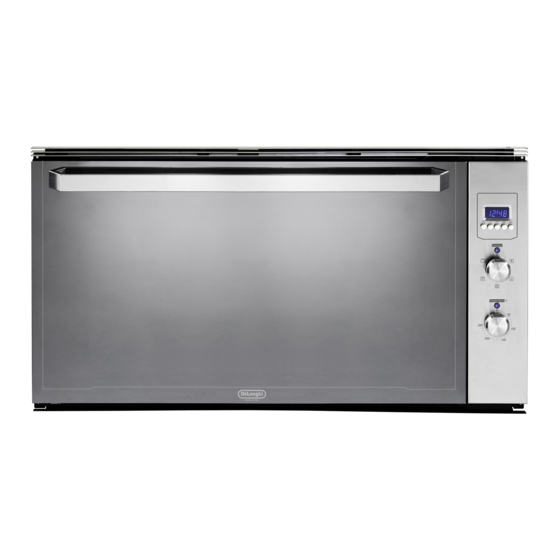
- Page 1 DE ’ L O N G H I C OO KING INSTALLATION and SERVICE INSTRUCTIONS USE and CARE INSTRUCTIONS D E90 4P SC FA N A SS IST E D BU ILT- IN O VEN distributed by DeLonghi Australia Pty Ltd DeLonghi New Zealand Ltd...
-
Page 2: Product Label
Dear Customer, Thank you for having purchased and given your preference to our product. The safety precautions and recommendations reported below are for your own safety and that of others. They will also provide a means by which to make full use of the features offered by your appliance. -
Page 3: Important Safety Precautions And Recommendations
IMPORTANT SAFETY PRECAUTIONS AND RECOMMENDATIONS IMPORTANT: This appliance is designed and manufactured solely for the cooking of domestic (household) food and is not suitable for any non domestic application and therefore should not be used in a commercial environment. The appliance guarantee will be void if the appliance is used within a non domestic environment i.e. - Page 4 manufacturer declines all responsibility for any inconvenience resulting from the inobservance of this condition. ■ Do not operate your appliance by means of an external timer or separate remote-control system. ■ Do not carry out cleaning or maintenance operations on the appliance without having previously disconnected it from the electric power supply.
- Page 5 ■ WARNING: During use the appliance and its accessible parts become hot; they remain hot for some time after use. Care should be taken to avoid touching heating elements – inside the oven. The door is hot, use the handle. –...
- Page 6 ■ Clean the oven regularly and do not allow fat or oils to build up in the oven base or tray. Remove spillages as soon as they occur. ■ Do not stand on the open oven door. ■ Always stand back from the appliance when opening the oven door to allow steam and hot air to escape before removing the food.
-
Page 7: Installation
Do not seal the oven into the cabinetry with silicone or glue; this makes future ■ servicing difficult. Delonghi will not cover the costs of removing the oven, or of damage caused by this removal. ■ The walls surrounding the oven must be made of heat-resistant material. - Page 8 3a on the next page. Should you require assistance please contact our Customer Service Centre for your nearest Authorised Delonghi Service Agent.
-
Page 9: Fixing The Oven
Fixing the rubber spacers to the base of the oven (if they are missing) by using the ones contained in the separate kit supplied with this appliance. Figure 3a FIXING THE OVEN Introduce the oven into the furniture opening and fix it with 4 screws (not supplied) as figure 3b. - Page 10 Figure 4 OVEN DOOR LOWER TRIM AIR FLOW IMPORTANT: Please take extra care not to damage the lower trim of the oven. Ensure the oven sits on wooden blocks or similar supports when it is removed from the carton as shown in above diagram. This will prevent any damage to the lower trim. Should the lower trim become damaged, straighten the trim and ensure the oven door opens fully without obstruction from the lower trim.
-
Page 11: Electrical Requirements
ELECTRICAL REQUIREMENTS ■ The appliance must be connected to the mains checking that the voltage corresponds to the value given in the rating plate and that the electrical cable sections can withstand the load specified on the plate. ■ A suitable isolating switch providing full disconnection from the mains power supply shall be incorporated in the permanent wiring, mounted and positioned to comply with the local wiring rules and regulations. -
Page 12: Replacing The Power Supply Cable
REPLACING THE POWER SUPPLY CABLE Important! This appliance must be connected to the electricity supply only by an authorised person. To connect the supply cable: ■ Unhook the terminal board cover by inserting a screwdriver into the two hooks “A” (fig. 5). ■... -
Page 13: Electric Diagram
ELECTRIC DIAGRAM Figure 8 ELECTRIC DIAGRAM KEY Cooling fan motor Oven switch Terminal block Oven thermostat Earth connection Thermal overload Cooling fan thermal overload Electronic programmer Testing block Oven lamp Line pilot lamp Thermostat pilot lamp Oven circular heating element Oven grill heating element Oven fan motor... -
Page 14: Using The Oven For The First Time
USE AND CARE CAUTION: ■ This appliance must be used only for the task it has explicitly been designed for, that is for domestic cooking of foodstuffs. Any other form of usage is to be considered as inappropriate and therefore dangerous. ■... - Page 15 ■ Unscrew the fixing screws and slide Figure 10 off the wire racks to the oven wall as Stop notch Guard rail in fig. 10. ■ Let the oven cool down, switch off the electrical supply, then clean the inside of the oven with a cloth soaked in water and neutral detergent and dry thoroughly.
- Page 16 TELESCOPIC SLIDING SHELF SUPPORTS (SOME MODELS ONLY) The telescopic sliding shelf supports make it safer and easier to insert and remove the oven shelves and trays. They stop when they are pulled out to the maximum position. Important! When fitting the sliding shelf supports, make sure that you fit: •...
-
Page 17: Cooking With Multifunction Oven
COOKING WITH MULTIFUNCTION OVEN Figure 13 Electronic programmer Power on light Function selector Temperature light Thermostat Please note: This appliance incorporates a safety cooling fan which you will hear operating whenever the oven or grill are in use. This fan may continue to run for several minutes after the appliance has been switched off. This fan is to reduce the external temperature of the appliance and cool the internal components. -
Page 18: General Features
Attention: The oven door becomes very hot during operation. Keep children away. GENERAL FEATURES OPERATING PRINCIPLES different thermostatic control Heating and cooking in the fan oven are functions are available to satisfy all cooking obtained in the following ways: requirements, provided by 2 heating a. - Page 19 Figure 14 Figure 15 THERMOSTAT KNOB To turn on the heating elements of the oven, set function selector knob to the required position and the thermostat knob to the desired temperature. To set the temperature, turn the thermostat control knob indicator mark to the required temperature.
-
Page 20: Cooking Advice
VENTILATED GRILL COOKING The infra-red grill and the fan are on. The heat is mainly diffused by radiation and the fan then distributes it throughout the oven. Use with the oven door closed and the thermostat knob must be regulated between 50°C and 225°C maximum. -
Page 21: Use Of The Grill
REGENERATION Set the switch to position and the thermostat knob to position 150°C. Bread becomes fragrant again if wet with a few drops of water and put into the oven for about 10 minutes at the highest temperature. SIMULTANEOUS COOKING OF DIFFERENT FOODS The oven set on position gives simultaneous heterogeneous cooking of different foods. - Page 22 RECOMMENDED COOKING TEMPERATURE Shelf Cooking Food °C °F Mark Position* Time (approx) CAKES Victoria sandwich 2 or 3 20-25 mins Small cakes/buns 1 and 2 15-20 mins Maidera cake 2 or 3 20 mins Fruit cake hours Rich fruit cake 3 or 4 hours Scones...
-
Page 23: Electronic Programmer
ELECTRONIC PROGRAMMER The electronic programmer is a device which groups together the following functions: • 24 hours clock with illuminated display • Timer (up to 23 hours and 59 minutes) • Program for automatic oven cooking • Program for semi-automatic oven cooking Description of the illuminated Description of the buttons: symbols:... -
Page 24: Setting Time Of Day
SETTING TIME OF DAY MANUAL OPERATION (fig. 17) The programmer is provided with an To use the oven manually, i.e. without the electronic clock with luminous figures programmer, you must cancel the flashing showing the hour and minutes. A by pressing the two buttons The first time the oven is connected up to simultaneously (the letter A will go out and the electricity supply and after a power cut,... -
Page 25: Audible Signal
MINUTE MINDER AUDIBLE SIGNAL The minute counter function consists The audible signal sounds at the end simply of an acoustic signal which can be of a minute minder cycle or of a cooking set for a maximum of 23 hours 59 minutes. programme for a period of 7 minute. -
Page 26: Semi - Automatic Cooking
SEMI - AUTOMATIC COOKING The oven will come on immediately and when the set time or programmed end of This automatically switches the oven off cooking time expires, it will automatically after the required cooking time. There are switch off. two methods of semi-automatic cooking: During cooking the letter A and the symbol remains on;... -
Page 27: Automatic Cooking
AUTOMATIC COOKING Set the cooking temperature and function via the function selector and To cook in the oven in automatic mode thermostat knob (see specific chapters). follow the instructions below: The oven is now programmed and Set the cooking time everything will work automatically;... -
Page 28: Cleaning And Maintenance
CLEANING AND MAINTENANCE GENERAL ADVICE Before you begin cleaning, you must ensure that the appliance is switched off ■ and disconnected from the electrical power supply. ■ It is advisable to clean when the appliance is cold and especially when cleaning the enamelled parts. - Page 29 INSIDE OF OVEN The oven should always be cleaned after use when it has cooled down. The cavity should be cleaned using a mild detergent solution and warm water. Suitable proprietary chemical cleaners may be used after first consulting with the manufacturers recommendations and testing a small sample of the oven cavity.
-
Page 30: Replacing The Oven Lights
REPLACING THE OVEN LIGHTS WARNING: Ensure the appliance is switched off before replacing the lamp to avoid the possibility of electric shock. ■ Let the oven cavity and the heating elements to cool down. ■ Switch off the electrical supply. ■... - Page 31 REMOVING AND REPLACING THE INNER DOOR GLASS PANE FOR CLEANING If you wish to clean the inner glass of the door, make sure you follow the precautions and instructions very carefully. Replacing the glass pane and the door incorrectly may result in damage to the appliance and may void your warranty.
-
Page 32: Removing The Oven Door
REMOVING THE OVEN DOOR The oven door can easily be removed as follows: ■ Open the door to the full extent (fig. 27). ■ Open the lever “A” completely on the left and right hinges (fig. 26). ■ Hold the door as shown in fig. 26. ■... - Page 33 REMOVING THE INNER PANE OF GLASS The oven door is fitted with no. 2 panes: ■ no. 1 outside; ■ no. 1 inner. To clean all panes on both sides it is necessary to remove the inner pane as follows: REMOVE THE INNER GLASS RETAINER Remove the oven door and place it on a soft surface.
- Page 34 AFTER CLEANING, REPLACE THE INNER GLASS PANE When replacing the inner glass pane, make sure that: ■ You replace the pane correctly, as shown. The pane must be in the position described below in order to fit into the door and to ensure that the oven operates safely and correctly.
- Page 35 REPLACE THE GLASS RETAINER Position the glass retainer, as shown in the figure 34. It should sit on the bottom edge of the outer glass. Check that the clamps “M” are not deformed or damaged. Gently push the glass retainer back into place. You should be able to hear the tabs on both sides click as they lock the glass retainer in.
- Page 36 REFIT THE DOOR Hold the door firmly (fig. 35). Insert the hinge tongues into the slots, making sure that the groove drops into place as shown in the figure 36. Open the door to its full extent. Fully close the levers “A” on the left and right hinges, as shown in the figure 37. Close the door and check that it is properly in place.
-
Page 37: Service And Maintenance
You have set the clock of the electronic programmer (the oven will not work until this has been done). None semi-automatic or automatic cooking program has been selected. Both the fuse and the mains fuse are intact. Should you still require assistance please contact our Customer Service Centre for your nearest Authorised Delonghi Service Agent. - Page 40 Descri pt i ons an d ill ustrati ons in this booklet a re giv en as simpl y ind icat ive. T h e ma nuf a ct ur er r es erv es the right, consider ing t he cha ract eri stics o f t he models described here, at any time and without notice, to make eventual necessary mo d ifi cat i on s f or the ir constr ucti on or for com merc ial n eeds.