Nautilus Be Strong Commerical T912 Service Manual
Commerical series treadmill
Hide thumbs
Also See for Be Strong Commerical T912:
- Assembly instructions (5 pages) ,
- Technical bulletin (2 pages) ,
- Manual (2 pages)

Related Manuals for Nautilus Be Strong Commerical T912


Summary of Contents for Nautilus Be Strong Commerical T912
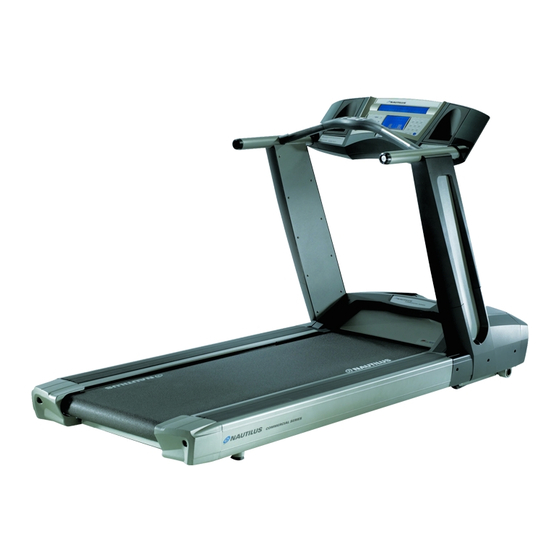
- Page 1 Be Strong. ™ Model: T9 Model: T9 Model: T9 Service Manual Commerical Series Treadmill P/N: 001-6976 Rev A (07/27/2006) Model: T912, T914, T916...
- Page 2 The information contained in this service manual is current as of the date of print. ATTENTION! THIS MANUAL IS INTENDED FOR AUTHORIZED NAUTILUS OR NAUTILUS CERTIFIED SERVICE PERSONNEL AND NOT FOR THE CONSUMER. THERE ARE NO USER SERVICEABLE PARTS. SERVICING OF THE NAUTILUS COMMERCIAL SERIES TREADMILL BY OTHER THAN AUTHORIZED NAUTILUS OR NAUTILUS CERTIFIED SERVICE PERSONNEL MAY RESULT IN VOIDING OF THE WARRANTY.
-
Page 3: Table Of Contents
Appendix D: Specifications Maintanence Logs Magnetic Key Limit Access Control IMPORTANT CONTACT NUMBERS SECTION THREE: TROUBLESHOOTING ELECTRICAL PROBLEMS - MODEL T912 Common Electrical & Electronic Problems Error Reporting Troubleshooting Flowcharts Wiring Schematics and Reference Tables Nautilus® Commercial T9 Series Treadmill Service Manual... - Page 4 Daily ...................6 Weekly ................6 Treadmill Interior ..............6 Adjusting Belt Tension ............7 Adjusting Belt Tracking ............8 Replacing the Walk Belt ............8 Replacing the Contact Heart Rate (CHR) Sensors .....13 Updating the Console Firmware ..........14 Model T912 ..............14 Model T914 & T916 ............14...
-
Page 5: Viewing Maintenance Information
Performing routine maintenance will help prevent unnecessary wear to the treadmill and/or injury to the user. The maintenance schedules are meant only to serve as a guide. Depending on where and how the treadmill is being used, more frequent routine maintenance may be required. Nautilus® Commercial T9 Series Treadmill Service Manual... -
Page 6: Daily
DO NOT USE DETERGENTS OR CLEANING AGENTS ON ANY PART OF THE DECK. DO NOT LET LIQUID ENTER THE TREADMILL OR CONTROLLER. IF IT DOES, THE EQUIPMENT MUST BE INSPECTED AND TESTED FOR SAFETY BY A NAUTILUS ® APPROVED TECHNICIAN BEFORE IT CAN BE USED AGAIN. -
Page 7: Adjusting Belt Tension
� � � � � � � DO NOT OVERTIGHTEN THE WALKING BELT. DO NOT TORQUE ADJUSTMENT SCREWS BEYOND 80 IN-LBS (9 N-M) MAXIMUM. OVERTIGHTENING THE BELT WILL REDUCE BELT LIFE AND DAMAGE THE ROLLER BEARINGS. Nautilus® Commercial T9 Series Treadmill Service Manual... -
Page 8: Adjusting Belt Tracking
� � � � � � � ��������� ������ �������� SECTION 1: MAINTENANCE 4. Test the belt by running on the belt at about four (4) mph. Hold the handrail lightly and resist the belt movement with your feet. � � � � � � � �... - Page 9 2.7 Slide the Front Roller over to the left, then use the belt to lift and slide out the roller from the machine (see Figure 2.9). Figure 2.2 Figure 2.3 Figure 2.5 Figure 2.4 Nautilus® Commercial T9 Series Treadmill Service Manual...
- Page 10 SECTION 1: MAINTENANCE Figure 2.6 Figure 2.7 Figure 2.8 Figure 2.9 Removing the Deck 3.1 Remove the right and left Rubber Side Extrusion exposing the Side Rail Bolts (see Figure 3.1). 3.2 Remove the right Side Rail Bolts and Side Rail exposing the Deck Bolts, then repeat for the left side (see Figure 3.2).
- Page 11 6.3 Use Loctite 243 and a 10 mm socket to tighten all the screws to 15 in.lbs. (1.7Nm). � � � � � � � DO NOT OVER-TIGHTEN THE DECK SCREWS. OVER-TIGHTENING THE DECK SCREWS WILL DAMAGE THE COMPRESSION MOUNTS. Nautilus® Commercial T9 Series Treadmill Service Manual...
- Page 12 SECTION 1: MAINTENANCE 7. Reinstalling the Front Roller Cut-Out 7.1 Slide the front roller inside the walking belt. 7.2 Insert the end of the roller opposite the pulley into the cut-out on the side rail (see Figure 7.1). 7.3 With your free hand, slip the motor drive belt onto the Front roller pulley and the motor flywheel.
-
Page 13: Replacing The Contact Heart Rate (Chr) Sensors
3. Reattach the CHR cables to the new top cover with CHR plates and secure to the bottom cover with the three screws. Note: Connect the color coded CHR wires in the same order that they were removed. Figure 1 Figure 2 Figure 3 Nautilus® Commercial T9 Series Treadmill Service Manual... -
Page 14: Updating The Console Firmware
SECTION 1: MAINTENANCE Updating the Console Firmware Model T912 The firmware can only be updated at the factory, the console must be exchanged. Model T914 & T916 � � � � � � � PLUG P7 AND CONNECTOR J7 ARE KEYED. DO NOT CONNECT P7 TO J7 BACKWARDS;... -
Page 15: Console Codes
Table 2-8: User Weight .........24 Table 2-8B: Enter Level 1-20 ........24 Table 2-9: Exercise Time ........24 Table 2-10: User Age ..........25 Table 2-11: Target Heart Rate ......25 Table 2-12:Treadmill Speed .........25 Table 2-13: Quick Start .........26 Nautilus® Commercial T9 Series Treadmill Service Manual... - Page 16 SECTION 2: CONSOLE CODES Owner-Defined Custom Table 2-14: Customize .........26 Table 2-15: Max Time ...........27 Table 2-16: Cool Down Time ........27 Table 2-17: Change Units ........27 Table 2-18: HR Inputs ..........28 Table 2-19: Select Statistics (T916 Only) .....28 Table 2-20: Language ..........28 Table 2-21: Upper LCD Contrast ......29 Table 2-22: Lower LCD Contract ......29 Table 2-23: Max Speed ........29...
- Page 17 Overview Model T912 There are 5 Menu groupings for the T912. All modes are initiated while in Dormant mode (screens blank). Initialize NVRAM - Deletes all setup information from the Console. IMPORTANT! All parameters will require resetting before treadmill is used again.
- Page 18 SECTION 2: CONSOLE CODES Parameter Menu / Configure System - Sets the device limits. Table 2–3. Setting Device Limits Step No. Press Keys on Console Display (What you will see) ENTER and STOP for 3 secs INCLINE UP OR INCLINE DOWN Scroll to ConF selection QUICKSTART Enters ConF selection setup...
- Page 19 Each group of codes is defined below by quick reference guides (Console Cardio Codes and T914/T916 Service Screen Overview) and detailed instruction sections. To access these console codes and the options within each group, follow the instructions for each section. Nautilus® Commercial T9 Series Treadmill Service Manual...
-
Page 20: Console Cardio Codes
SECTION 2: CONSOLE CODES Console Cardio Codes - Model T914 & T916 General Information: • Enter console codes mode by pressing the UP Speed key [], then the numeric [ # ] key, and then press the [ENTER] key once to enter this mode. •... - Page 21 [] [ 8 ] [ ENTER ] “ CHANGE MACHINE” [ ENTER ] (Defined as: Hardware Dependant Setup.) For Treadmill Devices, the selections are: [] [ ENTER ] “TREADCLIMBER” [] [ ENTER ] “T916” [] [ ENTER ] “T914” [] [ ENTER ] “TC/TM CONFIG RQD” Nautilus® Commercial T9 Series Treadmill Service Manual...
- Page 22 SECTION 2: CONSOLE CODES...
- Page 23 SECTION 2: CONSOLE CODES Cardio You can customize several default settings on the Nautilus® Commerical Series Models T914 and T916 treadmills to conform to your individual requirements, including changing the: • weight, • Level (Fat and Calorie Burn workouts), • workout time, •...
- Page 24 SECTION 2: CONSOLE CODES Refer to the following tables to change individual default workout settings without scanning through all the selections: Table 2–8. User Weight Step No. Press Keys on Console Display (What you will see) SPEED UP, 2, ENTER DEFAULT SPEED UP OR SPEED DOWN WEIGHT...
- Page 25 SPEED UP OR SPEED DOWN SPEED ENTER CURRENT SPEED SETTING SPEED UP OR SPEED DOWN SPEED CHANGES ENTER DEFAULT CLEAR THE RESULTS YOU WANT * Default setting. Setting could be different if the treadmill was customized. Nautilus® Commercial T9 Series Treadmill Service Manual...
-
Page 26: Owner-Defined Custom
SECTION 2: CONSOLE CODES Table 2–13. Quick Start Step No. Press Keys on Console Display (What you will see) SPEED UP, 2, ENTER DEFAULT SPEED UP OR SPEED DOWN QUICK START ENTER CURRENT QUICK START SETTING SPEED UP OR SPEED DOWN QUICK START SETTING CHANGES ENTER DEFAULT... - Page 27 SPEED UP OR SPEED DOWN CHANGE UNITS ENTER CURRENT SETTINGS SPEED UP OR SPEED DOWN SETTING CHANGES TO METRIC OR USA ENTER CUSTOMIZE CLEAR THE RESULTS YOU WANT * Default setting. Setting could be different. Nautilus® Commercial T9 Series Treadmill Service Manual...
- Page 28 SECTION 2: CONSOLE CODES Table 2–18. HR Inputs Step No. Press Keys on Console Display (What you will see) SPEED UP, 3, ENTER CUSTOMIZE SPEED UP OR SPEED DOWN HR INPUTS ENTER CURRENT SETTINGS SPEED UP OR SPEED DOWN LOCKED INPUTS, EITHER INPUTS, TELEMETRY ONLY, HAND ONLY, BOTH HR OFF ENTER CUSTOMIZE...
- Page 29 SPEED UP OR SPEED DOWN ENABLE MAG KEY ENTER ENABLE MAG KEY OFF* SPEED UP OR SPEED DOWN TOGGLES BETWEEN OFF AND ON ENTER CUSTOMIZE CLEAR THE RESULTS YOU WANT * Default setting. Setting could be different. Nautilus® Commercial T9 Series Treadmill Service Manual...
-
Page 30: Machine Status
SECTION 2: CONSOLE CODES Table 2–24B. Auto Stop Step No. Press Keys on Console Display (What you will see) SPEED UP, 3, ENTER CUSTOMIZE SPEED UP OR SPEED DOWN AUTOSTOP ENTER N/A (IF NOT AVAILABLE). OFF OR ON WITH CURRENT PRESSURE COUNT IN WINDOW SPEED UP OR SPEED DOWN TOGGLES BETWEEN ON AND OFF... -
Page 31: Machine Status
Step No. Press Keys on Console Display (What you will see) SPEED UP, 4, ENTER MACHINE STATUS SPEED UP OR SPEED DOWN ACCUMULATED DISTANCE IN CURRENT UNITS (Miles or CLEAR THE RESULTS YOU WANT Nautilus® Commercial T9 Series Treadmill Service Manual... - Page 32 SECTION 2: CONSOLE CODES Table 2–30. Software Revision Step No. Press Keys on Console Display (What you will see) SPEED UP, 4, ENTER MACHINE STATUS SPEED UP OR SPEED DOWN CURRENT CONSOLE REVISION CLEAR THE RESULTS YOU WANT Table 2–31. Configuration Step No.
-
Page 33: Diagnostic
Press Keys on Console Display (What you will see) SPEED UP, 6, ENTER DIAGNOSTIC SPEED UP OR SPEED DOWN DISPLAY TEST ENTER DISPLAY LCD SEGMENTS ILLUMINATE IN ALTERNATING FASHION CLEAR DIAGNOSTIC CLEAR THE RESULTS YOU WANT Nautilus® Commercial T9 Series Treadmill Service Manual... - Page 34 SECTION 2: CONSOLE CODES Table 2–36. Key Test Step No. Press Keys on Console Display (What you will see) SPEED UP, 6, ENTER DIAGNOSTIC SPEED UP OR SPEED DOWN KEY TEST ENTER PRESS KEY PRESS AND HOLD KEY THE NAME OF THE KEY YOU ARE PRESSING CLEAR DIAGNOSTIC CLEAR...
- Page 35 Display (What you will see) SPEED UP, 7, ENTER SERVICE SPEED UP OR SPEED DOWN MAINTENANCE HOURS ENTER CURRENT MAINTENANCE HOURS PRESS "0", THEN "ENTER" TO RESET CLEAR SERVICE CLEAR THE RESULTS YOU WANT Nautilus® Commercial T9 Series Treadmill Service Manual...
-
Page 36: Magnetic Key Limit Access Control
SECTION 2: CONSOLE CODES Magnetic Key Limit Access Control Overview Limited-access control lets you restrict treadmill use to authorized personnel. It also lets you stop the treadmill in an emergency. The magnetically-activated control is located on the front of the display console just below the STOP key. - Page 37 SECTION 2: CONSOLE CODES PAGE LEFT BLANK INTENTIONALLY Nautilus® Commercial T9 Series Treadmill Service Manual...
-
Page 38: Error Reporting
Section Troubleshooting Electrical Problems - Model T912 Contents Common Electrical and Electronic Problems Table 3–1. Electrical Issues ..........40 Table 3–2. Electronic Issues ..........41 Error Reporting Error List ................42 Troubleshooting Flowcharts ..........43 Wiring Schematics and Reference Tables T9.12 115 VAC Reference Table ........49 T9.12 115VAC Wiring Schematic ........50... - Page 39 SECTION 3: T912 TROUBLESHOOTING ELECTRICAL PROBLEMS Common Electrical and Electronic Problems The following tables provide possible causes and solutions to the most common types of electrical and electronic problems. While the information in these tables may not resolve all problems, they should help you isolate the area affected by the problem.
- Page 40 SECTION 3: T912 TROUBLESHOOTING ELECTRICAL PROBLEMS Table 3–2. Electronic Issues Problem Possible Causes Remedy System stops unexpectedly Belt is possibly worn and causing • Replace the belt and flip or possibly while user is running at the circuit breaker to open. With the replace the deck.
- Page 41 SECTION 3: T912 TROUBLESHOOTING ELECTRICAL PROBLEMS Error Reporting The system reports various problems to the user via the display. The format includes the text line reporting the error. Definitions Warning—A message display that appears on the console display that informs you of a condition that requires attention but does not stop treadmill operation.
- Page 42 SECTION 3: T912 TROUBLESHOOTING ELECTRICAL PROBLEMS Troubleshooting Flowcharts Use the flowcharts on the following pages to help you localize and correct electrical and electronic problems. Troubleshooting Flowchart: Motor Stalled / Overheated / No Signal - Error 1 Treadmill will not elevate.
- Page 43 SECTION 3: T912 TROUBLESHOOTING ELECTRICAL PROBLEMS Troubleshooting Flowchart: Motor Movement without Commands - Error 2 Motor Movement without commands ERROR 2 Treadmill elevates without user / program command Is a Other Err Code Go to appropriate “Err Grd2" displayed? chart...
- Page 44 SECTION 3: T912 TROUBLESHOOTING ELECTRICAL PROBLEMS Troubleshooting Flowchart: Grade Position Out of Range - Error 3 Treadmill will not elevate. Grade Position Out of Range ERROR 3 Is a Other Err Code Go to appropriate “Err Grd3" displayed? chart present?
-
Page 45: Belt Speed Signal Loss
SECTION 3: T912 TROUBLESHOOTING ELECTRICAL PROBLEMS Troubleshooting Flowchart: Belt Speed (Tach) Signal Loss - Error LS Treadmill Belt Belt Speed (Tach) Signal Loss Stops ERROR LS Is a "Err LS" Other Err Code Go to appropriate present on displayed? chart... - Page 46 SECTION 3: T912 TROUBLESHOOTING ELECTRICAL PROBLEMS Troubleshooting Flowchart: Belt Over Speed - Error OS Treadmill Belt Belt Over Speed Stops ERROR OS Is a "Err OS" Other Err Code Go to appropriate present on displayed? chart Note, after cycling power the...
-
Page 47: No Display/No Device Operation
SECTION 3: T912 TROUBLESHOOTING ELECTRICAL PROBLEMS Troubleshooting Flowchart: No Display / No Device Operation No Display / No Device There is no Console display. Operation Check fuses F1, Is LED 4 lit on or F2 on Drive Drive board? assembly. - Page 48 SECTION 3: T912 TROUBLESHOOTING ELECTRICAL PROBLEMS T9.12 115 VAC Reference Table for Drawing Reference Part Designator Number Description 41265 CONSOLE ASSEMBLY, T9.12 41286 MEMBRANE KEYPAD 41187 TELEMETRY HEART RATE RECEIVER PCBA 41191 TELEMETRY HEART RATE ROC CABLE ASSEMBLY 41174 TELEMETRY HEART RATE CONSOLE CABLE ASSEMBLY...
- Page 49 SECTION 3: T912 TROUBLESHOOTING ELECTRICAL PROBLEMS Nautilus® Commercial T9 Series Treadmill Service Manual...
- Page 50 SECTION 3: T912 TROUBLESHOOTING ELECTRICAL PROBLEMS T9.12 230 VAC Reference Table for Drawing Reference Part Designator Number Description 41265 CONSOLE ASSEMBLY, T9.12 41286 MEMBRANE KEYPAD 41187 TELEMETRY HEART RATE RECEIVER PCBA 41191 TELEMETRY HEART RATE ROC CABLE ASSEMBLY 41174 TELEMETRY HEART RATE CONSOLE CABLE ASSEMBLY...
- Page 51 SECTION 3: T912 TROUBLESHOOTING ELECTRICAL PROBLEMS Nautilus® Commercial T9 Series Treadmill Service Manual...
-
Page 52: Wiring Schematics And Reference Tables
Section Troubleshooting Electrical Problems - Model T914 & T916 Contents Common Electrical and Electronic Problems Table 4–1. Electrical Issues ..........53 Table 4–2. Electronic Issues ..........53 Error Reporting Error List ................54 Future Errors ..............55 Error Resolution ...............55 LED Patterns ..............56 Troubleshooting Flowcharts ..........57 Electrical Troubleshooting Guide ........60 Wiring Schematics and Reference Tables .....65... -
Page 53: Electronic Issues
• Refer to Part 2 for adjusting speed. activated treadmill maximum speed. Treadmill will not reach maximum Time limit control may be activated. • Refer to Part 2 for adjusting time. treadmill maximum time. Nautilus® Commercial T9 Series Treadmill Service Manual... - Page 54 SECTION 4: T914/916 TROUBLESHOOTING ELECTRICAL PROBLEMS Table 4–2. Electronic Issues continued Problem Possible Causes Remedy Walking belt stops, and no error User hit the Ergo stop button. • Press START to resume message appears. workout. ERGO cable is pinched or abraded. •...
-
Page 55: Error List
Display Type Response Description CS HW COM Warning Start-up—Stops CSAFE but ALL—CSAFE UART hardware link ERROR continues user selection. failure. CS COM ERROR Warning Anytime—Stops CSAFE but ALL—CSAFE communication failure. continues program. Nautilus® Commercial T9 Series Treadmill Service Manual... -
Page 56: Error Resolution
SECTION 4: T914/916 TROUBLESHOOTING ELECTRICAL PROBLEMS Table 4–5. Error Resolution Error Code Action TM COM ERROR Verify the cable connections at both ends. Check for bent or broken pins, and replace if required. If error persists, replace the VSD or controller as necessary. DRIVE ERROR Replace the VSD. - Page 57 1 (black) and 2 (brown) and pins 2 and 8 (purple) of the wire harness reads 18VDC. Replace the VSD Board. Is the Replace the Main voltage Cable. good? Replace the Processor PCB. Nautilus® Commercial T9 Series Treadmill Service Manual...
- Page 58 SECTION 4: T914/916 TROUBLESHOOTING ELECTRICAL PROBLEMS Troubleshooting Flowchart: No Elevation Movement Treadmill will not elevate. Is a “Grade Move Cycle the power. Error” present? Unplug P18, and Does the check for 118VAC treadmill between the blue elevate? and brown wires. Is the Upgrade the voltage...
- Page 59 Cycle the power. voltage is PCB. good? Replace the CHR, making sure the Is the CHR working? wire tabs do not contact each other inside the Ergo Bar Assembly. Replace the Controller/ Processor PCB. Nautilus® Commercial T9 Series Treadmill Service Manual...
- Page 60 SECTION 4: T914/916 TROUBLESHOOTING ELECTRICAL PROBLEMS...
- Page 61 SECTION 4: T914/916 TROUBLESHOOTING ELECTRICAL PROBLEMS Nautilus® Commercial T9 Series Treadmill Service Manual...
- Page 62 SECTION 4: T914/916 TROUBLESHOOTING ELECTRICAL PROBLEMS...
- Page 63 SECTION 4: T914/916 TROUBLESHOOTING ELECTRICAL PROBLEMS Nautilus® Commercial T9 Series Treadmill Service Manual...
- Page 64 SECTION 4: T914/916 TROUBLESHOOTING ELECTRICAL PROBLEMS...
-
Page 65: Vac Reference Table Drawing
27356 TRANSFORMER EXTENSION CABLE ASSEMBLY 41322 CONFIGURATION PLATE ASSEMBLY 27487 WALK BELT MOTOR 35382-002 POWER INPUT CABLE, 230V 35986-001 GRADE POWER CABLE ASSEMBLY 27122 JUMPER 41062 INCLINE MOTOR 27959 PREDRIVE POWER CABLE ASSEMBLY Nautilus® Commercial T9 Series Treadmill Service Manual... - Page 66 SECTION 4: T914/916 TROUBLESHOOTING ELECTRICAL PROBLEMS...
- Page 67 POWER INPUT CABLE, 230V 35986-001 GRADE POWER CABLE ASSEMBLY 41404 HARMONICS FILTER, INTERNATIONAL UNITS ONLY 27122 JUMPER TO REPLACE HARMONICS FILTER ON DOMESTIC UNITS ONLY 41289 INCLINE MOTOR 27959 PREDRIVE POWER CABLE ASSEMBLY Nautilus® Commercial T9 Series Treadmill Service Manual...
- Page 68 SECTION 4: T914/916TROUBLESHOOTING ELECTRICAL PROBLEMS...
- Page 69 Section Troubleshooting Mechanical Problems Contents Common Mechanical Problems and Solutions ....70 Replacing Grade Actuator ..........71 Replacing Drive Motor ............75 Nautilus® Commercial T9 Series Treadmill Service Manual...
-
Page 70: Common Mechanical Problems And Solutions
SECTION 5: TROUBLESHOOTING MECHANICAL PROBLEMS Common Mechanical Problems and Solutions Table 5–1. Walking Belt Problem Potential Causes Solutions Walking belt is too far to the • The belt is tracking • Adjust the tracking. (Refer improperly. to Part 1 to correct the left or right. -
Page 71: Replacing The Grade Actuator Motor
Remove the two (2) screws on the treadmill hood. Lift off the hood. 2. Remove the Grade Actuator Motor Unplug the Actuator cables from the VSD board. See Figure 1 for T912 and Figure 2 for T914/916. ��������� ������ ��������... - Page 72 Plug the Actuator cables to the VSD board and the ground wire to the frame. (On models T914/916 connect the ground wire only). See Figure 1 for T912, and Figure 2 for T914/T916. Position the Actuator with the shaft pointing upward (see Figure 6).
- Page 73 Align the Grade nut in the Grade weldment, than attach the Elevation nut and E-Ring clip. See Figure 3 and Figure 8. Flip the Actuator over to access the left side, than attach the Elevation nut and E-Ring clip. See Figure 5 and Figure 9. Nautilus® Commercial T9 Series Treadmill Service Manual...
- Page 74 SECTION 5: TROUBLESHOOTING MECHANICAL PROBLEMS Pull the Actuator back and align with bracket on the frame, Than attach with the mounting hardware. See Figure 4 and Figure 10. Remove the blocks and retest the unit. Reinstall the Treadmill Hood Install the treadmill hood over the motor compartment.
-
Page 75: Replacing The Drive Motor
Loosen the mounting bolt attaching the tension wheel to the bracket and remove the tension wheel assembly, than remove the drive belt from the ��������� ������ �������� motor flywheel pulley. See Figure 12. Figure 12 Nautilus® Commercial T9 Series Treadmill Service Manual... - Page 76 1/2 turn further. Do not over-tighten the bolts. FOR ONLY T912 UNITS: The unit has oblong cut mounting holes. The bolts MUST BE CENTERED in those holes. If the bolts are too far forward or backward, this will cause issues...
- Page 77 Plug the AC power cord into the treadmill, and turn on the treadmill circuit breaker switch. Electrical Troubleshooting Table and Wiring Schematics Use the electrical troubleshooting table and wiring schematics in Sections Three and Four to assist you in isolating and correcting electrical and electronic problems. Nautilus® Commercial T9 Series Treadmill Service Manual...
- Page 78 Section Parts List and Exploded Views Contents Parts List: Model T9.12 ............79 Exploded Views: Model T9.12 ..........84 Parts List: Model T9.14 ............93 Exploded Views: Model T9.14 ..........98 Parts List: Model T9.16 ............107 Exploded Views: Model T9.16 ........... 112...
- Page 79 Code "1" - 3 Year standard coverage on parts. Code "2" - 1 Year standard coverage on wearable parts. Code "3" - 15 Year standard coverage on frame and motor. T912, 110V, WARRANTY B.O.M, SKU #00060-001 PART NUMBER: WARRANTY MFG PART...
- Page 80 SECTION 6: PARTS LIST AND EXPLODED VIEWS PART NUMBER: WARRANTY MFG PART DESCRIPTION: CODE: NUMBER: SM35918-005 35918-005 WASHER,EXTR STAR,ZINC,METRIC SM27458 27458 POLY-V DRIVE BELT, 280J10 SM27551 27551 510/612 POLYOLEFIN WHEEL SM27552 27552 ROTARY TENSIONER SM27583 27583 GUIDE WIRE .500 SM27585 27585 WASHER, .406 X .812 X .065 FLAT SM27764...
- Page 81 SM41532 41532 SCREW, 3/8 - 16 X 5, HH G2 SM41588 41588 ASSY, SWITCH PLATE, T7'S, T912 SM41589 41589 ASSY, PWR INPUT, T7'S, T912, 120V SM41591 41591 BELT, WALKING, 57 INCH SM41604 S41604 ASY, RETRO KIT, HANDRAIL, T912, 57 SM41615 41615 PLUG, HOLE, .312, FINISHING BLK, L...
- Page 82 SECTION 6: PARTS LIST AND EXPLODED VIEWS Parts List: Model T9.12 ADDITIONAL COMPONENTS T912, 110V, DOMESTIC, TV, WARRANTY, SKU #00060-004 PART NUMBER: WARRANTY MFG PART DESCRIPTION: CODE: NUMBER: SM41588 41588 ASSY,SWITCH PLATE,T7’S,T9.12 SM41128 41128 CIRCUIT BREAKER,THERMAL,20 AMP SM17787 17787 CONNECTOR, RF, 3MM, F...
- Page 83 SECTION 6: PARTS LIST AND EXPLODED VIEWS T912, 230V, INTERNATIONAL, TV, WARRANTY, SKU #00060-003 PART NUMBER: WARRANTY MFG PART DESCRIPTION: CODE: NUMBER: SM41390 41390 ASSY,CONFIG PLATE, 230V INT’L SM17787 17787 CONNECTOR, RF, 3MM, F SM17847 17847 ASSY, HARNESS, TV/PWR, T914/T916...
- Page 84 SECTION 6: PARTS LIST AND EXPLODED VIEWS...
- Page 85 SECTION 6: PARTS LIST AND EXPLODED VIEWS Nautilus® Commercial T9 Series Treadmill Service Manual...
- Page 86 SECTION 6: PARTS LIST AND EXPLODED VIEWS ����� ����� ����� ������� ����� ������� ������� ����� ����� ��������� ����� ����� ����� �����...
- Page 87 SECTION 6: PARTS LIST AND EXPLODED VIEWS Nautilus® Commercial T9 Series Treadmill Service Manual...
- Page 88 SECTION 6: PARTS LIST AND EXPLODED VIEWS...
- Page 89 SECTION 6: PARTS LIST AND EXPLODED VIEWS Nautilus® Commercial T9 Series Treadmill Service Manual...
- Page 90 SECTION 6: PARTS LIST AND EXPLODED VIEWS...
- Page 91 SECTION 6: PARTS LIST AND EXPLODED VIEWS Nautilus® Commercial T9 Series Treadmill Service Manual...
- Page 92 SECTION 6: PARTS LIST AND EXPLODED VIEWS...
-
Page 93: Model T9.14
26420 KIT, CONTACT PLATE, R, NTR SM26423 26423 KIT, COVER UPRIGHT, TOP R, SV SM26424 26424 KIT, COVER, UPRIGHT TOP SM26427 26427 KIT, KICK PLATE, SV SM26428 26428 KIT, HARDWARE, KICK PLATE, SV Nautilus® Commercial T9 Series Treadmill Service Manual... - Page 94 SECTION 6: PARTS LIST AND EXPLODED VIEWS PART NUMBER: WARRANTY MFG PART DESCRIPTION: CODE: NUMBER: SM35918-005 35918-005 WASHER,EXTR STAR,ZINC,METRIC SM27000 27000 FAST TAB .250 SM27306 27306 KIT, CONNECTOR, LOCK, T914/T916 SM27319 27319 CIRCUIT BREAKER, ME SM27441 27441 WASHER, SHOULDER, ISOLATION SM27458 27458 POLY-V DRIVE BELT, 280J10...
- Page 95 ASSY, POWER INPUT, T914, T916, 120 SM41593 S41593 KIT, T7/T9, COMPRESSION MT/DECK SM41594 S41594 KIT, T914, MOUNTS, BOLTS, 60 INCH BELT SM41605 41605 ASY, RETRO KIT, HANDRAIL, T914, 60 SM42600 S42600 KIT, HARDWARE, T7/T9 UPRIGHT SV Nautilus® Commercial T9 Series Treadmill Service Manual...
- Page 96 SECTION 6: PARTS LIST AND EXPLODED VIEWS Parts List: Model T9.14 ADDITIONAL COMPONENTS T914, 110V, DOMESTIC, TV, WARRANTY, SKU #00070-004 PART NUMBER: WARRANTY MFG PART DESCRIPTION: CODE: NUMBER: SM41319 41319 CORDSET,PWR,ANGLE,C19LA 5-20P SM17787 17787 CONNECTOR, RF, 3MM, F SM17847 17847 ASSY, HARNESS, TV/PWR, T914/T916 SM41628 41628...
- Page 97 ACTUATOR, LINEAR, 230V, NTR TM SM41404 41404 ASSY, CHOKE 6 MH, INTERNATIONAL SM41608 41608 ASSY, SWITCH PLATE, T914/T916, 220 SM41613 41613 ASSY, CONSOLE, T914, INTERNATIONAL SMQ36498-002 36498-002 PCBA, TM VOLT CONFIG, 230V 15% Nautilus® Commercial T9 Series Treadmill Service Manual...
- Page 98 SECTION 6: PARTS LIST AND EXPLODED VIEWS...
- Page 99 SECTION 6: PARTS LIST AND EXPLODED VIEWS Nautilus® Commercial T9 Series Treadmill Service Manual...
- Page 100 SECTION 6: PARTS LIST AND EXPLODED VIEWS...
- Page 101 SECTION 6: PARTS LIST AND EXPLODED VIEWS Nautilus® Commercial T9 Series Treadmill Service Manual...
- Page 102 SECTION 6: PARTS LIST AND EXPLODED VIEWS...
- Page 103 SECTION 6: PARTS LIST AND EXPLODED VIEWS Nautilus® Commercial T9 Series Treadmill Service Manual...
- Page 104 SECTION 6: PARTS LIST AND EXPLODED VIEWS...
- Page 105 SECTION 6: PARTS LIST AND EXPLODED VIEWS Nautilus® Commercial T9 Series Treadmill Service Manual...
- Page 106 SECTION 6: PARTS LIST AND EXPLODED VIEWS...
- Page 107 26419 KIT, CONTACT PLATE, L, NTR SM26420 26420 KIT, CONTACT PLATE, R, NTR SM26423 26423 KIT, COVER UPRIGHT, TOP R, SV SM26424 26424 KIT, COVER, UPRIGHT TOP SM26427 26427 KIT, KICK PLATE, SV Nautilus® Commercial T9 Series Treadmill Service Manual...
- Page 108 SECTION 6: PARTS LIST AND EXPLODED VIEWS PART NUMBER: WARRANTY MFG PART DESCRIPTION: CODE: NUMBER: SMQ35918-005 35918-005 WASHER,EXTR STAR,ZINC,METRIC SM26429 26429 KIT,COVER,MOTOR FRONT,SV SM26428 26428 KIT, HARDWARE, KICK PLATE, SV SM27000 27000 FAST TAB .250 SM27306 27306 KIT, CONNECTOR, LOCK, T914/T916 SM27319 27319 CIRCUIT BREAKER, ME...
- Page 109 KIT,SIDERAIL,T916,RIGHT SM41581 41581 ASSY, SWITCH PLATE, T914, T916 SM41583 41583 ASSY, POWER INPUT, T914, T916, 120 SM41593 S41593 KIT, T7/T9, COMPRESSION MT/DECK SM41601 41601 ASY,RETRO KIT,HANDRAIL,T916,63 SM42600 S42600 KIT, HARDWARE, T7/T9 UPRIGHT SV Nautilus® Commercial T9 Series Treadmill Service Manual...
- Page 110 SECTION 6: PARTS LIST AND EXPLODED VIEWS Parts List: Model T9.16 ADDITIONAL COMPONENTS T916, 110V, DOMESTIC, TV, WARRANTY, SKU #00080-004 PART NUMBER: WARRANTY MFG PART DESCRIPTION: CODE: NUMBER: SM17787 17787 CONNECTOR, RF, 3MM, F SM17847 17847 ASSY, HARNESS, TV/PWR, T914/T916 SM41606 41606 ASSY,CONSOLE,T9.16,TV OPTION...
- Page 111 SCREW, SEMS, 10/32 X .375 SM41289 41289 ACTUATOR, LINEAR, 230V, NTR TM SM41404 41404 ASSY, CHOKE 6 MH, INTERNATIONAL SM41608 41608 ASSY, SWITCH PLATE, T914/T916, 220 SM41614 41614 ASSY,CONSOLE,T9.16,INTERNATIONAL SMQ36498-002 36498-002 PCBA, TM VOLT CONFIG, 230V 15% Nautilus® Commercial T9 Series Treadmill Service Manual...
- Page 112 SECTION 6: PARTS LIST AND EXPLODED VIEWS...
- Page 113 SECTION 6: PARTS LIST AND EXPLODED VIEWS Nautilus® Commercial T9 Series Treadmill Service Manual...
- Page 114 SECTION 6: PARTS LIST AND EXPLODED VIEWS...
- Page 115 SECTION 6: PARTS LIST AND EXPLODED VIEWS Nautilus® Commercial T9 Series Treadmill Service Manual...
- Page 116 SECTION 6: PARTS LIST AND EXPLODED VIEWS...
- Page 117 SECTION 6: PARTS LIST AND EXPLODED VIEWS Nautilus® Commercial T9 Series Treadmill Service Manual...
- Page 118 SECTION 6: PARTS LIST AND EXPLODED VIEWS...
- Page 119 SECTION 6: PARTS LIST AND EXPLODED VIEWS Nautilus® Commercial T9 Series Treadmill Service Manual...
- Page 120 SECTION 6: PARTS LIST AND EXPLODED VIEWS...
- Page 121 Section Appendixes Contents Appendix A—Required Tools & Lubricants .......122 Appendix B—Using a Multimeter ........123 Appendix C—International Power Plug Configurations ..126 Appendix D—Specifications ..........127 Nautilus® Commercial T9 Series Treadmill Service Manual...
-
Page 122: Required Tools
SECTION 7: APPENDIXES Appendix A Required Tools This is a list of the most common tools you will need to service the treadmill. Table 7–1. Required Tools and Uses Tool Purposes Socket wrench General 13-mm socket Removing and installing tracking bolts, front roller retainers, motor hardware, and grade block hardware 10-mm socket Removing and installing deck screws, VSD mounts, configuration... -
Page 123: Appendix B: Using A Multimeter
13 volts on the readout. Setting the meter to a lower maximum will show 13.5 volts. Autoranging meters automatically adjust the range to give an accurate reading. This type of meter is more expensive but much easier to use. Nautilus® Commercial T9 Series Treadmill Service Manual... - Page 124 SECTION 7: APPENDIXES Appendix B Switched Range Meter Set here to check DC Set here to check AC voltage voltage 20 will be the most used These are for setting for measuring checking amps and DC voltage output are not needed for our purposes Set here to check resistance (ohms)
- Page 125 Set the multitmeter to the lowest setting that is still higher than the highest output of the component being tested. Place the black and red leads or probes on the appropriate corresponding wires, pins, or connectors. Observe the reading, and proceed according to the troubleshooting sections in this manual. Nautilus® Commercial T9 Series Treadmill Service Manual...
- Page 126 SECTION 7: APPENDIXES Appendix C International Power Plug Configurations Table 7–2. International Power Plugs Power Cords System Country C, E, F Europe Swiss Australia...
- Page 127 3–95% relative (Limited to 90 F/32 C maximum dew Storage Humidity (non-condensing) point) Atmospheric Pressure (Operating) 8.60–15.0 psia, 445–775 mm Hg absolute Atmospheric Pressure (Shipping and 8.22–15.0 psia, 425–775 mm Hg absolute Storage) * Domestic/international 220VAC model Nautilus® Commercial T9 Series Treadmill Service Manual...
- Page 128 SECTION 7: APPENDIXES Appendix D: Model T914/T916 Specifications Voltage 115VAC (220VAC)* Amperage 20A (10A)* Motor 4.8 hp, 230VAC, 60 Hz, 3 Phase Display Two Line Text/Data and 1 Matrix 20Hx31W Back-lit LCD Length 85 in./2m (T9.14), 88 in./2.25m (T9.16) Width 35 in./89cm (T914), 35 in./89cm (T916) Height 48 in./1.2m (T914), 48 in./1.2m (T916)
-
Page 129: Important Contact Numbers
For technical assistance and a list of distributors of your machine and the date of purchase available when in your area, please call or fax one of the following you contact the appropriate Nautilus office listed below. numbers. OFFICES IN THE UNITED STATES: INTERNATIONAL CUSTOMER SERVICE: •... - Page 130 ® © 2005 Nautilus, Inc. All rights reserved. Nautilus, the Nautilus logo, Changing the Game in Health and Fitness, REACT, ROC, Remote Operation Control, Be Strong are either registered trademarks or trademarks of Nautilus, Inc. Nautilus, Inc. World Headquarters, 16400 SE Nautilus Drive, Vancouver, Washington, USA 98683, 1-800-628-8458, www.Nautilus.com.