Nautilus T916 Owner's And Assembly Manual Addendum
Hide thumbs
Also See for T916:
- Owner's manual (58 pages) ,
- Service manual (131 pages) ,
- Assembly instructions (5 pages)

Related Manuals for Nautilus T916


Summary of Contents for Nautilus T916
- Page 1 ® ® STRONGER THAN EVER ™ T916 Treadmill Owner’s And Assembly Manual Addendum Med-Fit Systems, Inc., exclusive manufacturers of Nautilus ® Commercial Fitness Equipment P/N 19-1001_F...
- Page 3 Notice: This Addendum provides important information regarding Important Safety Instructions, Grounding Instructions, Power Plug Receptacle Information, Assembly Instructions, Commercial Limited Warranty Information and Contact Information that is not found in the printed Owner’s Manual. If you need assistance, please contact Med-Fit Systems Customer Excellence at 800-235-2233 IMPORTANT SAFETY INSTRUCTIONS - SAVE THESE INSTRUCTIONS This page is in addition to the Important Safety Instructions page in the printed Owner’s Manual This icon means a potentially hazardous situation exists which, if not avoided, could...
-
Page 4: Power Plug Receptacles
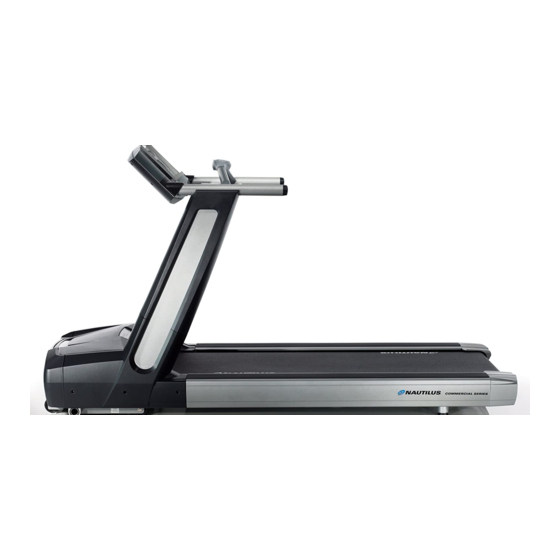
This section replaces the Power Plug Receptacles section in the printed Owner’s Manual If your T916 Treadmill was produced after January 2011, it is equipped with a hardwired power cord that extends from the front of the machine. The Rear Power Receptacle is no longer an available option after this production date. - Page 5 MOTOR COVERS INSTALLATION INSTRUCTIONS This procedure replaces Steps 3, 4, and 5 (pages 4 and 5) in the printed Assembly Manual Tools And Components Tools Required: Fasteners Included: (4) 10-32 x 1/2 SS Pan Head Screw #2 Phillips Screwdriver (25) 10-32 x 3/4 SS Pan Head Screw (16) Decorative Plastic Cap Components Included: (1) Top Motor Cover...
- Page 6 Step 1. Install Side Brackets (Figures 1, 2 and 3) 1-1 Place the (16) plastic caps on (16) 10-32 x 3/4 screws; 1-2 Secure (2) side brackets to the LH side cover using (2) screws with plastic caps; 1-3 Secure (2) side brackets to the RH side cover using (2) screws with plastic caps;...
- Page 7 Step 2. Attach Side Covers To Front Cover (Figures 4 and 5) 2-1 Align the holes in the left side of the front cover with the brackets attached to the LH side cover and secure using (2) screws with plastic caps; 2-2 Align the holes in the right side of the front cover with the brackets attached to the RH side cover and secure using (2)
- Page 8 Step 4. Install Top Bracket (Figure 7) 4-1 Secure the top bracket to the LH and RH side covers using (2) screws with plastic caps. Note: do not tighten any screws at this time. Step 5. Install Top Cover (Figures 8 and 9) 5-1 Place the top cover into position and align the holes with the top bracket;...
- Page 9 Step 6. Final Adjustment (Figures 10, 11, and 12) 6-1 Make sure the covers are positioned properly before tightening all the screws. All gaps should be even and all edges should be aligned; Note: some screws may have to be loosened and then re-tightened to ensure the best possible fit.
- Page 10 Inc. (Med-Fit) product. By using the product, you are consenting to be bound by the following warranty terms and conditions. LIMITED WARRANTY. Med-Fit warrants all new Nautilus Commercial products to be free from defects in materials ® and manufacture for the warranty periods set forth below. The warranty periods commence on the invoice date of the original purchase.
- Page 11 3. The warranty does not cover damage or equipment failure caused by electrical wiring not in compliance with electrical codes or Med-Fit owner’s manual specifications, or failure to provide reasonable and necessary maintenance as outlined in the owner’s manual. Nautilus ®...
- Page 12 Damage due to normal wear and tear as defined by items subject to normal use and/or exposure, consumables and cosmetic items, including, but not limited to, grips, seats, paint, scratches, and decals, b. Repairs performed on Nautilus Commercial products missing a serial number or with a ®...
-
Page 13: Exclusive Remedies
COMMERCIAL LIMITED WARRANTY INFORMATION continued EXCLUSIVE REMEDIES. For any product described above that fails to conform to its warranty, Med-Fit will provide, at their option, replacement of failed parts/whole goods or refund the current cost of the product. Med-Fit Limited Warranty parts may be obtained by contacting the authorized dealer from whom you purchased the item. -
Page 14: Contact Information
CONTACT INFORMATION This page replaces the Contact Information page in the printed Owner’s Manual If you need assistance, please have both the serial number of your machine and the date of purchase available when you call Med-Fit Systems Customer Excellence. TECHNICAL &...