
Related Manuals for Radio Shack 20-427 PRO-2054


Summary of Contents for Radio Shack 20-427 PRO-2054
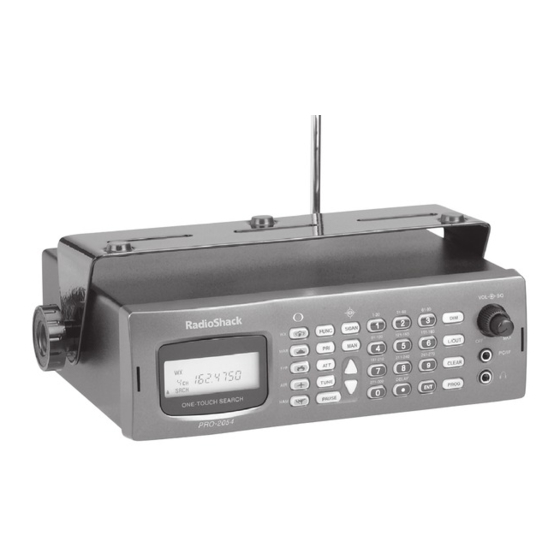
- Page 1 20-427 PRO-2054 300 channel mobile/base scanner Please read this user’s guide before installing, setting up and using your new product www.radioshack.com...
- Page 2 Thank you for purchasing your PRO-2054 300 channel mobile/base scanner from RadioShack. You can mount your scanner in a fi xed position and use it as a base scanner or you can use it as a mobile scanner by mounting it in a vehicle. This scanner lets you scan conventional transmissions and is preprogrammed with search banks for convenience.
-
Page 3: Table Of Contents
Contents The Basics features ............ 6 keypad ..............6 rear view ............8 display ..............9 installing your scanner ......installing your scanner ......installing your scanner mounting your scanner in your dashboard ..........10 mobile mounting in your vehicle ....11 using your scanner as a base station .....12 powering your scanner ...... - Page 4 Contents Beyond the Basics advanced functions ........23 storing known frequencies into channels ..........23 searching the one touch banks .......25 copying a frequency into a specifi ed channel ........27 copying a frequency into a vacant channel ...........28 copying a frequency into the priority channel ........28 band charts ............29 WX (weather) band .........29...
- Page 5 Contents locking out channels or frequencies ....39 locking out channels ........40 reviewing locked out channels .......40 locking out frequencies ........40 reviewing locked out frequencies ....41 clearing a locked out frequency .....41 clearing all locked out frequencies in the F/P , AIR or HAM search bank ....41 priority ..............42 programming the priority channel directly ..........43...
-
Page 6: The Basics
The Basics features keypad Adjusts the backlight level (Light, Dark, or OFF). L/OUT Locks out selected channels and skips specifi ed frequencies during a search. CLEAR Clears an incorrect entry. PROG Programs frequencies in selected channels. PWR/VOL/SQ Long knob turns the device ON/OFF and controls volume. - Page 7 The Basics Lets you search the scanner’s Scans through the seven preprogrammed aircraft band. preprogrammed weather channels, or jumps to a Skywarn channel you have programmed. Lets you search the scanner’s Lets you search the scanner’s preprogrammed amateur radio preprogrammed marine band. band.
-
Page 8: Rear View
The Basics Press these keys to enter a number. ./DELAY Press to enter a decimal point. Press to Completes the entry of program delay time for a channel/search frequenc frequenc frequency numbers. bank. rear view RESET Press to reset your scanner. your scanner. -
Page 9: Display
The Basics display Priority on/off ATT (attenuator) on/off Grobal attenuator on/off Listening to Listening to marine band amateur Listening to radio band WX (weather) Listening to aircraft band band Listening to fire/police band Stalker Channel storage function bank/search sub-bank on/off indicator Listening Skywarn... -
Page 10: Installing Your Scanner Installing Your Scanner
The Basics installing your scanner You can mount your scanner in your vehicle, install it for mobility, or install it as a base station. mounting your scanner in your dashboard in your dashboard in your dashboard If you are unsure about how to install your If you are unsure about how to install your NOTE scanner in your vehicle, consult your automobile... -
Page 11: Mobile Mounting In Your Vehicle
The Basics To remove your To remove your NOTES scanner from the scanner from the DIN sleeve, insert DIN sleeve, insert the two keys straight into the scanner’s front panel. Then, remove the scanner by pulling front panel. When mounting in your dashboard, you will need to connect an external antenna and an external speaker. -
Page 12: Using Your Scanner As A Base Station
The Basics Use the supplied mounting bracket as a template to mark positions for the two mounting screws. At the marked positions, drill holes slightly smaller than the screws. Remove the paper backing from each washer and stick one inside of each bracket’s ear, aligning the washer’s hole with the bracket’s hole. -
Page 13: Powering Your Scanner
The Basics powering your scanner You can power your scanner from a wall outlet, through your vehicle’s ignition, or from your vehicle’s cigarette lighter. from a wall outlet Connect the tip of the supplied AC adapter to the DC 13.8V jack at the rear of your scanner. Plug the AC adapter into your wall outlet. -
Page 14: Through Your Vehicle's Ignition
The Basics through your vehicle’s ignition Disconnect the cable from the negative (-) terminal of your vehicle’s battery. Ground the black wire of the supplied DC power cord to your vehicle’s chassis. CAUTION: Be sure CAUTION: NOTE the grounding the grounding screw makes complete contact with the metal screw makes complete contact with the metal frame of your vehicle. -
Page 15: From Your Vehicle's Cigarrette Lighter
The Basics from your vehicle’s cigarrette lighter To power your scanner from a 12V power source in your vehicle, such as a cigarette-lighter socket, you need a 12V, 600 mA DC cigarette-lighter adapter (not supplied), available at your local RadioShack store. Insert the adapter’s barrel plug into the scanner’s DC 13.8V jack. -
Page 16: Connecting Your Scanner Connecting Your Scanner
The Basics connecting your scanner connect the supplied antenna Push the antenna onto your scanner’s antenna connector and rotate until it locks into place. Your scanner’s sensitivity to various frequencies depends on its location and the antenna’s length. For best reception, adjust the antenna’s length as follows: Frequency Antenna Length... -
Page 17: Connect An External Speaker Or Headphones
The Basics Your local RadioShack store sells a variety of antennas. Always use 50-ohm coaxial cable, such as RG-58 or RG-8, to connect an outdoor antenna. For lengths exceeding 50 feet, use RG-8 low-loss dielectric coaxial cable. If your coaxial cable does not have a BNC connector, you will also need a BNC adapter (not supplied). -
Page 18: Listening Safely
The Basics listening safely To protect your hearing, follow these guidelines when you use headphones. • Adjust VOL (volume) to its lowest level before VOL (volume) to its lowest level before putting on headphones. With the headphones on, adjust VOL to a comfortable level. VOL to a comfortable level. -
Page 19: Quick Start
The Basics quick start To help familiarize yourself with the scanner’s functions, keypad, and available frequencies, you can utilize one of these three features before you begin programming the scanner. Signal Stalker II: searches nearby strong signals quickly. See “Signal Stalker II”. One-Touch Search Banks: allow you to listen to frequencies and decide which frequencies you want to store when you are ready to program the... -
Page 20: Using Your Scanner Using Your Scanner
The Basics using your scanner turning on the scanner and setting squelch 1. To turn on the scanner, turn VOL clockwise. VOL clockwise. WELCOME appears. After about 3 seconds, you might hear a hissing sound. Then adjust VOL to VOL to a comfortable level. -
Page 21: Manually Tuning A Frequency
The Basics manually tuning a frequency You can manually set the scanner to move through all receivable frequencies, or select a specifi c frequency as a starting point. 1. Press TUNE. The currently-tuned frequency appears. And, PSE and –t– (if zeromatic is on) appears alternately. -
Page 22: Scanning The Channels
The Basics scanning the channels To begin scanning channels or to start scanning again after monitoring a specifi c channel, press SCAN. You must store frequencies into channels You must store frequencies into channels NOTES before the scanner can scan them. The scanner before the scanner can scan them. -
Page 23: Beyond The Basics
Beyond the Basics advanced functions storing known frequencies into channels Good references for active frequencies are RadioShack’s Police Call, Aeronautical Frequency Directory, and Maritime Frequency Directory. We update these directories every year, so be sure to get a current copy. Follow these steps to store frequencies into channels. - Page 24 Beyond the Basics Use the number keys and •/DELAY to enter the frequency (including the decimal point) you want to store. f you make a mistake, press CLEAR to delete a single digit or press and hold CLEAR about 2 seconds to delete all digits.
-
Page 25: Searching The One Touch Banks
Beyond the Basics The next channel in sequence is ready for programming. Press PROG then repeat steps 3 and 4. searching the one touch banks Your scanner contains groups of preset frequencies called One Touch Banks. Each one touch bank is associated with a specifi c activity (see “Band Charts”). - Page 26 Beyond the Basics 1. Press F/P, AIR, or HAM. FIrE POLICE, AIr, or HAM appears. After about 2 seconds, the scanner starts searching. When the scanner fi nds an active frequency, it stops searching and displays the frequency’s number. • To reverse the search direction at any time, press ...
-
Page 27: Copying A Frequency Into A Specifi Ed Channel
Beyond the Basics Once you fi nd interesting frequencies during the search, you can store them into the scanner’s channel-storage banks. copying a frequency into a specifi ed channel You can copy a frequency into a specifi ed channel when the scanner stops on that frequency during search mode or manual tuning. -
Page 28: Copying A Frequency Into A Vacant Channel
Beyond the Basics copying a frequency into a vacant channel You can copy a frequency into a vacant channel in a bank you specifi y when the scanner stops on the frequency during search or tune mode. 1. Press FUNC then ENT when you fi nd a frequency you want to copy. -
Page 29: Band Charts
Beyond the Basics PCH fl ashes and the frequency (or 000.0000) appears. Press ENT to store the frequency into the priority channel, or press CLEAR to cancel. band charts WX (weather) band Receive mode: FM Channel Frequency Channel Frequency 162.400 MHz 162.500 MHz 162.425 MHz 162.525 MHz... - Page 30 Beyond the Basics 157.0000 157.0500 161.6000 157.1000 157.1500 157.2000 157.2500 161.8000 161.8500 157.3000 157.3500 161.9000 161.9500 157.4000 156.1750 162.0000 156.2250 156.2750 160.8250 156.3250 156.3750 156.4250 156.4750 156.5250 156.5750 156.6250 156.6750 156.7250 156.8750 156.9250 156.9750 157.0250 157.0750 157.1250 157.1750 157.2250 157.2750 161.8250 161.8750 157.3250...
-
Page 31: F/P (Police/Fi Re) Band
Beyond the Basics F/P (police/fi re) band Receive Mode: FM Frequency Step Frequency Step Group Group (MHz) (kHz) (MHz) (kHz) 33.420 — 33.980 151.820 — 151.940 37.020 — 37.420 153.770 — 154.130 39.020 — 39.980 154.145 — 154.445 42.020 — 42.940 154.570 44.620 —... -
Page 32: Ham (Amateur) Band
Beyond the Basics tuned frequency in the display. Because steps are so close together, the audio quality will not be affected by the offset. HAM (amateur) band Receive mode: FM Group Frequency (MHz) Step (kHz) 28.0000 — 29.7000 50.0000 — 54.0000 144.0000 —... -
Page 33: Monitoring A Single Channel
Beyond the Basics monitoring a single channel You can monitor a single channel with your scanner by navigating to that channel while in manual mode. The scanner will receive traffi c on the selected frequency. deleting frequencies from channels 1. Press MAN. 2. -
Page 34: Listening To The Weather Band
Beyond the Basics listening to the weather band The FCC (Federal Communications Commission) has allocated channels for use by the National Oceanic and Atmospheric Administration (NOAA). Regulatory agencies in other countries have also allocated channels for use by their weather reporting authorities. -
Page 35: Skywarn
Beyond the Basics If the scanner detects the weather alert, it sounds the alert for fi ve minutes when it receives the weather alert signal. After fi ve minutes the alert stops and the scanner beeps every ten seconds. Press any key except DIM to turn off the alarm. To cancel the weather alert operation, press FUNC then press WX again. -
Page 36: Signal Stalker Ii
Beyond the Basics To activate this function, you must program To activate this function, you must program NOTES your desired Skywarn frequency into the your desired Skywarn frequency into the Skywarn channel. Skywarn channel. If no frequency is programmed in the Skywarn channel, No proG appears. -
Page 37: Using Signal Stalker Ii
Beyond the Basics Once an active frequency is found, the transmission is played through your scanner’s speaker, and you can quickly store it in any of your scanner’s memory locations. using signal stalker II Your scanner’s Signal Stalker II functions when you press and hold SCAN/ for approximately 1 for approximately 1... -
Page 38: Using Signal Stalker Ii With Lockout
Beyond the Basics using signal stalker II with lockout The scanner’s lock out feature can be used to bypass unwanted transmissions while using the Signal Stalker II. Press L/OUT when the scanner is stopped on an undesired transmission. Press FUNC L/OUT to review or clear locked out frequencies in the Signal Stalker II. -
Page 39: Using Delay
Beyond the Basics Signal Stalker II features a special lockout mode that causes the scanner to skip a 1 MHz segment if fi ve or more lockouts exist in that 1 MHz segment. To activate this mode, press FUNC while in the Signal Stalker II mode. If a 1 MHz segment contains 5 or more lockouts it will be skipped entirely while Signal Stalker II is sweeping. -
Page 40: Locking Out Channels
Beyond the Basics locking out channels To lock out a channel while scanning, press L/OUT when the scanner stops on the channel. To lock out a channel manually, select the channel then press L/OUT. L/O appears on the display. You can still manually select locked out You can still manually select locked out NOTE channels. -
Page 41: Reviewing Locked Out Frequencies
Beyond the Basics reviewing locked out frequencies To review the frequencies within a search bank that you locked out: 1. Press one touch search button to review the locked out frequencies. 2. To review the F/P , AIR, or HAM bank, press FUNC then L/OUT. -
Page 42: Priority
Beyond the Basics 3. Press FUNC and then 6. L–O Fr–CL appears. Press ENT to clear all locked out frequencies. L–r EMPty appears. Press CLEAR to cancel the operation. priority In addition to the 300 programmable memory channels, the scanner has one priority channel. With the priority feature, you can scan through programmed channels and still not miss an important or interesting transmission on a specifi... -
Page 43: Programming The Priority Channel Directly
Beyond the Basics programming the priority channel directly 1. Press PROG. 2. Press PRI. 3. Enter the frequency you want to enter into the priority channel and then press ENT. programming a weather channel as the priority channel 1. Press WX. 2. -
Page 44: Using The Attenuator
Beyond the Basics using the attenuator To reduce interference or noise caused by strong signals, you can reduce the scanner’s sensitivity to these signals. There are two attenuator modes in your scanner. One is normal attenuator mode, in which you set the attenuator for each channel or each band/ group in the search and tune mode. -
Page 45: Using The Dimmer
CLOnE and Error may alternately appear when the scanner receives data from a scanner other than a PRO-2054. If this happens when the scanner receives data from another PRO-2054, turn off the scanner and then turn it on again. -
Page 46: Caring For Your Scanner
Beyond the Basics caring for your scanner Keep the scanner dry; if it gets wet, wipe it dry immediately. Use and store the scanner only in normal temperature environments. Handle the scanner carefully; do not drop it. Keep the scanner away from dust and dirt, and wipe it with a damp cloth occasionally to keep it looking new. -
Page 47: Resetting/Initializing Your Scanner
Beyond the Basics noise on that frequency. If the interference is not severe, you might be able to turn SQ clockwise to omit the birdie. To fi nd the birdies in your scanner, begin by disconnecting the antenna and moving it away from the scanner. -
Page 48: Initializing Your Scanner
Beyond the Basics initializing your scanner Initializing your scanner clears all information stored in your scanner’s memory. Initialize your scanner only when you are sure it is not working properly. 1. Turn off the scanner, then turn it on again. WELCOME appears. -
Page 49: Specifi Cations
Beyond the Basics specifi cations Frequency Coverage 28—54 MHz ............ (in 5 kHz steps) 108—136.99166 MHz ........ (in 8.33 kHz steps) 137—174 MHz ....(in 5, 6.25, 7.5, or 12.5 kHz steps) 406—512 MHz ........... (in 6.25 kHz steps) 806—823.9875 MHz ........(in 6.25 kHz steps) 849—868.9875 MHz ........ - Page 50 Beyond the Basics Audio Output Power (10% THD) ........1.5 W Built-in Speaker ..........3 Inches (77 mm) (8-ohm, Dynamic Type) Power Requirement ............13.8 V Current Drain (Squelched) ........60 mA (AC) Physical Dimensions (HWD) ..2 1/4 x 7 1/4 x 5 5/16 Inches (55 x 185 x 135 mm) Weight (without cabinet and accessories) ..
-
Page 51: The Fcc Wants You To Know
Beyond the Basics the FCC wants you to know This equipment has been tested and found to comply with the limits for a scanning receiver, pursuant to Part 15 of the FCC Rules. These limits are designed to provide reasonable protection against harmful interference in a residential installation. This equipment generates, uses and can radiate radio frequency energy and, if not installed and used in accordance with the instructions, may cause harmful interference to radio communications. -
Page 52: Glossary
Beyond the Basics glossary Frequency: the receiving signal location (expressed in MHz). To fi nd active frequencies, you can use frequency guides available from your local RadioShack store, frequency listings posted on the Internet, or the built-in search/stalker function. Channels: programmable memory locations for the frequencies you want to monitor. -
Page 53: Frequently Asked Questions
Beyond the Basics frequently asked questions The scanner is not working at all. What’s wrong? The AC or DC adapter or DC cable might not be connected. Be sure the adapter/cable’s barrel plug is fully inserted into the PWR DC 13.8V jack. - Page 54 Beyond the Basics notes...
- Page 55 Beyond the Basics notes...
- Page 56 limited one-year warranty This product is warranted by RadioShack against manufacturing defects in material and workmanship under normal use for one (1) year from the date of purchase from RadioShack company-owned stores and authorized RadioShack franchisees and dealers. For complete warranty details and exclusions, check with your local RadioShack store.