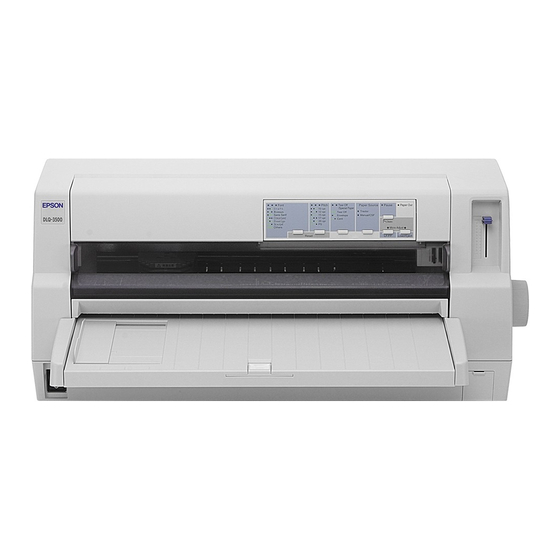
Epson DLQ-3500 User Manual
24-pin dot matrix printer
Hide thumbs
Also See for DLQ-3500:
- Reference manual (171 pages) ,
- Quick manual (32 pages) ,
- Setup manual (31 pages)
Table of Contents
Advertisement
®
24-pin Dot Matrix Printer
All rights reserved. No part of this publication may be reproduced, stored in a retrieval
system, or transmitted in any form or by any means, electronic, mechanical, photocopying,
recording, or otherwise, without the prior written permission of SEIKO EPSON
CORPORATION. The information contained herein is designed only for use with this EPSON
printer. EPSON is not responsible for any use of this information as applied to other printers.
Neither SEIKO EPSON CORPORATION nor its affiliates shall be liable to the purchaser of
this product or third parties for damages, losses, costs, or expenses incurred by the purchaser
or third parties as a result of: accident, misuse, or abuse of this product or unauthorized
modifications, repairs, or alterations to this product, or (excluding the U.S.) failure to strictly
comply with SEIKO EPSON CORPORATION's operating and maintenance instructions.
SEIKO EPSON CORPORATION shall not be liable for any damages or problems arising from
the use of any options or any consumable products other than those designated as Original
EPSON Products or EPSON Approved Products by SEIKO EPSON CORPORATION.
EPSON and EPSON ESC/P are registered trademarks and EPSON ESC/P2 is a trademark
of SEIKO EPSON CORPORATION.
Microsoft, Windows, and Windows NT are registered trademarks of Microsoft Corporation.
IBM is a registered trademark of International Business Machines Corporation.
General Notice: Other product names used herein are for identification purposes only and may be
trademarks of their respective owners. EPSON disclaims any and all rights in those marks.
Copyright © 2001 by SEIKO EPSON CORPORATION, Nagano, Japan.
Ref er ence G ui de
Advertisement
Table of Contents

Related Manuals for Epson DLQ-3500


Summary of Contents for Epson DLQ-3500
- Page 1 CORPORATION. The information contained herein is designed only for use with this EPSON printer. EPSON is not responsible for any use of this information as applied to other printers. Neither SEIKO EPSON CORPORATION nor its affiliates shall be liable to the purchaser of...
-
Page 3: Table Of Contents
Contents Chapter 1 Paper Handling Selecting a Paper Source ........1-1 Paper source and paper types. - Page 4 Using the EPSON Status Monitor 3 Utility....2-13 Setting up EPSON Status Monitor 3 ....2-14 Accessing EPSON Status Monitor 3 .
- Page 5 Ribbon Cartridge ........5-1 Genuine EPSON ribbon cartridge ..... 5-1 Replacing the ribbon cartridge .
- Page 6 Command Lists ......... A-30 EPSON ESC/P 2 control codes ..... . . A-30 IBM PPDS Emulation Control Codes .
-
Page 7: Chapter 1 Paper Handling
Paper Handling Selecting a Paper Source Your printer can print on a wide variety of paper types, including single sheets, continuous paper, multipart forms, labels, envelopes, postcards, overlapping forms, and continuous forms with labels. Caution: Do not use paper that is folded (except envelope flaps), creased, curled, torn, stained, or stamped. - Page 8 Paper s our ce: T r act or Paper s our ce: Paper gui de, aut om at i c s heet al i gnm ent uni t ( opt i on)
-
Page 9: Paper Source And Paper Types
Paper s our ce: C ut - s heet f eeder ( opt i on) Note: Be sure to load paper with the printable side up. Paper source and paper types Basically, there are two paper types and three paper sources. The table below shows the relationship between paper sources and paper types, as well as paper loading and ejecting orientation. -
Page 10: Paper Path
Paper path Paper source selection Continuous Tr act or T r act or paper * Single Paper gui de or aut om at i c s heet M anual /C SF sheets ** al i gnm ent uni t ( opt i on) C ut - s heet f eeder ( opt i on) M anual /C SF * Continuous paper i ncl udes l abel s , m ul t i par t f or m s , cont i nuous f or m s... -
Page 11: Adjusting The Paper-Thickness Lever
Adjusting the Paper-Thickness Lever You can get the best printing quality by adjusting the paper-thickness lever according to the type of paper you are using. Usually, set the paper-thickness lever to the AUT O position as shown below; your printer automatically adjusts itself to the thickness of the paper loaded in the printer. - Page 12 Paper type Paper-thickness lever position O r di nar y paper ( s i ngl e s heet s or - 1 t o 1 cont i nuous paper ) M ul t i par t f or m s ( car bonl es s ) 2 par t s ( or i gi nal + 1 copy) 0 or 1 3 par t s ( or i gi nal + 2 copi es )
-
Page 13: Loading Continuous Paper
It is recommended to set the paper-thickness lever to AUT O when printing on multipart forms, because the total thickness of multipart forms may vary depending on the kind of paper even if the number of parts is the same. However, if your printout appears faint, set the paper-thickness lever to a lower position within the range specified in the table above. -
Page 14: Positioning The Continuous Paper Supply
Positioning the continuous paper supply When you load continuous paper, make sure to line up the paper supply with the tractor so the paper feeds smoothly into the printer as shown below. -
Page 15: Loading Continuous Paper With The Tractor
Loading continuous paper with the tractor 1. Make sure that T r act or is selected as the paper source on the control panel. If not, select it by pressing the Paper Sour ce button. 2. Slide the edge guide all the way to the left. - Page 16 3. Facing the back of the printer, release the sprocket lock levers by pushing them up. * sprocket lock lever 4. Position the left sprocket so that the sprocket pins are to the left of the arrow mark on the back of the printer. Then push down the lock lever to lock the sprocket in place.
- Page 17 5. Slide the right sprocket to roughly match the width of your paper, but do not lock it. 6. Slide the center paper support to the middle of the two sprockets.
- Page 18 7. Open the sprocket covers. * sprocket cover 8. Fit the first three holes of the continuous paper over the sprocket pins on both sides. Be sure to position your paper supply so that the printable side faces up. Caution: Make sure the first sheet of your continuous paper has a clean, straight edge so that it can feed smoothly into the printer.
- Page 19 9. Close the sprocket covers. 10. Slide the right sprocket to remove any slack in the paper. Then push down the sprocket lock lever to lock the sprocket in place. 11. Turn on the printer if it is turned off. The printer is ready to start printing.
-
Page 20: Using The Tear-Off Function
Note: Always make sure there is at least one more sheet than required; continuous paper may not feed properly if it is not fed through the sprockets. Caution: Use the knob on the right side of the printer only to clear paper jams when the printer is off. - Page 21 Caution: Never use the tear-off function to feed continuous paper with labels backward; they may come off their backing sheet and jam the printer. Using the Tear Off/Special Paper button Follow these steps to advance continuous paper to the tear-off position using the T ear O f f /Speci al Paper button: 1.
- Page 22 3. Tear off all printed pages using the tear-off edge of the printer cover. * tear-off edge When you resume printing, the printer feeds the paper back to the top-of-form position and begins printing. (You can also manually feed the paper back to the top-of-form position by pressing the Tear O f f /Speci al Paper button.) Advancing paper to the tear-off position automatically To automatically advance your printed documents to the tear-off...
-
Page 23: Removing Continuous Paper
1. When printing is finished, the printer advances the perforation of the final printed page to the tear-off position. 2. Tear off all printed pages using the tear-off edge of the printer cover. Note: If your paper’s perforation is not properly aligned with the tear-off edge, you can adjust the tear-off position using the Micro Adjust function as described in “Adjusting the tear-off position”. -
Page 24: Loading Single Sheets
Loading Single Sheets Your printer can print on single sheets of paper from 90 to 420 mm (3.5 to 16.5 inches) wide. See “ Single sheets” for detailed single-sheet paper specifications. You can load one sheet of paper at a time using the paper guide or optional automatic sheet alignment unit. - Page 25 3. Make sure that M anual /C SF is selected as the paper source on the control panel. If not, select it by pressing the Paper Sour ce button. 4. Slide the edge guide until it rests against the guide mark. * guide mark...
- Page 26 5. While aligning the left side of a sheet of paper with the edge guide, insert it into the printer until it meets resistance. Be sure to load paper printable side up. After a few seconds, the printer automatically advances the paper to the loading position.
-
Page 27: Loading Single Sheets From The Rear
After printing a sheet, the printer ejects it onto the paper guide and the Paper O ut and Paus e lights come on. If you are printing a multiple-page document, remove the printed sheet and insert a new sheet into the paper guide. The printer automatically advances the paper and resumes printing. -
Page 28: Overlapping Multipart Forms
You can load single-sheet multipart forms from the paper guide, or with the optional cut-sheet feeder or optional automatic sheet alignment unit. For instructions, see “Loading Single Sheets”, “Loading paper to the cut-sheet feeder”, or “Loading paper using the automatic sheet alignment unit”. You can load continuous multipart forms in the same way as you load ordinary continuous paper. - Page 29 Caution: Use overlapping multipart forms only under normal operating conditions. 1. Make sure of the following: Your software settings keep the printing entirely within the printable area. See “Printable area” for more information. T r act or is selected as the paper source on the control panel.
-
Page 30: Labels
To tear off and eject overlapping multipart forms Always tear off and eject overlapping multipart forms following the instructions described below. Note: When O ver l appi ng For m s is turned on in the default-setting mode, the T ear O f f /Speci al Paper button is disabled and the Load/Ej ect button only feeds forms forward. - Page 31 The auto tear-off function is turned off in the default-setting mode. If you use labels whose backing sheet is exposed, make sure the paper-thickness lever is not set to AUT O . Set it to the appropriate position. See “Adjusting the Paper-Thickness Lever”...
- Page 32 1. At the back of your printer, tear off the last label form that has entered the printer, but do not press the T ear O f f /Speci al Paper button. See the illustration below. 2. Press the LF/FF button to eject the last label form forward. Caution: Do not leave labels loaded in the printer between print jobs;...
-
Page 33: Continuous Forms With Labels
Continuous forms with labels The continuous forms with labels is a type of continuous paper with one label on each page. This is different from label paper, which consists entirely of labels. When printing on this type of paper, the printer must adjust the height of the print head for the extra thickness of the labels. - Page 34 3. Follow the instructions in “ Loading continuous paper with the tractor”. Caution: Printing on the edge of continuous forms with labels can damage the print head. When loading continuous forms with labels, make sure the left edge of the form is no further than 3 cm to the left of the arrow mark (when facing the back of the printer).
- Page 35 1. At the back of your printer, tear off the last continuous form with labels that has entered the printer. 2. Press the LF/FF button to eject the last form forward. 3. To print on another type of paper, turn off O ver l appi ng For m s and Ski p over per f or at i on settings in the default-setting mode.
-
Page 36: Overlapping Multipart Forms With Labels
Overlapping multipart forms with labels This kind of continuous paper is a combination of the two types of forms; overlapping multipart forms and continuous forms with labels. Be sure to follow any special instructions intended for either type of forms. Caution: Use overlapping multipart forms with labels only under normal operating conditions because labels are especially sensitive to... - Page 37 Note: When O ver l appi ng For m s is turned on in the default-setting mode, the printer automatically activates the auto paper thickness function even though the paper-thickness lever may be set to another position. 3. Follow the instructions in “Loading continuous paper with the tractor”.
-
Page 38: Envelopes
Caution: Do not leave overlapping multipart forms with labels loaded in the printer between print jobs; they tend to curl and may come off their backing sheet and jam the printer when you resume printing. Envelopes You can print on a variety of envelopes by loading them the same way you load single sheets—... -
Page 39: Postcards
f r om t he paper gui de * top edge first and flap side down Postcards You can print on a variety of postcards by loading them the same way you load single sheets from the paper guide or with the optional cut-sheet feeder or optional automatic sheet alignment unit. -
Page 40: Switching Between Continuous Paper And Single Sheets
2. Make sure that M anual /C SF is selected as the paper source on the control panel. If not, select it by pressing the Paper Sour ce button. 3. Select C a r d on the control panel by pressing the T ear O f f /Speci al Paper button. -
Page 41: Switching To Single Sheets
Switching to single sheets Follow these steps to switch from continuous paper to single sheets: 1. When you have finished printing on continuous paper, press the T ear O f f /Speci al Paper button to advance the paper to the tear-off position. -
Page 42: Switching To Continuous Paper
4. Select M anual /C SF as the paper source on the control panel by pressing the Paper Sour ce button. Now you can load single sheets from the paper guide. See “Loading Single Sheets” for more information. Switching to continuous paper Follow these steps to switch from single sheets to continuous paper: 1. -
Page 43: Using The Micro Adjust Function
3. Select T r act or as the paper source on the control panel by pressing the Paper Sour ce button. The printer automatically advances the continuous paper from the standby position to the loading position when it receives data. Using the Micro Adjust Function The Micro Adjust function allows you to move the paper forward or backward in 0.141 mm (1/180-inch) increments so... - Page 44 Caution: Never use the knob to adjust the tear-off position; this may damage the printer or cause it to lose the tear-off position. Note: Your tear-off position setting remains in effect until you change it, even if you turn off the printer. 1.
-
Page 45: Adjusting The Top-Of-Form Position
Note: The printer has a minimum and a maximum tear-off position. If you try to adjust the tear-off position beyond these limits, the printer beeps and stops moving the paper. 5. Tear off the printed pages. 6. Press the Paus e button to exit the Micro Adjust mode. When you resume printing, the printer automatically feeds the paper back to the top-of-form position and begins printing. - Page 46 3. Load paper. Press the Load/Ej ect button to advance continuous paper to the current top-of-form position. If necessary, lift up the printer cover so you can see the paper position. 4. Hold down the Paus e button for about three seconds. The Paus e light starts flashing and the printer enters the Micro Adjust mode.
-
Page 47: Chapter 2 Printer Software
Windows software applications can take full advantage of the printer’s capabilities. The EPSON Status Monitor 3 utility program allows you to monitor the status of your printer, alerts you when errors occur, and provides you with troubleshooting tips. Status Monitor 3 is automatically installed when you install the printer driver. -
Page 48: Accessing The Printer Driver From Windows Applications
When you access the printer driver from the Start menu, the printer driver settings you make apply to all your applications. See “ Accessing the printer driver from the Start menu” for more information. See “Changing the printer driver settings” to check and change printer driver settings. -
Page 49: Accessing The Printer Driver From The Start Menu
2. Make sure that your printer is selected and then click Pr i nt er , Set up, Pr oper t i es , or O pt i ons . (You may need to click a combination of these buttons.) The Properties window appears, and you see the Paper, Graphics, and Device Options menu. -
Page 50: Changing The Printer Driver Settings
3. Right-click your printer icon, and click Pr oper t i es . The screen displays the Properties window, which contains the Paper, Graphics, Device Options, and Utility menus. These menus display the printer driver settings. 4. To view a menu, click the corresponding tab at the top of the window. -
Page 51: Using The Printer Driver With Windows 2000 And Nt 4.0
When you finish making printer driver settings, click O K to apply the settings, or click Res t or e Def aul t s to return the settings to their default values. Once you have checked your printer driver settings and made any necessary changes, you are ready to print. - Page 52 Note: The examples in the following section are from the Windows NT 4.0 operating system. They may vary in appearance from what actually appears on your screen; however, the instructions are the same. 1. Select Pr i nt Set up or Pr i nt from the File menu of your application software.
- Page 53 2. Make sure that your printer is selected and then click Pr i nt er , Set up, Pr oper t i es , or O pt i ons . (You may need to click a combination of these buttons.) The Document Properties window appears, and you see the Page Setup and Advanced menus.
-
Page 54: Accessing The Printer Driver From The Start Menu
3. To view a menu, click the corresponding tab at the top of the window. See “Changing the printer driver settings” to change the settings. Accessing the printer driver from the Start menu Follow these steps to access the printer driver from the Start menu: Note: The screen shots used in this procedure are from the Windows NT 4.0... - Page 55 3. Right-click your printer icon, and click Docum ent Def aul t s . The screen displays the Default Document Properties window, which contains the Page Setup and Advanced menus. These menus display the printer driver settings.
-
Page 56: Changing The Printer Driver Settings
When you click Pr oper t i es , the printer software window appears, which includes menus used to make the printer driver settings. 4. To view a menu, click the corresponding tab at the top of the window. See “Changing the printer driver settings” to change the settings. -
Page 57: Printer Driver Settings Overview
When you finish making your printer driver settings, click O K to apply the settings, or click C a ncel to cancel your changes. Once you have checked your printer driver settings and changed them if necessary, you are ready to print. Printer Driver Settings Overview The following tables show the Windows printer driver settings. -
Page 58: Printer Settings
Printer settings Settings Explanations Paper s i ze Sel ect t he s i ze of t he paper you w ant t o us e. I f you do not s ee your paper s i z e, us e t he s cr ol l bar t o s cr ol l t hr ough t he l i s t . -
Page 59: Monitoring Settings
Using the EPSON Status Monitor 3 Utility The EPSON Status Monitor 3 utility that comes with your printer is available for Windows Me, 98, 95, 2000 or NT 4.0. It allows you to monitor your printer’s status, alerts you when printer errors occur, and provides troubleshooting instructions when needed. -
Page 60: Setting Up Epson Status Monitor 3
If you install the driver using Add Printer in the Printers folder, or using the “Point and Print” method, EPSON Status Monitor 3 may not function properly. If you want to use EPSON Status Monitor 3, reinstall the driver as described in the Setup Guide. - Page 61 2. Click the M oni t or i ng Pr ef er ences button. The Monitoring Preferences dialog box appears. 3. The following settings are available: Sel ect D i s pl ays t he er r or i t em check box O N/O FF Not i f i cat i on s t at us .
-
Page 62: Accessing Epson Status Monitor 3
Click the Def aul t button to revert all items to the default settings. Accessing EPSON Status Monitor 3 Do one of the following to access the EPSON Status Monitor 3 utility: Double-click the printer-shaped shortcut icon on the taskbar. -
Page 63: Chapter 3 Control Panel
Control Panel Buttons and Lights Font but t on Selects one of the available fonts. To select a font, see “Selecting a Font and Pitch”. Font l i ght s Indicate which font is selected. Res et When you press both the Font and Pitch buttons simultaneously, the printer clears buffer and returns to its default settings. - Page 64 Pi t ch but t on Selects one of the pitch settings. To select a pitch, see “Selecting a Font and Pitch”. Pi t ch l i ght s Indicate which pitch is selected. T ear O f f /Speci al Paper but t on Feeds continuous paper forward to the tear-off position.
- Page 65 Paper Sour ce but t on Selects a paper source. T r act or l i ght On when continuous paper is selected. M anual /C SF l i ght On when single-sheet is selected. LF/FF but t on Feeds paper line by line when pressed shortly. Ejects a single sheet or advances continuous paper to the next top-of-form position when held down for a few seconds.
-
Page 66: Selecting A Font And Pitch
Paper out l i ght On when no paper is loaded in the selected paper source or paper is not loaded correctly. Flashes when paper has not been fully ejected or a paper jam has occurred. Paus e but t on Stops printing temporarily, and resumes printing when pressed again. - Page 67 The available pitch depends on the font you select. See the table below for more information. Font Pitch D r af t 10, 12, 15 Rom an 10, 12, 15, PS Sans Ser i f 10, 12, 15, PS C our i er 10, 12, 15 Pr es t i ge 10, 12...
-
Page 68: About Your Printer's Default Settings
10 cpi 12 cpi 15 cpi 17 cpi 20 cpi PS (proportional) =on, =of f 4. Make sure that the desired font and pitch are selected. About Your Printer’ s Default Settings The default settings control many printer functions. While you can often set these functions through your software or printer driver, you may sometimes need to change a default setting from the printer’s control panel using the default-setting mode. - Page 69 Default-setting mode Setting Options Page l engt h f or t r act or Lengt h i n i nches : 3, 3. 5, 4, 5. 5, 6, 7, 8, 8. 5, 11, 70/6, 12, 14, 17 Ski p over per f or at i on O f f , O n Aut o t ear - of f O f f , O n...
-
Page 70: Skip Over Perforation
Setting Options I nt er nat i onal char act er I t al i c U. S. A . , I t al i c Fr ance, I t al i c s et f or i t al i c t abl e** G er m any, I t al i c U. -
Page 71: Auto Line Feed
(Uni - D ). Printing is normally bidirectional; however, unidirectional printing allows for precise vertical printing alignment. Software When you select ESC /P2, the printer operates in the EPSON ESC/P2 mode. When you select I BM PPD S, the printer emulates an IBM printer. 0 slash... -
Page 72: High Speed Draft
High speed draft When high speed draft is on, the printer prints up to 550 cps (characters per second) at 10 cpi (characters per inch). When it is off, the printer prints 495 cps at 10 cpi. I/F (interface) mode The printer provides a slot for an optional interface in addition to its built-in parallel interface and USB interface. -
Page 73: Character Table
Packet mode Be sure to select A ut o when printing from Windows applications using the printer driver included in the CD-ROM that comes with the printer. In case you encounter any communication troubles when printing from applications based on other operating systems such as DOS, turn off this mode. -
Page 74: Changing Default Settings
Font One of these fonts selected in the default setting is corresponding to Others on the control panel. You can select the following fonts directly on the control panel: Draft, Roman, Sans Serif, Courier, Prestige and Script. Manual feed wait time This setting allows you to set the amount of wait time between when paper is inserted into the paper guide and it is fed. - Page 75 Note: To print the language selection and default-setting mode instructions, you need three sheets of A4 or letter size single-sheet paper or three pages of continuous paper that is at least 279 mm (11 inches) long and 210 mm (8.3 inches) wide. See “Loading Continuous Paper”...
-
Page 76: Printing In Color
5. When you finish making settings, turn off the printer and exit the default-setting mode. Note: You may exit the default-setting mode by turning off the printer at any time. Any settings you have made remain in effect until you change them again. -
Page 77: Chapter 4 Troubleshooting
Troubleshooting Using the Error Indicators You can identify many common printer problems using the lights on the control panel. If your printer stops working and one or more control panel lights are on or flashing or the printer beeps, use the following table to diagnose and fix the problem. If you cannot fix your printer problem using this table, see “Problems and Solutions”. -
Page 78: Problems And Solutions
••• Paper O ut The paper s our ce i s not s el ect ed cor r ect l y on t he cont r ol panel . Paus e Sel ect t he pr oper paper s our ce T hen pr es s t he Paus e but t on. -
Page 79: Power Supply Problems
“Paper loading or feeding problems” “Printing position problems” “Printing or printout quality problems” You can also use the self test to determine whether the printer or the computer is causing the problem. See “Printing a Self Test” for instructions on printing a self test. To pinpoint communication problems, experienced users may want to use the printer’s hex dump mode described in “Printing Hex Dump”. -
Page 80: Paper Loading Or Feeding Problems
The printer is turned off. Turn on the printer. The Power light comes on. The power cord is not Turn off the printer and make sure the properly plugged into the power cord is firmly plugged into the electrical outlet; or if your electrical outlet and the printer, if power cord is not necessary. - Page 81 Tr act or is selected as the Select M anual /C SF as the paper source paper source on the control on the control panel. (See “Buttons and panel. Lights”.) The platen rotates but the printer does not feed the paper. Cause What to do Tr act or is selected as the...
- Page 82 The printer does not fully eject the paper. Cause What to do Use the Load/Ej ect button to eject the You may not be able to fully eject your paper using the paper. LF/FF button. Your paper may be too long. Make sure the page length of your paper is within the specified range.
-
Page 83: Continuous Paper
Continuous paper The printer does not load continuous paper or does not feed it properly. Cause What to do M anual /C SF is selected as the Select T r act or as the paper source on paper source on the control the control panel. - Page 84 The paper supply is not Make sure you align your paper aligned with the printer. supply with the paper loaded in the tractor so the paper feeds smoothly into the printer. See “Positioning the continuous paper supply”. The paper supply is too far Make sure that your paper supply is away from the printer.
- Page 85 You may be trying to feed too If you are using normal continuous much paper backward. paper, tear off the last printed page and press the Load/Ej ect button to feed the paper backward. If you are using labels, tear off the paper entering the printer, and then press the LF/FF button to feed the labels forward.
- Page 86 Tr act or is selected as the Select M anual /C SF as the paper source paper source on the control on the control panel. (See “Buttons and panel. Lights”.) The right and left paper Adjust the paper guides to match the guides are too close to the width of your paper.
- Page 87 The paper is old or creased. Use only new, clean sheets of paper. You may not be using the Make sure your paper meets the right type of paper for the requirements of your printer and cut-sheet feeder. See “Paper” for cut-sheet feeder.
-
Page 88: Printing Position Problems
Cause What to do The paper source is not Select the proper paper source on the selected correctly. control panel. (See “Buttons and Lights”.) Printing position problems Wrong top-of-form position Your printing appears too high or low on the page. Cause What to do The paper size setting in... - Page 89 The top margin or Check and adjust the margin or top-of-form position setting top-of-form position settings in your is incorrect. application software. See “Printable area” for more information. You can also adjust the top-of-form position using the Micro Adjust function. However, settings made in Windows applications override settings made in the Micro Adjust mode.
- Page 90 The tear-off position setting Adjust the tear-off position using the is incorrect. micro adjust feature. See “Adjusting the top-of-form position”. Caution: Never use the knob to adjust the tear-off position; this may damage the printer or cause it to lose the tear-off position. You moved the paper using Adjust the tear-off position using the the knob while the printer...
-
Page 91: Printing Or Printout Quality Problems
Printing or printout quality problems The Paus e light is off but the printer does not print. Cause What to do The interface cable is not Check that both ends of the cable plugged in securely. between the printer and the computer are plugged in securely. - Page 92 Paper on the paper guide is Move the paper a little to the right, left positioned too far to the left, or inside. When it is positioned right or inside for the paper properly, the Paper O ut and Paus e sensor to detect it.
- Page 93 The printer stops printing and the Paus e light flashes. Cause What to do The print head is overheated. Wait for a few minutes; the printer resumes printing automatically once the print head cools. Part of the printout is missing, or dots are missing in random positions.
- Page 94 The print head is damaged. Stop printing and contact your dealer to have the print head replaced. Warning: Never try to replace the print head yourself because other parts of the printer must be checked at the same time. Incorrect characters are printed. Cause What to do Your printer and the...
- Page 95 The printer does not print the font you selected on the control panel or in the default settings. Cause What to do Software settings override Use your software to select the font. settings you make in the control panel or in the default settings.
-
Page 96: Paper Length
All the text is printed on the same line. Cause What to do No line feed command is Turn on the auto line feed option in the sent at the end of each line of default-settings mode, so that the text. -
Page 97: Correcting Usb Problems
Printing starts lower on the page than you expect, or the bottom of a page is printed at the top of the next page. Cause What to do The lines-per-page, top and Adjust these settings in your bottom margin, or form application software, as follows: length setting is incorrect. - Page 98 USB port or which has been upgraded from Windows 95 to Windows Me, 98 or 2000. For details about your computer, contact your dealer. Make sure that EPSON USB Printer Devices appears on the Device Manager menu (for Windows Me and Windows 98 only)
- Page 99 If your drivers are correctly installed, EPSO N USB Pr i nt er Devi ces should appear on the Device Manager menu. If EPSO N U SB Pr i nt er Devi ces does not appear on the Device Manager menu, click the plus (+) sign beside O t her devi ces to view the installed devices.
- Page 100 4. Under O t her devi ces , select USB Pr i nt er or EPSO N D LQ - 3500 and click Rem ove. Then, click O K. 5. When the following dialog box appears, click O K. Then click O K again to close the System Properties dialog box.
-
Page 101: Clearing A Paper Jam
Printer does not work correctly with the USB cable If your printer does not work correctly with the USB cable, try one or more of these solutions: Make sure that the cable you are using is a standard, shielded USB cable. If you are using a USB hub, connect the printer to the first tier of the hub, or connect the printer directly to the computer’s USB port. -
Page 102: Aligning Vertical Lines In Your Printout
2. Open the printer cover. 3. If continuous paper is jammed in the printer, tear off the fresh supply at the back of the printer. 4. Turn the knob on the right side of the printer to remove the paper. Remove any remaining pieces of paper. If the paper is stuck where the printer ejects it, gently pull the paper out of the printer. - Page 103 Note: To print the instruction sheet and alignment patterns, you need four sheets of A3 size single-sheet paper or 15-inch (recommended) continuous paper. (See “Loading Continuous Paper” or “Loading Single Sheets” for paper-loading instructions.) If you use single-sheet paper, be sure to load a new sheet of paper each time the printer ejects a printed sheet.
-
Page 104: Printing A Self Test
Printing a Self Test Running the printer’s self test helps you determine whether the printer or the computer is causing the problem: If the self test results are satisfactory, the printer is working properly and the problem is probably caused by your printer driver settings, application settings, computer, or interface cable. -
Page 105: Printing Hex Dump
Note: To temporarily stop the self test, press the Paus e button. To resume the test, press the Paus e button again. 3. To end the self test, press the Paus e button to stop printing. If paper remains in the printer, press the Load/Ej ect button to eject the printed page. -
Page 106: Contacting Customer Support
4. To exit the hex dump mode, press the Paus e button and eject the printed page(s), and turn off the printer. Contacting Customer Support If your EPSON product is not operating properly and you cannot solve the problem using the troubleshooting information in your product documentation, contact customer support services for assistance. -
Page 107: For Users In The United Kingdom And The Republic Of Ireland
Visit our Internet home page for a full list of support and warranty services including: Register your product on-line Free access to the latest EPSON software drivers Easy access to frequently asked questions Interactive web based support tool to help you quickly resolve... -
Page 108: For Users In The Middle East
Select your country from our Internet home page for a full list of support and warranty services including: Register your product on-line Free access to the latest EPSON software drivers Easy access to frequently asked questions Interactive web based support tool to help you quickly resolve... -
Page 109: For Users In Scandinavia
Select your country from our Internet home page for a full list of support and warranty services including: Register your product on-line Free access to the latest EPSON software drivers Easy access to frequently asked questions Interactive web based support tool to help you quickly resolve... -
Page 110: For Users In South Africa
Finland 0800 523 010 Norway 800 11 828 Sweden 08 445 12 58 Pre-Sales Enquiries Literature Requests and Nearest Dealer Denmark Home Page: http://www.epson.dk Telephone: 38 48 71 37 Finland Home Page: http://www.epson.fi Telephone: 0981 710 083 Norway Home Page: http://www.epson.no... -
Page 111: For Users In Australia
Home Page: http://www.epson.co.za Telephone: (011) 448-2736 or 0800 005 956 For users in Australia EPSON Australia wishes to provide you with a high level of customer service. In addition to your product documentation, we provide the following sources for obtaining information: Your Dealer Don’t forget that your dealer can often help identify and resolve... - Page 112 EPSON Helpdesk EPSON Helpdesk is provided as a final backup to make sure our clients have access to advise. Operators on the Helpdesk can aid you in installing, configuring and operating your EPSON product.
-
Page 113: For Users In Singapore
Information on product specifications, drivers for download, Frequently Asked Questions (FAQ), Sales Enquiries, and Technical Support via e-mail are available. Epson HelpDesk (Phone: (065) 5863111) Our HelpDesk team can help you with the following over the phone: Sales enquiries and product information... -
Page 114: For Users In Indonesia
To obtain technical support as well as other after-sales services, users are welcome to contact EPSON Hong Kong Limited. Internet Home Page EPSON Hong Kong has established a local home page in both Chinese and English on the Internet to provide users with the following information:... -
Page 115: For Users In Malaysia
Latest versions of EPSON product drivers Users can access our World Wide Web home page at: http://www.epson.com.hk Electronic Bulletin Board System An electronic bulletin board system (BBS) is also available to obtain product information and the latest versions of product drivers. -
Page 116: For Users In India
Epson Trading Shah Alam Head Office Phone: 03 5191366 Fax: 03 5191281 For users in India Contacts for information, support, and services are: World Wide Web (http://www.epson.co.in) Information on product specifications, drivers for download, Frequently Asked Questions (FAQ), Products Enquiry, and... -
Page 117: For Users In The Philippines
Hel p Desk Phone: 2404932 For users in the Philippines To obtain technical support as well as other after sales services, users are welcome to contact the EPSON Philippines Representative Office at the telephone and fax numbers below: Phone: (632) 813-6552... -
Page 119: Chapter 5 Options And Consumables
Other products not manufactured by EPSON may cause damage to your printer, which is not covered by EPSON’s warranties. Your printer uses the following ribbon cartridges:... - Page 120 Warning: If you have just used the printer, the print head may be hot; let it cool for a few minutes before replacing the ribbon cartridge. 3. The print head should be in the replacement position shown in the illustration below.
- Page 121 If it is not, close the printer cover and turn the printer on to move the print head to the replacement position. Wait a few seconds, then turn the printer off again and open the printer cover. Caution: Following the steps below while the printer is turned on can damage the printer.
- Page 122 6. Hold the ribbon cartridge with the part where the ribbon is exposed facing down and the ribbon-tightening knob facing to the front of the printer. Then guide the ribbon under the print head, and snap the cartridge into place so that the tabs on both sides of the cartridge fit into the notches in the cartridge holder.
-
Page 123: Cut-Sheet Feeder
Cut-Sheet Feeder The optional cut-sheet feeder C80683 gives you easier and more efficient handling of single-sheet paper, single-sheet multipart forms, envelopes, and postcards. You can use the cut-sheet feeder without removing continuous paper. You can load the following quantities of paper to the cut-sheet feeder: Single sheets A3 size paper... - Page 124 2. Assemble the cut-sheet feeder by following the instructions provided in the documentation that comes with the feeder. 3. Close the sprocket covers if they are open, and lock the sprockets by pushing down the lock levers if necessary. Note: You do not need to remove your continuous paper from the tractor to use the cut-sheet feeder.
- Page 125 6. Plug the cable connector of the cut-sheet feeder in the printer. 7. Pull out the paper guide and the paper guide extension completely. Then slide the edge guide all the way to the left.
-
Page 126: Loading Paper To The Cut-Sheet Feeder
8. Turn on the printer and adjust the paper size in your software, if necessary. You are now ready to load paper to your cut-sheet feeder. To remove the cut-sheet feeder, reverse the steps described above. Loading paper to the cut-sheet feeder For single-sheet multipart forms, use only the type of forms that are glued at the top. - Page 127 2. Release the paper guide lock levers by pulling them forward. 3. Slide the right paper guide so that its edge is even with the guide mark on the cut-sheet feeder and push back the lever to lock the paper guide in place. Next, slide the left paper guide to roughly match the width of the paper.
- Page 128 4. Slide the center support midway between the paper guides. 5. Fan a stack of paper, and tap the sides and bottom of the stack on a flat surface to even it up. Caution: Do not load labels to the cut-sheet feeder. 6.
- Page 129 Note: Load paper with the printable side up. If you are using pre-printed forms, load the forms top-down. 7. Push back the paper set levers to clamp the paper against the guide rollers. 8. Before printing, make sure that M anual /C SF is selected as the paper source on the control panel.
-
Page 130: Loading Paper Manually Using The Paper Guide
The cut-sheet feeder feeds paper when you send data to the printer. You can also feed paper by pressing the Load/Ej ect button. Note: If the platen turns without loading the paper, completely remove the paper and then insert it all the way into the printer again. If you need to adjust the position of the paper after it is loaded, see “Adjusting the top-of-form position”... -
Page 131: Switching Between The Tractor And The Cut-Sheet Feeder
After printing a page of your document, the printer ejects it onto the paper guide and the Paper O ut and Paus e lights come on. If you are printing a multiple-page document, remove the printed sheet and insert a new sheet into the paper guide. The printer automatically advances the paper and resumes printing. -
Page 132: Automatic Sheet Alignment Unit
4. Select M anual /C SF as the paper source on the control panel by pressing the Paper Sour ce button. Note: To load another type of continuous paper, you need to remove the cut-sheet feeder. Automatic Sheet Alignment Unit You can load single-sheet paper more easily by using the optional automatic sheet alignment unit C80688 . - Page 133 3. Hold the automatic sheet alignment unit horizontally with both hands, and slide the slots on both sides of it onto the mounting pegs in the printer as shown below. Then lower the unit until it locks into place. 1. slots 2.
-
Page 134: Loading Paper Using The Automatic Sheet Alignment Unit
5. Secure the cable to the port by tightening the two screws attached to the connector. Caution: Make sure the printer is turned off before connecting the cable. Note: To remove the automatic sheet alignment unit, turn off the printer and follow the installing procedure in reverse from the last step. - Page 135 2. Set the paper-thickness lever to the appropriate position for the type of single sheet you are using referring to the table in “Adjusting the Paper-Thickness Lever”. Normally set it to AUT O . * paper-thickness lever 3. Insert paper into the automatic sheet alignment unit so that the tip of the paper goes behind the rollers of the unit.
-
Page 136: Adjusting The Printing Position
1. inserted position 2. aligned position 3. arrow marks Note: Make sure to insert paper between the two arrow marks on the unit. Caution: Use the knob on the right side of the printer only to clear paper jams when the printer is off. 4. -
Page 137: Turn Off The Printer
Note: The range of printing position is from 1.9 mm (9/120 inch) to 25.4 mm (120/120 inch) from the left edge of the paper. The default is the pattern No. 2, which is about 3 mm (14/120 inch). The automatic sheet alignment unit must be installed prior to adjusting the printing position. - Page 138 3. Load paper into the automatic sheet alignment unit. The printer prints the instruction and the printing-position patterns. 4. As described in the instruction, compare the patterns of the printing position and select the number of the desired pattern using the LF/FF D and Load/Ej ect U buttons. Font lights indicate the pattern number currently selected.
-
Page 139: Interface Cards
Interface Cards You can use optional interface cards to supplement your printer’s built-in parallel and USB interfaces. The EPSON interface cards listed below are compatible with your printer. (Not all interfaces are available worldwide.) -
Page 140: Installing An Interface Card
Installing an interface card Follow these steps to install an optional interface card. 1. Make sure the printer is turned off. Unplug the printer’s power cord and disconnect the interface cable. 2. Remove the screws securing the shield plate on the back of the printer and remove the plate. - Page 141 Then reinsert the screws and tighten them. Note: Store the shield plate in a safe place; you will need to reattach it when you remove the interface card. To remove the interface card, reverse the steps described above.
-
Page 143: Appendix A Product Information
Product Information Safety Instructions Warnings, cautions, and notes Warnings must be followed carefully to avoid bodily injury. Cautions must be observed to avoid damage to your equipment. Notes contain important information and useful tips on the operation of your printer. Hot parts caution symbol This symbol is placed on the print head and other parts to indicate that they may be hot. - Page 144 Place the printer on a flat surface. The printer will not operate properly if it is tilted or placed at an angle. Do not block or cover the slots and openings in the printer’s cabinet, and do not insert objects through the slots. Use only the type of power source indicated on the printer’s label.
- Page 145 Bei Anschluss des Druckers an die Stromversorgung muss sichergestellt werden, dass die Gebaudeinstallation mit einer 10 A- oder 16 A-Sicherung abgesichert ist. NERGY TAR compliance ® As an NERGY Partner, EPSON has determined that this product meets the ® NERGY guidelines for energy efficiency. ® The International...
-
Page 146: For United Kingdom Users
For United Kingdom Users Use of options Epson (UK) Limited shall not be liable against any damages or problems arising from the use of any options or consumable products other than those designated as Original EPSON Products or EPSON Approved Products by Epson (UK) Limited. -
Page 147: Printer Parts
If damage occurs to the plug, replace the cord set or consult a qualified electrician. Printer Parts... - Page 148 1. printer cover 2. ribbon cartridge 3. power switch 4. edge guide 5. paper guide 6. print head 7. paper bail 8. knob 9. paper-thickness lever 10. control panel 1. center paper support* 2. parallel interface 3. USB interface 4. sprockets* * tractor unit parts...
-
Page 149: Printer Specifications
Printer Specifications Mechanical Printing method: 24-pin impact dot matrix Printing speed: High speed draft 550 cps at 10 cpi Draft 495 cps at 10 cpi (594 cps at 12 cpi maximum) Letter quality 165 cps at 10 cpi Printing direction: Bidirectional logic seeking for text and graphics printing. - Page 150 Reliability: Total print volume 25 million lines (except print head) MTBF 10,000 POH (25% duty) Print head life approx. 200 million strokes/wire x 2 (monochrome) approx. 100 million strokes/wire x 2 (color) Dimensions and Height 276 mm (10.8 inches) weight (with paper Width 660 mm (25.8 inches) guide):...
-
Page 151: Electronic
10.5, 8 to 32 points, in 2-point increments EPSON Sans Serif 10.5, 8 to 32 points, in 2-point increments EPSON Roman T 10.5, 8 to 32 points, in 2-point increments EPSON Sans Serif H 10.5, 8 to 32 points, in 2-point increments Barcode fonts... - Page 152 EAN-13, EAN-8, Interleaved 2 of 5, UPC-A, UPC-E, Code 39, Code 128, POSTNET Character tables: Standard version One italic and 12 graphics character tables: Italic table, PC 437 (US, Standard Europe), PC 850 (Multilingual), PC 860 (Portuguese), PC 861 (Icelandic), PC 865 (Nordic), PC 863 (Canadian-French), BRASCII, Abicomp, ISO Latin 1, Roman 8, PC 858, ISO 8859-15...
-
Page 153: Electrical
Electrical 120 V Model 220 to 240 V Model I nput vol t age r ange 99 t o 132 V 198 t o 264 V Rat ed f r equency r ange 50 t o 60 Hz I nput f r equency r ange 49. -
Page 154: Single Sheets
Humidity 30 to 60% RH Do not load paper that is curled, folded, or crumpled. Single sheets See also “Multipart forms” for detailed information on the specification for single-sheet multipart forms. Width 90 to 420 mm (3.5 to 16.5 inches)/100 to 420 mm (3.9 to 16.5 inches)* * W hen l oadi ng s i ngl e s heet s and s i ngl e- s heet m ul t i par t f or m s t hat... - Page 155 Continuous paper See also “Multipart forms” for detailed information on the specifications for continuous multipart forms. The sprocket hole must be a circle or notched circle. The holes must be cleanly cut. If the horizontal and vertical perforations are crossed, the shaded area below should not be printed on.
- Page 156 The ratio of the cut/uncut length at the perforation should be between 3:1 and 5:1. And expansion at the perforation (when the paper is kept flat) should be less than 1 mm (0.04 inch) as follows. 1. 3 mm cut 2.
- Page 157 Width 101.6 to 406.4 mm (4.0 to 16.0 inches) Length/page 76.2 to 558.8 mm (3.0 to 22.0 inches) Copies 1 original + 7 copies Total thickness single sheets 0.065 to 0.19 mm (0.0025 to 0.0074 inch) multipart forms 0.12 to 0.62 mm (0.0047 to 0.024 inch) Weight single sheets 52.0 to 157 g/m²...
- Page 158 The form sheets of continuous multipart forms should be securely joined together along the left and right edges by crimping or, spot-gluing. For the best printing quality, use multipart forms joined with spot-gluing. s pot - gl ui ng s pot - gl ui ng cr i m pi ng and cr i m pi ng on each s i de...
- Page 159 The thickness of the folded part when extended should be 2 mm or less. * 2 mm or less The binding area should be flat and have no creases. The sprocket holes of all sheets in the form should be aligned properly.
- Page 160 When using labels whose backing sheet is entirely covered, make sure the cuts around the edges of the labels are perforated. 1. backing sheet 2. label sheet 3. several uncut areas on each side 4. label When using labels whose backing sheet is not covered with the label material, see the illustration below and do not set the paper-thickness lever to the AUTO position, set it manually.
- Page 161 Backing sheet Width 101.6 to 406.4 mm (4.0 to 16.0 inches) Length/page 76.2 to 558.8 mm (3.0 to 22.0 inches) Labels Width 63.5 mm (2.5 inches), minimum Height 23.8 mm (0.94 inch), minimum Corner radius 2.5 mm (0.1 inch), minimum Weight 64 g/m²...
- Page 162 Postcards Width 100 to 200 mm (3.9 to 7.8 inches) Length 100 to 200 mm (3.9 to 7.8 inches) Thickness 0.22 mm (0.0087 inch) Weight 192 g/m² (51 lb) Quality Plain paper and recycled paper Continuous forms with labels The specifications for the continuous forms with labels are the same as those for labels except for the following items: 1.
- Page 163 Area measurements A 12 m m ( 0. 47 i nch) B 44. 2 m m ( 1. 74 i nches ) C t ot al t hi cknes s : 0. 56 m m ( 0. 022 i nch) or l es s Overlapping multipart forms The specifications for the overlapping multipart forms are the same as those for the continuous paper (multipart) except for the...
- Page 164 Area measurements A 17 ± 3 m m ( 0. 15 ± 0. 12 i nch) B 13. 3 m m ( 0. 52 i nch) or l es s C f r om per f or at i on t o t he t op of t he next over l appi ng f or m : 3.
- Page 165 1. the top of overlapping form 2. the bottom edge of overlapping form 3. label 4. perforation 5. backing sheet 6. the bottom edge of the glue point area The label on your form should be placed within the shaded area above, but not on the vertical or horizontal perforation.
- Page 166 Pre-printed Paper Pre-printed paper is paper with white space in the middle and ruled lines, letters, or figures printed in the top and bottom margins. The margins are printed the first time the paper is loaded in the printer, and a document is printed in the white space the second time the paper is loaded in the printer.
-
Page 167: Printable Area
Area measurements A 5 m m ( 0. 20 i nch) B 12 m m ( 0. 47 i nch) Printable area Single sheets (including single-sheet multipart forms) A 0 m m ( 0 i nch) or m or e B The m i ni m um l ef t and r i ght m ar gi ns ar e 3. - Page 168 Continuous paper (including continuous multipart forms) A The m i ni m um t op and bot t om m ar gi ns ( above and bel ow t he per f or at i on) ar e 4. 2 m m ( 0. 165 i nch) . B The m i ni m um l ef t or r i ght m ar gi n i s 9 m m ( 0.
- Page 169 Labels A 13 m m ( 0. 51 i nch) or m or e B 1. 2 m m ( 0. 0472 i nch) or m or e C 3 m m ( 0. 118 i nch) or m or e Envelopes and postcards A 0 m m ( 0 i nch) or m or e T he m i ni m um t op m ar gi n f or...
- Page 170 Continuous forms with labels Area measurements A 13 m m ( 0. 51 i nch) or m or e B 4. 2 m m ( 0. 165 i nch) or m or e C 25 m m ( 0. 984 i nch) or m or e D 45 m m ( 1.
- Page 171 Overlapping multipart forms Area measurements A 23 m m ( 0. 906 i nch) or m or e B 21. 2 m m ( 0. 835 i nch) or m or e C 4. 2 m m ( 0. 165 i nch) or m or e Overlapping multipart forms with labels Area measurements A 23 m m ( 0.
-
Page 172: Standards And Approvals
Australian model: AS/NZS 3548 Class B Command Lists EPSON ESC/P 2 control codes Selecting EPSON ESC/P 2 printer in your software allows you to use the most advanced font and graphics. General operation: ESC@, ESC U, ESC EM Paper feeding:... -
Page 173: Ibm Ppds Emulation Control Codes
Page format: ESC ( C, ESC C, ESC C 0, ESC Q, ESC l, ESC ( c, ESC N, ESC O Print position motion: ESC $, ESC \, ESC ( V, ESC ( v, ESC D, HT, ESC B, VT, ESC J Font selection: ESC k, ESC x, ESC y, ESC X, ESC P, ESC M, ESC g, ESC p, ESC 4, ESC 5, ESC E, ESC F, ESC ! - Page 174 General operation: NUL, DC3, ESC j, BEL, CAN, DC1, ESC Q, ESC [ K, ESC U, ESC [ F Paper feeding: FF, LF, ESC 5, ESC A, ESC A (AGM*), ESC 0, ESC 1, ESC 2, ESC 3, ESC 3 (AGM*), CR, ESC ] Page format: ESC C, ESC C0, ESC X, ESC N, ESC O, ESC 4 Print position motion:...
-
Page 175: Cleaning The Printer
Do not spray the inside of the printer with lubricants; unsuitable oils can damage the printer mechanism. Contact your EPSON dealer if you think lubrication is needed. Transporting the Printer If you need to transport your printer some distance, carefully... - Page 176 Follow these steps to repack the printer in its original packing materials: Warning: If you have just used the printer, the print head may be hot; let it cool for a few minutes before removing the ribbon cartridge. 1. Turn off the printer and remove any paper loaded in the printer.
-
Page 177: Bidirectional Printing
Glossary ASCII American Standard Code for Information Interchange. A standardized coding system for assigning numerical codes to letters and symbols. auto line feed When this feature is selected in the default-setting mode, each carriage-return (CR) code is automatically followed by a line-feed (LF) code. bidirectional printing Printing in which the print head prints in both directions (bidirectionally). -
Page 178: Fanfold Paper
See “printer driver”. ESC/P Abbreviation for EPSON Standard Code for Printers. This is the system of commands your computer uses to control your printer. It is standard for all EPSON printers and supported by most application software for personal computers. - Page 179 letter quality (LQ) The print mode used by your printer when a font other than Draft is selected. Printing with letter-quality fonts provides better readability and appearance at a reduced print speed. See also “draft” and “high speed draft”. line feed (LF) A control code and control panel button that advances the paper one line space.
-
Page 180: Unidirectional Printing
top-of-form position The position on the paper that the printer recognizes as the first printable line. This is the default top-margin position. unidirectional printing Printing in which the print head prints in one direction only. Unidirectional printing is useful for printing graphics because it allows precise vertical alignment. - Page 181 5-14 loading paper, 5-16 printing position, 5-18 Electrical, A-11 Auto tear-off, 1-14, 3-8 ENERGY STAR compliance, A-3 Envelopes, 1-32 EPSON Status Monitor 3 utility, 2-1, 2-13 Bidirectional printing (Bi-D), 3-9 accessing, 2-16 Button setting up, 2-14 Font, 3-1 Error indication, 4-2...
- Page 182 cut-sheet feeder, 5-5 Pitch interface card, 5-22 selecting, 3-4 Interface card Postcards, 1-33 installing, 5-22 Print direction, 3-9 International character set, 3-11 Printer driver, 2-1 accessing from Windows 2000 or NT 4.0, 2-5 from Windows Me, 98 or 95, 2-1 Labels settings, 2-11 loading, 1-24...