
Related Manuals for Geemarc AMPLIDECT 280


Summary of Contents for Geemarc AMPLIDECT 280
- Page 1 English ™ AMPLIDECT 280/285 AMPLIDECT285™...
- Page 2 Voltages present on the telecommunication network are classified TNV-3 (Telecommunication Network Voltage) according to the En60950 standard. For product support and help visit our website at www.geemarc.com telephone + 44 01707 384438 or fax + 44 01707 372529 UGAMPLIDECT280/285 UK_ED03...
-
Page 3: Table Of Contents
GUARANTEE Congratulations Making a call From the moment your Geemarc product is purchased, Geemarc guarantee it for the period of Receiving a call Safety Precautions one year. During this time, all repairs or replacements (at our option) are free of charge. Should... - Page 4 Contents If you subscribe to a DSL service Advanced Functions Feature List Please attach a noise filter (contact your DSL provider) to the telephone line between the base unit and the telephone line jack in the event of the following: Menu Navigation - Noise is heard during conversations.
-
Page 5: Prior To Use
Technical Specifications Prior To Use Congratulations Frequency Range 1.88~1.90GHz on purchasing our high quality product. Please read the manual carefully to find out about all features available and how your telephone Channels 120 Duplex channels functions. In doing so you will get the best out of your new phone. <250mW Carrier Power Modulation... - Page 6 7. Unplug this phone from the wall outlet and refer servicing to qualified service personnel only. Answering System Solutions (AMPLIDECT285™ only) 8. Pay attention to the polarity of the batteries, insert the rechargeable batteries in accordance with polarity symbols (this instruction is found in the installing batteries section.) Cannot hear messages, beep, etc.
-
Page 7: Unpacking
Troubleshooting Unpacking Once you have unpacked your phone, make sure that all the parts shown below are available. If any pieces are missing or broken, please promptly call your dealer. Symptom Check & Remedy Check that the power adapter is properly connected. No operation Check that the telephone line cord is properly connected. -
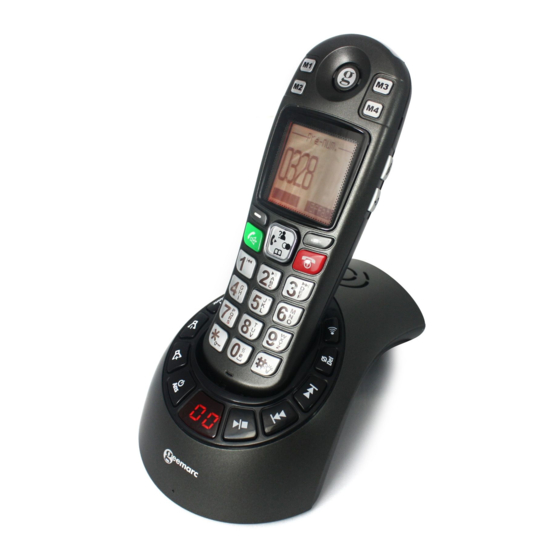
Page 8: Phone Layout And Key Function
Phone Layout and Keys Function Feature List (continued) Handset Note: The caller ID feature is only available if you Visual ringer subscribe to a Caller Display service from One-touch Earpiece your network provider. Memories Carrying clip M1 to M4 TAM Functions (AMPLIDECT285™only) Up key Digital Answering System... - Page 9 Phone Layout and Keys Function Feature List (continued) 1.8GHz DECT technology with GAP Redial, Flash, Pause Large 2.0" LCD (128 x 64 dots matrix DTMF/PULSE dialing mode selectable display) FLASH time selectable Up to 5 handsets for optional for one base Call duration display Up to 4 bases for optional for one handset Real time clock (set time)
- Page 10 Phone Layout and Keys Function Remote Control (continued) (AMPLIDECT285™ only) Base : AMPLIDECT285™ Base : AMPLIDECT280™ Remote access commands You can access many features of your answering Speaker machine remotely from any touch tone telephone. Button Function A four-digit security code (remote code) is Play the main menu required to access the system and the factory Paging...
-
Page 11: Key Description
Keys Description TAM Reset Week Date Setting This function allows you to reset the TAM settings Handset Before each message is played, the week and time to the factory default. it was received will be announced. You are able to Dial key Make/Answer a call. - Page 12 Keys Description Voice Prompt Language Remote Code (continued) You are able to select the language used to play To operate your answering machine remotely from the voice prompt messages. another phone you need to enter the remote code. Right key For security reasons you had better change this Enter the redial book, as described in page 18.
- Page 13 Keys Description Answer mode Select Set the ring delay (continued) The answering machine operates in two modes, The ring delay is the number of rings after the Base (AMPLIDECT285™ only) "answer and record (Announce1)" or "answer answering machine takes an incoming call and Answer on/off key only (Announce2)".
-
Page 14: Lcd Window Icons Description
LCD Window Icons Description TAM Setting (AMPLIDECT285™ only) TAM On/Off TAM Alert New Call Signal Icon You are able to switch the answering machine on A tone will sound every 1 minute when a new Indicates you have missed one Indicates current signal... -
Page 15: Connecting Lines
Delete all the messages Record the memo Connecting Lines Way 1: Using the menu your phone record memo Connect one end of the phone line cord to the phone messages (each can be up to 3 minutes) for 1. Press the TAM soft key in Standby mode. line jack of the base, and the other end to a another user of your phone. -
Page 16: Charging Handset
Message Installing Batteries (continued) (AMPLIDECT285™ only) Notes: The batteries need to be replaced 4. The phone will announce "You have N new The feature allows you to leave a message to the 3. T o r e p l a c e t h e b a t t e r y if they do not recover their full... -
Page 17: Using Handset Carrying Clip
Using Handset Carrying Clip Play Announce1/Announce2 Restore Announce1/Announce2 You can play the current Announce1/2. Way 1: Using the menu The supplied handset carrying clip allows you to 1. Press the TAM soft key in Standby mode. conveniently carry the handset with you. It clips Way 1: Using the menu easily to your belt, waist band, or shirt pocket. -
Page 18: Wall Mounting
Record Announce2 Use the base to record Announce1 Wall mounting /Announce2 Announce-only Announce2 is an answer-only Place the plate for wall mounting under the telephone. message. If you have not recorded a personal Press and hold the key on the base unit Drill 2 holes in the wall 60 mm apart, insert the wall Announce2, the unit will play the default one until the system announce. -
Page 19: Turning Handset On/Off
Turning Handset On/Off TAM Functions (AMPLIDECT285™ only) If the handset is in power off mode, when you Note: Announcement (AMPLIDECT285™ only) p l a c e t h e h a n d s e t t h e b a s e , If the handset is successful in finding a automatically turns on. -
Page 20: Basic Functions
Caller ID on call waiting Basic Functions All descriptions in this manual assume that the handset is in standby mode. Set the telephone to standby When you subscribe to Call Waiting service Note: mode by pressing the key. from your local telephone company, the If you have transferred an external call to telephone will display the name and number another handset, you cannot use the call... -
Page 21: Receiving A Call
Receiving a Call Setting up a 3-way conference call When you have both an external call and an When a call is received, t he New Call Result: After you hang up the call, the LCD intercom call in progress, you can set up a three- information will appear. -
Page 22: Muting The Microphone
Muting the Microphone Calling with more than one Handset During conversation, temporarily To mute your microphone, press the Mute soft If you have more than one handset registered to Note: During the internal call, if an external comes switch your phone's microphone off, so that the key during the conversation. -
Page 23: Ringer Setting
Registration Ringer Setting You can select your own external (from the Result: You can select the ring tone from The supplied handset is already registered with 4. If the base is found, and the handset is telephone Network) or internal (from other the number 1. -
Page 24: Last Number Redial
Last Number Redial Amplified Your phone is equipped with a specialized 1. Press the key in Standby mode. Notes: amplification function designed to fit your If no numbers are found, "Empty" is needs. If you switch this function on, the Result: The LCD displays the last number you displayed. - Page 25 Use Redial Book options Note: Selecting a Base HS Reset At step 3, when you select Delete or This function allows you to select a base from This function allows you to reset the Handset Using the redial book options, you can add a Delete All options, a message "Confirm ?"...
-
Page 26: Cid Book
CID Book LCD Contrast Setting 2. Press the key to choose Date & Time menu, press the Select soft key. The adjustment allows you to optimize the 2. Use the Select soft key to choose the CID Book, When receive call, caller's visibility of the display by changing its contrast... - Page 27 Add CID Number to Phone Book Audio Setup Key Tone 3. When the desired number appears on the 1. Perform steps 1 and 2 of previous paragraph. display, press the More soft key. You can also use the menu to adjust the audio Every time you press a key, your handset volume.
-
Page 28: Torch
Torch Key Lock HS Settings If you turn this feature on, the visual ringer will If you turn this feature on, all keys will be locked. Setting Alarm 6. Press the Next soft key, a beep sounds and light steadily. You can use the phone as a torch. the display shows Snooze On/Off, you can You can answer calls by using the key on... -
Page 29: Auto Answer
Auto Answer Modify PIN BS Reset This function allows you to reset the Base This function allows you to change the PIN With this feature, you can answer a call by 3. Use the key to choose Auto Answer, setting to the factory default. number of the currently active Base. -
Page 30: Hs Name
HS Name BS Settings Using this feature you can define a name of the 3. Use the key to choose HS Name, then Terminate HS Flash Time handset. This allows you to easily recognize your press the Select soft key. This function allows you to delete a handset You can select to change the Flash time by the handset if you have more than one registered on... -
Page 31: Paging
One-Touch Memories Paging To stop paging, press the key on the base again You can store up to 4 numbers in direct memory. Dialing from One-touch Memories You can page the handset from the base unit. or any key on the handset. All the number will be stored in phone book. -
Page 32: Handsfree
Handsfree Dialing a Number from Phone book Deleting the Phone book Entries Find the number you wish to dial. Refer to 1. Perform steps 1 and 2 of paragraph "Adding the D u r i n g c a l l , y o u m a y t u r n... -
Page 33: Menu Navigation
Adding the Phone book Entries Advanced Functions Note: If you make a mistake while entering a 1. Press the Menu soft key. number, use the Erase soft key to correct it. Each time you press the key, the last Menu Navigation 2. -
Page 34: Message
Menu Map Phone Book 1. CID Book The phonebook built in your cordless phone allows you to store frequently used numbers so that you can (see page 22) 4. HS Settings (see page 37) easily make a call without having to remember or enter the phone number. Alarm (see page 37) 2.