
Related Manuals for Sony CCU-590


Summary of Contents for Sony CCU-590
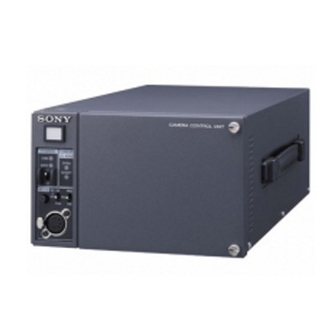
- Page 1 CAMERA CONTROL UNIT CCU-590 CCU-590P MAINTENANCE MANUAL Volume 1 1st Edition Serial No. 10001 and Higher: CCU-590 (UC) Serial No. 40001 and Higher: CCU-590P (CE)
- Page 2 Rear: 10 cm (4 inches) or more rack is within the specified limit of this product. Right, Left: 4 cm (1.6 inches) or more CCU-590/P/V1(E)
- Page 3 Mettre au rebut les batteries usagées conformément aux instructions du fabricant. For safety, do not connect the connector for peripheral device wiring that might have excessive voltage to the following port(s). : ETHERNET connector Follow the instructions for the above port. 1 (P) CCU-590/P/V1(E)
-
Page 5: Table Of Contents
Adjusting the Triax Signal ........2-16 2-4-6. Adjusting the Level of the Signals for a Waveform Monitor ..........2-17 2-4-7. Adjusting the Level of the Signals on a Picture Monitor ..............2-18 2-4-8. Adjusting the G/Y, B/B-Y, R/R-Y Signal Level ..............2-18 CCU-590/P/V1(E) - Page 6 R-Y OUT Level Adjustment ....... 4-18 4-5-10. Y BLACK Adjustment ........4-19 4-5-11. R-Y/B-Y Black Balance Adjustment ....4-19 4-5-12. Y A/D Level Adjustment ........4-20 4-5-13. R-Y/B-Y A/D Level Adjustment ......4-21 4-5-14. ANALOG RETURN VIDEO Level Adjustment ............4-22 CCU-590/P/V1(E)
-
Page 7: Manual Structure
Besides this “maintenance manual”, the following manuals are available for this unit..Maintenance Manual Vol.2 CCU-590/590P (Available on request) Contains the information on the premise of component level service (parts list, semiconductor pin assignments, block diagrams, schematic diagrams and board layouts) of the CCU-590/590P. -
Page 9: Installation Overview
Screw with stopper VA-211 board CN14 Cover 2. Loosen the four screws with stopper and open the front panel and the rear panel in the direction of the respec- tive arrows. Rear panel Front panel Screws with stopper Screws with stopper CCU-590/P/V1(E) - Page 10 CN207 removed in step 7. Flexible card wires S206 Screw with stopper Potbellied hole 13. Upon completion of front panel installation, check that the switch S206 (CCU-PW) on the MPU-124 board of the RM-B750 is ON. B3 x 6 CCU-590/P/V1(E)
-
Page 11: Supplied Accessories
SDI format, 270 M bps, SMPTE259M (BNC) Y: 1.0 V p-p, 75 Z Y/R-Y/B-Y video R-Y/B-Y: CCU-590: 700 mV p-p, 75 Z CCU-590P: 525 mV p-p, 75 Z 700 mV p-p, 75 Z R/G/B video (BNC) 1.0 V p-p, 75 Z... - Page 12 _6 V 60 dB 50 dB 40 dB [Input/output signals] 30 dB 20 dB TRIAX King type (for CCU-590) Fischer type (for CCU-590P) COAX (BNC) (Refer to section 1-7. To 8pin 15pin MIC GAIN CONT Contorl the Camera Using COAX Cable.)
- Page 13 ON: 24 V dc, TTL (H), SHORT – G TALLY (Y) IN OFF: 0 V dc, TTL (L), OPEN – RXD (_) *4 To use these interface signals, modification for AT board is required. For more details, please consult your Sony service representative. – – CCU-590/P/V1(E)
-
Page 14: Connection Connector
25PF-N or the equivalent WF MODE 1-560-155-00 plug, 4-pin male (4P, FEMALE) REMOTE 1-766-848-11 plug, 8-pin male, CCA cable assembly (optional) CCA-5-10 (10 m) (8P, FEMALE) CCA-5-3 (3 m) INCOM 1-508-370-11 XLR, 5-pin male, or CANNON XLR-5-12C or the (5P, FEMALE) equivalent CCU-590/P/V1(E) -
Page 15: Operating Environment
1-4. Operating Environment 1-6. Mounting on 19-Inch Rack Operating temperature: _10 dC to +40 dC Two CCU-590/590Ps can be mounted on a 19-inch EIA _20 dC to +55 dC Storage temperature: standard rack in parallel by using rack mount adaptor... -
Page 16: Controlling Camera Using A Coaxial Cable
1-7. Controlling Camera Using a Coaxial Cable To make communications available using a coaxial cable in the CA/CCU-590 series, replace the TRIAX connector on the CA with the COAX connector in the following change procedure. Change on the CA side For details of the change on the CA side, refer to CA-590 Maintenance Manual, Section 1-5. -
Page 17: Switch Settings
OFF: D-sub 15P MIC-remote address (location) on the board. 4. ON: MIC-Gain-CTL 1, 2 . Never change the setting of the factory use switches. independent OFF: 5. Not used 6. ON: Initial-CCU-ASPECT 16:9 OFF: Initial-CCU-ASPECT 4:3 7. Not used 8. Not used CCU-590/P/V1(E) - Page 18 Not used EN-156B BOARD (A SIDE) S708 (B-4) Not used S709 (B-4) Not used S1001 (G-4) Video selection out to front panel Set the following with S701-4 setting S701-4 S1001 → Ycd ON (Ycd) OFF (RGB) → RGB 1-10 CCU-590/P/V1(E)
- Page 19 3. ON: VBS-3/OFF: SDI-3 S363 (F-4) For adjustment use only 4. ON: VBS-4/OFF: SDI-4 S102 (B-4) 1 to 3 Not used 4. SDI RETURN FREQ. ADJ MODE S103 (A-4) Not used S104 (B-4) Not used S105 (A-4) Not used 1-11 CCU-590/P/V1(E)
- Page 20 ENG line is set to ClearCom S206 (D-4) Prod line is set to 4W AU-295 BOARD (A SIDE) RTS: ENG line is set to RTS/CC S207 (D-3) ENG line is set to 4W RTS: ENG line is set to RTS/CC 1-12 CCU-590/P/V1(E)
- Page 21 Communication available only between CA and CCU ENG: Engineer line S4 (C-2) MIC/PGM switch MIC-ON: Head set MIC ON MIC-OFF: Head set MIC OFF PGM: Program audio output S5 (A-1) MIC select DYNAMIC CARBON DYNAMIC S6 (A-1) OPEN 1-13 CCU-590/P/V1(E)
-
Page 22: Instance Of System Configuration
*1: Triax cable length (Fujikura cable) CCA-5 CABLE LENGTH RCP-750/751 Cable-length limitation CCA-5 CCA-5 CCA-5 Diameter Extensible for prompter signal length transmission Total length 200 m or less 8.5 mm 700 m 500 m 14.5 mm 1400 m 1000 m 1-14 CCU-590/P/V1(E) - Page 23 VIDEO SELECTOR CCA-5 CABLE VCS-700 (max. 200 m) CCA-5 CABLE (max. 200 m) MASTER SETUP UNIT MSU-900/950 CAMERA CONTROL UNIT CCU-590/590P CCA-5 CABLE (*2) System without CNU-700 CAMERA CONTROL UNIT RCP-750 RCP-751 CCU-550D/550DP (*3, *4, *5, *6) CCA-5 CABLE (*2)
-
Page 25: System Setup
CHARACTER switch down (MENU) within two seconds. 4. CCU CONFIGURATION MENU appears on the monitor television. To cancel operation of the menu, set the CHARAC- TER switch to “OFF” (center). **CCU-MENU** NETWORK SETTING CCU CONFIGURATION *: NETWORK SETTING is not used. CCU-590/P/V1(E) - Page 26 <BAR CHARA SET> ASPECT-FLAG : 1 BAR SELECT DEFAULT/SMPTE/EIA/ FULL/EBU/95%/NTSC100%/ PAL100%/SNG 2 GRAY OUT SET CB/GRAY 3 TEST2 SELECT 3-STEP/10-STEP 4 BAR-CHARA ON/OFF 5 BAR-CHARA WHITE LEVEL 75%/88%/100%/107% 6 BAR-CHARA BLACK LEVEL 0%/7.5%/15%/25% 7 ASPECT FLAG _ _ _ CCU-590/P/V1(E)
- Page 27 <BAR CHARA SET> $%&'()*+,-./0123456789: ;<=>?@ABCDEFGHIJKLMNOPQR STUVWXYZ[ ]_ INS DEL RET ESC END *1: Pressing ENTER here resets the edited content and editing mode. *2: Pressing DOWN returns the cursor to the end of the data editing region. CCU-590/P/V1(E)
- Page 28 When ENTER is pressed (1) Pressing UP shifts right the character select cursor <BAR CHARA SET> by one character. 1?134 <BAR CHARA SET> 1?1234 $%&'()*+,-./0123456789: ;<=>?@ABCDEFGHIJKLMNOPQR STUVWXYZ[ ]_ INS DEL RET ESC END $%&'()*+,-./0123456789: ;<=>?@ABCDEFGHIJKLMNOPQR STUVWXYZ[ ]_ INS DEL RET ESC END CCU-590/P/V1(E)
- Page 29 8 SKIN GATE LEVEL ± 99 9 MARKER ON/OFF ON/OFF 0 MARKER SELECT 4:3/13:9/14:9/15:9/EURO-V/ VISTA/CINEMA !- MODURATION ON/OFF ON/OFF != MODURATION LEVEL ± 99 ![ MONITOR CHARA WHITE LEVEL 75%/88%/100%/107% !] MONITOR CHARA BLACK LEVEL 0%/7.5%/15%/25% !\ BAR CHARA MIX ON/OFF ON/OFF CCU-590/P/V1(E)
- Page 30 6 PROMPTER 6 SC – PHASE 0d to 359d C05: AUDIO SET <AUDIO SET> ?C05 TOP CHU MIC GAIN : (LOCAL) : 60dB : 60dB MAIN SDI AUDIO EMBEDDED : ON 1 CH1 60/50/40/30/20dB 2 CH2 60/50/40/30/20dB 3 EMBEDDED ON/OFF CCU-590/P/V1(E)
- Page 31 7 R-Y DC 4 WRITE MS ± 99 8 B-Y DISTORTION 5 FILE ID ± 99 9 R-Y DISTORTION 6 CCU CODE ± 99 0 CHU-H PHASE 7 DATE !- TRIAX TEST 8 PRESET OFF/ON PRESET CCU SETTING DATA → ENTER CCU-590/P/V1(E)
- Page 32 YY/MM/DD hh:mm 4 CATEGORY 2 MIX STD/RVS ON/OFF 5 PAGE STD/RVS 1 to 12 6 ITEM STD/RVS LEFT/CENTER/RIGHT 7 DATA 5 BACKUP RESET STD/RVS FRAM RESET *: After this operation, turn off the power switch, and turn on again. CCU-590/P/V1(E)
- Page 33 TRUNK LINE SEL : --- 1 TRUNK LINE OFF/ON 2 TRUNK LINE SEL _ _ _/INCOM2/AUDIO2 C15: SERIAL NO SET <SERIAL NO SET> ?C15 TOP SERIAL No : 0010001 WRITE EDIT CANCEL SERIAL No : 1 SERIAL NO SETTING CCU-590/P/V1(E)
-
Page 34: Audio System
Set the switches S206 (PROD SELECT) and S204 (CC/ selected by means of the camera adapter CA-590/590P or RTS) on the AU-295 board according to the intercom CCU-590/590P. system to be used. Since this unit conforms to the 4W and RTS intercom... - Page 35 INCOM SELECT switch on the program sent to front panel of the AT board the front panel 3. Setting for the INTERCOM connector on the front panel to the INTERCOM connector on the front panel 2-11 CCU-590/P/V1(E)
-
Page 36: Setting The Program Microphone Signal
The microphone input level can also be set by the CCU Pin No. CONFIGURATION menu of “C05” page. _60 dBu _50 dBu _40 dBu _30 dBu _20 dBu +5 V (C-MOS level) Input impedance: 100 kZ +5 V pull up 2-12 CCU-590/P/V1(E) -
Page 37: Control System
POWER POWER Before adjustment, reset the control data of the unit. supply At the factory, set the switches S1 and S2 on the CCU-590/590P to CONTACT. 1. Open page “C13” of the CCU CONFIGURATION menu. 2. Position the cursor at “BACKUP RESET” in the lower line. -
Page 38: Adjusting The Phases Of The Signals
2. Set the master black level of the camera to the maxi- signals mum value. Signal level: 40 IRE (for CCU-590) or 3. Monitoring the VBS signal, adjust the phases using the 0.3 V p-p (for CCU-590P) CCU CONFIGURATION menu “CHU H-PHASE”... -
Page 39: Adjusting The Vbs Signal Level
Adjust the level of the VBS signal output from the VBS connector of the unit using a color-bar signal. 1. Adjustment by CONFIGURATION menu 1. Connect the RCP or RM to the CCU-590 and press the BARS button to display the color-bar signal on a waveform monitor or vectorscope. -
Page 40: Adjusting The Triax Signal
(525 feet) 330 m 660 m 490 m (1,083 feet) (2,165 feet) (1,608 feet) 550 m 1100 m 820 m (1,805 feet) (3,609 feet) (2,690 feet) 770 m 1540 m 1150 m (2,526 feet) (5,053 feet) (3,773 feet) 2-16 CCU-590/P/V1(E) -
Page 41: Waveform Monitor
2. Adjust the interval of the signals displayed on the monitor screen with 1RV301 (STAIR STEP POSI- 1. Connect the RCP or RM to the CCU-590 and press the BARS button to display the color-bar signal on a TION control) on the EN-156B board. -
Page 42: Monitor
1. To display the color-bar signal on the waveform monitor, set “PIX” to “ENC” by the COMFIGURA- 1. Connect the RCP or RM to the CCU-590 and press the TION menu (page “C00”). BARS button to display the color-bar signal on a 2. - Page 43 D = 700 ± 7 mV R-Y/R OUT RV104 B-Y/B OUT RV105 When S701 = “RGB” [For NTSC] Y/G OUT [For PAL] Y/G OUT [For PAL] R-Y/R OUT [For NTSC] R-Y/R OUT [For PAL] B-Y/B OUT [For NTSC] B-Y/B OUT 2-19 CCU-590/P/V1(E)
-
Page 45: Service Overview
Section 3 Service Overview 3-1. Location of Printed Wiring Boards AU-295 TR-133B IV-57B EN-156B DM-140 AT-155B IF-943 MB-1011 CN-2649 CN-2506 VDA-62B CN-2546 DIF-148 CN-2474B Power unit IO-214 CN-2647 SW-1189 CN-2648 CN-2516 CCU-590/P/V1(E) -
Page 46: Circuit Description
LPF where the signal is clamped and output after its unnecessary 45 MHz carrier component is eliminated. The R-Y signal is also demodulated in the same way by a carrier whose phase is different (by 90 degrees) from the B-Y signal. CCU-590/P/V1(E) - Page 47 5.6 MHz is demodulated by the FM demodulator IC. The CAM DATA is shaped after the residual carrier is eliminated, and is then sent to the AT-155B board. The TONE signal transferred to the TONE detector circuit is used to control ON/OFF of 180 VDC supplied from CCU-590 to the camera.
- Page 48 (0 dB or _20 dB) by S200 and 201. INCOM Switching Circuit This circuit switches INCOM lines on the CA side and the CCU-590 front panel side. There are three types of INCOM lines: PRODUCER line, ENGINEER line (external system), and PRIVATE line isolated from the external system.
- Page 49 D/A converted by IC408. The analog signal passes through the LPF and the MIX amplifier IC412, and is then output from this board. In the SDI RETURN input mode, the Y MIX processing is performed digitally in IC307, which enables fine setting of MIX ratio. CCU-590/P/V1(E)
- Page 50 IC306 to compare their phases. The difference passes through the burst gate, is A/D converted by IC311, and is then re-input into IC326 where subcarrier genlock synchronization is carried out. CCU-590/P/V1(E)
- Page 51 The 16 bit flash memory IC114 and IC115 store the control program, but it can be selected which ROM to store by S102. The control program is stored in IC114 when CCU-590 is shipped from the factory. The 1M bit SRAMs IC116 and IC119 are used as work memory. IC301 to IC305 handle input/output data from/to on-board switches, variable resistors, AC power supply unit, etc., including open/short-circuit...
- Page 52 IO-214 Board This board is used to merge the RF signal (between camera and CCU-590) and the power voltage to the camera. The RF signal is supplied from CN2, and 180 VDC is supplied form W1. The RF signal passes through C1, and the 180 VDC passes through L4, L3, and L2, and these signals are merged and then sent to the camera.
-
Page 53: Adjusting/Setting Items After Board Replacement
2-5-3. Adjusting the Phases of the Signals . Adjusting the phase of the sync signal 2-4-1. Selecting the Input/Output Signal . Adjusting using the AT-155B board of CCU-590/ 2-4-4. Adjusting the VBS Signal Level 590P 2-4-6. Adjusting the Level of the Signals for a Wavefrom . -
Page 54: Extending Dm-140 And Tr-133B Boards
Board spacer TR-133B board RF cable CN100 (White) Board spacer DM-140 board 3. Insert an extension board, and attach the DM-140 and TR-133B board TR-133B boards to the extension board. CN801 CN701 TR-133B board Extension board DM-140 board 3-10 CCU-590/P/V1(E) -
Page 55: Removing/Reinstalling The Top Cover
TR-133B board using three RF signal extension 1. Loosen the two screws with stopper and open the front cables. panel in the arrow direction. RF signal extension cable: (Sony Part No. : 1-830-369-11) Front panel [Notes|at|installation] [Notes|at|installation] [Notes|at|installation] [Notes|at|installation]... -
Page 56: Power Supply Unit
4. After replacement of the power supply unit, assemble the power unit in the reverse procedure of removal. 1 B3 x 6 5. Connect the power cord, turn on the power of the CCU-590/590P, and confirm that the CCU-590/590P operates normally. 3-12 CCU-590/P/V1(E) -
Page 57: Replacing The Dc-Dc Board/Ac-Dc Board
PS5 x 8 7. After replacement of the board, reinstall the power supply unit on the CCU-590/590P by reversing the steps above. 8. Connect the power cord, power on the CCU-590/590P, and check that the unit works normally. 3-13 CCU-590/P/V1(E) -
Page 58: Replacing The Fuse
Fan assembly Fan holder 7. After replacement of the fuse, reinstall the power supply unit on the CCU-590/590P by reversing the steps above. 8. Connect the power cord, power on the CCU-590/590P, and check that the unit works normally. 3-14 CCU-590/P/V1(E) -
Page 59: Backup Battery Replacement
When replacing, be sure to use the specified part. BATTERY, LITHIUM CR-2032 : ! 1-528-174-11 AT-155B board If the trouble below occurs when the CCU-590/590P is used, replace the lithium battery on the AT-155B board. Trouble When the date on “C13” page of the CCU CONFIGURA- TION menu is incorrect. -
Page 60: Flexible Card Wire
A. 250 mm 2. Slide the portion * of the connector in the direction of the arrow B to lock it. Connector Flexible card wire Insulated surface (Blue) SW-1189 board (CN1) Blue surface 3-16 CCU-590/P/V1(E) -
Page 61: Settings After Replacing The Eeprom/Pld
Section 3-10.) IV-57B IC307 Program for Write the PLD IC306 EEPROM internal data 230 mm (Refer to Section 3-10.) AU-295 IC105 Program for Write the PLD internal data (Refer to Section 3-10.) Insulated surface (Blue) SW-1189 board (CN2) 3-17 CCU-590/P/V1(E) -
Page 62: Writing And Rewriting The Pld Internal Data
Download the Project file from the Sony Database used. Server. . The PLD internal data is controlled in the Sony Database Server under the name Project file (E_xxx_xxx_xx_xx). 2. Turn off the power of this unit. Connect the PC . The printed circuit board is equipped with the standard... -
Page 63: Updating The Software
CONTROL SELECT switch. 6. Lighting of the POWER LED (MAIN) indicates completion of the program upgrade. REFERENCE REFERENCE 7. Turn off the power, and then remove the Memory LOCK Stick. PHASE REMOTE 3-19 CCU-590/P/V1(E) -
Page 64: Optional Fixtures
The printed pattern (copper foil) may peel away if the heated tip is applied for too long, so be careful. 2. Standardization of Parts Some repair parts supplied by Sony differ from those used for the unit. These are because of parts common- ality and improvement. -
Page 65: Electrical Alignment
FL102, FL302, FL601 FL602, FL701, FL801, FL901 Tektronix 1751A or equivalent (for PAL) . Color monitor . Each adjustment category lists an item to be adjusted Sony BVM-1911/2811 or equivalent (for NTSC) during installation, periodic inspection or part replace- Sony BVM-2011P/3011P or equivalent (for PAL) ment. -
Page 66: Connection
TRIAX CABLE Signal generator REF OUT SIGNAL OUT Waveform monitor/ Vectorscope RET-1 CAMERA 75 Z 75 Z CONTROL UNIT CCU-590/590P with RM-B750 or Color monitor RCP-750/751 75 Z Audio connection Audio generator 600 Z Fig 1 Audio generator 600 Z... -
Page 67: Adjustment Flow
4-5-12. Y A/D Level Adjustment 4-5-10. Y BLACK Adjustment (When replacing RV104 or IC117/IV57) 4-5-13. R-Y/B-Y A/D Level Adjustment 4-5-11. R-Y/B-Y Black Balance Adjustment (When replacing RV105, RV106, IC118 or IC119/ IV-57) 4-7-1. RETURN VIDEO Carrier Frequency Adjustment 4-7-2. RETURN VIDEO Deviation Adjustment CCU-590/P/V1(E) -
Page 68: Video Signal System Adjustment
TP505 RV303 RV304 RV305 S102 S101 RV101 S310 S309 TP301 S305 S306 TP502 S707 S303 S708 S307 TP501 S709 S311 S312 S304 S308 S703 S701 S301 S302 S704 S702 S705 S706 AT-155B BOARD (SIDE A) EN-156B BOARD (SIDE A) CCU-590/P/V1(E) -
Page 69: Wf Out Level Adjustment
RV501 RV502 TP101 S301 TP302 RV301 RV302 RV104 RV106 RV105 TP102 TP104 TP103 RV102 RV101 RV103 TP303 TP304 TP305 TP306 RV303 RV304 RV305 TP301 TP502 S707 S708 TP501 S709 S703 S701 S704 S702 S705 S706 EN-156B BOARD (SIDE A) CCU-590/P/V1(E) -
Page 70: Y Out Level Adjustment 1
RV501 RV502 TP101 S301 TP302 RV301 RV302 RV104 RV106 RV105 TP102 TP104 TP103 RV102 RV101 RV103 TP303 TP304 TP305 TP306 RV303 RV304 RV305 TP301 TP502 S707 S708 TP501 S709 S703 S701 S704 S702 S705 S706 EN-156B BOARD (SIDE A) CCU-590/P/V1(E) -
Page 71: R-Y/R, B-Y/B Out Level Adjustment
RV501 RV502 TP101 S301 TP302 RV301 RV302 RV104 RV106 RV105 TP102 TP104 TP103 RV102 RV101 RV103 TP303 TP304 TP305 TP306 RV303 RV304 RV305 TP301 TP502 S707 S708 TP501 S709 S703 S701 S704 S702 S705 S706 EN-156B BOARD (SIDE A) CCU-590/P/V1(E) -
Page 72: Stair Case Adjustment
TP503 TP301 TP303 TP102 RV104 RV501 RV102 CN902 S301 RV303 TP504 TP304 RV302 RV304 TP302 TP104 RV101 S704 S705 RV301 S703 TP305 RV106 RV502 RV305 S701 TP103 RV105 RV103 S702 TP306 S706 S709 S708 S707 EN-156B BOARD (SIDE A) CCU-590/P/V1(E) -
Page 73: Y Cable Compensation System Adjustment
RV801 TP101 E101 S301 TP301 TP603 TP602 E301 TP803 TP802 S101 RV161 RV301 RV602 RV804 RV603 RV805 TP102 TP302 TP501 LV501 TP502 RV502 RV501 RV503 TP503 TP505 RV504 TP504 TP901 RV902 TP701 TP801 RV702 RV802 DM-140 BOARD (SIDE A) CCU-590/P/V1(E) -
Page 74: Sync Sample Hold Pulse Width Adjustment
TP101 S301 TP301 E101 E301 TP603 TP602 TP803 TP802 S101 RV161 RV301 RV602 RV804 RV603 RV805 TP102 TP302 TP501 LV501 TP502 RV502 RV501 RV503 TP503 TP505 RV504 TP504 TP901 RV902 TP701 TP801 RV702 RV802 DM-140 BOARD (SIDE A) 4-10 CCU-590/P/V1(E) -
Page 75: Sample Pulse Width Adjustment
TP502 (for PAL) RV502 RV501 RV503 Check TP504 if there are 5 TP503 TP505 sample pulses in the odd RV504 TP504 field and also in the even field. TP901 RV902 TP701 TP801 RV702 RV802 DM-140 BOARD (SIDE A) 4-11 CCU-590/P/V1(E) -
Page 76: Mhz Carrier Level Adjustment
Setting after adjustment S101 RV161 RV301 RV602 RV804 . S101 (Y 2nd AGC)/DM-140 board → ON RV603 RV805 TP102 TP302 TP501 LV501 TP502 RV502 RV501 RV503 TP503 TP505 RV504 TP504 TP901 RV902 TP701 TP801 RV702 RV802 DM-140 BOARD (SIDE A) 4-12 CCU-590/P/V1(E) -
Page 77: Y Offset Adjustment
TP101 E101 S301 TP301 TP603 TP602 E301 TP803 TP802 S101 RV161 RV301 RV602 RV804 RV603 RV805 TP102 TP302 TP501 LV501 TP502 RV502 RV501 RV503 TP503 TP505 RV504 TP504 TP901 RV902 TP701 TP801 RV702 RV802 DM-140 BOARD (SIDE A) 4-13 CCU-590/P/V1(E) -
Page 78: Y Output Level Adjustment
TP101 S301 TP301 E101 E301 TP603 TP602 TP803 TP802 S101 RV161 RV301 RV602 RV804 RV603 RV805 TP102 TP302 TP501 LV501 TP502 RV502 RV501 RV503 TP503 TP505 RV504 TP504 TP901 RV902 TP701 TP801 RV702 RV802 DM-140 BOARD (SIDE A) 4-14 CCU-590/P/V1(E) -
Page 79: C Vco Dc Set Adjustment
Setting after adjustment RV161 RV301 RV602 RV804 . S301 (C 2nd AGC)/DM-140 board → “ON” RV603 RV805 TP102 TP302 TP501 LV501 TP502 RV502 RV501 RV503 TP503 TP505 RV504 TP504 TP901 RV902 TP701 TP801 RV702 RV802 DM-140 BOARD (SIDE A) 4-15 CCU-590/P/V1(E) -
Page 80: B-Y Crosstalk Adjustment
TP101 E101 S301 TP301 TP603 TP602 E301 TP803 TP802 S101 RV161 RV301 RV602 RV804 RV603 RV805 TP102 TP302 TP501 LV501 TP502 RV502 RV501 RV503 TP503 TP505 RV504 TP504 TP901 RV902 TP701 TP801 RV702 RV802 DM-140 BOARD (SIDE A) 4-16 CCU-590/P/V1(E) -
Page 81: B-Y Out Level Adjustment
TP101 S301 TP301 E101 E301 TP603 TP602 TP803 TP802 S101 RV161 RV301 RV602 RV804 RV603 RV805 TP102 TP302 TP501 LV501 TP502 RV502 RV501 RV503 TP503 TP505 RV504 TP504 TP901 RV902 TP701 TP801 RV702 RV802 DM-140 BOARD (SIDE A) 4-17 CCU-590/P/V1(E) -
Page 82: R-Y Crosstalk Adjustment
TP101 S301 TP301 E101 E301 TP603 TP602 TP803 TP802 S101 RV161 RV301 RV602 RV804 RV603 RV805 TP102 TP302 TP501 LV501 TP502 RV502 RV501 RV503 TP503 TP505 RV504 TP504 TP901 RV902 TP701 TP801 RV702 RV802 DM-140 BOARD (SIDE A) 4-18 CCU-590/P/V1(E) -
Page 83: Y Black Adjustment
. Push the STD button on RM or RCP. Setting after adjustment . Push the STD button on RM or RCP. TP101 TP104 RV101 RV105 RV103 RV102 TP103 S101 CN902 RV106 S105 S104 TP102 S107 RV104 S103 S102 RV401 S108 IV-57B BOARD (SIDE A) 4-19 CCU-590/P/V1(E) -
Page 84: Y A/D Level Adjustment
ON or OFF in the RM or RCP. [For NTSC] [For PAL] After the above adjustment is completed, readjust 4-5-10 repeatedly until the specifications of 4-5-10 and 4-5-12 are S102 S104 satisfied. S101 S103 S105 S107 S108 RV101 RV103 RV102 IV-57B BOARD (SIDE A) 4-20 CCU-590/P/V1(E) -
Page 85: R-Y/B-Y A/D Level Adjustment
[For NTSC] [For PAL] S102 S104 S101 S103 S105 S107 S108 RV101 RV103 RV102 After the above adjustment is completed, readjust 4-5-11 repeatedly until the specifications of 4-5-11 and 4-5-13 are IV-57B BOARD (SIDE A) satisfied. 4-21 CCU-590/P/V1(E) -
Page 86: Analog Return Video Level
. S102-4 (FREE RUN)/IV-57B board → “OFF” Specification: CN902 CN901 RV300 TP300 TP101 TP401 RV402 RV401 TP104 TP103 TP102 RV105 RV106 RV104 IC307 IC403 S104 S102 S101 S105 S103 S106 S107 S108 RV101 RV103 RV102 IV-57B BOARD (A SIDE) 4-22 CCU-590/P/V1(E) -
Page 87: Sdi Return Video Level Adjustment
A = 1.00 ± 0.02 V p-p Specification: [For NTSC] [For PAL] CN902 CN901 RV300 TP300 TP101 TP401 RV402 RV401 TP104 TP103 TP102 RV105 RV106 RV104 IC307 IC403 S104 S102 S101 S105 S103 S106 S107 S108 RV101 RV103 RV102 IV-57B BOARD (A SIDE) 4-23 CCU-590/P/V1(E) -
Page 88: Triax Interface System Adjustment
* TR-DM assembly: TR-133B board + DM-140 board 4-6-1. Frequency Set Adjustment Adjustment category: Note: Do not input signals to the intercom line and the PGM line CN902 at the CCU-590/590P side. Perform this adjustment only after replacing the TR-133B S362 board parts below. S363 S361... -
Page 89: Incom1 Deviation Adjustment
TP901 E701 RV701 TP201 RV201 LV201 E101 TP202 TP21 LV601 LV602 RV601 LV21 RV41 CN902 LV41 TP41 LV402 RV401 LV401 TP402 LV101 RV101 E100 TP401 TP101 LV301 RV301 E300 E102 LV302 S363 TP302 TP301 TR-133B BOARD (SIDE A) 4-25 CCU-590/P/V1(E) -
Page 90: Incom2 Deviation Adjustment
E400 CN902 TP601 TP41 RV501 LV61 RV61 LV501 LV502 TP502 TP61 LV81 TP501 RV81 RV401 LV401 LV402 TP402 TP81 LV101 S361 S362 RV101 E100 TP401 RV301 E300 TP101 E102 LV301 LV302 S363 TP302 TP301 TR-133B BOARD (A SIDE) 4-26 CCU-590/P/V1(E) -
Page 91: Incom1 Demodulation Adjustment
RV701 RV902 E100 Minimum TP901 TP21 TP41 TP101 E102 3. Perform steps 1 and 2 repeatedly to meet the specifica- LV101 E701 TP701 tions in 1 and 2. RV41 RV101 E101 TR-133B BOARD (SIDE A) 4-27 CCU-590/P/V1(E) -
Page 92: Incom2 Demodulation Adjustment
TP21 TP41 TP61 TP81 TP101 E102 3. Perform steps 1 and 2 repeatedly to meet the specifica- LV21 LV41 LV61 LV81 LV101 TP701 E701 tions in 1 and 2. RV41 RV61 RV81 RV101 E101 TR-133B BOARD (A SIDE) 4-28 CCU-590/P/V1(E) -
Page 93: Mic 1 Demodulation Adjustment
Minimum RV901 TP201 LV902 3. Perform steps 1 and 2 repeatedly to meet the specifica- RV701 RV902 tions in 1 and 2. E100 TP901 TP21 TP41 TP101 E102 LV101 E701 TP701 RV41 RV101 E101 TR-133B BOARD (SIDE A) 4-29 CCU-590/P/V1(E) -
Page 94: Mic 2 Demodulation Adjustment
RV901 TP201 Minimum LV902 RV701 RV902 3. Perform steps 1 and 2 repeatedly to meet the specifica- E100 tions in 1 and 2. TP901 TP21 TP41 TP101 E102 LV101 E701 TP701 RV41 RV101 E101 TR-133B BOARD (SIDE A) 4-30 CCU-590/P/V1(E) -
Page 95: Chu Data Demodulation Adjustment
Set 1RV201 to the center of (a) and (b). E801 LV901 LV601 LV401 LV301 LV201 RV901 TP201 LV902 Set to the center RV701 RV902 E100 TP901 TP21 TP41 TP101 E102 LV101 E701 TP701 RV41 RV101 E101 TR-133B BOARD (SIDE A) 4-31 CCU-590/P/V1(E) -
Page 96: Return Video Cable Compensation System Adjustment
TP901 E701 CT701 RV701 TP201 RV201 LV201 TP202 TP21 E101 LV601 RV601 LV21 LV602 RV41 CN902 LV41 TP41 LV401 RV401 LV402 TP402 LV101 RV101 TP401 TP101 LV301 RV301 E300 E102 LV302 TP302 S363 TP301 TR-133B BOARD (SIDE A) 4-32 CCU-590/P/V1(E) -
Page 97: Rx Prompt Video Demodulation
TP701 TP901 E701 RV701 TP201 RV201 LV201 E101 TP202 TP21 LV601 LV602 RV601 LV21 RV41 CN902 LV41 TP41 LV402 LV401 RV401 TP402 LV101 RV101 TP401 TP101 LV301 RV301 E300 E102 LV302 S363 TP302 TP301 TR-133B BOARD (SIDE A) 4-33 CCU-590/P/V1(E) -
Page 98: Rx Prompt Video Rf Agc Adjustment
TP701 TP901 E701 RV701 TP201 RV201 LV201 E101 TP202 TP21 LV601 LV602 RV601 LV21 RV41 CN902 LV41 TP41 LV402 LV401 RV401 TP402 LV101 RV101 TP401 TP101 LV301 RV301 E300 E102 LV302 S363 TP302 TP301 TR-133B BOARD (SIDE A) 4-34 CCU-590/P/V1(E) - Page 99 A (see figure below) becomes minimal. LV902 (Excessive turn causes the SYNC level to deteriorate.) RV701 RV902 E100 TP901 TP21 TP41 TP101 E102 LV101 E701 TP701 RV41 RV101 E101 Where each black portion of TR-133B BOARD (SIDE A) noise level A becomes minimal. 4-35 CCU-590/P/V1(E)
-
Page 100: Rx Prompt Video Level Adjustment
TX side with POWER ON and then to REM. E102 . Re-set S301 on the DM-139B board of CA-590/590P to “RX” LV101 E701 TP701 . Disconnect the BNC cable from the PROMPTER RV41 RV101 terminal. E101 TR-133B BOARD (SIDE A) 4-36 CCU-590/P/V1(E) -
Page 101: Prompt Video Cable Compensation System Adjustment
LV902 Note: RV701 Set the switch below after the adjustment is completed. RV902 . S1 (Cable Length)/DM-140 board (CCU) → “F” E100 TP901 (AUTO) TP21 TP41 TP101 E102 LV101 E701 TP701 RV41 RV101 E101 TR-133B BOARD (SIDE A) 4-37 CCU-590/P/V1(E) -
Page 102: Intercom System Adjustment
S103 TP201 TP200 S100 IC105 TP101 S107 S106 TP100 TP102 S104 S108 S102 S105 CN902 TP205 RV100 RV201 S203 S207 TP208 RV101 TP203 RV200 S202 S205 TP210 RV102 TP204 S204 RV203 S206 RV204 TP209 AU-295 BOARD (A SIDE) 4-38 CCU-590/P/V1(E) -
Page 103: Rts Intercom System Adjustment
S103 TP201 TP200 S100 IC105 TP101 S107 S106 TP100 TP102 S104 S108 S102 S105 CN902 TP205 RV100 RV201 S203 S207 TP208 RV101 TP203 RV200 S202 S205 TP210 RV102 TP204 S204 RV203 S206 RV204 TP209 AU-295 BOARD (A SIDE) 4-39 CCU-590/P/V1(E) -
Page 104: Mic Level Adjustment
S103 TP201 TP200 S100 IC105 TP101 S107 S106 TP100 TP102 S104 S108 S102 S105 CN902 TP205 RV100 RV201 S203 S207 TP208 RV101 TP203 RV200 S202 S205 TP210 RV102 TP204 S204 RV203 S206 RV204 TP209 AU-295 BOARD (A SIDE) 4-40 CCU-590/P/V1(E) -
Page 105: Mic2 Level Adjustment
S103 TP201 TP200 S100 IC105 TP101 S107 S106 TP100 TP102 S104 S108 S102 S105 CN902 TP205 RV100 RV201 S203 S207 TP208 RV101 TP203 RV200 S202 S205 TP210 RV102 TP204 S204 RV203 S206 RV204 TP209 AU-295 BOARD (A SIDE) 4-41 CCU-590/P/V1(E) - Page 107 : The material contained in this manual consists of information that is the property of Sony Corporation. Check the metal trim, “metallized” knobs, screws, Sony Corporation expressly prohibits the duplication of...
- Page 108 CCU-590 (UC) Printed in Japan Sony Corporation CCU-590P (CE) E 2005. 5 08 9-968-167-01 ©2005...