Nortel M7310 Quick Programming Manual
Norstar modular plus release 5
Hide thumbs
Also See for M7310:
- Quick reference manual (8 pages) ,
- Manual (7 pages) ,
- User's card (4 pages)
Table of Contents
Advertisement
Advertisement
Table of Contents

Related Manuals for Nortel M7310


Summary of Contents for Nortel M7310
- Page 1 Norstar Modular Plus Release 5 Quick Programming Guide...
- Page 2 This Nortel documentation is protected by copyright. It cannot be copied in any form or medium except pursant to the Nortel Licence to Copy Documentation (“Licence”). If a licence has been purchased, it is enclosed with this copy of Nortel documentation.
-
Page 3: Table Of Contents
Table of Contents SECTION I: GENERAL INFORMATION Getting Started ..................... 5 TELEPHONE PROGRAMMING BUTTONS PROGRAMMING OVERLAYS TELEPHONE FEATURES AND KEYS DISPLAY AND DISPLAY KEYS USING THE KEYPAD TO ENTER LETTERS CONVENTIONS To begin a programming session............... 9 BASIC PASSWORD SYSTEM ADMINISTRATOR PASSWORD SYSTEM ADMINISTRATOR PLUS PASSWORD ENDING A PROGRAMMING SESSION PROGRAMMING MAP FOR PASSWORDS... - Page 4 Ta b l e o f C o n t e n t s PROGRAMMING USING THE SYSTEM ADMINISTRATOR PLUS PASSWORD (continued) Speed Dial ......................22 SHORTCUTS PROGRAMMING A SYSTEM-WIDE SPEED DIAL CODE SELECTING A LINE FOR THE NEW SPEED DIAL CODE CHOOSING THE SPEED DIAL DISPLAY FORMAT PROGRAMMING A NAME FOR THE SPEED DIAL CODE CONFIRMING THE DIALLING RESTRICTIONS...
-
Page 5: Getting Started
S E C T I O N Getting Started TELEPHONE PROGRAMMING BUTTONS You will note that your Business Series Terminal (BST) has different icons on the keycaps than the Norstar telephones. This table shows how the icons compare between the telephones. Business Series Terminals M7000, M7100N, M7208N, Button Name... - Page 6 G e t t i n g S t a r t e d M7310 Heading Back Show Next M7324 Norstar Programming Overlay M7324N Heading Show Back Next The four keys covered by the overlay have special functions for programming features on your system.
-
Page 7: Telephone Features And Keys
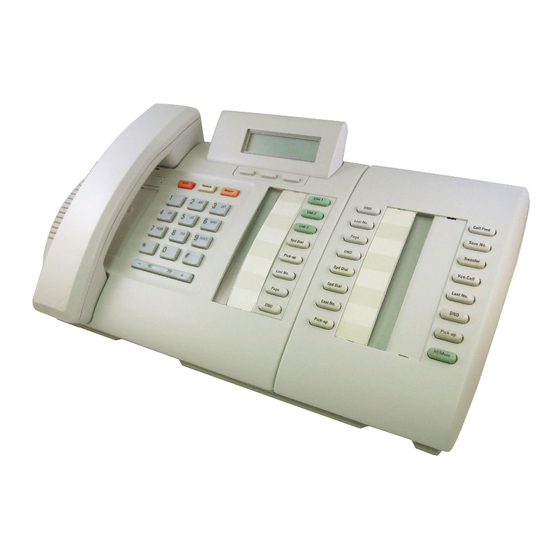
G e t t i n g S t a r t e d TELEPHONE FEATURES AND KEYS Take a few moments to look over your extension and become familiar with the key layout. Unlike the M7310N, the M7324N, T7316 and T7316 telephones do not have a shift key (5) or dual memory keys (6). -
Page 8: Display And Display Keys
G e t t i n g S t a r t e d DESCRIPTION Puts an active call on hold. Hold key ˙, ˙, ≥ Hangs up an active call or ends programming. Release key , ™ ) ® Mutes handset and microphone. -
Page 9: To Begin A Programming Session
To begin a programming session BASIC PASSWORD This allows routine programming of individual extensions. ACTION VISUAL DISPLAY 1. Place the programming overlay over the appropriate buttons on 1 Jan 1:00 am your programming telephone (refer to "PROGRAMMING OVERLAYS" on page 5). 2. -
Page 10: System Administrator Plus Password
To b e g i n a p r o g r a m m i n g s e s s i o n SYSTEM ADMINISTRATOR PLUS PASSWORD This allows access to all administration settings as well as several installer settings. ACTION VISUAL DISPLAY 1. -
Page 11: Time And Date
S E C T I O N Time and Date To adjust the time and date on the entire system, you need only adjust the clock at one extension using the Basic password. The clock, which also controls the schedules for your routing and ringing features, must be re-set after a power failure. -
Page 12: Programming Map For Time And Date
T i m e a n d D a t e ACTION VISUAL DISPLAY 13. Press Month:01 NEXT NEXT CHANGE 14. Press Month:__ CHANGE CANCL 15. Use the keypad to enter 07 for July (01 is January; 12 is Month:07 December). -
Page 13: Pickup Groups
S E C T I O N I I I Pickup Groups This feature allows you to answer calls for and from any extension in a Pickup Group. This section shows you how to assign an extension to a Pickup Group and how to answer a call from any extension within a Pickup Group. -
Page 14: Answering An Extension
P i c k u p G r o u p s ANSWERING AN EXTENSION If there is more than one incoming call at an extension in a Pickup Group, calls are answered in this sequence: 1. on an extension line, 2. -
Page 15: Line Access
S E C T I O N Line Access This section shows you both how to assign lines to individual extensions, and how to programme the number of appearances of DIA lines at each extension. LINE ASSIGNMENT With this setting, you assign physical lines and Direct Inward Access (DIA) lines to each extension. •... -
Page 16: Line Appearances
L i n e A c c e s s LINE APPEARANCES With this setting, you can programme the number of appearances a DIA line is permitted at each extension. • Line appearances rely on the previously described line-assignment setting, Ring Only, Appr&Ring or Appr. -
Page 17: Programming Map For Lines
L i n e A c c e s s PROGRAMMING MAP FOR LINES Line assignment ˆ Show, Show line Show extn# Line access ˆ Show ˆ Show ˆ Next Line Pool access ˆ Enter extension or Show, Line Pool A ˆ... -
Page 18: Restrictions
Restrictions This feature prevents users from dialling certain numbers by assigning filters (packages of pre-set restrictions) to a line or extension. Filters can be added to an extension even if that extension shares a line. You can also programme extensions to override the filters. -
Page 19: Assigning A Dialling Filter To A Line
R e s t r i c t i o n s ACTION VISUAL DISPLAY You have selected a filter. You can now add restrictions. 9. Press ≠. No restrictions 10. Press Restrn 01: 11. Press Restrn 01:•__ BKSP 12. Press ° . Restrn 01:•8 BKSP 13. -
Page 20: Assigning A Restriction Filter To An Extension
R e s t r i c t i o n s ACTION VISUAL DISPLAY 4. Enter the three-digit line number to which you want to assign Show lines: 00- restrictions. BKSP LIST For this example, we chose line 001. Line 001:Line 001 FIND 5. -
Page 21: Programming Map For Line Restrictions
R e s t r i c t i o n s ACTION VISUAL DISPLAY 4. Press ≠. Line access COPY 5. Press ‘ four times. Restrictions COPY 6. Press ≠. Restrn filters 7. Press ‘. Extn restrns 8. Press ≠. Filters 9. -
Page 22: Speed Dial
Speed Dial This Speed Dial section shows you how to programme a new Speed Dial code from start to finish, including: • Programming a system-wide Speed Dial code • Selecting a line for the Speed Dial code • Choosing the Speed Dial display format •... -
Page 23: Programming A System-Wide Speed Dial Code
S p e e d D i a l SHORTCUTS (continued) Programming a name for the Speed Dial code (NOTE: To do this, Display digits must be set to “No.” 1. Press ≠. 2. Enter the Speed Dial code for which you wish to change the name. 3. -
Page 24: Selecting A Line For The New Speed Dial Code
S p e e d D i a l SELECTING A LINE FOR THE NEW SPEED DIAL CODE ACTION VISUAL DISPLAY 1. After programming the new exchange, as explained in the 001:01912567843 previous section: CHANGE 2. Press ‘. Use prime line CHANGE 3. -
Page 25: Confirming The Dialling Restrictions
S p e e d D i a l CONFIRMING THE DIALLING RESTRICTIONS The system cannot bypass dialling restrictions already on the extension or line. This feature can either confirm existing restrictions or lift them. To change the dialling restrictions, refer to “Adjusting the Dialling restrictions.”... -
Page 26: Call Forward No Answer
Call Forward No Answer You can programme an extension to forward a call to a pre-determined extension if the call is not answered within a set number of rings. The default setting is 4, but options 2, 3, 4, 6 and 10 rings are available. If a designated extension is set on Do Not Disturb or Do Not Disturb On Busy, the incoming call continues to ring at the original extension and the caller continues to hear ringback. -
Page 27: Programming Map For Terminal Capabilities
C a l l F o r w a r d N o A n s w e r PROGRAMMING MAP FOR TERMINAL CAPABILITIES Show extn# ˆ Show Line access Enter extension or ˆ Next ˆ Next Terminals & Extns ˆ... -
Page 28: Call Forward On Busy
Call Forward on Busy You can programme your extension to forward a call to a different extension if you are engaged at your station or if you have Do Not Disturb activated. ACTION VISUAL DISPLAY 1. Begin the session by following the instructions under "To begin Terminals&Extns a programming session"... -
Page 29: Programming Map For Terminal Capabilities
C a l l F o r w a r d o n B u s y PROGRAMMING MAP FOR TERMINAL CAPABILITIES Show extn# ˆ Show Line access Enter extension or ˆ Next ˆ Next Terminals & Extns ˆ Show to go through a list of Capabilities ˆ... -
Page 30: Naming Extensions
Naming Extensions This section allows you to assign a name to each extension in your office. ACTION VISUAL DISPLAY 1. Begin the session by following the instructions under "To begin Terminals&Extns a programming session" on page 9, and by using the System Administrator Plus password. -
Page 31: Programming Map For Naming Extensions
N a m i n g E x t e n s i o n s PROGRAMMING MAP FOR NAMING EXTENSIONS Show extn# ˆ Show Line access Enter extension or ˆ Next ˆ Next Terminals & Extns ˆ Show to go through a list of Capabilities telephones. -
Page 32: Moving Extensions
Moving Extensions This feature allows you to move an extension to another socket without losing all of its custom programming or its assigned extension number. There are some things to know about this feature to ensure success: • It may take up to 60 seconds for the Central Control Unit to recognise the extension at the new location. -
Page 33: Programming Map For Setting System Settings
M o v i n g E x t e n s i o n s PROGRAMMING MAP FOR SETTING SYSTEM SETTINGS Note: ˆ symbol means ‘Press’. For example, Press Show, Press Next, or Press Heading. Hunt groups ˆ Next Backgrnd music ˆ... -
Page 34: Ringing Service
Ringing Service This service is used if you want to treat incoming calls differently during the lunch hour, in the evening or during holidays. You can set up the Ringing Service to handle calls according to any one of six different pre-programmed schedules: •... -
Page 35: Programming Map For Services
R i n g i n g S e r v i c e PROGRAMMING MAP FOR SERVICES Services ˆ Show Note: ˆ symbol means ‘Press’. For example, Press Show, Press Next, or Press Heading. Ringing groups ˆ Show, Sched:Night ˆ... -
Page 36: Programming Map (System Administrator Plus Password)
S E C T I O N Programming map (System Administrator Plus password) Line assignment ˆ Show, Show line Show extn# Line access ˆ Show ˆ Show ˆ Next Line Pool access ˆ Enter extension or Show, Line Pool A ˆ... - Page 37 P r o g r a m m i n g m a p ( S y s t e m A d m i n i s t r a t o r P l u s p a s s w o r d ) Speed dial number is displayed ˆ...
- Page 38 P r o g r a m m i n g m a p ( S y s t e m A d m i n i s t r a t o r P l u s p a s s w o r d )
- Page 39 P r o g r a m m i n g m a p ( S y s t e m A d m i n i s t r a t o r P l u s p a s s w o r d )
- Page 40 P r o g r a m m i n g m a p ( S y s t e m A d m i n i s t r a t o r P l u s p a s s w o r d )
- Page 41 P r o g r a m m i n g m a p ( S y s t e m A d m i n i s t r a t o r P l u s p a s s w o r d )
- Page 42 This Nortel documentation is protected by copyright. It cannot be copied in any form or medium except pursant to the Nortel Licence to Copy Documentation (“Licence”). If a licence has been purchased, it is enclosed with this copy of Nortel documentation.