
Related Manuals for Jensen JiMS-190


Summary of Contents for Jensen JiMS-190
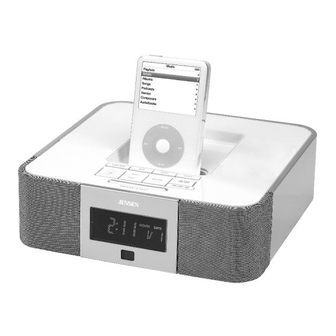
- Page 1 ® DOCKING DIGITAL MUSIC SYSTEM FOR iPod OWNER'S MANUAL JiMS-190 ® (iPod Not Included) PLEASE READ THIS OPERATING MANUAL COMPLETELY BEFORE OPERATING THIS UNIT AND RETAIN THIS BOOKLET FOR FUTURE REFERENCE...
-
Page 3: Table Of Contents
DEAR JENSEN CUSTOMER ® IMPORTANT SAFETY INSTRUCTIONS COMPLIANCE WITH FCC REGULATIONS PRODUCT FEATURES INSTALLATION LOCATION OF CONTROLS RADIO OPERATIONS iPod DOCKING ® AUXILIARY INPUT CLOCK AND CALENDAR SETTINGS ALARM OPERATIONS CARE AND MAINTENANCE TROUBLESHOOTING GUIDE SPECIFICATIONS SERVICE "Made for iPod" means that an electronic accessory has been designed to connect specifically to iPod and has been certified by the developer to meet Apple performance standards. -
Page 4: Dear Jensen Customer
Model Number: JiMS-190 IMPORTANT SAFETY INSTRUCTIONS When used in the directed manner, this unit has been designed and manufactured to ensure your personal safety. -
Page 5: Compliance With Fcc Regulations
IMPORTANT SAFETY INSTRUCTIONS 7.Object and Liquid Entry Care should be taken so that objects do not fall and liquids are not spilled into any openings or vents located on the product. 8.Attachments Do not use attachments no recommended by the product manufacturer. 9.Lightning and Power Surge Protection Unplug the unit from the wall outlet and disconnect the periods of time. -
Page 6: Product Features
PRODUCT FEATURES JiMS-190 is an iPod Docking Music System which incorporates the following features: ® ® ® - iPod , iPod mini, iPod classic, iPod touch and iPod nano Player / Recharger - Audio Line-in for Connecting CD Player or Other Digital Audio Player... -
Page 7: Location Of Controls
Main Unit Top view 5 10 Front view 1.iPod Dock ® 2.iPod Docking Connector ® 3.POWER On/Off Button To turn the unit on or off 4.VOLUME +/- Buttons Adjust the volume level up or down 5.SNOOZE/LIGHT Button Activate the snooze function; Turn the LCD backlight on or off 6.TUN +/- /iPod Buttons Forward/Backward Buttons... - Page 8 Remote Control RECORD RECORD LOCATION OF CONTROLS 1.Infra-red Transmitter 2.POWER On/Off Button 3.VOL +/- Button 4.FUNCTION Button 5.ALARM On/Off Button 6.SNOOZE/LIGHT Button 7.TUN Up/Down Buttons for Down, 8.CH +/- Buttons 9.MEM Button 10.MODE Button 11.SLEEP Button 12.iPod Skip/Search Forward/Backward Buttons ®...
-
Page 9: Radio Operations
FM Antenna Connect the detachable FM Antenna Wire to the FM Antenna Terminal as instructed in the section “INSTALLATION”. Fully extend the FM Antenna Wire for the maximum reception. Radio Tuning 1.Press the POWER button to turn on the unit. 2.Press the FUNCTION button repeatedly until “AM”... -
Page 10: Ipod Docking
If the docking port will not be used for an extended period of time, it is recommended to cover the docking port by using the “Dock Cover” insert (included). 1.Use the iPod adaptor included in your iPod and insert it into the docking area. Your iPod can now be inserted into the docking port by placing the connector on the bottom of the iPod onto the connector in the docking bay. -
Page 11: Auxiliary Input
The auxiliary input cable and plug are built in the unit and allows users to connect their CD player, MP3 player or other digital audio players to the unit. 1.Keep turning the Cord Retracting Wheel, located at the rear of the unit, to the right and pull out the AUX IN Cable located next to the wheel. -
Page 12: Clock And Calendar Settings
CLOCK AND CALENDAR SETTINGS The clock and calendar can be set in Power Off mode. Clock Setting 1.Press the MODE button 3 times, the clock starts to flash. 2.Press the TUN +/- button to set the hour. 3.Press the VOL +/- button to set the minute. 4.Press the MEM button to confirm the settings. -
Page 13: Alarm Operations
Setting the Alarm Time When the unit is in Power Off mode: 1.Press the MODE button once. The alarm clock display flashes now. 2.Press the TUN +/- button to set the alarm hour and VOL +/- button to set the alarm minute. 3.Press the MODE button again. -
Page 14: Care And Maintenance
- Do not subject the unit to excessive force, shock, dust or extreme temperature. - Do not tamper the internal components of the unit. - Clean your unit with a damp (never wet) cloth. Solvent or detergent should never be used. - Avoid leaving your unit in direct sunlight or in hot, humid or dusty places. -
Page 15: Troubleshooting Guide
TROUBLESHOOTING GUIDE Symptom Possible Problem AC Adaptor is not plugged into a wall outlet or the connector is not The unit does plugged into the power supply jack not respond (no power) on the back of the unit. Wall outlet is not functioning. Using no/wrong iPod Adaptor ®... -
Page 16: Specifications
Power Supply Power Adaptor (included) Battery Back-up for Clock Remote Control Frequency Range USA's Radio Broadcast System EU's Radio Broadcast System Japan's Radio Broadcast System Please refer to the instructions on the enclosed warranty card for returning your unit for service. When returning the unit, please remove batteries to prevent damage to the unit in transit and/or from possible leakage.