Table of Contents

Related Manuals for Jensen JiMS-185i


Summary of Contents for Jensen JiMS-185i
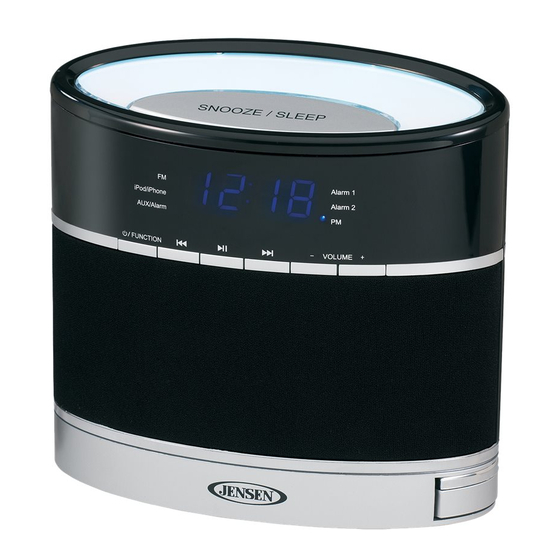
- Page 1 Docking Digital Music System With Night Light For iPod and iPhone USER MANUAL JiMS-185i (iPod/iPhone Not Included) PLEASE READ THIS USER MANUAL COMPLETELY BEFORE OPERATING THIS UNIT AND RETAIN THIS BOOKLET FOR FUTURE REFERENCE.
-
Page 2: Dear Jensen® Customer
The serial number of this product is found on its bottom cover. You should note the serial number of this unit in the space provided as a permanent record of your purchase to aid in identification in the event of theft of loss. Model Number: JiMS-185i Serial Number:... - Page 3 IMPORTANT SAFETY INSTRUCTIONS When used in the directed manner, this unit has been designed and manufactured to ensure your personal safety. However, improper use can result in potential electrical shock or fire hazards. Please read all safety and operating instructions carefully before installation and use, and keep these instructions handy for future reference.
-
Page 4: Compliance With Fcc Regulations
COMPLIANCE WITH FCC REGULATIONS This device complies with Part 15 of the FCC Rules. Operation is subject to the following two conditions: (1) this device may not cause harmful interference, and (2) this device must accept any interference received, including interference that may cause undesired operation. -
Page 5: Product Features
PRODUCT FEATURES The Unit is an iPod/iPhone Docking Music System that incorporates the following features: x Play and Charge Your iPod nano, iPod touch, iPod classic, iPod video and iPhone x Auxiliary Input Jack x FM digital tuner with 10 presets x Time synchronization x Digital Volume Control x Sleep timer function... -
Page 6: Location Of Controls
LOCATION OF CONTROLS MAIN UNIT AUX/Alarm... - Page 7 DC 5V 2A PRESS 1.Snooze/Sleep Button 12. SKIP/Fast Backward Button 2.FM indicator 13. Standby /Function Button 3.iPod/iPhone indicator 14. Light On/Off Button 4.Aux/Alarm indicator 15. Reset Button 5.Alarm 1 indicator 16. Preset/ Time set Button 6.Alarm 2 indicator 17. ALARM 2 7.PM indicator 18.
- Page 8 REMOTE CONTROL FUNCTION TIME SET SNOOZE DIMMER ALARM1 SLEEP REPEAT ALARM2 PRESET ENTER MENU 1.Standby Button 11.iPod Repeat Button 2.Time set Button 12.Sleep Button 3.ALARM 1 Button 13.Preset Button 4.ALARM 2 Button 14.iPod Menu Up Button 5.SKIP/Fast Backward Button 15.SKIP/Fast Forward Button 6.iPod Menu Button 16.iPod Enter Button...
-
Page 9: Getting Started
GETTING STARTED ACCESSORIES INCLUDED Carefully remove the unit and all accessories from the display carton. Please verify that you have all the following accessories if you are recycling the gift box. x User Manual x AC Adaptor Input:AC100-240V 50/60Hz Output:DC5V 2000mA, center-positive x Remote control POWER SOURCE This unit operates on an external AC adaptor rated at DC5V 2000mA (included) - Page 10 CAUTIONS: The AC Adaptor Plug will only fit into matching AC outlets. This is a safety feature to reduce the possibility of electric shock. If the plug will not fit in your AC outlets, you should have the outlet changed by a qualified, licensed electrician.
-
Page 11: Setting The Time
BATTERY CARE x If the unit is not used for an extended period of time, remove the battery. An old or leaking battery can cause damage to the unit and may void the warranty. x Do not dispose batteries in fire. Batteries may leak or explode. x Do not try to recharge batteries that are not intended to be recharged;... -
Page 12: Setting The Current Time Manually
SETTING THE CURRENT TIME MANUALLY 1. With the unit in standby mode, press and hold the PRESET/TIME SET button on the main unit or press the TIME SET button on remote control until “12Hr” is blinking on the LED Display. 2. -
Page 13: Radio Operation
Press the ALARM 1 button on main unit or remote control to confirm, Press buttons on main unit or remote control to set the wake up volume level. Press the ALARM 1 button on main unit or remote control button to confirm. 8. - Page 14 3. To manually tune to a weaker station that may have been skipped during the automatic tuning, tap buttons on main unit or remote control repeatedly until the station is properly tuned. The frequency readout will revert to the current time after about 5 seconds. 4.
-
Page 15: Listening To Your Ipod/Iphone
LISTENING TO YOUR iPod/iPhone CHARGING YOUR iPod OR iPhone This unit plays and charges various iPod and iPhone models in all modes using the 30-pin docking connector. Even if the unit is in standby mode, once your iPod or iPhone is properly docked, the charging process will start automatically. -
Page 16: Auxiliary Input
AUXILIARY INPUT This unit provides an auxiliary audio signal input jack for connecting external audio devices like MP3 players, CD players and older, non-dockable iPods (except iPod shuffle 3 generation) and listen to your external source through the speakers of this system. 1. -
Page 17: Care And Maintenance
DIMMER Press the DIMMER button to adjust the LED Display intensity from High/Mid/Low to obtain the best clarity of LED Display readout. RESETTING If the system does not respond or has erratic or intermittent operation, you have experienced an electrostatic discharge (ESD) or a power surge that triggered the internal microcontroller to shut down automatically. -
Page 18: Troubleshooting Guide
TROUBLESHOOTING GUIDE Symptom Possible Problem Solution AC Adaptor is not plugged into a wall outlet or the Plug the AC adaptor into a wall outlet and plug the The unit does not connector is not plugged into connector into the supply jack on the unit. respond (no the power supply jack on the power). -
Page 19: Specifications
SPECIFICATIONS Power Requirement AC-DC adaptor: Input: AC 120V, 60Hz Main unit: DC input: DC5V/ 2000mA Remote Control: 1 x 3V CR2025 Lithium Battery Frequency 87.5-108MHz “Made for iPod” and “Made for iPhone” mean that an electronic accessory has been designed to connect specifically to iPod and iPhone, respectively, and has been certified by the developer to meet Apple performance standards. - Page 20 90 DAY LIMITED WARRANTY AND SERVICE VALID IN THE U.S.A . ONLY SPECTRA MERCHANDISING INTERNATIONAL, INC. warrants this unit to be free from defective materials or factory workmanship for a period of 90 days from the date of original customer purchase and provided the product is utilized within the U.S.A. This warranty is not assignable or transferable.