Table of Contents

Related Manuals for Jensen JIMS-260I


Summary of Contents for Jensen JIMS-260I
- Page 1 WALL MOUNTABLE DOCKING MUSIC SYSTEM WITH CD FOR iPod and iPhone USER MANUAL JiMS-260i (iPod/iPhone Not Included) PLEASE READ THIS USER MANUAL COMPLETELY BEFORE OPERATING THIS UNIT AND RETAIN THIS BOOKLET FOR FUTURE REFERENCE.
-
Page 2: Dear Jensen® Customer
The serial number of this product is found on its back cover. You should note the serial number of this unit in the space provided as a permanent record of your purchase to aid in identification in the event of theft of loss. Model Number: JiMS-260i Serial Number:... -
Page 3: Important Safety Instructions
IMPORTANT SAFETY INSTRUCTIONS When used in the directed manner, this unit has been designed and manufactured to ensure your personal safety. However, improper use can result in potential electrical shock or fire hazards. Please read all safety and operating instructions carefully before installation and use, and keep these instructions handy for future reference. - Page 4 CAUTION CAUTION CLASS 1 LASER PRODUCT CAUTION CLASS 1 LASER PRODUCT INVISIBLE LASER RADIATION APPAREIL LASER DE CLASSE 1 WHEN OPEN AND INTERLOCKS PRODUCTO LASER DE CLASE 1 DEFEATED AVOID EXPOSURE TO BEAM. This product contains a low power laser device. This product complies with DHHS Rule 21 Subchapter J at date of manufacture.
-
Page 5: Compliance With Fcc Regulations
PRECAUTION FOR USE • UNPACK ALL PARTS AND REMOVE PROTECTIVE MATERIAL. • DO NOT CONNECT THE UNIT TO THE MAINS BEFORE CHECKING THE MAINS VOLTAGE AND ALL OTHER CONNECTIONS HAVE BEEN MADE. • DO NOT COVER ANY VENTS AND MAKE SURE THAT THERE IS A SPACE OF SEVERAL CENTIMETERS AROUND THE UNIT FOR VENTILATION. -
Page 6: Protect Your Furniture
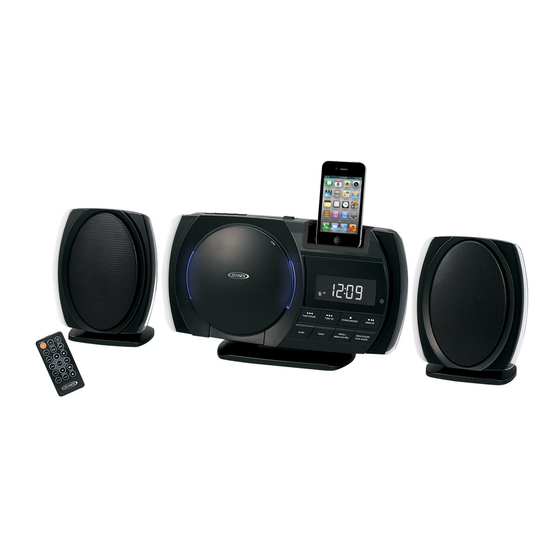
'feet' before you place the product on fine wooden furniture. PRODUCT FEATURES The JiMS-260i is an iPod/iPhone Docking Music System with incorporates the following features: Player / Charger for iPod nano, iPod touch, iPod classic, iPod video and •... -
Page 7: Installation
INSTALLATION FOR TABLE TOP USE Attach the stand to the main unit as shown in figure 1a below. Attach the stands to the speakers as shown in figure 1b below. Fig. 1a Fig.1b FOR WALL MOUNTING 1) Detach the stands from both speakers and from the main unit. -
Page 8: Location Of Controls
LOCATION OF CONTROLS Main Unit 1. Function Selection Button 2. Volume+ Button 3. Volume- Button 4. Power On/Standby Button 5. Left Speaker 6. CD Door 7. Sleep Button 8. Timer Button 9. CD Program; FM Station Memory Set; Clock Adjust Button 10. - Page 9 Remote Control Infra-red Transmitter Power On/Standby Button Function Selection Button iPod Menu Button CD/iPod Skip/Search Backward Button; FM Radio Tuning- ; Clock/Timer adjust down iPod Enter Button Timer Button Sleep Button CD Program; FM Station Memory Set; Clock adjust Button Battery Compartment Volume+/- Buttons CD/iPod Skip Search Forward...
-
Page 10: Getting Started
GETTING STARTED SPEAKER CONNECTION Unpack the unit carefully. The speaker wires are already attached to main unit. Handle with care to avoid damaging the wires. Place the left speaker on the left side of the main unit and place the right speaker on the right side of the main unit. ANTENNA CONNECTION FM: Untie and fully extend the FM Antenna wire for best reception. -
Page 11: Clock Setting
NOTE: Only use a well-known brand of cell battery to ensure the longest life and best performance. BATTERY CARE If the unit is not used for an extended period of time, remove the battery. An old or leaking battery can cause damage to the unit and may void the warranty. Do not dispose batteries in fire. - Page 12 3.) To automatically search for stations with strong signals, press and hold either button until the frequency read out on display begins to scan then release the button. The tuner will stop on the first strong station signal it finds. 4.) Adjust the sound level by pressing the VOLUME buttons.
-
Page 13: Listening To Ipod/Iphone
LISTENING TO iPod/iPhone CONNECTING If the docking port will not be used for an extended period of time, it is recommended to cover the docking port by using the “Dock Cover (included)”. 1.) Use the iPod adapter included with your iPod and insert it into the docking area. -
Page 14: Video Out From The Ipod/Iphone
VIDEO OUT FROM THE iPod/iPhone 1. You can connect this unit to a television or other video display that has a composite video input. 2. Securely dock your iPhone or iPod with video. 3. Connect one end of an RCA cable (not included) to rear RCA video jack on the unit. - Page 15 Normal Playback After loading the disc, the disc will begin spinning and the total number of the tracks on the disc will be shown on the display for a while. Then the CD Player will automatically play the CD start from the first track and the display will show the playback time of the current track.
-
Page 16: Sleep Timer
Programmed CD Playback The CD player can be programmed to play any sequence of up to 20 tracks. In CD mode, 1. Load a compact disc into the CD compartment. 2. After load the disc, press the STOP button before starting the programming. 3. -
Page 17: Auxiliary Input
Press the TIMER button to confirm, wake up source flashing. Press the button to select a source you want to wake 6). Press the TIMER button to confirm, Press the buttons to set the wake volume level. 7). Press TIMER button to confirm, Note: When “Wake to Radio”... -
Page 18: Care And Maintenance
4. To select auxiliary audio input, press the FUNCTION button to select “AUX” mode. 5. The volume level can now be controlled through the main unit. Operate all other functions on the auxiliary device as usual. Note: (1) If the Line Out Jack of your external device is connected, then you only need to adjust the volume control of this system. - Page 19 When cleaning the disc, wipe in straight lines from the center of the disc to the edge • of the disc. Never wipe in circular motions. To remove a disc from its storage case, press down on the center of the case and lift •...
-
Page 20: Troubleshooting Guide
TROUBLESHOOTING GUIDE Symptom Possible Problem Solution AC Adaptor is not plugged into a wall outlet or the Plug the AC adaptor into a wall outlet and plug the The unit does not connector is not plugged into connector into the supply jack on the unit. the power supply jack on the respond (no power). -
Page 21: Specifications
SPECIFICATIONS Power Requirement Main Unit AC-DC adaptor Input: AC 120V~ 60Hz Output: DC10V / 2000mA Remote Control 1 x 3V CR2025 Lithium Battery Frequency Range Radio FM 87.5 - 108 MHz, 0.1 MHz tuning step “Made for iPod” and “Made for iPhone” mean that an electronic accessory has been designed to connect specifically to iPod and iPhone, respectively, and has been certified by the developer to meet Apple performance standards. - Page 22 90 DAY LIMITED WARRANTY AND SERVICE VALID IN THE U.S.A ONLY SPECTRA MERCHANDISING INTERNATIONAL, INC. warrants this unit to be free from defective materials or factory workmanship for a period of 90 days from the date of original customer purchase and provided the product is utilized within the U.S.A. This warranty is not assignable or transferable.