
Related Manuals for Precor TRM 211


Summary of Contents for Precor TRM 211
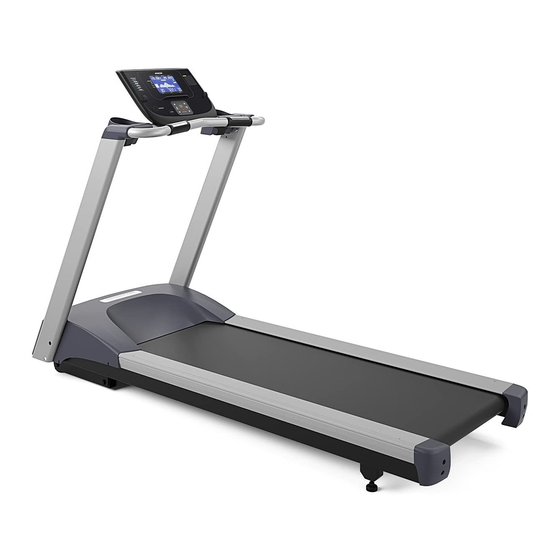
- Page 1 Quick Start Card ENERGY SERIES ™ TRM 211 TREADMILL WELCOME TO A PERSONALIZED FITNESS EXPERIENCE FOR YOUR HOME...
- Page 2 ENERGY SERIES 211 TREADMILL As you get to know your new Precor treadmill and your own fitness WarnInG: Read through ALL of the safety information in the goals, you’ll use the advanced features of the treadmill more often.
- Page 3 When these steps are complete, you are ready to view When these steps are complete, you are ready to view with fitness workouts from the Precor web site When these steps are complete, you are ready to view High...
- Page 4 O W N E R ’ S M A N U A L Energy Series ™ T R M 2 1 1 T R E A D M I L L WELCOME TO A PERSONALIZED FITNESS EXPERIENCE FOR YOUR HOME...
-
Page 6: Important Safety Instructions
Important Safety Read all instructions in this guide before installing and using the equipment and follow any labels on Instructions the equipment. Make sure all users see a physician for a complete physical examination before they begin any fitness Read the following precautions thoroughly before program. - Page 7 TRM 211 Owner's Manual Use care when getting on or off the treadmill. Before the running belt begins moving (before your Always grasp the handrail when stepping on the workout), and after it stops (at the end of your...
- Page 8 Make sure all users wear proper exercise clothing Route power cables so that they are not walked on, and shoes for their workouts and avoid loose or pinched, or damaged by items placed upon or dangling clothing. Users should not wear shoes against them, including the equipment itself.
-
Page 9: Safety Approval
Do not use accessory CAN/CSA-E-335-1/3-04, EN 60335-1: 2002 Safety of attachments that are not recommended by Precor. Household and Similar Electrical Appliances. Such attachments may cause injuries. Do not operate the equipment where aerosol ... -
Page 10: Grounding Instructions
Precor Commercial Products Customer Support for local codes and ordinances. Failure to properly ground information regarding battery removal (refer to the treadmill could void the Precor Limited Warranty. Obtaining Service). DANGER Improper connection of the equipment-grounding conductor can result in a risk of electric shock. -
Page 11: Product Recycling And Disposal
TRM 211 Owner's Manual Product Recycling and In accordance with the European WEEE Directive, electrical and electronic equipment (EEE) is to be Disposal collected separately and to be reused, recycled, or recovered at end of life. Users of EEE with the WEEE... -
Page 12: Regulatory Notices For Cardiovascular Exercise Equipment
The treadmill Equipment generates, uses, and can radiate radio frequency Precor equipment has been tested and found to energy and, if not installed and used in accordance comply with the following applicable safety standards. with the owner’s manual instructions, may cause harmful interference to radio communications. -
Page 13: 120 V Treadmills
Le présent appareil numérique n’émet pas de bruits Precor Limited Warranty. If an appropriate cord for your radioélectriques dépassant les limites applicables aux location was not included with your treadmill, please appareils numériques de la class B prescrites dans le... -
Page 14: Obtaining Service
Refer treadmill does not contain any user-serviceable parts to the following figure. that require lubrication. For information about product operation or service, see the Precor web site at Model #: _______ Serial #: ______________________ www.precor.com. -
Page 15: Table Of Contents
TRM 211 Owner's Manual Table of Contents Heart Rate Features ......... 15 Important Use and Safety Information .... 15 Using the Touch-Sensitive Heart Rate Important Safety Instructions ......1 Grips ..............17 Using SmartRate ............ 19 Safety Precautions ........... 1 Heart Rate Analysis .......... - Page 16 Hill Climb Program ..........37 Adjusting the Running Belt ....... 49 Walk Program ............37 Long-Term Storage ..........50 Fun Run Program ..........38 Precor Residential Equipment Limited Advanced Programming and Warranty ........... 51 Troubleshooting ........39 Advanced Programming Tips ......39 Selecting a U.S.
-
Page 17: Treadmill Safety Features
TRM 211 Owner's Manual Treadmill Safety Note: If the safety power switch trips, the treadmill does not retain your workout statistics. Features To resume exercising, take the following steps: If needed, reattach the safety clip to your clothing The treadmill is equipped with certain items that, when and the magnetic safety key onto the display used properly, help sustain an enjoyable workout. -
Page 18: Using The Handrails
Using the Handrails 4. Hold onto a handrail while you step on to the running belt with the speed at or below 1 mph (1.6 To maintain your balance, always grasp a handrail kph). when you step on or off the treadmill, and when you use the keypad. -
Page 19: Turning The Unit On And Off
TRM 211 Owner's Manual Turning the Unit On and Off Using the Reset Switch To turn the unit On and Off, use the power switch The treadmill contains a circuit breaker that trips if it located at the front of the unit, near the power cord detects overload conditions. -
Page 20: Heart Rate Features
Heart Rate Features Important Use and Safety Information Read the following before using the heart rate or SmartRate features. CAUTION: Before beginning any fitness program, see your physician for a thorough physical examination. Seek advice from your physician to learn the target heart rate appropriate for your fitness level. - Page 21 TRM 211 Owner's Manual The calculation used for the heart rate target zone Always face forward on the treadmill and use the is (220 minus your age) multiplied by a percent handrail for balance. Keep upper body movement and is controlled by the user increasing or to a minimum.
-
Page 22: Using The Touch-Sensitive Heart Rate Grips
Using the Touch-Sensitive Important: Enter your age when the treadmill prompts you. If you do not, the information on the SmartRate Heart Rate Grips display will not be accurate. The treadmill console incorporates a heart rate The touch-sensitive grips are located on the treadmill’s receiver so that you can monitor your heart rate while handlebars, as shown in the following figure. - Page 23 TRM 211 Owner's Manual To ensure a more accurate heart rate readout, follow As you work out, your perspiration will help these tips: transmit your heart rate signal. If you have difficulty using the touch-sensitive grips to Grip the sensors with both hands.
-
Page 24: Using Smartrate
Using SmartRate Table 1. Heart rate target zones and SmartRate LEDs The SmartRate feature helps you monitor and maintain Heart Rate Zone SmartRate Blinking Target your heart rate in the target zone best suited to your Percent Bars Lit Zone specific needs. -
Page 25: Heart Rate Analysis
TRM 211 Owner's Manual Heart Rate Analysis The SmartRate indicator lights do not appear when: Every time you complete a program using the You use the QUICKSTART button to start your touch-sensitive heart rate grips, your average heart workout. -
Page 26: Display Console
Display Console SMARTRATE DISPLAY: Blinking horizontal bars appear when the SmartRate feature is activated. Use the SmartRate display to monitor your heart rate and maintain it in your target zone (refer to Using The following diagram and table describe the main SmartRate). - Page 27 TRM 211 Owner's Manual QUICKSTART: Press QUICKSTART to start your STOP: A firm tap on the red STOP key slows the workout immediately using the Manual Program (refer running belt to a stop and the treadmill enters pause to Choosing QUICKSTART).
-
Page 28: More Information About The Center Display
More Information about the As you continue your exercise session, a blinking column indicates your position in the program. If the Center Display profile is only one row in height, then markers ( appear occasionally and provide a sense of movement The center display shows the program profile and through the program. -
Page 29: More Information About The Workout Statistics And The Lower Display
TRM 211 Owner's Manual More Information about the Upper Display Workout Statistics: HEART RATE, CALORIES, DISTANCE, and TIME Workout Statistics and the HEART RATE—Your heart rate appears in the HEART Lower Display RATE display if you are using the touch-sensitive heart rate grips (refer to Heart Rate Features). - Page 30 Lower Display Workout Statistics: SPEED—Displays the running belt speed in miles per hour (mph) or kilometers per hour (kph). The running INCLINE, PACE, and SPEED belt speed ranges from 0.5 and 12 mph (0.8 to 20 kph) INCLINE—Displays the percentage of incline during and can be changed in 0.1 increments using the SPEED your workout.
-
Page 31: Workout Options
TRM 211 Owner's Manual Workout Options If you want … Then press ... To start exercising QUICKSTART (refer to immediately Choosing QUICKSTART) CAUTION: Before beginning any fitness program, see your To select your workout PROGRAMS (refer to physician for a complete physical examination. Know your... -
Page 32: Choosing Quickstart
Choosing QUICKSTART QUICKSTART applies the following defaults: Prompts Default Value Program Manual Time Unlimited Weight 150 lb (68 kg) 2. Hold onto a handrail and straddle the running belt. BELT STARTING scrolls across the display. A 3-second countdown appears in the upper display, and then the running belt starts moving. -
Page 33: Selecting A Program
TRM 211 Owner's Manual Selecting a Program 3. Continue through the setup phase and enter your weight (23—350 lbs/10—159 kg) and then your age (10—99). Note: To change a value (program, weight, or age) that you have already entered press STOP/HOLD TO RESET or wait 30 seconds to return to the banner. -
Page 34: Cooling Down After A Workout
Cooling Down After a Workout To prematurely end the cool-down period, do the following: Incorporate a cool-down period into your workout to help lower your heart rate and minimize muscle Grasp a handrail with one hand. stiffness or soreness. 2. Press the red Stop key with your other hand. The treadmill enters pause mode. -
Page 35: Pausing During A Workout Or The Cool-Down Period
TRM 211 Owner's Manual Pausing During a Workout or Ending a Workout the Cool-Down Period CAUTION: Hold on to a handrail when you near the end of your exercise session. The incline automatically Press the red Stop key to pause anytime during a recalibrates to a 0% grade. - Page 36 If you choose to exercise with no set time limit, you 3. Press the red STOP key again to view the workout must manually end a program by pressing the red summary. STOP key. You can also press the SPEED down arrow 4.
-
Page 37: Programs
Your heart rate should never exceed 85% of your have established goals. The Precor web site maximum aerobic heart rate. Your maximum heart rate is (www.precor.com) can give you many ideas about equal to 220 minus your age. -
Page 38: Program Tips
If your level of exertion becomes too great, reduce your pace or change the incline using the SPEED or Begin at the Precor banner (refer to Workout INCLINE arrow keys to override each upcoming Options). column in the program profile. -
Page 39: Manual Program
TRM 211 Owner's Manual Manual Program Note: An exception to the cool-down period exists (refer to Advanced Programming and Troubleshooting). To use the SmartRate feature, you need to specify your age during the setup prompts. The Manual Program profile, available by pressing the MANUAL key, begins as a flat line. -
Page 40: Weight Loss Program
Weight Loss Program During the Weight Loss Program, your heart rate should be in the FatBurn range, between 55% and 70% of your maximum aerobic heart rate. Set a comfortable pace and adjust the speed and incline to meet the target range (refer to Heart Rate Features). -
Page 41: Interval Program
TRM 211 Owner's Manual Interval Program When you begin the program, the incline is preset. You can change the incline levels using the INCLINE arrow keys, as shown in the following figure. The settings are repeated throughout the program. The Interval Program is among the best for conditioning your cardiovascular system. -
Page 42: Hill Climb Program
Hill Climb Program Walk Program The Hill Climb Program is great for endurance building. The Walk Program is a great cardio-conditioning The program uses the full range of incline (0% to program for both beginners and serious walkers. The 15%). You can change the speed or override incline is preprogrammed. -
Page 43: Fun Run Program
TRM 211 Owner's Manual Fun Run Program The running belt’s speed is completely under your control. Adjust the speed using the SPEED arrow keys. The TIME display shows the amount of time you have been exercising. For comparison purposes, record your time to note the changes as you increase your fitness and endurance levels. -
Page 44: Advanced Programming And Troubleshooting
Advanced Advanced Programming Tips You have a 2-second window to access diagnostics Programming and mode. During this 2-second period, you need to press the appropriate keys quickly and without Troubleshooting pause. Exit the diagnostics mode by pressing the STOP/HOLD TO RESET key for two or more Certain features remain hidden and can only be seconds. -
Page 45: Selecting A U.s. Standard Or Metric Display
TRM 211 Owner's Manual Selecting a U.S. Standard or 4. If you press ENTER, the current unit of measure (US STANDARD or METRIC) appears in the Metric Display display. The treadmill can display measurements in either Any arrow key lets you alternate between the METRIC or U.S. -
Page 46: Informational Displays
In general, you would only access this DISTANCE display. The furthest digit on the left information if directed to do so by Precor Customer marks the hundred-thousandths position, while the Support. furthest digit to the right indicates tenths of a mile These instructions guide you through the informational or kilometer. -
Page 47: Red Reset Button
4. Push the red reset button, and then turn the treadmill On. A red button, near the power switch, resets the 5. Check the display to verify that the Precor banner treadmill’s circuit breaker. If the running belt stops is scrolling across the display. If the display unexpectedly and all display console functions cease, remains blank, call Precor customer support. -
Page 48: Troubleshooting Error Codes
For information about product operation or service, see the Precor web site at www.precor.com. For future reference, write the model, serial number, and date of purchase for your unit in the space provided. The serial number is printed on a label located on the front panel, near the power cord (refer to Obtaining Service). -
Page 49: Troubleshooting Heart Rate Issues
TRM 211 Owner's Manual Troubleshooting Heart Rate Note: To conduct electrical impulses from a user’s heart, the sensors in the touch-sensitive grips must be Issues in contact with the user’s skin. Usually, the concentration of salts in a person’s perspiration... -
Page 50: Maintenance
Look and listen for slipping belts, loose fasteners, described in this section. Failure to maintain the unusual noises, worn or frayed power cords, and treadmill as described here could void the Precor any other indications that the equipment may be in Limited Warranty. -
Page 51: Cleaning The Equipment
(refer to Obtaining Service). CAUTION: Do not use any acidic cleaners. Doing so will weaken the paint or powder coatings and void the Precor Limited Warranty. Never pour water or spray liquids on any part of the treadmill. Allow the treadmill to dry completely before using. -
Page 52: Storing The Chest Strap
Do not store it in a place that may be exposed to Precor web site at www.precor.com. For future reference, temperatures below 32° F (0° C). write the model, serial number, and date of purchase for your unit in the space provided. - Page 53 (refer to Adjusting the Running Belt). Important: Failure to align the belt may cause the belt to tear or fray, which is not covered by the Precor Limited Warranty. 6. To stop the running belt, press the red STOP key.
-
Page 54: Adjusting The Running Belt
For information about product operation or service, see the Precor web site at www.precor.com. For future reference, write the model, serial number, and date of purchase for your unit in the space provided. The serial number is printed on a label located on the front panel, near the power cord (refer to Obtaining Service). -
Page 55: Long-Term Storage
TRM 211 Owner's Manual Long-Term Storage To determine left and right, stand at the rear of the treadmill and face the display. Make all belt When the treadmill is not in use for any length of time, adjustments on the right rear corner bolt using the turn it Off. -
Page 56: Precor Residential Equipment Limited Warranty
To make claim under warranty, the buyer must notify EFX® 447, 425, 423, 245, 225, 222, and 221 Precor or their authorized Precor dealer within 30 days after the For Treadmills: date of discovery of any nonconformity and make the affected ... - Page 57 Except in Canada, Precor does not pay labor outside the and delivery, they have a 90-day parts and labor limited warranty. All components that are not internally connected United States.
- Page 58 Disclaimer and Release The warranties provided herein are the exclusive warranties Software version upgrades. given by Precor and supersede any prior, contrary or additional Cosmetic items, including, but not limited to the following: representations, whether oral or written. ANY IMPLIED...
- Page 59 Exclusion of Consequential and Incidental For any product described above that fails to conform to its Damages warranty, Precor will provide, at their option, one of the PRECOR AND/OR ITS SUPPLIERS SHALL HAVE NO following: (1) repair; (2) replacement; or (3) refund of the OBLIGATION OR LIABILITY, WHETHER ARISING IN purchase price.
- Page 60 Notes: Notes...
- Page 61 TRM 211 Owner's Manual Notes:...
- Page 62 TRM 211 Low Impact Treadmill Product Specifications Electronic Readouts Length: 81 in (206 cm) Calories Program Profile Width: 32 in (80 cm) Distance SmartRate Zone* Height: 54 in (137 in) Heart Rate* Speed Weight: 227 lb (103 kg) Incline Time Elapsed...
- Page 63 Precor considers the unauthorized appropriation TRM 211 Owner’s Manual Woodinville, WA USA 98072-4002 of its proprietary rights to be a very serious matter. Precor will vigorously 303207-111 rev B, en 1-800-347-4404 pursue all unauthorized appropriation of its proprietary rights.
- Page 64 Assembly Guide ENERGY SERIES TREADMILLS MODEL: 211 WELCOME TO A PERSONALIZED FITNESS EXPERIENCE FOR YOUR HOME...
- Page 66 Table of Contents Getting Started ....................2 Obtaining Service ........................ 2 Installation Requirements ....................2 Unpacking the Equipment ....................3 Required Tools ........................3 Hardware Kit (not to scale) ....................3 Assembling the Treadmill ................... 5 Assembling the Frame ....................... 6 Attaching the Handrail Assembly ...................
-
Page 67: Getting Started
Check the ON/OFF power switch on the front of the tasks as described in the owner’s manual. For more information regarding treadmill. Place the switch in the O (OFF) position. customer support numbers or a list of Precor authorized service dealers, visit the Precor web site at www.precor.com. ... -
Page 68: Unpacking The Equipment
Ask for help from two or more people to unpack and hardware components shown in the following table. Before you begin assembly, assemble the treadmill. If any items are missing, contact your dealer. make sure that your hardware kit is complete. If not, please contact Precor Customer Support. WARNING Do not attempt to move the equipment by yourself. - Page 69 Treadmill 211 Assembly Guide Other Components Two water bottle holders 6 mm T-handle hex wrench Stop key and clip...
-
Page 70: Assembling The Treadmill
Assembling the Treadmill The following figure shows the names used in this manual for the major components of the equipment. CAUTION: The location of the On/Off switch is beneath the cutout on the base frame. Make sure the power switch is in the Off position. Make sure the power cord is disconnected from its power source. -
Page 71: Assembling The Frame
Important: Do not force the fasteners into place and do not tighten them completely until instructed to do so. If the head of the fastener is not flush with the head of the product, contact Customer Support at www.precor.com. To assembly the frame: Unwind the wire tie from the base of the left upright support and feed it through the large hole. - Page 72 5. The upright support attaches to the base frame side bracket using two 6. Repeat this procedure to attach the right upright support. Partially tighten the M8 x 15 mm socket head screws and 8.4 mm washers. To secure the fasteners.
-
Page 73: Attaching The Handrail Assembly
Important: Make sure the fasteners do not pinch the cable. Cables damaged by To attach the handrail assembly: improper installation will not be covered by the Precor Limited Warranty. Ask your assistant to hold the handrail assembly while you connect the base unit data cable between the left base support and the left side of the handrail assembly. -
Page 74: Attaching The Console
Attaching the Console 2. Secure the cables under the clips in the indented area on the back of the display console and lower the display console onto its bracket. Important: Make sure that the cables are tucked into the cable clips before you Remove the display console from its box and protective packaging. -
Page 75: Completing The Assembly
Completing the Assembly Removing the Protective Film The treadmill ships with a protective film over the Precor logos and on the The bottle holders attach to brackets on either side of the display console. face of the console. To remove the film, grasp the edge of it and peel it off the equipment. -
Page 76: Leveling The Treadmill
Leveling the Treadmill To level the treadmill: Important: Before using the treadmill, make sure it is completely level and that it sits Ask your assistant to lift the rear portion of the treadmill. evenly on the floor. Important: Use proper lifting techniques when lifting the treadmill. To ensure that the treadmill is completely level, you should check it in two 2. -
Page 77: Checking The Alignment
Important: If the belt needs alignment, make the adjustments at once. Failure to 3. Recheck the alignment of the running belt. align the belt may cause the belt to tear or fray, which is not covered by the Precor Limited Warranty. - Page 79 U.S. and foreign patents for both the mechanical construction and the visual aspects P.O. Box 7202 of its product design. Any party contemplating the use of Precor product designs is hereby forewarned Energy™ Series TRM 211 Treadmill Assembly Guide...