Precor TRM 425 Owner's Manual
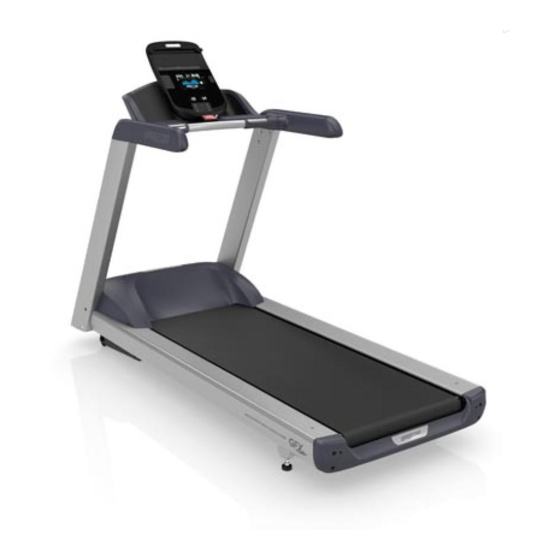
Precision series / energy series treadmill
Hide thumbs
Also See for TRM 425:
- Owner's manual (111 pages) ,
- Service manual (146 pages) ,
- Quick installation manual (2 pages)

Related Manuals for Precor TRM 425


Summary of Contents for Precor TRM 425
- Page 1 Quick Start Card PRECISION SERIES ™ AND ENERGY SERIES ™ TREADMILLS WELCOME TO A PERSONALIZED FITNESS EXPERIENCE FOR YOUR HOME...
- Page 2 PRECISION SERIES AND ENERGY SERIES TREADMILLS As you get to know your new Precor treadmill and your own fitness WarnInG: Read through ALL of the safety information in the goals, you’ll use the advanced features of the treadmill more often.
- Page 3 Precor web site When these steps are complete, you are ready to view When these steps are complete, you are ready to view...
- Page 4 O W N E R ’ S M A N U A L Precision ™ & Energy ™ S E R I E S T R E A D M I L L S T R M 4 2 5 T R M 2 2 3 WELCOME TO A PERSONALIZED FITNESS EXPERIENCE...
-
Page 6: Important Safety Instructions
DANGER Important Safety To reduce the risk of electrical shock always unplug the treadmill from the electrical outlet Instructions immediately after using and before cleaning. When using the equipment, always take basic WARNING To reduce the risk of burns, fire, precautions, including the following: electric shock, or injury, take the following precautions:... - Page 7 Precision Series / Energy Series Treadmill Owner's Manual: TRM 425 / 223 Assemble and operate the equipment on a solid, Maintain the equipment in good working condition level surface. Locate the equipment a few feet from (refer to Maintenance). Make sure that all fasteners walls or furniture.
-
Page 8: Safety Approvals For Cardiovascular Equipment
1 mile per hour (mph) or 1.6 kilometers per hour Precor equipment has been tested and found to (kph). Never step off the treadmill while the comply with the following applicable safety standards. -
Page 9: Grounding Instructions
Precision Series / Energy Series Treadmill Owner's Manual: TRM 425 / 223 Grounding Instructions 120 V Units Designated for North American Markets The equipment must be grounded. If the equipment malfunctions or breaks down, grounding provides a The unit must be connected to a dedicated, grounded path of least resistance for electric current, which circuit. -
Page 10: Radio Frequency Interference (Rfi)
Precor could void the cause harmful interference to radio communications. user’s authority to operate the If the equipment does cause harmful interference to equipment. -
Page 11: Obtaining Service
Precision Series / Energy Series Treadmill Owner's Manual: TRM 425 / 223 Obtaining Service Canadian Department of Communications This digital apparatus does not exceed the Class B You should not attempt to service the equipment limits for radio noise emissions from digital apparatus... - Page 12 The equipment serial number is located at the lower The console serial number is located inside the audio front edge of the treadmill cover, near the power connector compartment on the back of the console. switch and cord. You will need to open the cover of this compartment to see the number.
-
Page 13: Table Of Contents
Precision Series / Energy Series Treadmill Owner's Manual: TRM 425 / 223 Table of Contents Getting Familiar with the Controls ....17 Status Display ............18 Workout Selection and Volume Controls ..20 Important Safety Instructions ......1 Lower Readouts and Intensity Controls ..21 Connecting Your Audio Player ...... - Page 14 Reading Diagnostic Information ..... 43 Maintenance ............ 45 Inspection ............... 45 Cleaning the Equipment ........46 Storing the Chest Strap ........46 Checking the Alignment of the Running Belt ........... 47 Adjusting the Running Belt........ 48 Long-Term Storage ..........49 Important Safety Instructions...
-
Page 15: Treadmill Safety Features
Precision Series / Energy Series Treadmill Owner's Manual: TRM 425 / 223 Treadmill Safety Location It is important to keep the area around the treadmill Features open and free from encumbrances such as other equipment. The minimum space requirements needed... -
Page 16: Turning The Unit On And Off
Turning the Unit On and Off Using the Treadmill Safety Clip To turn the unit on and off, use the power switch The treadmill is equipped with two different stop located underneath the front of the unit, near the functions, which behave as follows: power cord connection. - Page 17 Precision Series / Energy Series Treadmill Owner's Manual: TRM 425 / 223 The following figure shows the location of the STOP CAUTION: When you work out, ALWAYS attach the switch and the stop key. safety clip to your clothing. A position near your waistline normally works best.
-
Page 18: Entering The Safety Code
Entering the Safety Code 4. Start the workout from the beginning, reducing the time as needed to account for the amount of The treadmill provides a safety code to help prevent exercise that has been completed. unauthorized use. By default, this code is not active. However, if you want the treadmill to operate only for people who know and can enter the code, you can activate it when you set up the treadmill (refer to... -
Page 19: Using The Handrails
Precision Series / Energy Series Treadmill Owner's Manual: TRM 425 / 223 Using the Handrails As you press the correct keys, a line of asterisks appears on the console. Once you have entered the To maintain your balance, always grasp a handrail... -
Page 20: Getting Started
Getting Started To get started with your new Precor treadmill: Turn the treadmill on if necessary. As you get to know your new Precor treadmill and your 2. Step onto the treadmill. own fitness goals, you’ll use the advanced features of 3. - Page 21 Precision Series / Energy Series Treadmill Owner's Manual: TRM 425 / 223 7. Use the up and down arrows to adjust the incline 8. If you need to end your workout early, do one of angle of the treadmill and the speed of the belt.
-
Page 22: Getting Familiar With The Controls
Getting Familiar with the Controls The figure and table on the following page introduce the controls on the console of your fitness equipment. Getting Familiar with the Controls... -
Page 23: Status Display
Precision Series / Energy Series Treadmill Owner's Manual: TRM 425 / 223 Status Display Table 1. Control descriptions Number Name Purpose Upper text Displays status messages and your display workout progress graph Lower text Displays text messages about your display... - Page 24 Number Name Purpose Number Name Purpose User Shows which user profile is Calorie Displays the number of calories indicator currently selected. Progress made indicator that you have used in your current during the current workout will be workout applied to this profile. Cal / Min Displays the average number of SmartRate®...
-
Page 25: Workout Selection And Volume Controls
Precision Series / Energy Series Treadmill Owner's Manual: TRM 425 / 223 Workout Selection and Table 2. Control descriptions Volume Controls Number Name Purpose User keys Selects a user profile to personalize your exercise experience WORKOUTS Displays preset workouts ENTER key... -
Page 26: Lower Readouts And Intensity Controls
Lower Readouts and Intensity Table 3. Control descriptions Controls Number Name Purpose Incline Displays the current incline angle as a indicator grade percentage Speed Displays the current belt speed in indicator kilometers per hour or miles per hour GO key Begins a manual workout PAUSE Pauses the treadmill for a limited... -
Page 27: Connecting Your Audio Player
Precision Series / Energy Series Treadmill Owner's Manual: TRM 425 / 223 Connecting Your Audio Player The reading tray at the top of your display console can also hold an audio player or a tablet. If you connect your device to the console, you can use the console’s headphone connector and volume controls to listen to your music without interrupting your workout. -
Page 28: Setting Up Your Equipment
Setting Up Your If you want to … Press … Switch between available choices The right and left Equipment arrow keys Make a selection or save a setting After the console is installed, it needs the following PAUSE Cancel out of the setup routine and information to work correctly: return to the Welcome prompt ... - Page 29 Precision Series / Energy Series Treadmill Owner's Manual: TRM 425 / 223 3. When the first setting (SAFETY CODE) appears, Table 4. Console settings press a key to continue. Setting Effect Values Default If you want to … Then press …...
- Page 30 Setting Effect Values Default Setting Effect Values Default SET DEFAULT Controls ON or OFF; ON (30 SET MAX SPEED Selects the A speed 12 mph WORKOUT TIME whether if ON, you minutes) maximum between 0.5 (19.3 kph) workouts speed must also and 12.0 start with a choose the...
- Page 31 Precision Series / Energy Series Treadmill Owner's Manual: TRM 425 / 223 Setting Effect Values Default SET MAX COOL Selects the A number of 5 minutes DOWN TIME length of minutes between 0 cooldown and 5 phase at the end of...
-
Page 32: Creating User Profiles
Creating User To create a user profile: Press one of the two USER keys. Profiles 2. Use the left and right arrow keys to adjust the workout length you want, then press ENTER. Your equipment can keep track of profiles for two 3. -
Page 33: Measuring Your Heart Rate
Precision Series / Energy Series Treadmill Owner's Manual: TRM 425 / 223 Measuring Your Before you start working out, make sure you know your maximum heart rate. Then, as you work out, be sure to Heart Rate reduce the intensity of your exercise if you reach or exceed that number. - Page 34 The following graph shows how your effective heart On the Workout List, you can find several rate ranges vary with your age. preprogrammed heart rate workouts (refer to Available Workouts). These workout courses automatically manage your heart rate at a target level based on your Heart Rate Target Zones age.
-
Page 35: Using Smartrate
Precision Series / Energy Series Treadmill Owner's Manual: TRM 425 / 223 Using SmartRate CAUTION: Before beginning any fitness program, see your ® physician for a thorough physical examination. Seek The Precor SmartRate technology is a precise, advice from your physician to learn the target heart rate easy-to-read heart rate monitor that helps users appropriate for your fitness level. - Page 36 Note: In the Basic Heart Rate Control workout, the GO To test your heart rate: key is deactivated. The equipment needs to know your Select a workout and press GO or ENTER. age to set an accurate target heart rate, so you must 2.
-
Page 37: Getting Accurate Heart Rate Readings
Precision Series / Energy Series Treadmill Owner's Manual: TRM 425 / 223 Getting Accurate Heart Rate Carefully dampen the back of the strap with tap water. Refer to the following figure. Readings Note: Do not use deionized water. It does not have... - Page 38 2. Adjust the strap and fasten it around your chest. 4. After you put on the chest strap, face the display The strap should feel snug, not restrictive. Refer to console for a few seconds. This allows the receiver the following figure. in the console to recognize the signal from the chest strap.
-
Page 39: Troubleshooting Heart Rate Readings
Precision Series / Energy Series Treadmill Owner's Manual: TRM 425 / 223 Troubleshooting Heart Rate For a chest strap: Readings Make sure the strap is fastened, positioned, and moistened correctly. If your heart rate readings look wrong, or if you do not ... -
Page 40: Choosing And Completing A Workout
Choosing and To choose a workout: Press the WORKOUTS key repeatedly to scroll Completing a through the available workouts. 2. When you reach the workout you want, press the Workout ENTER key to select it, then press GO to begin. Tip: The WORKOUTS key remains active while you work out, in case you want to switch workouts The instructions shown earlier in this manual provide... -
Page 41: Available Workouts
Precision Series / Energy Series Treadmill Owner's Manual: TRM 425 / 223 Available Workouts To prevent muscle adaptation from setting in as you work out, try different kinds of workouts on different Your fitness equipment includes a wide selection of days. - Page 42 Interval 1-1 and Interval 1-2 Interval workouts help exercisers improve strength, endurance, aerobic and anaerobic fitness. They Figure 15: Interval 1-1 alternate short bursts of high intensity activity with recovery periods. These workouts are designed to raise and lower your heart rate in a repeating fashion for a user-defined period of time by alternating rest and work intervals of two minutes each (for the Interval 1-1 workout) and...
- Page 43 Precision Series / Energy Series Treadmill Owner's Manual: TRM 425 / 223 Weight Loss The total time for this workout is fixed at 28 minutes. It consists of alternating four-minute work and rest The American College of Sports Medicine intervals. During the work intervals, you can change recommends that adults get at least 30-60 minutes of the incline at any time.
- Page 44 Basic Heart Rate Control Training tip: This program offers a coaching benefit for new and returning users who are learning how to This workout monitors your heart rate to guide you maintain a moderate, steady exertion level throughout through a moderate intensity program that is optimal their workouts.
- Page 45 Precision Series / Energy Series Treadmill Owner's Manual: TRM 425 / 223 Hill Climb Cross Country This workout engages a wider range of muscle groups This workout delivers true training variety and by adjusting the incline to simulate a hill climbing muscular engagement by continuously adjusting the experience.
- Page 46 Random Manual Variety (for both the muscles and the mind) is the key This workout motivates you by allowing you to define to continued success for every exercise goal. The and track your exertion levels throughout your exercise Random workout delivers a different training profile session.
-
Page 47: Ending A Session
Precision Series / Energy Series Treadmill Owner's Manual: TRM 425 / 223 Ending a Session Cooling down is an important aspect of your workout because it helps reduce muscle stiffness and soreness by transporting excess lactic acid out of the working muscles. -
Page 48: Reading Diagnostic Information
Your fitness equipment keeps track of its own history. 7. To return to the Welcome screen, press RESET. The details it stores about itself can be useful if you ever need to contact Precor Customer Support. Table 5. Types of diagnostic information To show the diagnostic information:... - Page 49 Precision Series / Energy Series Treadmill Owner's Manual: TRM 425 / 223 Heading Contents LOWER Version number of the operating software SOFTWARE in the lower mechanism USAGE LOG List of the workouts that have been used, the number of times each one has been...
-
Page 50: Maintenance
Replace missing or worn safety lanyards immediately. Do not exercise on the treadmill without attaching the safety clip to your clothing. To order parts or to contact a Precor authorized service provider in your area, refer to Obtaining Service. Maintenance... -
Page 51: Cleaning The Equipment
Precision Series / Energy Series Treadmill Owner's Manual: TRM 425 / 223 Cleaning the Equipment Storing the Chest Strap Most of the working mechanisms are protected inside Store your chest strap in a place where it remains free the hood and base of the treadmill. However, for of dust, dirt, and moisture, such as in a closet or efficient operation, the treadmill relies on low friction. -
Page 52: Checking The Alignment Of The Running Belt
If you are unsure extremely uneven surfaces. about this procedure, call Precor Customer Support. 2. Turn the unit on. CAUTION: Special care must be taken when aligning the 3. -
Page 53: Adjusting The Running Belt
Precision Series / Energy Series Treadmill Owner's Manual: TRM 425 / 223 Adjusting the Running Belt 5. Walk around to the rear of the unit and observe the belt for a few minutes. The belt should be If you are unsure about adjusting the running belt, call centered on the running belt. -
Page 54: Long-Term Storage
Long-Term Storage To determine left and right, stand at the rear of the treadmill and face the display. Make all belt When the equipment is not in use for any length of adjustments on the right rear corner bolt using the time, turn it off. - Page 55 Precision Series / Energy Series Treadmill Owner's Manual: TRM 425 / 223 Notes:...
- Page 56 Notes: Notes...
- Page 57 Precision Series / Energy Series Treadmill Owner's Manual: TRM 425 / 223 Notes:...
- Page 58 TRM 425 / TRM 223 Low Impact Treadmills Product Specifications Electronic Readouts TRM 425 TRM 223 Calories Distance Length: 79 in (204 cm) 81 in (206 cm) Calories per Minute Workout Profile Width: 34 in (86 cm) 33 in (82 cm)
- Page 59 Precor considers the unauthorized appropriation TRM 425 / 223 Owner’s Manual Woodinville, WA USA 98072-4002 of its proprietary rights to be a very serious matter. Precor will vigorously 303120-112 rev C, en 1-800-347-4404 pursue all unauthorized appropriation of its proprietary rights.
- Page 60 Assembly Guide ENERGY SERIES TREADMILLS MODELS: 243, 223 WELCOME TO A PERSONALIZED FITNESS EXPERIENCE FOR YOUR HOME...
- Page 62 Table of Contents Getting Started ....................2 Obtaining Service ........................ 2 Installation Requirements ....................2 Unpacking the Equipment ....................3 Required Tools ........................3 Hardware Kit (not to scale) ....................3 Assembling the Treadmill ................... 5 Assembling the Base Frame ..................... 6 Attaching the Handrail Assembly ...................
-
Page 63: Getting Started
For more information regarding into a power source. Check the ON/OFF power switch on the front of the customer support numbers or a list of Precor authorized service dealers, visit the treadmill. Place the switch in the O (OFF) position. -
Page 64: Unpacking The Equipment
The hardware kit shipped with this equipment contains the fasteners and other techniques. hardware components shown in the following table. Before you begin assembly, make sure that your hardware kit is complete. If not, please contact Precor To unpack the equipment: Customer Support. - Page 65 Treadmill 200 Series Assembly Guide Table 2. Other components 6 mm T-handle hex wrench Console bracket Left and right dash buckets Stop key and clip...
-
Page 66: Assembling The Treadmill
Assembling the Treadmill The following figure shows the names used in this manual for the major components of the equipment. CAUTION: The location of the On/Off switch is beneath the cutout on the base frame. Make sure the power switch is in the Off position. Make sure the power cord is disconnected from its power source. -
Page 67: Assembling The Base Frame
If the head of the fastener is not flush with the head of the the fasteners. product, contact Customer Support at www.precor.com. To assembly the frame: Unwind the wire tie from the base of the left upright support and feed it through the large hole. -
Page 68: Attaching The Handrail Assembly
Partially tighten the fasteners. Important: Make sure the fasteners and assembled parts do not pinch the cable. Cables damaged by improper installation will not be covered by the Precor Limited Warranty. Note: Thread the bottom hole first on either side. This will help line up the other holes. -
Page 69: Tightening The Fasteners
Treadmill 200 Series Assembly Guide Tightening the Fasteners Tighten the base screws in the order presented below. To tighten the base fasteners: Fully tighten the four front screws (two on each upright support) using the 5 mm hex key. 2. Use the 6 mm T-handle hex wrench to tighten the two side screws on each upright support. -
Page 70: Attaching The Console
Attaching the Console Attaching the Cables to the Console Four cables attach to the console. This guide feature helps ensure that the cables Before you begin, make sure there are four cables protruding upward from the top are not pinched when the console is attached to the treadmill. of the handrail assembly. - Page 71 Treadmill 200 Series Assembly Guide To attach the cables to the console: 2. Set the console onto the console bracket. It should sit flush on the bracket without gaps. If there is a gap, check to make sure that no cables are being Ask your assistant to hold the console over the console bracket while you pinched between the console and the console bracket.
-
Page 72: Attaching The Dash Buckets
Attaching the Dash Buckets b. The back edge of the dash bucket fits behind the console bracket. The handrail assembly arrives with a bucket clip already attached to each handrail. To attach the dash buckets: Tilt the dash bucket and slip it onto the handrail assembly so that: Figure 16: Back edge position 2. - Page 73 Treadmill 200 Series Assembly Guide 3. Secure the console to the dash buckets and console bracket using four ¹ ₄-inch x ⁵ ₈-inch buttonhead screws. Once you have threaded all four screws, you can fully tighten them. Figure 18: Console attachment...
-
Page 74: Completing Assembly
Owner’s Manual. Removing the Protective Film The treadmill ships with a protective film over the Precor logos and on the face of the console. To remove the film, grasp the edge of it and peel it off the equipment. -
Page 75: Leveling The Treadmill
Treadmill 200 Series Assembly Guide To level the treadmill: Leveling the Treadmill Ask your assistant to lift the rear portion of the treadmill. Important: Before using the treadmill, make sure it is completely level and that it sits Important: Use proper lifting techniques when lifting the treadmill. evenly on the floor. -
Page 76: Checking The Alignment
Important: If the belt needs alignment, make the adjustments at once. Failure to Overtightening the bolt can damage the treadmill. align the belt may cause the belt to tear or fray, which is not covered by the Precor 3. Recheck the alignment of the running belt. -
Page 77: Breaking In The Equipment
Treadmill 200 Series Assembly Guide Breaking in the Equipment Precor equipment does not require an actual break-in period. However, moving components such as belts, gears, and bearings can settle while the equipment is being stored or shipped. This can cause the equipment to operate with a small amount of roughness or noise when it starts up for the first time. - Page 79 U.S. and foreign patents for both the mechanical construction and the visual aspects P.O. Box 7202 of its product design. Any party contemplating the use of Precor product designs is hereby forewarned Energy™ Series TRM 200 Treadmill Assembly Guide...
- Page 80 Precision Series (TRM 445 and 425) • Energy Series (TRM 243, 223, and 211) PLEASE READ THESE WARRANTY TERMS AND CONDITIONS CAREFULLY BEFORE USING YOUR PRECOR INCORPORATED PRODUCT. BY USING THE EQUIPMENT, YOU ARE CONSENTING TO BE BOUND BY THE FOLLOWING WARRANTY TERMS AND CONDITIONS.
-
Page 81: Limited Warranty
To make a claim under this warranty, the buyer must notify Precor or his or her authorized Precor Distributor within 30 days after the date... - Page 82 This warranty is valid only in accordance with the conditions set forth below: The warranty applies to the Precor product only if: a. It has been serviced by a Precor Authorized Service Provider and/or Precor Certified facility staff. Outside of North America, the product must have been serviced by the local Precor sales office or an Authorized Precor Distributor.
- Page 83 5. Precor is not responsible for Internet connectivity to its products. This restriction applies to services, such as those provided by an Internet Service Provider (ISP), and also to hardware related to Internet connectivity, such as Ethernet cabling, routers, servers and switches.
- Page 84 If the touch heart rate feature does not work for you, Precor recommends that you use a chest transmitter strap. 8. Precor does not warranty the work or product of third party companies (e.g., head end systems, low voltage wiring, etc.) 9.
- Page 85 Disclaimer and Release The limited warranties provided herein are the exclusive warranties given by Precor and supersede any prior, contrary or additional representations, whether oral or written. ANY IMPLIED WARRANTIES, INCLUDING THE WARRANTY OF MERCHANTABILITY OR FITNESS FOR...
- Page 86 Exclusive Remedies For any product described above that fails to conform to its warranty, Precor will provide, at their option, one of the following: (1) repair; (2) replacement; or (3) refund of the purchase price. Precor Limited Warranty service may be obtained by contacting the authorized Distributor from whom you purchased the item.
- Page 87 Residential Cardiovascular Equipment Limited Warranty Exclusion of Consequential and Incidental Damages PRECOR AND/OR ITS SUPPLIERS SHALL HAVE NO OBLIGATION OR LIABILITY, WHETHER ARISING IN CONTRACT (INCLUDING WARRANTY), TORT (INCLUDING ACTIVE, PASSIVE, OR IMPUTED NEGLIGENCE AND STRICT LIABILITY), OR OTHERWISE, FOR DAMAGE TO THE EQUIPMENT, PROPERTY DAMAGE,...