Table of Contents
Advertisement
Quick Links
Table Of Contents:
Features
Options
PATENTED: www.voxxintlcorp.com/company/patents
Rev b New Format 5/13
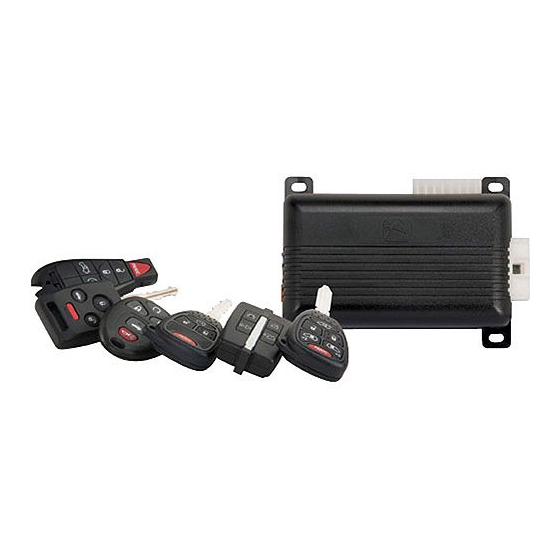
Model AS-9234
Owners Guide
Upgrade Vehicle Security
& Remote Start System
Page 1
Page 2
Page 2
Page 3
Page 4
Page 4 - 5
Page 5
Page 5 - 6
Page 6
Page 6 - 7
Page 7
Page 7 - 8
Page 8 - 11
Page 11
Page 11
Page 12 - 13
Page 14 - 15
Page 16 - 17
Page 18
Page 19
Page 20
128-8970a
1 of 20
Advertisement
Table of Contents

Related Manuals for Audiovox AS-9234


Summary of Contents for Audiovox AS-9234
-
Page 1: Table Of Contents
Model AS-9234 Owners Guide Upgrade Vehicle Security & Remote Start System Table Of Contents: Features Page 2 Options Page 2 Arming the System - Active Page 3 Arming the System - Passive (Automatic) Page 4 Protection While the System is Armed... - Page 2 FEATURES: Programmable Active or Passive Arming Selectable Manual Override Mode Remote Panic in all modes Protected Push Button Valet/Override Switch Selectable Automatic Timed Start Mode User Programmable Manual Override Code 7 Function LED - Arm / Disarm / Zone 1 / Zone 2 / Zone 3 / Valet / Arming ...
-
Page 3: Arming The System - Active
NOTE: All functions of the system will be controlled by the factory transmitter, including the start sequence. If you find the operating range to be less than desired, Audiovox offers an optional one button transmitter kit which can be added to increase operating range for starting and unlocking while running under control of the the remote start. -
Page 4: Arming The System - Passive (Automatic)
ARMING THE SYSTEM - PASSIVE (AUTOMATIC) (Must be activated during programming) 1. Turn the ignition key off, exit the vehicle, and close all doors. 2. The Dash Mounted, LED or the optional LED found on the glass mounted receiver will begin to flash rapidly, indicating that the system is automatically (passively) arming. -
Page 5: Disarming The System
2. Whenever the system is armed, the Dash Mount PRLED, or the optional on windsheild mount receiver's LED indicator will slowly flash. This serves as a visual deterrent to the potential thief. The LED is a very low current bulb, and will not cause the vehicle’s battery to drain, even when the vehicle is left unattended for extended periods. -
Page 6: Operating The Emergency Panic
2. If the LED is flashing two times, pause, two times, pause, etc., then an intrusion attempt was made to the hood or trunk, or to an optional sensor connected to zone 2. 3. If the LED is flashing three times, pause, three times, pause, etc., then an intrusion attempt was made through one of the vehicle’s doors. -
Page 7: Manually Overriding Your System
3. Press and hold the pushbutton switch found on the dash mount PRLED, or on the optional glass mounted receiver assembly for 5 seconds, until the LED turns on, indicating valet mode has been successfully entered. TO EXIT VALET: With the ignition switch in the on position, press and release the same pushbutton switch used to enter the valet mode one time. -
Page 8: Using Custom Code Manual Override
1. Disarm the system by use of the transmitter, or by use of the emergency override sequence. Turn the ignition switch to the on position. 2. Within 10 seconds, press and release PRLED, or the optional push-button switch found on the glass mounted receiver assembly 3 times. 3. - Page 9 your system can be overridden allowing operation of the vehicle. The manual override code is pre-programmed at the factory to 11. This code can be changed by the operator to a more familiar two digit number. Once you’ve become familiar with the system’s operation and override procedure, we suggest you change the code for added security.
- Page 10 In many cases, to increase the security of your system, you may elect to change the manual override code to a number that is more familiar to you, or simply to have a different code than was pre-assigned from the factory. To change the pre-assigned override code follow the steps outlined below.
-
Page 11: Optional Ignition Lock/Unlock Feature
You will note the LED flashing five times, pause, and then flash two times, pause. This pattern will be repeated three times indicating the new code (52) has been accepted and stored in memory. NOTE: If after step 8, the LED flashes a code other than what was just entered, this indicates that the code has not been changed. -
Page 12: To Remote Start Your Vehicle
4. Whenever power to the system has been disconnected (for repair or service to the vehicle), the chirps will be activated when the power is re-connected. To turn the chirps off, simply execute steps 1 through 3 above. NOTE : Whenever the Arm/Disarm chirps are bypassed, the 3 chirp defective zone, and the 4 chirp intrusion indicator, will continue to operate. - Page 13 When you arrive at your vehicle, unlock by pressing and releasing the unlock button of your keychain transmitter or by use of the vehicle key. Enter the vehicle and turn the ignition key to the on position. CAUTION! Do not turn the key to the start position. This will cause the starter motor to engage with the already running engine which could result in damage.
-
Page 14: Operating On Automatic Start Up Timer Mode
2.Depress the vehicles brake pedal. 3.Open the the hood. 4.Racing the RPM of the engine to above 4000. Also note, if this option is installed, as you approach the vehicle while running under control of the remote start unit, the optional single button transmitter can be used to unlock the doors, simply press and hold the start button until the doors unlock. - Page 15 NOTE: The automatic start up timer can also be initiated from the keychain transmitter. To do this: 1.Start the vehicle using the keychain transmitter by pressing lock, unlock, lock, on the factory transmitter or by pressing and releasing the optional remote start transmitter button two times in succession. (The vehicle will start) 2.Shut off the vehicle by pressing lock, unlock, lock, on the factory transmitter, or by pressing and releasing the optional remote start...
-
Page 16: To Enter The Remote Start Safety By-Pass Mode
DASH MOUNTED PRLED, OR THE OPTIONAL WINDSHEILD MOUNTED RECEIVERS PUSH-BUTTON SAFETY CONTROL SWITCH. TO ENTER THE REMOTE START SAFETY BY-PASS MODE: The Push-Button LED safety control switch allows you to temporarily dis- able the remote starting function of the system. This recommended when- ever the vehicle is being serviced. - Page 17 TO EXIT THE REMOTE START SAFETY BY-PASS MODE: 1. With the system disarmed, press and hold the push-button used to enter the override mode on. 2. Turn the ignition switch on, off, on, off, on, off. 3. The LED turns off indicating that the R/S unit is fully functional one again.
-
Page 18: Owner's Notes
OWNER'S NOTES Page 18 128-8970a 18 of 20... -
Page 19: Programming Bank 1
OPTIONAL ADD ON RECEIVER/TRANSMITTER KIT The transmitters are pre-programmed from the factory, if you find you need to program new or additional transmitters follow the instructions below. PROGRAMMING BANK 1 TRANSMITTER PROGRAMMING/OPTIONAL ADDP1 or ADDSS Transmitter Model Name Is Found On Back Of Transmitter Case 1. -
Page 20: System Functions At A Glance
Valet Override Remote Window Closure Custom Code Override To purchase replacement transmitters or to get additional product information go to: www.prestigecarsecurity.com © 2013 Audiovox Electronics Corp. 150 Marcus Blvd. Hauppauge, N.Y. 11788 128-8970a Page 20 128-8970a 20 of 20...