Table of Contents
Advertisement
Quick Links
Download this manual
See also:
Owner's Manual
Advertisement
Table of Contents

Related Manuals for Audiovox AS9233ST


Summary of Contents for Audiovox AS9233ST
- Page 1 128-8605 1 of 20...
- Page 2 Note: Where indicated, press transmitter lock button to change, the Factory Transmitter Lock button, Door Lock Switch, or the supplied transmitter can be used. To program these selectable features; Action System Response Turn ignition on No response Press and release the valet switch 3 times 1 Chirp - LED 1 flash Within 3 seconds, turn ignition Off Then On Short chirp, then long chirp...
- Page 3 128-8605 3 of 20...
- Page 4 Action System Response Turn ignition on No response Press and release the valet switch 3 times 1 Chirp - LED 1 flash Within 3 seconds, turn ignition Off, On, Off, On Short chirp, then 2 long chirps This Action Accesses Feature Bank 3 Remote Start Selectable Features First Press the valet switch one time Non Functional On This Unit...
- Page 5 For Trunk areas a similar installation method may be used and an optional switch may be purchased from the Audiovox Accessory Catalog. THE RECEIVER/ANTENNA /PUSHBUTTON/LED ASSEMBLY: The Superheterodyne Receiver Antenna Assembly provided with this unit allows routing from below the dash board for maximum operating range.
-
Page 6: Wiring The 6 Pin Main Power Harness
from all areas of the vehicle. The selected location must be within 18" of the control module to allow routing and connecting of the 4 pin harness. Secure the shock sensor to the chosen location using two #8 self taping sheet metal screws. - Page 7 Note: This wire must be connected to the vehicle side of the starter cut relay (when used). For the electrical neutral switch configuration, this connection must be made between the starter inhibit relay, (when used) and the neutral safety switch as shown in the following diagram. Failure to connect this wire to the ignition switch side of the neutral safety switch can result in personal injury and property damage.
- Page 8 WIRING CONNECTIONS: Multi Pin Accessory Input/Output Harness White w/ Red Trace Wire: Parking Light Flasher Feed This wire is the common contact of the on board parking light flasher relay. If the vehicle you are working on has +12 volt switched parking lights, connect this wire to a fused + 12 volt source. (Max. 15 Amps) Note: If the vehicle's parking lights are ground switched, connect this wire to chassis ground.
- Page 9 5. Connect the previously selected resistor from terminal #87 to the second (#2) wire (as shown). Note: The above information and following diagram is for the GM VATS system only. For GM PASS LOCK System you will require the Audiovox AS-PASS II Module. 128-8605 9 of 20...
- Page 10 General Motors VATS By-Pass Diagram Grey Wire: Negative Inhibit Input The Grey w/ Black Trace wire provides an instant shutdown for the Remote Start Control Module whenever it is grounded. Connect the Grey trace wire to the hood pin switch previously installed. This wire must be routed through a grommet in the firewall and connected to the hood pin switch.
- Page 11 Brown w/ Black Trace Wire: Positive Inhibit Input The Brown w/ Black Trace wire provides an instant shutdown for the Remote Start Control module when- ever it gets + 12 volts. If the Brake lights switch in the vehicle switches + 12 volts to the brake light circuit, connect the Brown w/ Black trace wire to the output side of the brake switch.
- Page 12 Green/Yellow Wire: Diesel Wait To Start Input The Green/Yellow wire will connect to a diesel vehicles glow plug wire. When the unit receives a start command, this wire must go to + 12 then to ground to allow the crank sequence to begin. When ignition #1 is activated by the remote start unit, the glow plug circuit gets energized, (+ 12 volts), when the glow plug circuit of the vehicle drops the + 12 volts, which effectively grounds the wait to start input, then 500mS later the starter will engage.
- Page 13 Note! When installing this system as a stand alone passive security system, the RED wire in this connector must be connected to a rest at ground , + 12 VDC switched ignition source. RED w/BLACK, GREEN & GREEN/BLACK wires must be connected to ground. The BLUE wire in this connector will not be required for the stand alone installation.
- Page 14 output would be to disarm a factory theft deterrent system to prevent false triggering of the factory alarm when the remote start unit engages or when the 785 is used to unlock the doors. Black w/ Light Green Trace Wire: Pulsed Ground Output After Start The Black w/ Light Green Trace wire will provide a 1 second mA pulsed ground output after the vehicle is started under control of the remote start unit.
-
Page 15: Timed Start Program
These applications require the use of additional components which may include relays, fixed resistors, or for convenience, the DLRK Door Lock Interface. Refer to the AUDIOVOX Door Lock Wiring Supplement and or the Audiovox fax back service for information on your particular vehicle for properly connecting to these types of circuits. - Page 16 3. Connect the Yellow wire to a +12 volt ignition 1 source. This wire will have +12 volts with the ignition in the on and start position and have 0 volts with the ignition in the off position. 4. Connect the Green wire to the (Green) or (Orange/Green) tach input of the Audiovox remote start unit. 128-8605...
-
Page 17: Testing Your Installation
2. Reach inside the car and pull the hood release. 3. Raise the hood and confirm that the remote start unit shuts down. If the unit fails this test, recheck your pin switch connection to the Gray/Black wire of the Audiovox Remote Start Unit. -
Page 18: Mechanical Neutral Safety Switch Considerations
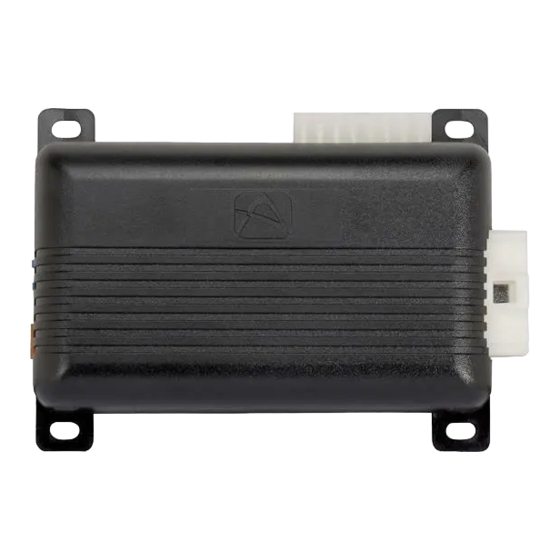
E. Connect the cathode (striped) side of a 4002 series diode to this same wire, and connect the (non striped) side to the negative shut down safety wire (Gray / Black) of the Audiovox Remote Start Unit. F. Connect terminal 86 of the relay to a fused +12 volt constant battery source. - Page 19 COMPLETING THE INSTALLATION: After you have confirmed the operation of the Audiovox Remote Start Alarm system and tested all the safety features of the system: 1. Mount the control module up and behind the dash securing it in place with cable ties or screws. Be certain that the chosen mounting location will not inhibit any of the controls of the vehicle.
- Page 20 © 2009 Audiovox Electronics Corp., Hauppauge, N.Y. 11788 128-8605 128-8605 20 of 20...