Honeywell Dolphin 70e Black User Manual
Powered by android 4.0
Hide thumbs
Also See for Dolphin 70e Black:
- User manual (184 pages) ,
- Network and security manual (36 pages) ,
- Quick start manual (17 pages)
Table of Contents
Advertisement
Quick Links
Download this manual
See also:
User Manual
Advertisement
Table of Contents

Related Manuals for Honeywell Dolphin 70e Black


Summary of Contents for Honeywell Dolphin 70e Black
- Page 1 Dolphin™ 70e Black powered by Android™ 4.0 User’s Guide...
- Page 2 Disclaimer Honeywell International Inc. (“HII”) reserves the right to make changes in specifications and other information contained in this document without prior notice, and the reader should in all cases consult HII to determine whether any such changes have been made. The information in this publication does not represent a commitment on the part of HII.
-
Page 3: Table Of Contents
Table of Contents Chapter 1 - Dolphin 70e Black Terminal Agency Information Label Locations ........................1-1 Model Number, Serial Number and IMEI Labels............1-1 LED Safety ...........................1-1 LED Safety Statement....................1-1 UL and C-UL Statement.......................1-2 Approvals by Country......................1-2 R&TTE Compliance Statement—802.11a/b/g/n, Bluetooth, and/or GSM......1-2 FCC Requirements ......................1-3... - Page 4 AutoInstall ........................2-17 Information Resources ...................... 2-17 Chapter 3 - Hardware Overview Standard Configurations for the Dolphin 70e Black............. 3-1 Peripherals for the Dolphin 70e Black ................. 3-2 Accessories for the Dolphin 70e Black ................3-3 Features of the Dolphin 70e Black ..................3-4 Front, Bottom, and Right Panels..................
- Page 5 Overview..........................6-1 Wireless & Network Settings ....................6-1 Device Settings........................6-1 Sound Settings ......................6-1 Display Settings ......................6-2 Honeywell Smart Sensors Settings ................6-2 Storage Settings ......................6-2 Battery Settings ......................6-2 Apps Settings and Management..................6-2 Managing Apps......................6-3 Personal Settings ........................
- Page 6 Configuring or Unpairing Bluetooth Devices..............8-1 Making the Terminal Discoverable ..................8-2 Bluetooth Menu Options ...................... 8-2 Sharing Pictures and Video ....................8-2 Chapter 9 - Dolphin 70e Black HomeBase (Model 70e-HB) Overview..........................9-1 Unpacking the HomeBase ..................... 9-1 Charging Overview ......................9-1 Communications ......................
- Page 7 Communication........................10-7 Establishing Ethernet Communication................. 10-7 Establishing USB Communication ................10-8 Mounting the eBase......................10-8 Desk Mounting......................10-9 Chapter 11 - Dolphin 70e Black Mobile Base (Model 70e-MB) Overview..........................11-1 Charging Overview ...................... 11-1 Convenient Storage ..................... 11-1 Dimensions ........................11-1 Weight..........................
- Page 8 Parts and Functions......................13-2 Front Panel ........................13-2 Back Panel ........................13-3 Bottom Panel ....................... 13-4 Power ..........................13-4 Connecting Power to the Net Base................13-4 Charging the Main Battery....................13-5 To Power a Terminal and Charge the Main Battery ............ 13-5 Communication........................
-
Page 9: Chapter 1 - Dolphin 70E Black Terminal Agency Information
Dolphin 70e Black Terminal Agency Information Dolphin 70e Black mobile computers meet or exceed the requirements of all applicable standards organizations for safe operation. However, as with any electrical equipment, the best way to ensure safe operation is to operate them according to the agency guidelines that follow. Read these guidelines carefully before using your Dolphin terminal. -
Page 10: Ul And C-Ul Statement
2006/95/EC Low Voltage Directive when supplied with the recommended power supply. Honeywell shall not be liable for use of our product with equipment (i.e., power supplies, personal computers, etc.) that is not CE marked and does not comply with the Low Voltage Directive. -
Page 11: Fcc Requirements
High power radars are the primary users of 5250-5350 MHz and 5650-6850 MHZ bands. This may cause interference to Wireless Local Area Network devices. European Contact: Hand Held Products Europe B.V. Nijverheidsweg 9-13 5627 BT Eindhoven The Netherlands FCC Requirements Dolphin RF Terminal—802.11a/b/g/n, Bluetooth, and/or GSM This device complies with Part 15 of the FCC Rules. -
Page 12: Conformité À La Règlementation Canadienne
5Ghz band: UNII (Unlicensed National Information Infrastructure) or band1 (5.150 to 5.250 GHz) is restricted to indoor use only. Any other use will make the operation of the device illegal. For body worn operation, this phone has been tested and meets the FCC RF exposure guidelines for use with the following body worn accessory: Holster-1. -
Page 13: Honeywell Scanning & Mobility Product Environmental Information
IEC specification. Hearing Aid Compatibility (HAC) Dolphin 70e Black models 70eLGN and 70eLG0 have been tested for hearing aid compatibility. These devices have an M4 and T4 rating. For additional HAC information, including the HAC rating for this product, please refer to www.honeywellaidc.com. -
Page 14: Microwaves
T-Rating: Phones rated T3 or T4 meet FCC requirements and are likely to be more usable with hearing devices' telecoil than unrated phones. T4 is the superior/higher of the two ratings. The more immune the hearing aid device is, the less likely one is to experience interference noise from the wireless phone. -
Page 15: Chapter 2 - Getting Started
Dolphin 70e Black models powered by Android™ unless otherwise indicated. Memory Card Specifications Applications on your Dolphin 70e Black terminal utilize the memory card to store files and application data. A microSD memory card is included and pre-installed in the device. Memory card use is recommended to avoid potential application errors or possible data loss. - Page 16 How to Install the Battery Step 2. Charge the Battery The power source for the Dolphin terminal is the 3.7V Li-ion rechargeable battery located under the battery door on the back panel of the device. See Battery on page 3-10 for additional information on battery storage, use, and disposal.
-
Page 17: Using The Usb Charge/Communication Cable (Model 70E-Usb Adapterkit)
Dolphin terminals ship with the battery significantly discharged of power. After installing the battery in the terminal, charge the battery with a Dolphin 70e Black charging peripheral for a minimum of 4 hours for the standard battery pack or 6 hours for the extended battery pack. When using the 70e-USB Charge/ Communication cable to charge from a 500mA USB port on a host device, charge the battery for a minimum of 6 hours for the standard battery and 8 hours for the extended battery. -
Page 18: The Welcome Screen
Note: Placing the terminal in Suspend mode while charging reduces the current draw of the terminal and shortens the charging time of the battery. Touch > Settings > Battery to verify the battery is charging. Right Side Panel of Dolphin 70e Black USB Door Micro Port USB Port on Host Device... -
Page 19: The Locked Screen
The Locked Screen Drag the to the right or press the Menu button to unlock the display and access the Home screen. Screen Security on page 6-5 for information on customizing the screen lock/unlock security feature. Note: During the initial charging stage, the terminal may have entered Suspend Mode to conserve battery power. In Suspend mode the touch screen dims then darkens automatically after a period of no activity. -
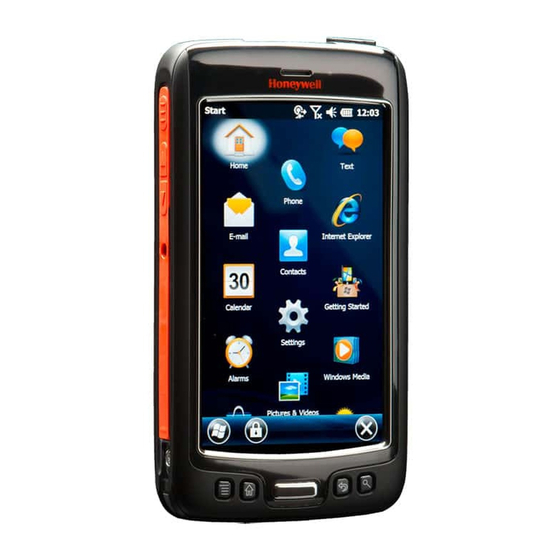
Page 20: The Home Screen
The Android™ operating system provides space for user customization and control with five Home Screen panels. Note: Some of the features listed below are specific to Dolphin 70e Black models equipped with Google™ Mobile Services and may require an active Google account be setup on your terminal. -
Page 21: Common Status And Notification Icons
The Notification Panel A plus sign icon appears on the status bar when the quantity of notifications exceed the available space on the bar. To view all the notifications, touch and hold the status bar, then drag down to open the notification panel. - Page 22 Icon Meaning New text message or multimedia message Bluetooth technology is turned on New E-mail Terminal connected to a device with Bluetooth technology Error with text or multimedia message Bluetooth incoming file notification delivery Terminal is connected to a computer using a Network signal strength USB cable ABD active...
-
Page 23: Search Bar
Search Bar You can search for an item on the terminal or the Internet using Google Search at the top of any ™ Home screen panel. Touch to initiate Google Voice Touch inside the box to Search or a Voice Action. access the virtual keyboard for text entry. -
Page 24: Personalize The Home Screen Panels And Favorites Tray
Personalize the Home Screen Panels and Favorites Tray Streamline your work flow by customizing the Home screen panels and Favorites tray with your choice of app shortcuts, folders, and widgets. To add an app shortcut: 1. Touch 2. Select and hold the app icon you want to add. The terminal vibrates, then switches to the home screen. -
Page 25: Hotkeys
3-4 for button locations on the terminal. Virtual Keyboard The enhanced Honeywell virtual keyboard appears when you open an application or select a field that requires text or numerical input. The content of the keyboard may vary depending on the application in use and the input field requirements. -
Page 26: Customization Process
There are two software components required for customizing the enhanced Honeywell Virtual keyboard. • The first is the Honeywell Virtual Keypad Creator , which resides on your PC and is used to design, save, and download custom keyboard layouts to your Dolphin terminal. -
Page 27: Turning Power On/Off
Turning Power On/Off To turn the terminal On, press and release the Power button To turn the terminal Off: 1. Press and hold the Power button until the Phone Options menu displays. 2. Touch Power Off. Suspend Mode Suspend mode differs from Power off mode. Power off mode is the equivalent to having no battery or external power source connected to the device. - Page 28 Note: Do not attempt to use the terminal without the battery door installed. 4. The terminal begins booting as soon as power is applied. We recommend use of Honeywell Li-ion battery packs. Use of any non-Honeywell battery may result in damage not covered by the warranty.
-
Page 29: Resetting The Terminal
Connecting the Terminal to a Computer via a USB Connection You can transfer files (e.g., pictures, music, and videos) between your computer and the terminal using the supplied USB Charge/Communication cable or a Dolphin 70e Black HomeBase with a standard USB cable. -
Page 30: Honeywell
Send). \Honeywell The \Honeywell folder on the Dolphin terminal’s SD card is semi-permanent storage on the terminal. By default, files in this folder are maintained after a reboot; however, there is an option (Settings > Storage > Erase SD card) that clears the contents of the SD card. -
Page 31: Autoinstall
Upgrades for the Power Tools and other system software on the Dolphin terminal come in the form of zip files. When the zip files are placed in the \Honeywell\autoinstall folder on the Dolphin terminal SD card, they are automatically installation after a Hard Reset (see page 2-15) if AutoInstall is enabled. - Page 32 2 - 18...
-
Page 33: Chapter 3 - Hardware Overview
Hardware Overview Standard Configurations for the Dolphin 70e Black WLAN, WPAN & Camera • Android 4.0 • TI OMAP3715 1.0GHz Processor • 512MB RAM X 1GB Flash • 3.7V Li-ion rechargeable standard or extended battery pack • Dedicated imager capable of decoding standard 1D and 2D bar code symbologies •... -
Page 34: Peripherals For The Dolphin 70E Black
Dolphin 70e Black Net Base (Model 70e-NB) The Net Base enables up to four Dolphin 70e Black terminals to communicate with a host device over an Ethernet network. In addition, the Net Base provides a second RJ45 Ethernet port for connection to an additional device such as a printer, workstation, eBase, or another Net Base. -
Page 35: Accessories For The Dolphin 70E Black
Dolphin 70e Black Mobile Charger (Model 70e-MC) The Dolphin 70e Black Mobile Charger is a charging cable that connects the terminal directly to a 12 Volt DC power source, such as a cigarette lighter port inside a vehicle, eliminating the need for a cradle. Intel- ligent battery technology on-board the terminal ensures proper charging. -
Page 36: Features Of The Dolphin 70E Black
Features of the Dolphin 70e Black Note: Your Dolphin model may differ from the model illustrated; however, the features noted are standard for all Dolphin 70e Black models powered by Android unless otherwise indicated. Front, Bottom, and Right Panels General Notification LED... -
Page 37: Feature Descriptions: Front, Bottom, And Right Panels
Feature Descriptions: Front, Bottom, and Right Panels Back Button By default, the Back button returns you to the previous screen. Bottom Speaker The integrated bottom speaker sounds audio signals as you scan bar code labels and enter data. The integrated speaker also supports playback of wave and MP3 files, software mixer, and speaker phone for WWAN/GSM audio. - Page 38 Scan Button The Scan button is centrally located for easy access with the right or left hand. When pressed, the Scan button activates the scanner/imager. The Scan button also functions as a system wake-up control for the terminal. You can reassign the button to launch applications or execute commands;...
-
Page 39: Back, Top, And Left Panels
* WWAN equipped models only Note: Your Dolphin model may differ from the model illustrated; however, the features noted are standard for all Dolphin 70e Black powered by Android models unless otherwise indicated. For a description of each callout, see... -
Page 40: Feature Descriptions: Back, Top, And Left Panels
The 3.5mm audio jack supports both speaker (stereo) and microphone (mono) headsets. Battery Dolphin 70e Black model terminals are designed for use with battery part numbers BAT-STANDARD-01 (Li-ion 3.7 V, 6.179 watt hour) and BAT-EXTENDED-01 (Li-ion 3.7 V, 12.358 watt hour) manufactured for Honeywell International Inc. For information on how to... - Page 41 When the battery door and battery pack are properly installed, the card is sealed against moisture and particle intrusion, read/write data is stored securely, and the terminal’s environmental rating is preserved; see Installing a SIM Card and/or Replacing the Memory Card on page 3-15.
-
Page 42: The I/O Connector
The primary power source for the Dolphin terminal is the 3.7V Li-ion rechargeable battery located under the battery door on the back panel of the device. Honeywell recommends, you keep the battery in the terminal charged at all times to help prevent data loss. Letting the battery become fully discharged causes the terminal to lose all data in RAM. -
Page 43: Charging Options
• Dolphin 70e Black Net Base (Model 70e-NB), see page 13-1 • Dolphin 70e Black USB Charge/Communication Cable (Model 70e-USB ADAPTERKIT), see page 2-3 When the main battery is not installed in the terminal: • Place the battery pack in the... -
Page 44: Managing Battery Power
Power button once. Managing Battery Power Letting the battery become fully discharged causes the terminal to lose all data in RAM. Honeywell recommends, you keep a charged battery in the terminal at all times to help prevent data loss. Removing the battery from the terminal erases all non-persistent memory. -
Page 45: Storing Batteries
• Improper battery use may result in a fire, explosion or other hazard. • We recommend use of Honeywell Li-ion battery packs. Use of any non-Honeywell battery may pose a personal hazard to the user. -
Page 46: System Resets
Honeywell International Inc. or an authorized service center for inspection. • If you are not sure the battery or charger is working properly, send it to Honeywell International Inc. or an authorized service center for inspection, see... -
Page 47: Installing A Sim Card And/Or Replacing The Memory Card
Note: Applications on your Dolphin 70e Black terminal utilize the microSD card to store files and application data. Memory card use is recommended to avoid potential application errors or possible data loss. - Page 48 4. If you are replacing the memory card, slide the existing card out of the memory socket. Note: Memory card use is recommended to avoid potential application errors or possible data loss. 5. Slide the SIM or replacement memory card (contacts facing down) into the appropriate socket, then close the retainer flap.
-
Page 49: Overview
Using the Scan Image Engine Overview The Dolphin 70e Black terminal houses a compact image engine that instantly reads popular 1D and 2D bar codes and supports omni-directional aiming and decoding for greater flexibility in real-world settings. The image engine can also capture black and white digital images, such as signatures and pictures of damaged inventory. -
Page 50: Supported Bar Code Symbologies
5 mil microPDF 5 mil DataMatrix 10 mil DataMatrix 1.52 (3.8) 4.87 (12.3) 3.35 (8.5) 20 mil DataMatrix 1.07 (2.7) 9.66 (24.5) 8.59 (21.8) 10 mil QR 1.50 (3.8) 5.13 (13.0) 3.63 (9.2) 20 mil QR 2.48 (6.3) 9.66 (24.5) 7.18 (18.2) 32 mil Maxicode 1.56 (3.9) -
Page 51: Using The Scan Demo To Decode A Bar Code
Using the Scan Demo to Decode a Bar Code 1. Touch > Demos > ScanDemo to open the Scan Demo application. 2. Point the Dolphin terminal at the bar code. Note: For optimum performance, avoid reflections by scanning the bar code at a slight angle. -
Page 52: Configuring The Scan Demo Application
Continuous Scanning Enable Continuous scanning mode to activate the imager for continuous scanning only when the operator touches and holds Scan or presses and holds the Scan button. The time interval between scan attempts is minimal and not configurable. 1. Slide the Continuous blue button to the ON position to enable the feature. 2. - Page 53 3. Modify the settings to meet your application needs, then press the Back button to return to the Scan Demo screen. Settings Touch the checkbox to enable or disable a feature. • Vibrate - When checked, the terminal vibrates to indicate a successful bar code scan and decode.
-
Page 54: Using The Power Tools Scantool
Using the Power Tools ScanTool Note: Detailed information on the ScanTool Power Tool is provided in the Dolphin Power Tools for Mobile Devices Powered by Android™ User’s Guide, available for download at www.honeywellaidc.com. 1. Touch > Power Tools > ScanTool 2. -
Page 55: Capturing Images
2D Matrix Symbol Capturing Images The image-capture process is an intuitive, split-second operation for experienced users. By following the basic guidelines, new users can easily develop their own technique and, with practice, quickly learn to adapt it to different application environments. Image Preview When the imaging process is initiated, the touch screen displays a preview of the object. -
Page 56: Using The Iqimage Demo To Decode Intelligent Bar Codes And Capture Images
Note: You don’t need to clear the field to take another scan, just activate the image engine again. 6. Press the Menu button, then tap File to save an image of the scan or bar code. The file is saved in the mnt/sdcard/honeywell/iqdemo folder on the microSD card. Configuring the IQImage Demo Application 1. -
Page 57: Using The Signature Demo
3. Touch 4. Enter a name for the of the image file you want to save, then select the file type: JPG or PNG. 5. Touch Save. The signature image file is saved in the mnt/sdcard/honeywell/signaturedemo folder on the microSD card. - Page 58 4 - 10...
-
Page 59: Chapter 5 - Using The Color Camera
Using the Color Camera Overview Dolphin 70e Black terminals are equipped with 5.0-Megapixel auto focus cameras to provide easy integration of color picture and video capture into business applications. The camera lens and camera flash are located on the back panel of the terminal. -
Page 60: Adjusting The Camera Settings
Adjusting the Camera Settings To adjust the camera/video settings from the Camera app screen. • Use the slider bar to zoom in (+) or out (-). • Touch then select from additional icons to adjust the Exposure, White balance, Flash, and the Time lapse interval for videos. -
Page 61: Chapter 6 - Settings
Settings Overview The Settings allows you to verify and/or alter system parameters to customized your terminal to meet your specific needs. Touch > Settings or pull down the notification panel, then touch the Settings icon next to the date. Wireless & Network Settings Wireless &... -
Page 62: Display Settings
Suspend mode. Honeywell Smart Sensors Settings Touch Honeywell Smart Sensor from the Settings menu to configure the integrated motion detection sensors for advanced power management. • Keep awake on motion - When enabled, the terminal is prevented from entering Suspend mode when motion is detected. -
Page 63: Managing Apps
• Running - Displays apps running on the terminal and any processes or services running or in cache. Touch Show cached processes or Show running services at the bottom of the screen to switch between the lists. The memory or storage type, the amount of space used by the applications or services listed, and the amount of free space remaining are displayed at the bottom of each category screen. -
Page 64: Personal Settings
Personal Settings Accounts & sync Touch Accounts & sync from the Settings screen to add, remove, and manage exchange accounts (e.g., e-mail) and allow apps to automatically schedule and sync data. To add an account: 1. Touch > Settings > Accounts & Sync. 2. -
Page 65: Security
Security Touch Security from the Settings screen to manage terminal security parameters (e.g., authorization for device administration, setup a screen lock, setup a SIM card PIN, enable/disable visible passwords, load security certificates, and setup a password to protect the terminal's credential storage). Screen Security The Screen Lock settings screen provides access to additional security features that enable you to prevent an unauthorized person from unlocking the touch screen and accessing the terminal. -
Page 66: Language & Input
Trusted credentials Touch Trusted credentials from the Security screen to view all the security credentials installed on the terminal. Tabs organize the certificates into two categories: System and User. Touch the certificate name to view additional details about the certificate. To disable a system certificate or remove a user certificate: 1. - Page 67 > Settings > Language & input > Default. 2. Select an input method Android Keyboard or Enhanced Keyboard. Note: Dolphin 70e Black terminals are shipped from the factory configured to use the Honeywell Enhanced Keyboard as the default input method. Touch next to the keyboard name to adjust settings specific for the keyboard type (e.g., Keyboard...
-
Page 68: Backup & Reset
Touch Select input method. Select the radio button next to the input type you want to use. • English (US) - Android keyboard • Enhanced keyboard - Honeywell customizable Enhanced keyboard • Google voice typing Speech To configure Voice Search settings, touch >... -
Page 69: System
System Date & Time Touch Date & time from the Settings screen to access options to configure the date, time, time zone, time format, and date format displayed on the terminal. You can set the terminal to synchronize the date and time using a network connection by checking the Automatic date &... - Page 70 remaining charge level of the battery, the phone number, the carrier network, the signal strength, the mobile network type and state, the service state, the roaming status, the IMEI and IME SV numbers, the Wi-Fi MAC address, and the Bluetooth address of the terminal. Note: The content of the Status screen is base on the Model type.
-
Page 71: Chapter 7 - Communication
WLAN (802.11a/b/g/n) The Dolphin 70e Black has a 802.11a/b/g/n WLAN (Wireless Local Area Network) radio. The radio is interoperable with other 802.11a/b/g/n, Wi-Fi compliant products including access points (APs), worksta- tions via PC card adapters, and other wireless portable devices. -
Page 72: Wi-Fi Network Connections
Wi-Fi Network Connections Turning Wi-Fi Networking On or Off 1. Touch > Settings 2. Touch the Wi-Fi OFF/ON toggle box to turn the radio Connecting to a Wi-Fi Network 1. Touch > Settings > Wi-Fi. 2. Verify the Wi-Fi is turned 3. -
Page 73: Advanced Wi-Fi Settings And Network Utilities
Advanced Wi-Fi Settings and Network Utilities Menu To modify how the Wi-Fi radio reacts when the terminal enters sleep (Suspend) mode, adjust the Wi-Fi idle timeout or view the terminal MAC address and IP address. 1. Touch > Settings > Wi-Fi 2. -
Page 74: Airplane Mode
> Power Tools > Wireless Manager Note: Refer to the Dolphin Power Tools for Mobile Devices powered by Android User’s Guide (available for download at www.honeywellaidc.com) for detailed information on the Wi-Fi Settings network utility. Airplane Mode Airplane Mode on page 2-13. Virtual Private Networks (VPN) To complete the VPN setup screens, you may need to ask your ISP or network administrator for the proxy server name, server type, port, type of Socks protocol used, and your user name and password if... -
Page 75: Disconnecting From A Vpn
4. Enter any security credentials (e.g., password, user name, certificate information or server name) required by the VPN. 5. Touch Connect. Note: When a VPN connection is established, a shows in the status bar. Disconnecting from a VPN 1. Drag the status bar down from the top of the touch screen to view the Notification panel. 2. - Page 76 7 - 6...
-
Page 77: Chapter 8 - Working With The Bluetooth Radio
Working with the Bluetooth Radio Turning the Bluetooth Radio On or Off Bluetooth™ is a short-range wireless communications technology used to exchanged data between devices over a distance of approximately 26.2 feet (8 meters). Before you can connect or pair your termi- nal to another device using Bluetooth technology, you must first turn on the Bluetooth radio. -
Page 78: Making The Terminal Discoverable
. Verify the Bluetooth radio is activated 2. Touch Bluetooth. 3. Touch Dolphin 70e Black (default terminal name) at the top of the screen to make the device discoverable. The terminal starts a 2 minute count down during which time the terminal is temporarily discoverable by other devices using Bluetooth technology. - Page 79 a. Touch Scan for devices, then touch the name of the receiving device from the available device list. b. Touch on the name of an already paired device from the Bluetooth device list. 7. A pop-up message notifies you the file is Sending and the upload notification icon appears on the status bar.
- Page 80 8 - 4...
-
Page 81: Chapter 9 - Dolphin 70E Black Homebase (Model 70E-Hb)
Guidelines for Battery Pack Use and Disposal on page 3-13. We recommend use of Honeywell Li-ion battery packs. Use of any non-Honeywell battery may result in damage not covered by the warranty. Communications Reliable data communications at speeds of up to 480 Mbps can be transmitted by the base through the Hi-Speed USB port. -
Page 82: Convenient Storage
This means that one base can charge two battery packs: the one installed in the terminal and a spare. We recommend use of Honeywell peripherals, power cables, and power adapters. Use of any non-Honeywell peripherals, cables, or power adapters may cause damage not covered by the warranty. -
Page 83: Parts And Functions
Parts and Functions Front Panel Auxiliary Battery Well Terminal Well COMM LED Dock LED AUX Battery LED Terminal Well Place the terminal in this well to communicate with a host device, power the terminal, and charge the installed battery pack. The base completely charges the main battery in a Dolphin terminal in 4 hours for the standard battery or 6 hours for the extended battery. -
Page 84: Back Panel
COMM LED This is the communication LED. It indicates the status of data transfer between the Dolphin terminal and the host device. This color means… Green A USB Connection is established with the host workstation. Back Panel Auxiliary Battery Well USB Port DC Power Jack Auxiliary Battery Well... -
Page 85: Bottom Panel
The power adapter included with the base, converts the voltage from the AC power source to 12 Volts DC. Use only a UL listed power supply, which has been qualified by Honeywell with output rated at 12VDC and 3 amps with the device. The operating temperature range is -10° to 50°C (14°... -
Page 86: Charging The Main Battery
Icons on page 2-7. We recommend use of Honeywell Li-Ion battery packs. Use of any non-Honeywell battery may result in damage not covered by the warranty. Charging a Spare Battery in the Auxiliary Battery Well The auxiliary battery well located on the back of the base charges a spare battery independently of the terminal well. -
Page 87: Communication
Communication Dolphin terminals support USB communications out of the box. The base also supports USB communi- cations via the USB port located on the back. The base acts as a USB device by interfacing the USB signals of the Dolphin terminal to the USB of the host workstation. Using a standard USB cable, the base’s USB interface allows the Dolphin terminal to communicate with a workstation. - Page 88 Installing the DIN Rail 1. Slide the DIN rail into the slot along the bottom panel of the base. 2. Then, using the appropriate nuts and bolts, secure the DIN rail to the desk or flat surface. 9 - 8...
-
Page 89: Chapter 10 - Dolphin 70E Black Ebase (Model 70E-Ehb)
Dolphin 70e Black eBase (Model 70e-EHB) Overview The Ethernet Base (eBase) enables a single Dolphin 70e Black computer to communicate with a host device over an Ethernet network. The 70e-EHB charger is designed for use with Dolphin 70e model terminals and battery part numbers BAT-STANDARD-01 (Li-ion 3.7 V, 6.179 watt hour) and BAT-EXTENDED-01 (Li-ion 3.7 V, 12.358 watt... -
Page 90: Dimensions
Capacity The base holds one terminal and features an auxiliary battery well behind the terminal well that can charge a battery pack independently of the terminal well. This means that one base can charge two bat- tery packs: the one installed in the terminal and a spare. Dimensions 65.6 mm [2.58 inches]... -
Page 91: Parts And Functions
Parts and Functions Front Panel Auxiliary Battery Well Terminal Well COMM LED AUX Battery LED Dock LED Terminal Well Place the terminal in this well to communicate with a host device, power the terminal, and charge the installed battery pack. The eBase completely charges the main battery in a Dolphin terminal in 4 hours for the standard battery or 6 hours for the extended battery. -
Page 92: Back Panel
COMM LED Indicates the status of the connection and data transfer between the Dolphin terminal and the host device. This color means… Green A USB Connection is established with the host workstation. Note: Ethernet activity is indicated by RJ45 integrated LED on the back panel of the base. Back Panel Auxiliary Battery Well Green LED... -
Page 93: Bottom Panel
AC power source to 12 Volts DC. Use only a UL listed power supply, which has been qualified by Honeywell with out- put rated at 12VDC and 3 amps with the device. The operating temperature range is -10° to 50°C (14°... -
Page 94: Charging The Main Battery
Icons on page 2-7. We recommend use of Honeywell Li-Ion battery packs. Use of any non-Honeywell battery may result in damage not covered by the warranty. Charging a Spare Battery in the Auxiliary Battery Well The auxiliary battery well located on the back of the base charges a spare battery independently of the terminal well. -
Page 95: Communication
Communication Establishing Ethernet Communication Connecting the Dolphin Terminal to the eBase By default, the Dolphin terminal is configured to obtain IP addresses automatically via DHCP server. This means that in most cases you would simply plug-and-play the unit. 1. Connect power to the eBase (see Power on page 10-5). -
Page 96: Establishing Usb Communication
Displaying the eBase and Terminal IP Address Once the Dolphin terminal has been successfully connected to the network through eBase, the terminal uses the eBase IP address. The IP address can be used by any application on the Dolphin terminal. Touch >... -
Page 97: Desk Mounting
Desk Mounting The DIN rail slot (7.5 X 35 mm) may be mounted on the bottom to allow for secure desk attachment of the unit if desired. Hardware Required • 3/16 in. dia x 5/8 in. long pan head screw •... - Page 98 10 - 10...
-
Page 99: Chapter 11 - Dolphin 70E Black Mobile Base (Model 70E-Mb)
The base features a mounting bracket and a cigarette lighter adapter to adapt it to your environment. The 70e-MB charger is designed for use with Dolphin 70e Black model terminals and battery part numbers BAT-STANDARD-01 (Li-ion 3.7 V, 6.179 watt hour) and BAT-EXTENDED-01 (Li-ion 3.7 V, 12.358 watt hour) manufactured for Honeywell International Inc. -
Page 100: Mobile Base Components
Mobile Base Components Terminal Charging Well Spring Speaker Latch Power Adapter Power Jack Speaker Volume Control Mounting Lever Two point Adjustable Arm Suction Cup Base Adjustable Arm with Suction Cup Base for Windshield Mounting The Mobile Base includes a two point adjustable arm with a suction cup base for fixed mount locations (e.g., a car windshield). -
Page 101: Mounting The Mobile Base
Mounting the Mobile Base Safety Precautions Honeywell is not responsible for any damages caused to you, your vehicle, or other individuals due to the installation of the Dolphin Mobile mount. Follow these safety precautions when mounting the mobile base: Do not mount the base in a location where it prevents safe operation of the vehicle and/or impedes the vehicle operator's field of view. -
Page 102: Charging The Main Battery
For more information about Honeywell battery packs and how to check battery power levels in your terminal, refer to Battery (page 3-10). -
Page 103: To Power A Terminal And Charge Its Main Battery
11-3. 3. Pull the spring latch back and insert the Dolphin 70e Black into the terminal well. Charging begins immediately if required by the Dolphin terminal. Note: Align the contacts on the back panel of the terminal with the charging contacts on the Mobile Base. - Page 104 11 - 6...
-
Page 105: Chapter 12 - Dolphin 70E Black Chargebase (Model 70E-Cb)
Dolphin 70e Black ChargeBase (Model 70e-CB) Overview The Dolphin 70e Black ChargeBase is a 4-slot charging cradle that can power four Dolphin terminals, and charge their main batteries in 4 hours for the standard battery or 6 hours for the extended battery. -
Page 106: Dimensions
Dimensions 59.75 mm [2.35 inches] 427.11 mm 98.8 mm [16.80 inches] [3.89 inches] Weight ChargeBase weight: 674g [1.49 lbs.] Note: Weight excludes packaging, cables and power supply. Parts and Functions Front Panel Terminal Wells (Qty. 4) Dock LED (Qty. 4) Terminal Wells The base contains four terminal wells, which offer independent battery charging for each docked terminal. -
Page 107: Back Panel
Dock LEDs The Dock LED indicates if the terminal is properly seated in the charging well. Each well has a dedicated Dock LED, which illuminates blue when a terminal is properly seated in the charging well. Back Panel Power Supply Connector Power Supply Connector This connector receives input from the power adapter. -
Page 108: Power
AC power source to 12 volts DC. Use only a UL Listed power supply, which has been qualified by Honeywell with output rated at 12VDC and 5 amps with the device. The operating temperature range is -10° to 50°C (14° to 122°F). -
Page 109: Mounting The Chargebase
Icons on page 2-7. We recommend use of Honeywell Li-Ion battery packs. Use of any non-Honeywell battery may result in damage not covered by the warranty. Mounting the ChargeBase This base should be mounted to a dry, stable surface. When choosing a location, always bear in mind that: •... - Page 110 Installing the DIN Rail 1. Slide the DIN Rail into the DIN Rail slot on the bottom panel of the base. DIN Rail 2. Turn the base and DIN Rail right side up. 3. Then, using the appropriate nuts and bolts, secure the DIN Rail to a stable, flat horizontal surface. 12 - 6...
-
Page 111: Chapter 13 - Dolphin 70E Black Net Base (Model 70E-Nb)
Net Base, or another Net Base. The 70e-NB charger is designed for use with Dolphin 70e Black model terminals and battery part numbers BAT-STANDARD-01 (Li-ion 3.7 V, 6.179 watt hour) and BAT-EXTENDED-01 (Li-ion 3.7 V, 12.358 watt hour), manufactured for Honeywell International Inc. -
Page 112: Dimensions
Capacity The base holds up to four Dolphin terminals. Each charging well charges each terminal independently of the other wells. Dimensions 59.75 mm [2.35 inches] 427.11 mm [16.80 inches] 98.8 mm [3.89 inches] Weight Net Base weight: 694g [1.53 lbs.] Note: Weight excludes packaging, cables and power supply. -
Page 113: Back Panel
DOCK LEDs The Dock LED indicates if the terminal is properly seated in the charging well. Each well has a dedicated Dock LED, which illuminates blue when a terminal is properly seated in the charging well. Back Panel Yellow LED (Qty. 1 Per Port) Green LED (Qty. -
Page 114: Bottom Panel
5 amps with the device. The operating temperature range is -10° to 50°C (14° to 122°F). Honeywell recommends that you leave the Net Base connected to its power source at all times, so that it is always ready to use. -
Page 115: Charging The Main Battery
Dolphin terminals may be stored in the base indefinitely without damage to the terminals, battery packs, or the base. For more information about Honeywell battery packs and how to check battery power levels in your terminal, refer to Battery (page 3-10). -
Page 116: Mounting The Net Base
Troubleshooting If the items on the Ethernet configuration screen are grayed out and not accessible, verify the base has power, the Ethernet cable is undamaged and properly installed to the base, there is an active network signal over the Ethernet cable, and the terminal is properly docked in the base. Ethernet Configuration Settings Instead of using the default DHCP assigned IP address, the Dolphin terminal can be configured to use a statically assigned IP address. - Page 117 Bottom Panel DIN Rail Slot Rubber Feet, Qty. 6 Desk Mounting The DIN Rail (7.5 X 35 mm) slot on the bottom panel enables secure mounting on a horizontal surface. Hardware Required • 3/16 in. dia x 5/8 in. long pan head screw •...
- Page 118 13 - 8...
-
Page 119: Chapter 14 - Customer Support
If your mobile device has a touch screen display, please note that a touch screen responds best to a light touch from the pad of your finger or a Honeywell approved stylus. Using excessive force or a metallic object when pressing on the touch-screen may cause damage to the tempered glass surface and may not be covered by the product's warranty. - Page 120 • The duration of the limited warranty for touch screens is one year. • The duration of the limited warranty for the Dolphin 70e Black HomeBase, Dolphin 70e Black eBase, Dolphin 70e Black Mobile Base, Dolphin 70e Black ChargeBase device, and Dolphin 70e Black Net Base is one year.
-
Page 121: How To Extend Your Warranty
How to Extend Your Warranty Honeywell International Inc. offers a variety of service plans on our hardware products. These agree- ments offer continued coverage for your equipment after the initial warranty expires. For more informa- tion, contact your Sales Representative, Customer Account Representative, or Product Service Marketing Manager from Honeywell International Inc., or your Authorized Reseller. - Page 122 Honeywell Scanning & Mobility 9680 Old Bailes Road Fort Mill, SC 29707 www.honeywellaidc.com 70E-AND-UG Rev A 9/13...