Table of Contents
Advertisement
Quick Links
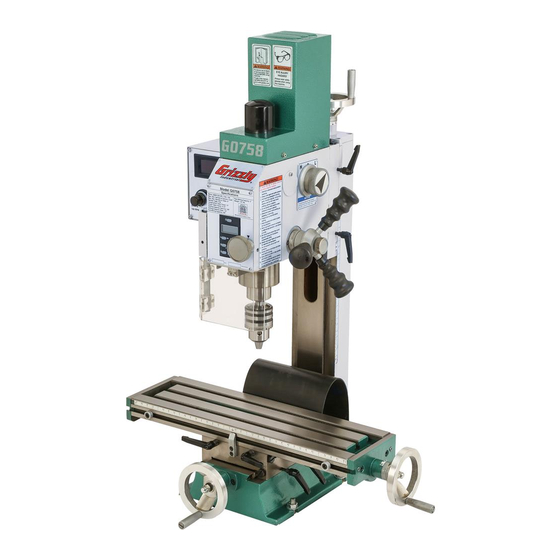
MODEL G0758
MILL/DRILL
OWNER'S MaNuaL
(For models manufactured since 02/14)
shown with optional stand
(Model t26612)
Copyright © May, 2014 By grizzly industrial, inC.,
WaRNING: NO pORtION Of thIS MaNuaL May bE REpRODucED IN aNy ShapE
OR fORM WIthOut thE WRIttEN appROvaL Of GRIzzLy INDuStRIaL, INc.
#dM16290 printed in China
V1.05.14
Advertisement
Table of Contents

Related Manuals for Grizzly G0758


Summary of Contents for Grizzly G0758
- Page 1 (Model t26612) Copyright © May, 2014 By grizzly industrial, inC., WaRNING: NO pORtION Of thIS MaNuaL May bE REpRODucED IN aNy ShapE OR fORM WIthOut thE WRIttEN appROvaL Of GRIzzLy INDuStRIaL, INc. #dM16290 printed in China V1.05.14...
- Page 2 This manual provides critical safety instructions on the proper setup, operation, maintenance, and service of this machine/tool. Save this document, refer to it often, and use it to instruct other operators. Failure to read, understand and follow the instructions in this manual may result in fire or serious personal injury—including amputation, electrocution, or death.
-
Page 3: Table Of Contents
SEctION 8: WIRING ........36 unpacking ............ 12 inventory ............13 Wiring safety instructions ......36 Cleanup ............14 g0758 Wiring overview ....... 37 site Considerations ........15 g0758 Wiring ..........38 lifting & placing ........... 16 SEctION 9: paRtS ........40 Bench Mounting ........... -
Page 4: Introduction
INtRODuctION Machine Description Manual accuracy We are proud to provide a high-quality owner’s the Model g0758 is a high-precision mill/drill with manual with your new machine! a 600 Watt ( ⁄ hp) high-torque, low noise motor, with low speed gearing for maximum torque in the We made every effort to be exact with the instruc- lowest rpM range. -
Page 5: Identification
1. Front identification. z-axis handwheel Motor high/low gearbox Knob Coarse downfeed handles z-axis lock levers downfeed selector Knob Work table Quill lock lever figure 2. right side identification. Model G0758 (Mfd. Since 2/14) -
Page 6: Controls & Components
3 & 4 and the following descrip- tions to become familiar with the basic controls of this machine. figure 4. g0758 controls (front side). h. variable-Speed Knob: Controls spindle speed. variable-Speed Digital Readout unit (DRO): displays spindle speed. -
Page 7: Machine Data Sheet
The information contained herein is deemed accurate as of 5/20/2014 and represents our most recent product specifications. Model G0758 PAGE 1 OF 2 Due to our ongoing improvement efforts, this information may not accurately describe items previously purchased. Model G0758 (Mfd. Since 2/14) - Page 8 The information contained herein is deemed accurate as of 5/20/2014 and represents our most recent product specifications. Model G0758 PAGE 2 OF 2 Due to our ongoing improvement efforts, this information may not accurately describe items previously purchased. Model G0758 (Mfd. Since 2/14)
-
Page 9: Section 1: Safety
Model G0758 (Mfd. Since 2/14) - Page 10 Contact our debris. Make sure they are properly installed, technical support at (570) 546-9663. undamaged, and working correctly. Model G0758 (Mfd. Since 2/14)
-
Page 11: Additional Safety For Mills/Drills
If normal safety precautions are over- looked or ignored, serious personal injury may occur. Model G0758 (Mfd. Since 2/14) -
Page 12: Section 2: Power Supply
-10- Model G0758 (Mfd. Since 2/14) -
Page 13: Grounding & Plug Requirements
Two-prong outlets do not meet the grounding requirements for this machine. Do not modify or use an adapter on the plug provided—if it will not fit the outlet, have a qualified electrician install the proper outlet with a verified ground. -11- Model G0758 (Mfd. Since 2/14) -
Page 14: Section 3: Setup
Entanglement can result tion of your shipment, inventory the contents. in death, amputation, or severe crushing injuries! SUFFOCATION HAZARD! Keep children and pets away from plastic bags or packing materials shipped with this machine. Discard immediately. -12- Model G0758 (Mfd. Since 2/14) -
Page 15: Inventory
If you cannot find an item on this list, care- fully check around/inside the machine and packaging materials. Often, these items get lost in packaging materials while unpack- ing or they are pre-installed at the factory. figure 6. inventory included with machine. -13- Model G0758 (Mfd. Since 2/14) -
Page 16: Cleanup
7. t23692 orange power degreaser. off the rest with the rag. repeat Steps 2–3 as necessary until clean, then coat all unpainted surfaces with a quality metal protectant to prevent rust. -14- Model G0758 (Mfd. Since 2/14) -
Page 17: Site Considerations
Only install in an shadows, glare, or strobe effects that may distract access restricted location. or impede the operator must be eliminated. " " " figure 8. g0758 working clearances. -15- Model G0758 (Mfd. Since 2/14) -
Page 18: Lifting & Placing
(or stand) where machine will be placed. the Model g0758 mill/drill can be mounted to a workbench or the Model t26612 optional stand use vertical handwheel to raise headstock as (see figure 9). -
Page 19: Bench Mounting
14. z-axis handwheel handle attached. Lag Screw Flat Washer Machine Base Workbench figure 12. example of a "direct Mount" setup. -17- Model G0758 (Mfd. Since 2/14) -
Page 20: Joining Drill Chuck & Arbor
. if you can pull them apart, repeat this procedure. Note: Refer to Installing/Removing Tooling sec- tion on Page 25 for installing arbor into spindle instructions. -18- Model G0758 (Mfd. Since 2/14) -
Page 21: Test Run
Button lar operations. refer to troubleshooting table in this manual. Variable- speed Congratulations! the test Run is complete. Knob Continue to Spindle break-In. oFF Button figure 16. location of mill/drill controls (front). -19- Model G0758 (Mfd. Since 2/14) -
Page 22: Spindle Break-In
"l". press on button. run spindle for minimum of 10 minutes. Without stopping spindle, use variable-speed knob to run machine at 500 and 1000 rpM for 10 minutes each. press oFF button. -20- Model G0758 (Mfd. Since 2/14) -
Page 23: Section 4: Operations
Read books/magazines or get formal training before beginning any proj- ects. Regardless of the content in this sec- tion, Grizzly Industrial will not be held liable for accidents caused by lack of training. -21- Model G0758 (Mfd. Since 2/14) -
Page 24: Downfeed Controls
Button in/mm Button v Button figure 19. identification of dro controls. press in/mm button to select inches or mil- limeters. each press of button switches between units. -22- Model G0758 (Mfd. Since 2/14) -
Page 25: Headstock Movement
20. location of z-axis lock levers. angle lock nut to secure headstock. use vertical handwheel shown in figure 21 to adjust headstock height. Vertical handwheel figure 21. location of z-axis handwheel. retighten lock levers. -23- Model G0758 (Mfd. Since 2/14) -
Page 26: Table Travel
25, then use the handwheel in front of the table in the same man- figure 24. graduated dial location. ner as the X-axis handwheel. -24- Model G0758 (Mfd. Since 2/14) -
Page 27: Installing/Removing Tooling
Note: Height of drawbar inside spindle can be changed by rotating adjustment nut (see the Model g0758 includes a 1–13mm drill chuck Figure 28). with r-8 arbor (see figure 26). drawbar adjustment... -
Page 28: Removing Tooling
-26- Model G0758 (Mfd. Since 2/14) -
Page 29: Section 5: Accessories
Gun treatment 4.5 Oz. Spray ® to reduce this risk, only install accessories recommended for this machine by Grizzly. NOTICE Refer to our website or latest catalog for additional recommended accessories. G7156—4" (3 ⁄... -
Page 30: Section 6: Maintenance
MaChine FroM poWer BeFore perForMing luBriCation! follow reasonable lubrication practices as outlined in this manual. failure to do so could lead to premature failure of machine and will void warranty. -28- Model G0758 (Mfd. Since 2/14) -
Page 31: Table And Column Ways
35. y-axis way lubrication points. X-axis Ways figure 36. X-axis lubrication points. -29- Model G0758 (Mfd. Since 2/14) -
Page 32: Table Leadscrews
From beneath table, use mineral spirits and a brush to clean as much of existing grease and debris as possible off of X-axis leadscrew shown in figure 39. allow leadscrew to dry. X-axis leadscrew figure 39. location of X-axis leadscrew. -30- Model G0758 (Mfd. Since 2/14) -
Page 33: Quill Outside Surface
43. Battery cover for dro. remove old battery, dispose of it according to state and federal regulations, then replace it with a new one. rack replace battery cover. figure 42. Quill rack location. -31- Model G0758 (Mfd. Since 2/14) -
Page 34: Section 7: Service
8. Bit is chattering. 8. replace/sharpen bit; index bit to workpiece; use appropriate feed rate and cutting rpM. 9. Motor bearings are at fault. 9. test by rotating shaft; rotational grinding/loose shaft requires bearing replacement. -32- Model G0758 (Mfd. Since 2/14) - Page 35 3. Check for proper cutting rotation for cutting tool. 4. Workpiece not secure. 4. properly clamp workpiece on table or in vise. 5. spindle extended too far down. 5. Fully retract spindle and lower headstock. this increases rigidity. -33- Model G0758 (Mfd. Since 2/14)
-
Page 36: Adjusting Gibs
X-axis gib screw the y-axis leadscrew nut is similar and is accessed y-axis gib screw (1 of 2) from underneath the machine base. (1 of 2) figure 44. location of gib screws. -34- Model G0758 (Mfd. Since 2/14) -
Page 37: Brush Replacement
48. Inserting new motor brush. replace brush cap to secure brush. figure 46. Location of motor cover cap screws. repeat Steps 3–5 for second brush assem- bly on other side of motor. replace motor cover. -35- Model G0758 (Mfd. Since 2/14) -
Page 38: Section 8: Wiring
Technical source. Support at (570) 546-9663. The photos and diagrams included in this section are best viewed in color. You can view these pages in color at www.grizzly.com. READ ELECTRICAL SAFETY -36- Model G0758 (Mfd. Since 2/14) ON PAGE 36! -
Page 39: G0758 Wiring Overview
G0758 Wiring Overview Motor spindle sensor Front panel figure 49. Wiring overview. side panel Front panel rear panel limit switch inside Bottom panel figure 50. Wiring overview. READ ELECTRICAL SAFETY -37- Model G0758 (Mfd. Since 2/14) ON PAGE 36! -
Page 40: G0758 Wiring
G0758 Wiring JYMC- 22UB-II DC Motor Speed Control READ ELECTRICAL SAFETY -38- Model G0758 (Mfd. Since 2/14) ON PAGE 36! - Page 41 51. Front panel. figure 54. rear panel. figure 52. Jd-014 circuit board. figure 55. CesX 1101-28 circuit board. figure 53. spindle rpM sensor. figure 56. guard limit switch. READ ELECTRICAL SAFETY -39- Model G0758 (Mfd. Since 2/14) ON PAGE 36!
-
Page 42: Section 9: Parts
SEctION 9: paRtS column -40- Model G0758 (Mfd. Since 2/14) - Page 43 Note: We do our best to stock replacement parts whenever possible, but we cannot guarantee that all parts shown here are available for purchase. Call (800) 523-4777 or visit our online parts store at www.grizzly.com to check for availability.
-
Page 44: Electrical Box
P0758093 POWER CORD 16G 3W 72" 5-15 P0758085 CONTROL PANEL PLATE P0758094 STRAIN RELIEF M20 X 1.5 TYPE-3 P0758086 CAP SCREW M4-.7 X 6 P0758096 FUSE 10A 250V FAST-ACTING, GLASS P0758087 RPM DIGITIAL DISPLAY ZD-SX-THL P0758097 HEX NUT M3-.5 -42- Model G0758 (Mfd. Since 2/14) -
Page 45: Headstock
-43- Model G0758 (Mfd. Since 2/14) - Page 46 P0758204 TAPERED ROLLER BEARING 32005 P0758151 PRELOAD ADJUSTER NUT P0758205 WRENCH 12 X 14MM OPEN-ENDS P0758152 DOWEL PIN 4 X 20, BRASS P0758206 WRENCH 8 X 10MM OPEN-ENDS P0758153 SET SCREW M5-.8 X 12 -44- Model G0758 (Mfd. Since 2/14)
-
Page 47: Chip Guard
CAP SCREW M4-.7 X 20 P0758261 SET SCREW M5-.8 X 10 P0758255 EXT RETAINING RING 12MM P0758262 CHIP GUARD POST P0758256 WAVY WASHER 20MM P0758263 CHIP GUARD P0758257 GUARD MOUNTING BLOCK P0758264 CAP SCREW M4-.7 X 18 -45- Model G0758 (Mfd. Since 2/14) -
Page 48: Labels & Cosmetics
Safety labels help reduce the risk of serious injury caused by machine hazards. If any label comes off or becomes unreadable, the owner of this machine MUST replace it in the original location before resuming operations. For replacements, contact (800) 523-4777 or www.grizzly.com. -46-... -
Page 49: Warranty Card
Would you recommend Grizzly Industrial to a friend? _____ Yes _____No Would you allow us to use your name as a reference for Grizzly customers in your area? Note: We never use names more than 3 times. _____ Yes _____No 10. - Page 50 FOLD ALONG DOTTED LINE Place Stamp Here GRIZZLY INDUSTRIAL, INC. P.O. BOX 2069 BELLINGHAM, WA 98227-2069 FOLD ALONG DOTTED LINE Send a Grizzly Catalog to a friend: Name_______________________________ Street_______________________________ City______________State______Zip______ TAPE ALONG EDGES--PLEASE DO NOT STAPLE...
-
Page 51: Warranty & Returns
WaRRaNty & REtuRNS Grizzly Industrial, Inc. warrants every product it sells for a period of 1 year to the original purchaser from the date of purchase. This warranty does not apply to defects due directly or indirectly to misuse, abuse, negligence, accidents, repairs or alterations or lack of maintenance.