Table of Contents
Advertisement
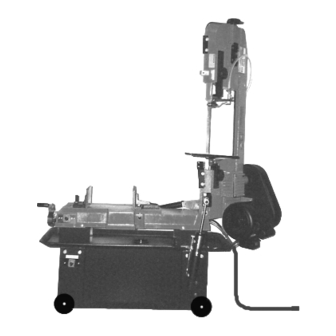
7" X 12"
METAL CUTTING BANDSAW
Model 93507
ASSEMBLY AND OPERATING INSTRUCTIONS
Due to continuing improvements, actual product may differ slightly from the product described herein.
®
3491 Mission Oaks Blvd., Camarillo, CA 93011
Visit our Web site at: http://www.harborfreight.com
TO PREVENT SERIOUS INJURY,
READ AND UNDERSTAND ALL WARNINGS
AND INSTRUCTIONS BEFORE USE.
Copyright
2005 by Harbor Freight Tools
. All right reserved. No portion of this manual or
©
®
any artwork contained herein may be reproduced in any shape or form without the express
written consent of Harbor Freight Tools.
For technical questions, please call 1-800-444-3353.
Advertisement
Table of Contents

Related Manuals for Central Machinery 93507


Summary of Contents for Central Machinery 93507
- Page 1 2005 by Harbor Freight Tools . All right reserved. No portion of this manual or © ® any artwork contained herein may be reproduced in any shape or form without the express written consent of Harbor Freight Tools. For technical questions, please call 1-800-444-3353.
-
Page 2: Table Of Contents
ADJUSTING ThE BLADE GUIDE BRACKETS: ............20 BASIC BANDSAW OPERATION -- VERTICAL POSITION: ........20 BASIC BANDSAW OPERATION -- hORIzONTAL POSITION: .......22 INSPECTION, MAINTENANCE, AND CLEANING ........24 TROUBLEShOOTING ................29 PARTS LIST ....................30 ASSEMBLY DIAGRAM ................32 For technical questions, please call 1-800-444-3353. SKU 93507 Page 2... -
Page 3: Product Specifications
Keep bystanders, children, and visitors away while operating a power tool. Distractions can cause you to lose control. Protect others in the work area from debris such as chips and sparks. Provide barriers or shields as needed. For technical questions, please call 1-800-444-3353. SKU 93507 Page 3... -
Page 4: Electrical Safety
Avoid accidental starting. Be sure the Power Switch is off before plugging in. Carrying power tools with your finger on the Power Switch, or plugging in power tools with the Power Switch on, invites accidents. For technical questions, please call 1-800-444-3353. SKU 93507 Page 4... - Page 5 When servicing a tool, use only identical replacement parts. Follow instruc- tions in the “Inspection, Maintenance, And Cleaning” section of this manual. For technical questions, please call 1-800-444-3353. SKU 93507 Page 5...
-
Page 6: Specific Safety Rules
SPECIFIC SAFETY RULES Maintain labels and nameplates on the Bandsaw. These carry important infor- mation. If unreadable or missing, contact Harbor Freight Tools for a replacement. Always wear safety impact eye goggles and heavy work gloves when using the Bandsaw. Using personal safety devices reduce the risk for injury. - Page 7 Your risk from these exposures varies, depending on how often you do this type of work. To reduce your exposure to these chemicals: work in a well ventilated For technical questions, please call 1-800-444-3353. SKU 93507 Page 7...
-
Page 8: Grounding
The green wire in the cord must be the only wire connected to the tool’s grounding system and must never be attached to an electrically “live” terminal. (See Figure A.) For technical questions, please call 1-800-444-3353. SKU 93507 Page 8... -
Page 9: Extension Cords
(See Figure C.) If you are using an extension cord outdoors, make sure it is marked with the suffix “W-A” (“W” in Canada) to indicate it is acceptable for outdoor use. For technical questions, please call 1-800-444-3353. SKU 93507 Page 9... - Page 10 * Based on limiting the line voltage drop to five volts at 150% of the rated amperes. SYMBOLOGY Double Insulated Canadian Standards Association Underwriters Laboratories, Inc. Volts Alternating Current Amperes n 0 xxxx/min. No Load Revolutions per Minute (RPM) For technical questions, please call 1-800-444-3353. SKU 93507 Page 10...
-
Page 11: Unpacking
UNPACKING When unpacking, check to make sure that the item is intact and undamaged. If any parts are missing or broken, please call Harbor Freight Tools at the number shown on the cover of this manual as soon as possible. -
Page 12: B - Remove The Shipping Bolt
Pulley Cover, and secure the lid with the Thumb Screw (190). (See Figure F.) PULLEY COVER (189) ThUMB SCREW SCREW (187) (190) WAShER (188) FIGURE F REV 10/06 For technical questions, please call 1-800-444-3353. SKU 93507 Page 12... -
Page 13: D - Attach The Tool Stop Rod And Block
Slide the Coolant Tank (107) back under the Table (39) of the Bandsaw. Then insert the Hose (102) through the hole in the white lid. (See Figure h.) hOSE (102) WhITE LID COOLANT TANK (107) FIGURE h For technical questions, please call 1-800-444-3353. SKU 93507 Page 13... -
Page 14: Wiring Instructions
230 VOLT, GROUNDED, ELECTRICAL OUTLET 3-PRONG, 230 VAC, (NOT INCLUDED) POLARIzED, TWISTLOCK, POWER CORD PLUG (NOT INCLUDED) 230V 120V FIGURE I FIGURE J For technical questions, please call 1-800-444-3353. SKU 93507 Page 14... -
Page 15: Operating Instructions
1/2 turn and move the Front Vise to the desired position. Then tighten the Front Vise against the workpiece by turning the Handle Wheel clock- wise. (See Figure L.) FRONT VISE (94) hANDLE WhEEL FIGURE L (47) REV 10/06 For technical questions, please call 1-800-444-3353. SKU 93507 Page 15... -
Page 16: Adjusting The Quick Vise For An Angle Cut
Adjust the Stop Block (73) to the desired length position. Then, retighten the Thumb Screw. (See Figure N.) (WORKPIECE NOT INCLUDED) STOP BLOCK (73) ThUMB SCREW (72) STOCK STOP ROD (74) FIGURE N For technical questions, please call 1-800-444-3353. SKU 93507 Page 16... -
Page 17: Converting The Bandsaw For Vertical Use
If a new Saw Blade does not correct the problem, check the Blade Adjustable Seats (134, 143) to obtain the proper clearance. (See Figure Q, next page.) For technical questions, please call 1-800-444-3353. SKU 93507 Page 17... -
Page 18: Adjusting The Blade Tracking
(127) is tracking properly, making sure Blade tension is maintained by turning the Blade Tension Knob (181). (See Figure R, next page.) Make sure to retighten the upper Screw (168) when adjustment is complete. (See Figure R.) For technical questions, please call 1-800-444-3353. SKU 93507 Page 18... -
Page 19: Adjusting The Blade Tension
Nut on the left one turn to increase feed rate. After adjusting, tighten the Nut on the right securely while holding the left nut still. (See Figure S.) SPRING ADJUSTING NUT (91) (88) NUT (91) FIGURE S For technical questions, please call 1-800-444-3353. SKU 93507 Page 19... -
Page 20: Adjusting The Blade Guide Brackets
Power Cord Plug (38) into the nearest 120 volt, grounded, electrical outlet (if the Bandsaw is powered by a 120 volt system). If powered by a 230 volt system, plug the Power Cord Plug into the nearest 230 volt, grounded, electrical outlet. For technical questions, please call 1-800-444-3353. SKU 93507 Page 20... - Page 21 VALVE (159) SAW BLADE (127) LARGE VERTICAL CUTTING PLATE (182) MOTOR TOGGLE SWITCh (37) hYDRAULIC CYLINDER (20) COOLANT PUMP TOGGLE SWITCh (11) POWER CORD PLUG (38) FIGURE U REV 10/06 For technical questions, please call 1-800-444-3353. SKU 93507 Page 21...
-
Page 22: Basic Bandsaw Operation -- Horizontal Position
(not included) with a larger workpiece. (See Figure V.) If cutting several workpieces at the same length, you may wish to adjust the Stop Block (73) to the desired position. (See Figure V.) REV 10/06 For technical questions, please call 1-800-444-3353. SKU 93507 Page 22... - Page 23 PUMP VALVE SAW hEAD (159) BLADE (127) MOTOR STOP BLOCK TOGGLE SWITCh (73) (37) hYDRAULIC CYLINDER (20) COOLANT PUMP TOGGLE SWITCh (11) POWER CORD PLUG FIGURE V (38) REV 10/06 For technical questions, please call 1-800-444-3353. SKU 93507 Page 23...
-
Page 24: Inspection, Maintenance, And Cleaning
If abnormal noise or vibration occurs, have the problem corrected before further use. Do not use damaged equipment. REV 10/06 For technical questions, please call 1-800-444-3353. SKU 93507 Page 24... - Page 25 IMPORTANT: The teeth must be pointing downward toward the Motor. (See Figure W.) BLADE TENSION KNOB (181) UPPER BLADE WhEEL (175) UPPER GUIDE ASSY. LOWER WhEEL COVER BLADE GUIDE (129) (127) ASSY. LOWER BLADE WhEEL (124) FIGURE W For technical questions, please call 1-800-444-3353. SKU 93507 Page 25...
- Page 26 Tighten the Hex Head Screw to secure the Motor (192) in place. (See Figure X.) PULLEY COVER (189) V-BELT (183) MOTOR PULLEY (185) PULLEY (184) hEX hEAD SCREW FIGURE X For technical questions, please call 1-800-444-3353. SKU 93507 Page 26...
- Page 27 Coolant from clogging the hoses. To replace the Coolant: Slide the Coolant Tank (107) out from under the Table (39) of the Bandsaw. (See Figure z, next page.) For technical questions, please call 1-800-444-3353. SKU 93507 Page 27...
- Page 28 AND NOT BY THE BUYER. THE BUYER ASSUMES ALL RISKS AND LIABILITY ARISING OUT OF HIS OR HER REPAIRS TO THE ORIGINAL PRODUCT OR RE- PLACEMENT PARTS THERETO, OR ARISING OUT OF HIS OR HER INSTALLATION OF REPLACEMENT PARTS THERETO. For technical questions, please call 1-800-444-3353. SKU 93507 Page 28...
-
Page 29: Troubleshooting
5. Gear not aligned properly. 5. Adjust Gears so that Worm is in center of Gear. (See page 26.) 6. Gears need lubrication. 6. Check Oil Bath. (See page 26.) For technical questions, please call 1-800-444-3353. SKU 93507 Page 29... -
Page 30: Parts List
Saw Bow Hex Head Screw 112N Tap Screw Spring Washer Vent Plug 58-1 Washer 114N Gear Box Cover Support Plate 115N Gear Box Gasket Stop Screw Worm Gear REV 04/06, 10/06 For technical questions, please call 1-800-444-3353. SKU 93507 Page 30... - Page 31 Hex Head Screw 161-1 Spring Washer C-Ring Adjustable Bracket (Rear) NOTE: Some parts are listed and shown for illustration purposes only, and are not available individually as replacement parts. REV 10/06 For technical questions, please call 1-800-444-3353. SKU 93507 Page 31...
-
Page 32: Assembly Diagram
ASSEMBLY DIAGRAM REV 10/06 For technical questions, please call 1-800-444-3353. SKU 93507 Page 32... - Page 33 ASSEMBLY DIAGRAM (CONT.) REV 10/06 For technical questions, please call 1-800-444-3353. SKU 93507 Page 33...
- Page 34 LIMIteD 90 DAy/1 yeAr wArrAnty Harbor Freight Tools Co. makes every effort to assure that its products meet high quality and durability standards, and warrants to the original purchaser for a period of ninety days from date of purchase that the motor/engine, the belts (if so equipped), and the blades (if so equipped) are free of defects in materials and workmanship.