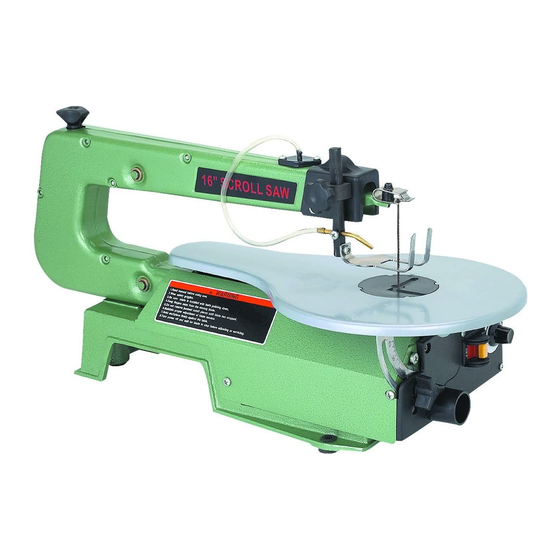
Central Machinery 93012 Assembly And Operating Instructions Manual
Harbor freight tools assembly & operating instructions 16 inch variable speed scroll saw 93012
Hide thumbs
Also See for 93012:
- Assebly and operation instructions (18 pages) ,
- Owner's manual & safety instructions (17 pages)
Table of Contents
Advertisement
16 INCH VARIABLE SPEED
SCROLL SAW
93012
ASSEMBLY AND OPERATING INSTRUCTIONS
3491 MISSION OAKS BLVD., CAMARILLO, CA 93011
VISIT OUR WEB SITE AT HTTP://WWW.HARBORFREIGHT.COM
®
Copyright © 2007 by Harbor Freight Tools
. All rights reserved. No portion of
this manual or any artwork contained herein may be reproduced in any shape or
form without the express written consent of Harbor Freight Tools.
For technical questions and replacement parts, please call 1-800-444-3353
Advertisement
Table of Contents

Summary of Contents for Central Machinery 93012
- Page 1 . All rights reserved. No portion of this manual or any artwork contained herein may be reproduced in any shape or form without the express written consent of Harbor Freight Tools. For technical questions and replacement parts, please call 1-800-444-3353...
-
Page 2: Specifications
Keep bystanders, children, and visitors away while operating a power tool. Distractions can cause you to lose control. Protect others in the work area from debris such as chips and sparks. Provide barriers or shields as needed. SKU 93012 For technical questions, please call 1-800-444-3353 SPECIFICATIONS... -
Page 3: Electrical Safety
Do not overreach. Keep proper footing and balance at all times. Proper footing and balance enables better control of the power tool in unexpected situations. SKU 93012 For technical questions, please call 1-800-444-3353 Electrical Safety eliminates the need for the three wire grounded power... -
Page 4: Tool Use And Care
SPECIFIC SAFETY RULES FOR THIS PRODUCT Maintain labels and nameplates on the Scroll Saw. These carry important information. If unreadable or missing, contact Harbor Freight Tools for a replacement. Always wear ANSI approved safety impact eye goggles, dust mask and heavy work gloves when using the Scroll Saw. - Page 5 Avoid unintentional starting. Make sure you are prepared to begin work before turning on the Scroll Saw. Do not force the Scroll Saw. This tool will do the work better and safer at the speed and capacity for which it was designed.
- Page 6 Your tool must be plugged into an appropriate outlet, properly installed and grounded in accordance with all codes and ordinances. The plug and outlet should look like those in the following illustration. (See Figure A.) Figure A SKU 93012 For technical questions, please call 1-800-444-3353 GROUNDING WARNING!
-
Page 7: Extension Cords
7.1 – 12.0 12.1 – 16.0 16.1 – 20.0 * Based on lim iting the line voltage drop to five volts at 150% of the rated am peres. SKU 93012 For technical questions, please call 1-800-444-3353 EXTENSION CORDS Table A... - Page 8 When unpacking, check to make sure that all the parts are included. Refer to the Assembly section, and the Assembly Drawing and Parts List at the end of this manual. If any parts are missing or broken, please call Harbor Freight Tools at the number on the cover of this manual as soon as possible.
-
Page 9: Mounting Scroll Saw To Workbench
ASSEMBLY INSTRUCTIONS Mounting Scroll Saw to Workbench Pick a solid, wood workbench to mount the saw. The workbench must be stable, and able to support the weight of the Scroll Saw and the material being cut. Find the four 5/16 inch mounting holes in the Base (9) and mark through the holes for drilling with a 3/8 inch drill bit. -
Page 10: Inside Cuts
Follow the procedures for removing and installing the Saw Blade (45) as described on page 13. Place the workpiece on the Saw Table (53) so that the hole is centered over the Blade access hole. Insert the Blade through the hole in the workpiece and the Saw Table (53). -
Page 11: Curved Cuts
Blade. When cutting curves, be careful not to twist the Blade out of line. If the curve cut is forced off the cut-line, back the material off the Saw Blade and start a new, straight cut through a scrap section of the material. Begin the curved cut again from an appropriate angle point. -
Page 12: Inspection, Maintenance, And Cleaning
Periodically recheck all nuts, bolts, and screws for tightness. Applying a light coat of paste wax on the Saw Table allows the material being cut to glide smoothly across the Saw Table (53) surface. Buff the wax off with a clean cloth after application. - Page 13 Upper Blade Holder (37) Saw Blade (45) The Scroll Saw can use a variety of blade widths and thicknesses, as long as they are five inches long and have the cross pin for mounting. These are used for cutting various types of...
-
Page 14: Troubleshooting
Included as an accessory are two Plain End Blade Adapters. When installed, they enable the mounting of plain end saw blades (not included). To install blades of this type: Using a Hex Wrench, loosen both set screws on each of the Plain End Blade Adapters. -
Page 15: Parts List
CENSED TECHNICIANS AND NOT BY THE BUYER. THE BUYER ASSUMES ALL RISK AND LIABILITY ARISING OUT OF HIS OR HER REPAIRS TO THE ORIGINAL PRODUCT OR REPLACEMENT PARTS THERETO, OR ARISING OUT OF HIS OR HER INSTALLATION OF REPLACEMENT PARTS THERETO. SKU 93012 For technical questions, please call 1-800-444-3353 PARTS LIST... -
Page 16: Assembly Drawing
ASSEMBLY DRAWING Page 16 SKU 93012 For technical questions, please call 1-800-444-3353...


