Table of Contents
Advertisement
Quick Links
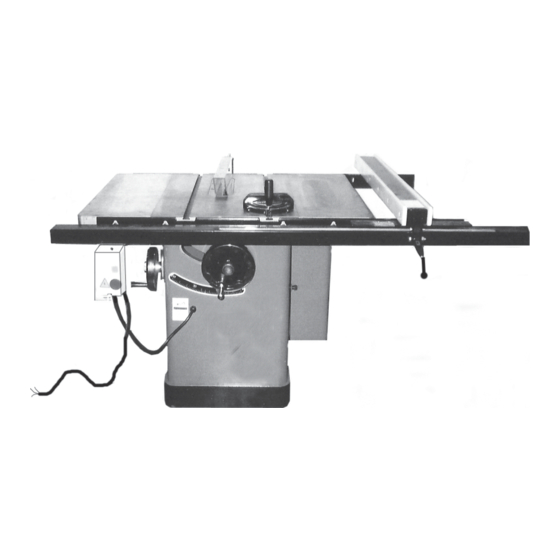
10" TILTING ARBOR, CABINET
ASSEMBLY AND OPERATING INSTRUCTIONS
Due to continuing improvements, actual product may differ slightly from the product described herein.
3491 Mission Oaks Blvd., Camarillo, CA 93011
Visit our Web site at: http://www.harborfreight.com
READ AND UNDERSTAND ALL WARNINGS
AND INSTRUCTIONS BEFORE USE.
©
Copyright
2005 by Harbor Freight Tools
manual or any artwork contained herein may be reproduced in any shape or form
without the express written consent of Harbor Freight Tools.
For technical questions, please call 1-800-444-3353.
TABLE SAW
Model 93380
TO PREVENT SERIOUS INJURY,
®
®
. All rights reserved. No portion of this
Advertisement
Table of Contents

Related Manuals for Central Machinery 93380


Summary of Contents for Central Machinery 93380
-
Page 1: Table Saw
2005 by Harbor Freight Tools . All rights reserved. No portion of this manual or any artwork contained herein may be reproduced in any shape or form without the express written consent of Harbor Freight Tools. For technical questions, please call 1-800-444-3353. -
Page 2: Product Specifications
Do not operate power tools in explosive atmospheres, such as in the presence of flammable liquids, gases, or dust. Power tools create sparks which may ignite the dust or fumes. SKU 93380 For technical questions, please call 1-800-444-3353. Page 2... -
Page 3: Electrical Safety
Avoid accidental starting. Be sure the Power Switch is off before plugging in. Plugging in power tools with the Power Switch on, invites accidents. SKU 93380 For technical questions, please call 1-800-444-3353. Page 3... - Page 4 Check for misalignment or binding of moving parts, breakage of parts, and any other condition that may affect the tool’s operation. If damaged, have the tool serviced before using. Many accidents are caused by poorly main- tained tools. SKU 93380 For technical questions, please call 1-800-444-3353. Page 4...
-
Page 5: Specific Safety Rules
Interrupter (GFCI). (See Figure A, page 10.) Maintain labels and nameplates on the Table Saw. These carry important information. If unreadable or missing, contact Harbor Freight Tools for a replacement. Avoid unintentional starting. Make sure you are prepared to begin work before turning on the Table Saw. - Page 6 The Saw Blade will become hot while cutting. Allow the Saw Blade to com- pletely cool before handling. Do not force the workpiece into the Saw Blade when cutting. Apply moder- SKU 93380 For technical questions, please call 1-800-444-3353. Page 6...
- Page 7 * When restarting a woodstock on the Table Saw, center the Saw Blade in the pre-cut kerf and check that the Saw Teeth are not engaged into the woodstock. If the Saw Blade is binding, the woodstock may walk up or kick- SKU 93380 For technical questions, please call 1-800-444-3353. Page 7...
- Page 8 Use the right tool for the job. Do not attempt to force small equipment to do the work of larger industrial equipment. There are certain applications for which this Table Saw was designed. It will do the job better and more safely at the rate SKU 93380 For technical questions, please call 1-800-444-3353. Page 8...
-
Page 9: Grounded Tools: Tools With Three Prong Plugs
Tools marked with “Grounding Required” have a three wire cord and three prong grounding plug. The plug must be connected to a properly grounded outlet. If the tool should electrically malfunction or break down, grounding provides a low SKU 93380 For technical questions, please call 1-800-444-3353. Page 9... -
Page 10: Extension Cords
(See Figure B.) When using more than one extension cord to make up the total length, make sure each cord contains at least the minimum wire size required. (See Figure B.) SKU 93380 For technical questions, please call 1-800-444-3353. Page 10... - Page 11 150% of the rated amperes. SYMBOLOGY Double Insulated Canadian Standards Association Underwriters Laboratories, Inc. Volts Alternating Current Amperes No Load Revolutions xxxx/min. per Minute (RPM) FIGURE C SKU 93380 For technical questions, please call 1-800-444-3353. Page 11...
-
Page 12: Setup Instructions
When unpacking both boxes, check to make sure all the parts shown on the Parts Lists on pages 31, 33, and 34 are included. If any parts are missing or broken, please call Harbor Freight Tools at the number shown on the cover of this manual as soon as pos- sible. - Page 13 Remove the waxy oil with a solvent or citrus- based de-greaser. NOTE: Chlorine-based cleaners and solvents will damage the painted surfaces of the Table Saw. SKU 93380 For technical questions, please call 1-800-444-3353. Page 13...
-
Page 14: Assembly Instructions
Main Table (115) directly above the front Bolts (111), and flush with the edge of the Main Table. Then, firmly tighten the front Bolts. (See Figure G.) BOLTS (111) FLAT WASHERS (112) FIGURE G SKU 93380 For technical questions, please call 1-800-444-3353. Page 14... -
Page 15: Self-Tapping Screw
Repeat Step #1 above to attach the Rear Rail (24B) to the rear edges of the Left Wing, Main Table, and Right Wing. (See Figure I.) BOLT (27B) ELASTIC WASHER (26B) FIGURE I FLAT WASHER (25B) SKU 93380 For technical questions, please call 1-800-444-3353. Page 15... - Page 16 Threaded Nut (109) on the Spindle (105). (See Figure K, next page.) Remove the Left-Threaded Nut (109) and the Outer Flange (108) from the Spindle (105). Remove and discard the 3/4” diameter spacer on the Spindle. (See Figure K.) SKU 93380 For technical questions, please call 1-800-444-3353. Page 16...
- Page 17 Saw Blade through its full range of motion. Also, rotate the Saw Blade, making sure the Blade never contacts any part of the Table Insert. Repeat this proce- dure with the Saw Blade in the 45 position. SKU 93380 For technical questions, please call 1-800-444-3353. Page 17...
- Page 18 BOLT (123) FLAT WASHER (124) ELASTIC WASHER (125) NUT (126) L-BRACKET (122) BOLT (129) ELASTIC WASHER (128) FLAT WASHER (127) SHAFT (74) LOWER GUARD BRACKET (120) SCREW FIGURE M (121) SKU 93380 For technical questions, please call 1-800-444-3353. Page 18...
- Page 19 To Attach The Power Switch Assembly: Attach the Power Switch Assembly (137) to the left end of the Front Rail (23B), using two Screws (135). (See Figure O, next page.) SKU 93380 For technical questions, please call 1-800-444-3353. Page 19...
- Page 20 Using an accurate straight edge, align the Splitter (315) with the Saw Blade. Make sure the straight edge rests against the side of the Saw Blade. (See Figure Q.) FIGURE Q FIGURE P SKU 93380 For technical questions, please call 1-800-444-3353. Page 20...
- Page 21 Set Screw (39) in the middle groove of the Motor Pulley (38) and slowly slide the Pulley toward the end of the Motor (34) Shaft. Once the V-Belts are back in alignment, tighten the Set Screw securely. (See Figure T.) FIGURE S SKU 93380 For technical questions, please call 1-800-444-3353. Page 21...
- Page 22 Place a square on the Main Table (115) and check to see that the Saw Blade is at a 90 degrees angle to the Main Table. Make sure the square is touching the side of the Saw Blade. (See Figure U.) SKU 93380 For technical questions, please call 1-800-444-3353. Page 22...
- Page 23 Select a tooth on the far side of the Saw Blade and directly over the Table Insert (116A, 116B). Mark the tooth with a marker. Measure the distance from the SKU 93380 For technical questions, please call 1-800-444-3353. Page 23...
-
Page 24: Operating Instructions
TABLE MOUNTING HOLES FIGURE W OPERATING INSTRUCTIONS Basic Operation For Using The Rip Fence Assembly: WARNING! Always wear safety impact eye goggles and heavy work gloves when using the Table Saw. SKU 93380 For technical questions, please call 1-800-444-3353. Page 24... - Page 25 Saw Blade. Do not force the Saw Blade to remove material faster than it is designed to cut. RIP FENCE ASSY. (1B THRU 27B) LOCK LEVER (9B) POWER SWITCH (137) FIGURE X SKU 93380 For technical questions, please call 1-800-444-3353. Page 25...
- Page 26 Set the Miter Gauge assembly (200 thru 214) on the Main Table (115) of the Table Saw. (See Figure Y.) MITER GAUGE BODY KNOB (202) (200) POWER SWITCH (137) FIGURE Y SKU 93380 For technical questions, please call 1-800-444-3353. Page 26...
-
Page 27: Inspection, Maintenance, And Cleaning
If abnormal noise or vibration occurs, have the problem corrected before further use. Do not use damaged equipment. SKU 93380 For technical questions, please call 1-800-444-3353. Page 27... - Page 28 To clean the exterior parts of the Table Saw, use only a clean cloth and mild detergent to clean the body of the Saw. Then, dry. Do not immerse any electrical part of the tool in any liquids. SKU 93380 For technical questions, please call 1-800-444-3353. Page 28...
-
Page 29: Motor Pulley
THE BUYER ASSUMES ALL RISKS AND LIABILITY ARISING OUT OF HIS OR HER REPAIRS TO THE ORIGINAL PRODUCT OR REPLACEMENT PARTS THERETO, OR ARISING OUT OF HIS OR HER INSTALLATION OF REPLACEMENT PARTS THERETO. SKU 93380 For technical questions, please call 1-800-444-3353. Page 29... -
Page 30: Troubleshooting
TROUBLESHOOTING SOLUTION POSSIBLE REASON TROUBLE 1. Allow Motor to cool and reset by turning Power Switch to “ON” SKU 93380 For technical questions, please call 1-800-444-3353. Page 30... -
Page 31: Parts List
SKU 93380 For technical questions, please call 1-800-444-3353. Page 31... -
Page 32: Assembly Diagram
ASSEMBLY DIAGRAM NOTE: Some parts are listed and shown for illustration purposes only, and are not available individually as replacement parts. SKU 93380 For technical questions, please call 1-800-444-3353. Page 32... - Page 33 Pointer Roll Pin Pawl Stop Retainer Set Screw Splitter Blade Guard NOTE: Some parts are listed and shown for illustration purposes only, and are not available individually as replacement parts. SKU 93380 For technical questions, please call 1-800-444-3353. Page 33...
- Page 34 Elastic Washer (GB859-10) Nut (GB889-M8) Bolt (GB5781-M10x25) Fence Body 7B 8B NOTE: Some parts are listed and shown for illustration purposes only, and are not available individually as replacement parts. SKU 93380 For technical questions, please call 1-800-444-3353. Page 34...
- Page 35 POWER SWITCH SCHEMATIC SKU 93380 For technical questions, please call 1-800-444-3353. Page 35...