Table of Contents
Advertisement
Advertisement
Table of Contents

Related Manuals for Henny Penny CLIMAPLUS LCS


Summary of Contents for Henny Penny CLIMAPLUS LCS
- Page 1 Applications Manual and Cooking Guide ClimaPlus Combis ® All LCS and LCG Models...
- Page 2 Any claim must be presented to either Henny Penny or the distributor from whom the appliance was purchased. No allowance will be granted for repairs made by anyone else without Henny Penny’s written consent. If damage occurs during shipping, notify the carrier at once so that a claim may be filed.
- Page 3 Dear Customer, Congratulations on your decision to purchase a new Henny Penny ClimaPlus Combi. In our opinion, you now possess the most advanced ® combi in the industry, featuring IQT–Intelligent Cooking Technology– and the unique ClimaPlus Control which provides the ideal cooking ®...
-
Page 4: Table Of Contents
Table of Contents General Information Operating the Clima Plus Combi Cooking Modes ...16 Cooking Functions Probe Cooking with IQT Sensor ...30 IQT Logic Programs IQT Key Special Functions Programming ...43 Additional Key Pad Functions Cleaning...54 Installation – Electric and Gas Units ...59 Cooking Guides ...68 Distributors ...83 Models and Features ...5... -
Page 5: General Information
Basic Operation Loading and Unloading ClimaPlus Control ClimaPlus Combis from Henny Penny have the potential to make your entire approach to foodservice production simpler, more consistent and more productive. Simpler because, ultimately, you will use fewer appliances as you become more adept at utilizing the ClimaPlus for different applications. -
Page 6: Models And Features
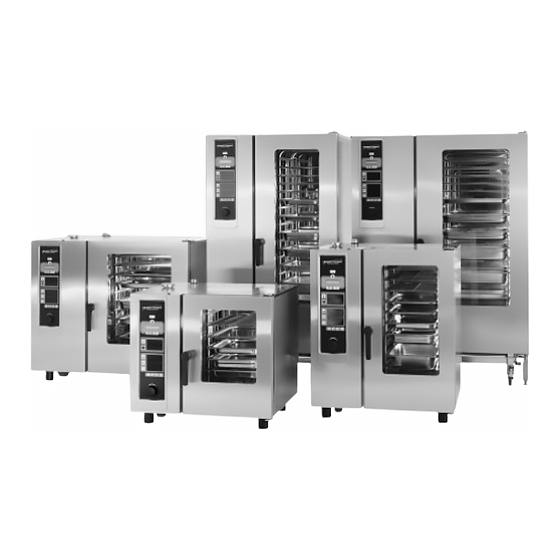
GENERAL INFORMATION Models and Features Models and sizes available Model numbers are designated according to pan capacity. Units are available in either electric (LCS) or gas (LCG.) Base-top models Floor models NOTE: Features may vary between gas and electric models. Accessories may vary according to unit size. - Page 7 GENERAL INFORMATION Models and Features Control continued ClimaPlus Control regulates precise humidity for unlimited combinations of moist and dry heat. Fully digital operation Alphanumeric LED readouts featuring optional Asian character display Auto-reverse fan Cooking control functions: • Steam Injection • Half Speed Fan (Available on all LCS electric models and the LCG-40) •...
- Page 8 GENERAL INFORMATION Models and How it works Features continued 1. Steam is created and dispersed 2. Dry heat up to 575°F (300°C) 3. Select either Moist Heat or 4. Precise combinations of moist 5. ClimaPlus regulates cooking rapidly from the self-cleaning steam generator.
-
Page 9: Control Panel Functions
GENERAL INFORMATION Control Panel Functions PROG START LCS COMBI ClimaPlus COOK SYSTEM at a glance ON/OFF switch ClimaPlus function key with control arrows (green) ClimaPlus display window MOIST HEAT MODE key DRY HEAT MODE key • Press MOIST HEAT MODE key and DRY HEAT MODE key for COMBINATION MODE CABINET TEMPERATURE indicator key CABINET TEMPERATURE display... -
Page 10: Basic Operation And Settings
GENERAL INFORMATION Basic Operation and Settings Turning unit on Select Cooking Mode Choosing Time and Temperature Cooking Dial in settings while the display is flashing. In most cases, settings can be changed in this manner at any time during the cooking process. Choosing IQT Sensor Cooking Dial in settings while the display is flashing. -
Page 11: Loading And Unloading
INFORMATION Loading and Unloading Your Henny Penny ClimaPlus Combi includes either a removable hinged racking system (standard with 6 and 10-pan units) or a mobile oven rack that is integral to the equipment’s operation. All pans and grids are loaded directly onto the hinged racking system, or onto the mobile oven rack which is then rolled into the cooking cabinet. - Page 12 GENERAL INFORMATION Loading and Unloading continued NOTE: LCS & LCG models 20 & 40 have a built-in safety latch that lets steam and heat out before door fully opens. Safety latch is optional on models 6, 10 and 1020. If your ClimaPlus Combi is NOT equipped with this feature, open door slightly until fan stops and steam dissipates.
- Page 13 GENERAL INFORMATION Loading and Partial Loads Unloading Individual pans or racks of product can be easily loaded or unloaded while the unit continued is in operation. Open door slightly until fan stops and heat dissipates. Open door fully with care. Using oven mitts or pads, load or unload individual containers.
-
Page 14: Climaplus ® Control
GENERAL INFORMATION ClimaPlus Use ClimaPlus Control to set, measure and maintain desired humidity in the cooking environment. ClimaPlus is a patented technology that precisely and automatically measures and controls the amount of humidity in the cooking climate. This gives operators the flexibility and control to produce crisp crusts for roast chicken... - Page 15 GENERAL INFORMATION ClimaPlus Control Capabilities continued ClimaPlus works by constantly monitoring and controlling the level of humidity in the cooking environment. Most foods release moisture into the air as they cook, naturally building excess humidity in the cabinet. When humidity rises above the set level, ClimaPlus removes excess moisture.
-
Page 16: Operating The Climaplus Combi
Installation The following section presents in some detail a complete overview of the operation of your Henny Penny ClimaPlus Combi. You'll find the advantages, tips and step-by-step operating instructions for each feature of the LCS and LCG models, from cooking modes to IQT applications and additional keypad functions. -
Page 17: Cooking Modes
Cooking Modes ClimaPlus Combis have two basic cooking modes: Moist Heat and Dry Heat. These two cooking modes can be used individually, in sequence, or together in a third Combination mode. Almost all traditional cooking processes can be accomplished in these modes. Moist Heat Mode The steam generator produces hygienic steam and releases it (without pressure) into the cooking cabinet where it is circulated at high speeds by the fan. -
Page 18: Moist Heat Mode
COOKING MODES Moist Heat Mode Pressureless steam generation and auto-reverse fan quickly produce a cooking environment of 100% humidity. Perfect for steaming a wide variety of foods with no flavor transfer. Also used for stewing, blanching, poaching, simmering, soaking, thawing, rethermalizing, preserving. Advantages Extremely short preheating time. - Page 19 COOKING MODES Moist Heat Operation and Settings continued Turn unit on. Select MOIST HEAT mode and set TIMER on Continuous Run. Only blue bars appear in ClimaPlus window indicating 100% moist heat. Preheat until temperature reaches 212°F (100°C), or to desired temperature. CONT-RUN Load oven.
-
Page 20: Tender Steaming
COOKING MODES Tender Steaming A gentle cooking application in Moist Heat mode that uses steam with less air turbulence at temperatures below the boiling point. Use Tender Steaming for scalding, poaching, thawing, proofing, simmering, blanching, rethermalizing, soaking, vacuum cooking, and preserving. Advantages Menu suggestions Tips... - Page 21 COOKING MODES Tender Steaming Cooking times continued Moist Heat mode principles apply: generally, the lower the cooking temperature the longer the cooking time. Seasoning Season lightly. Low temperature cooking intensifies a food’s natural taste, as well as the taste of seasonings. For the same reason, use less essences or reducing agents. Texture, appearance Tender Steaming imparts excellent characteristics to food for presentation in display merchandisers:...
-
Page 22: Forced Steaming
COOKING MODES Forced Steaming A cooking application in Moist Heat mode using additional heat to allow full-humidity steaming at temperatures well above boiling. Forced Steaming is excellent for cooking dense products, such as root vegetables and frozen casseroles. Advantages Creates an intensified cooking process Shorter cooking times Product retains color, nutrients Less shrinkage... - Page 23 COOKING MODES Forced Steaming Operation and settings continued Turn unit on. Select MOIST HEAT mode and set TIMER on Continuous Run. Preheat to set temperature. CONT-RUN Load oven. Set desired Forced Steaming TEMPERATURE 213-265°F (101-130°C) using Central Dial. Select TIMER. Set desired cooking time using Central Dial OR select IQT Sensor and set desired core temperature using Central Dial OR select Continuous Run.
-
Page 24: Dry Heat Mode
COOKING MODES Dry Heat Mode Powerful convection heating and auto-reverse fan create the ideal environment for fast, even broiling, roasting, baking, browning, thawing, grilling and sautéing. Advantages Menu suggestions Tips Cooking times Proper cooking times will vary depending on the quality, weight, or size of the product being cooked. - Page 25 COOKING MODES Dry Heat Baking continued Preheat to desired baking temperature. In general, ClimaPlus Combi baking temperatures will be 70-80°F (20-25°C) LOWER than conventional ovens. When baking do NOT preheat pans. For bread, rolls, and muffins use only every second rack. Trays should not be deeper than 2 Defrost frozen bread dough and let rise for a short time before baking.
-
Page 26: Combination Mode
COOKING MODES Combination Mode Fast, consistent method for cooking foods that require a combination of moist and dry heat. Enables practically any percentage of humidity and precise control of the desired level. Use when combi-baking, combi-roasting, combi- steaming, browning, braising, glazing, basting. Advantages Menu suggestions Tips... - Page 27 COOKING MODES Combination Operation and settings continued Turn unit on. Press Moist Heat and Dry Heat keys at the same time to set on COMBINATION mode. CONT-RUN Set TIMER on Continuous Run. A bar that is mostly blue and partly red appears in ClimaPlus window, indicating that the ClimaPlus Control is set at 90% humidity.
-
Page 28: Rethermalizing
COOKING MODES Rethermalizing Rethermalizing is a cooking application that utilizes a combination of moist and dry heat plus ClimaPlus Control to maintain flavor and textures when bringing chilled cooked foods back up to serving temperatures. Advantages Different food products can be reheated without being covered. Perfect mode for re-heating ingredients, servings or meals previously cooked and chilled as part of a cook/chill production process. - Page 29 COOKING MODES Rethermalizing Create a custom cooking program with Rethermalizing settings that can be used for similar recurring situations. continued Use ClimaPlus Control to “fine tune” Rethermalizing to achieve desired results. Operation and settings Turn unit on. Press Moist Heat and Dry Heat keys at the same time to set on COMBINATION mode.
-
Page 30: Cooking Functions
Cooking Functions ClimaPlus Combis feature a host of digital controlled functions that can be employed to create the perfect cooking environment for practically any type of food. These functions also help automate the cooking process, saving labor and providing consistent results, load after load. Probe cooking with IQT Sensor The new IQT Sensor 5-point probe works with IQT Logic and the ClimaPlus Control to automatically produce the desired browning, texture and core food... -
Page 31: Probe Cooking With Iqt Sensor
COOKING FUNCTIONS Probe Cooking The Probe Cooking function allows the operator to select the food’s desired “done” temperature. The IQT Sensor probe is inserted into the food to measure the actual internal temperature of the food as it cooks. The IQT Logic controls the cooking time and stops the cooking cycle when the selected internal temperature is achieved. -
Page 32: Cooking Functions Probe Cooking With Iqt Sensor
COOKING FUNCTIONS Probe Cooking Operation and settings with IQT Sensor continued NOTE: Be sure IQT Sensor is clean and cool prior to insertion. NOTE: TIMER function does not operate when using probe function. If TIMER is set before selecting IQT Sensor, the cook time continues to run in the back- ground, but does not control the cooking process. - Page 33 COOKING FUNCTIONS Probe Cooking Probe Cooking Guide to “Doneness” with IQT Sensor Meat continued Beef Veal Pork Lamb Mutton Fully cooked 165°F Poultry Fully cooked 185°F Probe “Done Temp” Rare 130°F 55°C Medium rare 140F 60°C Medium 145°F 63°C Well done 167-189°F 75-65°C Fully cooked 155-170°F...
-
Page 34: Iqt +Profile Cooking
COOKING FUNCTIONS IQT + Profile Cooking +PROFILE IQT +Profile Cooking allows operators to dial in both the desired core temperatures AND the degree of browning/crispness–IQT Logic does the rest. Capabilities +Profile is an automated cooking control program that is essentially “self-regulating” in nature. - Page 35 COOKING FUNCTIONS IQT + PROFILE Operation and settings continued Turn unit on. Load oven rack. Insert probe into thickest part of meat, or into central location of other types of foods, on center oven rack. NOTE: Be sure IQT Sensor is clean and cool prior to insertion. DO NOT select cooking mode.
-
Page 36: Iqt +Low-T Cooking
COOKING FUNCTIONS IQT + Low-T Cooking +PROFILE IQT +Low-T Cooking offers operators a completely automated low temperature slow-cook solution for maximizing yield, color and consistency of large roasts. Capabilities +Low-T (low temperature) is a gentle cooking process designed for cooking large roasts over a long period of time. - Page 37 COOKING FUNCTIONS IQT + LOW-T COOKING Operation and settings continued Turn unit on. DO NOT load yet. DO NOT select cooking mode. Deactivate if mode has already been selected. Press IQT key: (“+PROFILE” appears in the adjacent display.) Use Central Dial to select +LOW-T.
-
Page 38: Iqt +Delta-T Cooking
COOKING FUNCTIONS IQT + Delta-T Cooking +DELTA-T IQT +Delta-T Cooking offers operators a gentle, effective and completely auto- mated program for cooking hams and large marinated, salted or cured cuts of meat with the best flavor and yield. Capabilities +Delta-T uses IQT Logic to provide a gentle slow-cooking process in which the cabinet temperature rises slowly in direct proportion to the rise in the core temperature of the meat. - Page 39 COOKING FUNCTIONS IQT + DELTA-T Operation and settings COOKING Turn unit on. continued Load oven rack. Insert IQT Sensor probe. DO NOT select cooking mode. Deactivate if mode has already been selected. Press IQT key: (“+PROFILE” appears in the adjacent display.) Use Central Dial to select +DELTA-T.
-
Page 40: Preset Program Library
COOKING FUNCTIONS Preset Program Library +ROASTCHI Built-in programs for cooking, preheating, rethermalization and cleaning. The IQT key can be used to access a library of preset programs based on manufacturer’s research and testing. The library includes a host of cooking programs for basic items. There are also programs for efficient preheating, rethermalizing plated portions, and a cleaning program. -
Page 41: Delta-T
COOKING FUNCTIONS Half Energy continued Press IQT key. Use Central Dial to select Half Energy. Display will read “E 1/2 OF”. E 1/2 OF Press PROG/START key to activate function. Display will change to “E 1/2 ON”. PROG E 1/2 ON START When Half Energy is in operation, the letter “E”... -
Page 42: Haccp Interface
COOKING FUNCTIONS HACCP HACCP PROG 1 . 60 START Special Functions: HACCP Interface A special capability that records, prints and/or transmits actual cooking data for conformance with HACCP procedures. The ClimaPlus Combi is equipped with a serial interface to output key cooking data, such as core temperature progression, cabinet temperature, start and end times, etc. - Page 43 COOKING FUNCTIONS HACCP Interface Windows 95 and Windows 98 continued 1. Create a new connection in Hyper Terminal and name it “HACCP.” 2. In the “Phone Number” dialog box, click on Connect Using and select 3. In the Properties dialog box that appears, select the following settings: 4.
-
Page 44: Programming
COOKING FUNCTIONS Programming PROG START Programming capabilities of the ClimaPlus Combi allow operators to: If you are not already familiar with the LCS control panel, please review page 8 before attempting to program your unit. Capabilities Memory Control Create custom cooking programs Incorporate IQT functions into custom programs Lock/Unlock programs Up to 99 total cooking programs are available to the operator. - Page 45 COOKING FUNCTIONS Programming Programming the ClimaPlus Combi continued To create custom cooking programs: Turn unit on and open door. PROG LASAGNA Press the PROG/START key. The display shows the current program START number/name. Select the desired program number (1-99) using Central Dial. Flashing numbers indicate available program numbers.
- Page 46 COOKING FUNCTIONS Programming Naming programs: continued You may wish to name programs in order to identify them faster and more reliably. Names can contain up to eight characters. PROG START PIE A Programs are stored by name or by number. Named programs will be stored in alphabetical order and will appear first in the display, followed by the numeric dis- play.
- Page 47 COOKING FUNCTIONS Programming NOTES: continued Any cooking parameter in any step of a program can be changed. However, once saved, no step can be added or removed. Factory Preset Programs (See Library of Preset Programs, page 39) CANNOT be edited. However, they can be copied and saved as a custom program, and then edited.
- Page 48 COOKING FUNCTIONS PROG PIE A START PROG START PROG START ********* C******** *L******* PROG LOCK PROG START To insert IQT Logic programs as custom program steps: Follow the procedures for creating a new program or changing a saved program. When the desired step is displayed, follow the procedures above for copying an IQT Logic program.
- Page 49 COOKING FUNCTIONS To Change Programming Password IMPORTANT: If the pre-programmed password is changed and then forgotten, it is only possible to deactivate the program locking system with a total reset procedure. If a total reset must be performed all custom programs in the system will be lost.
- Page 50 COOKING FUNCTIONS To specify settings AM:PM ENGLISH FAHRENH PROG START NOTE: If you have chosen the USER language selection, DO NOT exit with PROG/START. To convert text commands to User language: WATER WATER PROG START Setting the clock The unit’s clock can be set to display continuous operation or real time. Automatic start-up time can also be set.
- Page 51 COOKING FUNCTIONS To set real time: Press and hold the TIMER key for about 10 seconds, skipping the start-time REALTIME display. Display shows “REALTIME”. Use Central Dial to set correct real time. 9:15 AM Press TIMER once to store real time. To set automatic Start Time: Press TIMER key for about 5 seconds, skipping the duration display.
-
Page 52: Steam Injection
COOKING FUNCTIONS Additional functions: Steam Injection Steam Injection is a keypad function enabled in Dry Heat mode that, when activated, sprays a four-second burst of water onto heating elements, creating an immediate and brief humidified environment in the cooking cabinet. Advantages Tips Operation and settings... -
Page 53: Half Speed Fan
COOKING Available on all LCS electric models and the LCG-40 FUNCTIONS Additional functions: Half Speed Fan Half Speed Fan is a keypad function that reduces fan speed by one-half to produce less turbulence in the cooking environment. Advantages Maintains a gentle cooking environment for light pastries, custards and other items with exposed fillings. -
Page 54: Cool Down
COOKING FUNCTIONS Additional Functions: Tips Pulse Fan continued Operation and settings Additional functions: Cool Down Cool Down is a keypad convenience function that enables the fan to continue operating when the door is open. This dissipates heat quickly. Advantages Operation and control OPEN DOOR COOL DOWN NOTE: Always cool unit down 20-30°... -
Page 55: Cleaning
2. Allow cooking cabinet to cool down below 130°F (55°C). 3. Spray all interior cabinet surfaces (even behind the pivoted air baffle) as well as oven rack, grids and pans thoroughly with Henny Penny Oven and Grill Cleaner. (Goggles and gloves should be worn when using chemicals.) To initiate factory pre-set cleaning program (about 40 minutes) NOTE: If you do not wish to use pre-set cleaning program, skip steps 4-6. -
Page 56: Using Cleanjet
CLEANING Using CleanJet CLEANJET ClimaPlus Combis are now equipped with CleanJet, a unique, patented system that cleans and rinses the cabinet interior with no labor or supervision whatsoever. The CleanJet cleaning arm The special CleanJet arm attaches to the inside of the cabinet and lays down a powerful “vortex”... - Page 57 CLEANING Unit must be on, WITHOUT CleanJet arm(s) attached, and no mode selected. Press TEMPERATURE and TIMER keys simultaneously for about 10 seconds 24:00 or until the TIMER display reads “24:00” or “AM:PM”. Press TEMP key three times. Either “+STEP 0”, “STANDARD” or “+STEP56”...
- Page 58 CLEANING Cycle time in minutes. Detergent and rinse values in ounces. Water values in gallons. CleanJet ® continued Tables of cycle times and water usage for CleanJet ® Cycle time in minutes. Detergent, rinse and water values in liters. Guide to selecting Level 0 Very small amounts of crumbs from bakery products.
-
Page 59: Cds Calcdiagnosis System
IMPORTANT: Descaling should ALWAYS be performed by a certified and properly trained technician. CDS CalcDiagnosis Henny Penny ClimaPlus Combis are equipped with a special feature called CDS CalcDiagnosis that monitors limescale build-up and warns the operator when descaling is necessary. This is a particular advantage because the CalcDiagnosis system permits the operator to schedule descaling not just regularly or randomly, but when needed. -
Page 60: Installation - Electric And Gas Units
Installation Refer to the following pages for important information regarding the installation of LCS and LCG ClimaPlus Combis. It is recommended that installation be accomplished by a certified and properly trained technician. NOTE: When installing a ClimaPlus combi, humidity calibration must be performed. - Page 61 INSTALLATION Unit weights: LCS 6: LCS 10 continued LCS 1020 LCS 20 LCS 40 6) Installation models 6, 10, 1020 Fig. 3 7) Installation models 20, 40 Fig. 4 Fig. 5 Electrical 8) Electrical connection Fig. 6 Connected load for electric units: Fig.
- Page 62 Common tap 208 volt tap IMPORTANT Fig. 11 In some areas Henny Penny Electric Combis are shipped set up for 240 volts, but can be converted to 208 volt operation. If conversion is necessary the unit must be Jumper wire reset and calibrated.
- Page 63 Model Terminal Positions LCG-6 5 and 6 LCG-10 5 and 6 LCG-1020 5 and 6 LCG-20 6 and 7 LCG-40 5 and 6 Once conversion has been completed, a “total reset” of the CPU-PCB must be done. Record all end-user (custom) programs before undertaking a Total Reset. Secure all panels and covers.
- Page 64 WZ1 WZ2 Optional Treated Water Connection NOTE: If using external filter to treat hard water: Contact your Henny Penny distributor for average water consumption when using CleanJet. Increases in average water consumption may exceed specifications of external filters and may affect the frequency of filter maintenance.
-
Page 65: Gas Supply
INSTALLATION General 11) Technical Data Working place specific noise level: <70dB Average water consumption during operation: Model 6: Model 10: Model 1020: Model 20: Model 40: Heat emission: Model LCS/G-6 LCS-G-10 LCS/G-1020 LCS-G-20 LCS/G-40 Ventilation Contact your local regulatory agency for ventilation requirements. If a ventilation hood is installed, observe the following: The standards of the local authority. - Page 66 Gas pressure All Henny Penny Combi-Steamers are equipped with two heat exchanger systems. One is responsible for steam production, the second for dry heat. Each individual heat exchanger is heated with a separate burner assembly.
- Page 67 INSTALLATION During pressure testing note the following: continued 1. The unit and its individual shut-off valves must be disconnected from the gas supply piping system during any pressure testing of that system when test pressures exceed gas supply line. 2. The unit must be isolated from the gas supply piping system by closing its individual manual shut-off valves during any pressure testing of the gas supply piping system at test pressure equal to or less than 3.
- Page 68 INSTALLATION Utilize elbows when necessary to avoid sharp kinks or excessive bending. For ease of movement, install with a “lazy” loop. Gas appliance must be disconnected prior to continued maximum movement. (Minimum movement is permissible to disconnect gas line. Cable Restraint Please refer to the illustration at left when installing cable restraint on all moveable gas appliances Eye-bolt is to be secured to the building using acceptable building practices.
-
Page 69: Cooking Guides
Cooking Guides The following section offers basic guidelines for preparing a wide variety of popular menu items in the Henny Penny ClimaPlus Combi. Menu items are charted in a format that covers quantities, proper containers, times, temperatures, ClimaPlus Control settings, and whether probe cooking or and/or additional items should be employed. - Page 70 Meat & Poultry Item/Prep notes Container Rotisserie Style Chicken Chicken grid ⁄ -3 lb. whole birds. Season. Per load Time cook–check for internal temp. 185 (85). Or, use IQT +Profile. 1020 Item/Prep notes Container Baked Chicken, pieces ⁄ sheet pan Eight cut.
- Page 71 Item/Prep notes Container Steaks, chops Grid Season. Preheat grids to Per load 575 (300). Vary time for thickness and desired doneness. 1020 Pork, add 3-5 min. Serving tip: Plate grid side up. Item/Prep notes Container Roast Beef Grid/drip pan 1 per grid Rib Roast (Prime Rib) Per load 10-18 lb.
- Page 72 Meat & Poultry continued Item/Prep notes Container Corned Beef Brisket, raw Grid/drip pan 1 piece per grid Texture is more important Per load than core temperature. Allow sufficient cook time for brisket to become very tender. 1020 Item/Prep notes Container Beef Stew ⁄...
- Page 73 Item/Prep notes Container Sausage, links or patties ⁄ sheet pan Per load 1020 Item/Prep notes Container Smoked Sausage Grid or ⁄ sheet 4 (1.8) per grid Time cook or probe cook. Per load 1020 Item/Prep notes Container Italian Sausage, Bratts Grid or ⁄...
- Page 74 Pork continued Item/Prep notes Container Pork Roast Grid/drip pan Fresh Ham, large Per load 8 lbs. (3.6 kg) or more. Season. IQT +Profile 1020 Item/Prep notes Container Smoked ham Grid/drip pan 1 per grid 12-15 lbs. (5.5-6.8 kg) hams. Per load 1020 Fish, Seafood Item/Prep notes...
- Page 75 Item/Prep notes Container Breaded Fish Pieces ⁄ in. enamel Lightly grease pan. Per load Spray top of product with shortening prior to cooking. 1020 Item/Prep notes Container Cocktail Shrimp Perf pan Season. Cook in shell. Per load Remove and blast-chill immediately.
- Page 76 Meats, Special Cuts Item/Prep notes Container Cutlets, breaded ⁄ in. enamel Bread. Preheat pans to Per load 575 (300). Spray top of product with shortening prior to cooking. 1020 Item/Prep notes Container Medallions ⁄ in. enamel Season or marinate. Preheat Per load pan to 575 (300).
- Page 77 Item/Prep notes Container Roasted Potatoes ⁄ sht or enam 6 lbs. (2.7 kg) Cut, oil, season. Per load 1020 Breads Item/Prep notes Container Proofing ⁄ sheet pan Lightly grease pan. Per load Proof until dough doubles in size. 1020 Item/Prep notes Container Bread Dough ⁄...
- Page 78 Breads continued Item/Prep notes Container Cinnamon Rolls ⁄ sheet pan Proof first. Per load Lightly grease pan. 1020 Item/Prep notes Container Biscuits, frozen ⁄ sheet pan Lightly grease pan. Per load Serving tip: Melted butter may be brushed on biscuit tops after cooking.
- Page 79 Item/Prep notes Container Cobbler ⁄ in. pan According to recipe. Per load 1020 Item/Prep notes Container Pie, fresh ⁄ sheet pan Brush tops with egg wash. Per load 1020 Item/Prep notes Container Bread Pudding ⁄ in. pan According to recipe. Per load Lightly grease pans.
- Page 80 Miscellaneous continued Item/Prep notes Container Vegetables, frozen ⁄ in. perf. pan 9 lbs. (4 kg) Per load 1020 Item/Prep notes Container Vegetables, fresh ⁄ in. perf. pan Cut to desired serving size. Per load 1020 Item/Prep notes Container Beans, dry ⁄...
- Page 81 Item/Prep notes Container Egg Rolls, frozen ⁄ sheet pan 24 per pan 3-4 oz. egg rolls. Per load 1020 Item/Prep notes Container Pizza, frozen Perf alum Maximum diameter pizza for Per load half sheet pan is 12 in. Models 1020 and 40 can accommodate larger pizzas 1020 on full size sheet pans...
- Page 82 Miscellaneous continued Item/Prep notes Container Stir Fry ⁄ in. enam 8 lbs. (3.6 kg) Prepare ingredients according Per load to recipe. Preheat pans to 575 (300). Sauce after removing food 1020 from unit. Max yield Cooking stages and suggested parameters Step Mode Temp...
- Page 83 Item/Prep notes Container Per load 1020 Item/Prep notes Container Per load 1020 Item/Prep notes Container Per load 1020 Item/Prep notes Container Per load 1020 Item/Prep notes Container Per load 1020 Max yield Cooking stages and suggested parameters Step Mode Temp Per load Max yield Cooking stages and suggested parameters...
-
Page 84: Distributors
P.O. Box 60 Eaton, OH 45320 +1 937 456.8400 +1 937 456.8402 Fax Toll free in USA 800 417.8417 800 417.8402 Fax www.hennypenny.com Form No.: FM01-795 ©2000 Henny Penny Corporation, Eaton, OH 45320, Revised 11-00, Printed 11-00 Printed in USA...