Table of Contents
Advertisement
Quick Links
Download this manual
See also:
Installation Manual
Advertisement
Table of Contents

Related Manuals for Smart Technologies SMART Board 4000i


Summary of Contents for Smart Technologies SMART Board 4000i
- Page 1 Installation Guide Rear Projection SMART Board™ 4000i Interactive Whiteboard...
- Page 2 © 1992–2007 SMART Technologies Inc. All rights reserved. No part of this publication may be reproduced, transmitted, transcribed, stored in a retrieval system or translated into any language in any form by any means without the prior written consent of SMART Technologies Inc.
-
Page 3: Important Information
Important Information Please read this manual carefully before setting up and using the Rear Projection SMART Board™ 4000i interactive whiteboard. WARNING The projector inside the unit is a high brightness light source. Don’t look directly into the beam of light. Prevent children from looking directly into the beam. WARNING To reduce the risk of fire or electric shock, don’t expose this product to rain or moisture. - Page 4 • Don’t touch the rear surface of the screen or apply isopropyl alcohol, water or acetone to it. These fluids will damage the diffusion coating, resulting in a permanent deterioration in display quality. • If you inadvertently smudge the rear surface of the screen, dab it carefully with a soft cloth and alcohol-free glass cleaner.
-
Page 5: Table Of Contents
Table of Contents Important Information Other Precautions ..........................i About the 4000i 4000i Features ..........................1 The projectiondesign F20 Projector ....................1 Pen Tray Features ......................... 2 Control Panel ..........................2 Connection Panel..........................3 Main Power Input and Power Outputs .................... 4 Setting Up the 4000i Positioning the 4000i........................ - Page 6 Customer Support Online Support ..........................35 Training ............................35 Contacting SMART Technical Support ..................35 General Inquiries........................... 35 Registration ........................... 35 Sending Feedback ........................36 Waste Electrical and Electronic Equipment Regulations Index 99-00582-20 REV A0...
-
Page 7: About The 4000I
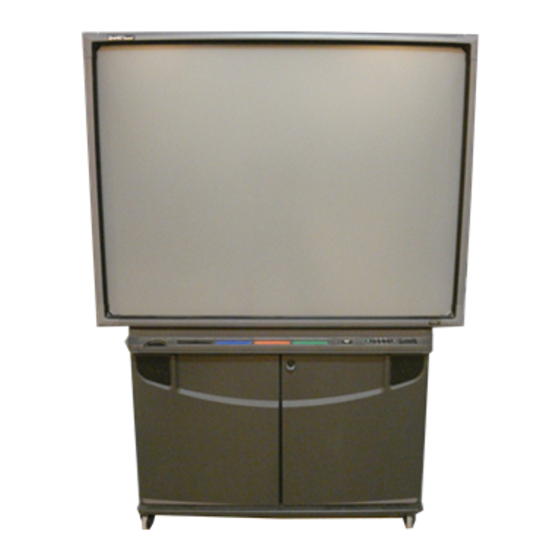
About the 4000i The 4000i is a Rear Projection SMART Board interactive whiteboard cabinet with an integrated liquid crystal display (LCD) projector and a 66" (167.6 cm) diagonal interactive screen. A mirror system in the cabinet reflects the projected image onto the back of the interactive whiteboard screen, eliminating the shadows that may occur in a front projection system. -
Page 8: Pen Tray Features
Pen Tray Features Eraser Pen Tray Pens Control Panel Pen Tray Pen Tray Buttons Using a pen tray pen, you can write over the computer image with digital ink. You can use SMART Board software to change any of these pens to highlighters, assign a new color, or alter their width. You can also change the eraser’s size. -
Page 9: Connection Panel
Connection Panel You can use the connection panel to make a variety of external connections to the 4000i cabinet. 1. Printer (Female) – Enables connection to an external printer. See page 9 for more information. 2. Network – Enables connection to a network. See page 10 for more information. 3. -
Page 10: Main Power Input And Power Outputs
Main Power Input and Power Outputs The Main Power IN and Power OUT connections are located to the right of the connection panel (when you face the rear of the cabinet). NOTE: The power connections on your 4000i may be arranged differently from what is illustrated in this diagram. -
Page 11: Setting Up The 4000I
Setting Up the 4000i Use this section of the manual to learn how to: • position the 4000i (this page) • install and connect the computer (page 6) • connect a VCR or DVD player (page 7) • connect a printer (page 9) •... -
Page 12: Installing And Connecting A Computer
5. Open the cabinet’s front doors. Unbuckle and remove the strap that secures the small mirror located in the middle of the speaker panel, below the projector platform. Remove this strap. Installing and Connecting a Computer To install and connect a computer 1. -
Page 13: Connecting To A Vcr And/Or Dvd Player
NOTE: You can remove the 4000i’s rear access panel if you need greater access to the computer’s connection panel. To remove the rear access panel, loosen the two captive thumbscrews at the top of the rear access panel. Rotate the top of the rear access panel toward you and then pull it up, releasing it from the cabinet. - Page 14 If you want to connect both a VCR and a DVD player to the projector, you must use the composite video cable for the VCR and the S-video cable for the DVD player. If both are connected, pressing the VCR/DVD Player button alternates the display source between the VCR and the DVD player. There is a three-second delay before the alternate display source appears.
-
Page 15: Connecting A Printer
To link the VCR and DVD player audio connections 1. If there is a tape in the VCR, remove it. 2. Connect standard RCA audio cables (not supplied) from the DVD player’s RCA Audio (or Audio OUT) outputs to the VCR’s RCA Audio (or Audio IN) inputs. Keep the right and left channel connections correct for stereo sound. -
Page 16: Connecting The 4000I To A Network
Connecting the 4000i to a Network Connect a standard male-to-male RJ45 network cable (not supplied) from the network cable outlet to the Network IN receptacle on the connection panel. Network IN Printer Network Audio OUT Output Audio IN VCR/DVD Audio OUT Computer 2 Serial Computer 2 Inputs Connecting an External Sound System... - Page 17 To connect a guest laptop 1. Connect the included bundle of laptop connection cables to the corresponding receptacles on the 4000i’s rear panel. Laptop video input Printer Network Laptop sound input Audio OUT Output Audio IN Laptop serial input VCR/DVD Audio OUT Computer 2 Serial Computer 2 Inputs 2.
- Page 18 Setting Up the 4000i 99-00582-20 REV A0...
-
Page 19: Finalizing The Installation
Finalizing the Installation Use this section of the manual to learn how to: • configure the computer settings (this page) • select the projector’s picture settings (page 14) • adjust the projected image (page 14) • install SMART Board software on the connected computer (page 17) •... -
Page 20: Selecting The Projector's Picture Settings
Selecting the Projector’s Picture Settings The projectiondesign F20 projector has two picture quality settings. If you turn eco mode off, the projector displays its brightest image, but this setting also reduces the life of the lamp. To display an acceptable image without reducing the lamp’s life, turn eco mode on. To select the projector’s picture setting 1. - Page 21 To move the image up or down 1. Loosen the upper thumbscrews on both sides of the small mirror. Don’t loosen the lower pivot. 2. Gently push the mirror away from you to lower the image, or pull it towards you to raise the image.
- Page 22 To adjust the image laterally (side to side) 1. Loosen the two knobs on the bottom left side of the mounting plate and slide the projector to the left or right. If the projector won’t slide after you’ve loosened the two knobs, try slightly loosening the spring-loaded knob on the right side of the projector plate.
-
Page 23: Installing Smart Board Software
To adjust the image size 1. Using the TR20 torx key included in the accessory kit, loosen the three bolts that attach the projector to the projector plate. Loosen these three bolts. 2. Slide the projector backward to increase the image size or forward to reduce the image size. 3. -
Page 24: Configuring The Computer Port
1. Turn the computer and the projector on. IMPORTANT If you’re using a USB adapter to connect the interactive whiteboard to the computer and the computer can’t find an appropriate driver, unplug the USB adapter from the computer, install SMART Board software and then reconnect the USB adapter. -
Page 25: Basic Operations
Basic Operations Use this section of the manual to learn how to: • start the 4000i (this page) • switch the 4000i to Standby mode (page 21) • turn off the 4000i (page 22) • work with the interactive whiteboard (page 22) •... - Page 26 To start the 4000i Use the following table to restore the 4000i to a fully operational state. What You See What You Should Do The screen is black and The projector is in Standby mode (with the lamp off). the Lamp On LED is Press the Lamp On button on the control panel.
-
Page 27: Switching The 4000I To Standby Mode
Switching the 4000i to Standby Mode CAUTION The projector inside the 4000i has been designed for use under normal operating conditions only. Normal operating conditions are defined as product use that does not exceed eight hours per day and 260 days per year. Exceeding these operating conditions could cause projector damage. -
Page 28: Turning Off The 4000I
To switch the 4000i to Standby mode 1. Log off the computer at the end of a session or shut down the computer at the end of the day. 2. Press the Lamp Off button to switch the projector to Reversible Standby mode for three minutes. - Page 29 Using the pen tray buttons Press the top pen tray button to activate the on-screen SMART Keyboard. Press the bottom pen tray button to make your next contact with the interactive screen a right-click. You can also reconfigure these buttons to perform other functions. For more information on using and customizing the pen tray buttons, see SMART Board software Help.
-
Page 30: Changing The Projector's Display Source
LinQ software With LinQ software, you can link a laptop to a SMART interactive product. After you establish a connection, you can use LinQ software to show the laptop’s video output on the interactive screen. To establish a communication link between the 4000i and a laptop, you must: •... -
Page 31: Adjusting The Volume
To switch to the internal computer Press the Internal Computer button on the control panel. To switch to a guest computer Press the Guest Laptop button on the control panel. Adjusting the Volume To increase the volume, press and hold the Volume Up button on the control panel. To decrease the volume, press and hold the Volume Down button on the control panel. - Page 32 Basic Operations 99-00582-20 REV A0...
-
Page 33: Maintaining The 4000I
Maintaining the 4000i Use this section of the manual to learn how to: • clean the interactive whiteboard and other components (this page) • clean the projector (page 28) • replace the projector’s lamp (page 28) • restore the projector’s settings (page 29) •... -
Page 34: Cleaning The Projector
Cleaning the Projector Clean the projector and its lens periodically. To clean the projector 1. Shut down the computer and the projector. 2. Wipe the projector’s casing with a damp cloth. If necessary, use a mild detergent. Don’t use a strong detergent or a solvent such as alcohol or thinner. -
Page 35: Restoring Projector Settings
Restoring Projector Settings Use the following procedure to restore the projector’s optimal settings that have been accidentally altered. IMPORTANT When you restore the projector’s optimal settings, the projected image on the 4000i’s screen is reversed because the projector’s default orientation isn’t correct for the 4000i’s mirror configuration. - Page 36 Maintaining the 4000i 99-00582-20 REV A0...
-
Page 37: Appendix A: Removing And Replacing The Projector
Appendix A: Removing and Replacing the Projector To remove the projector, you must remove the 4000i’s rear access panel, disconnect the projector’s cables and detach the projector. CAUTION Do not touch the rear surface of the screen or apply isopropyl alcohol, water or acetone to it. - Page 38 5. Using the TR20 torx key included in the accessory kit, loosen and remove the three bolts that attach the projector to the projector plate. Set these bolts aside. Loosen these three bolts. NOTE: Don’t change the position of any other screws, bolts or knobs. 6.
-
Page 39: Appendix B: Connecting Rack-Mount Equipment To The Projector Platform
Appendix B: Connecting Rack-Mount Equipment to the Projector Platform Use the clip-on nuts (included) to secure rack-mount equipment to the sides of the projector platform, just below the projector itself. The projector platform can accommodate rack-mount equipment with a width of 19" (48.3 cm). To connect rack-mount equipment to the projector platform 1. - Page 40 Appendix B: Connecting Rack-Mount Equipment to the Projector Platform 99-00582-20 REV A0...
-
Page 41: Customer Support
Customer Support Online Support www.smarttech.com/support Visit the SMART Technologies support site to view and download user’s guides, “how-to” and troubleshooting articles, software and more. Training Visit http://www.smarttech.com/trainingcenter for free training materials and information about our training services. Contacting SMART Technical Support SMART Technical Support welcomes your call. - Page 42 Customer Support 99-00582-20 REV A0...
-
Page 43: Waste Electrical And Electronic Equipment Regulations
If you need more information on the collection, reuse and recycling of electrical and electronic equipment, please contact your local WEEE recycling agency. Alternatively, contact your local reseller or SMART Technologies for information on the environmental performance of our products. - Page 44 Waste Electrical and Electronic Equipment Regulations 99-00582-20 REV A0...
-
Page 45: Index
Index 4000i Display Source, 24 Introduction, 1 DVD Player Maintaining, 27 Connecting, 7 Orienting, 18 Linking VCR and DVD Player Audio Setting Up, 5 Connections, 9 Starting, 19 Switching to the Connected DVD Player, 24 Switching the 4000i to Standby Mode, 21 DViT Technology, 1 Using, 22 External Sound System, 10... - Page 46 SMART Notebook Software, 23 Standby Mode, 21 Orienting the 4000i, 18 Starting the 4000i, 19 Switching to Connected DVD Player, 24 Connected VCR, 24 Pen Tray, 2 Guest Laptop, 25 Pen Tray Buttons, 23 Pen Tray Pens, 22 Power Input, 4 Power Output, 4 Tools Printer, 9...
- Page 48 SMART Technologies Inc. Corporate Headquarters 1207 – 11 Avenue SW, Suite 300 Calgary, AB T3C 0M5 CANADA Toll Free 1.866.518.6791 www.smarttech.com/support www.smarttech.com/contactsupport 99-00582-20 REV A0...