TEC MA-600 Series Owner's Manual
Electronic cash register
Hide thumbs
Also See for MA-600 Series:
- Maintenance manual (52 pages) ,
- Programming manual (191 pages)
Table of Contents
Advertisement
Quick Links
Advertisement
Chapters
Table of Contents

Related Manuals for TEC MA-600 Series


Summary of Contents for TEC MA-600 Series
- Page 1 T e l : 0 1 4 / 4 2 . 5 5 . 9 9 w e b s h o p . v a n me c h e l e n . b e TEC Electronic Cash Register MA-600 SERIES...
- Page 2 3. Please refer to your local Authorised Service representative with regard to any queries you may have in this manual. Copyright © 2005 < For EU Only > by TOSHIBA TEC CORPORATION TOSHIBA TEC Europe Retail Information Systems S.A. All Rights Reserved Rue de la Célidée 33 BE-1080 Brussels 570 Ohito, Izunokuni-shi, Shizuoka-ken, JAPAN...
- Page 3 Do not attempt to effect repairs or modifications to this equipment. If a fault occurs that cannot be rectified using the procedures described in this manual, turn off the power, unplug the machine, then contact your authorized TOSHIBA TEC representative for assistance. Meanings of Each Symbol This symbol indicates warning items (including cautions).
- Page 4 Utilize our maintenance services. ● After purchasing the machine, contact your authorized TOSHIBA TEC representative for assistance once a year to have the inside of the machine cleaned. Otherwise, dust will build up inside the machines and may cause a fire or a malfunction. Cleaning is particularly effective before humid rainy seasons.
- Page 5 OPERATOR’S GUIDE...
-
Page 6: Table Of Contents
EO1-11154 MA-600 SERIES TABLE OF CONTENTS Page 1. TO OUR CUSTOMERS -------------------------------------------------------------------------------1- 1 2. ACCESSORIES-----------------------------------------------------------------------------------------1- 1 3. APPEARANCE AND NOMENCLATURE --------------------------------------------------------3- 1 4. MODE LOCK AND MODE SELECTOR KEYS -------------------------------------------------4- 1 Mode Lock ------------------------------------------------------------------------------------------------- 4- 1 Mode Selector Keys ------------------------------------------------------------------------------------- 4- 1 5. - Page 7 EO1-11154 MA-600 SERIES Page 11.17 Listing Capacity Open-------------------------------------------------------------------------------- 11-12 11.18 Tax Status Modification ------------------------------------------------------------------------------ 11-12 11.19 Subtotal (Sale Total Pre-taxed) Read------------------------------------------------------------ 11-12 11.20 VAT Calculation and Print--------------------------------------------------------------------------- 11-13 11.21 VAT Print ------------------------------------------------------------------------------------------------ 11-13 11.22 Add-on Tax Calculation and Print ----------------------------------------------------------------- 11-13 11.23 Tax Exemption (for Add-on Tax Feature) ------------------------------------------------------- 11-14...
-
Page 8: To Our Customers
1. TO OUR CUSTOMERS 1. TO OUR CUSTOMERS Thank you for choosing the TEC electronic cash register MA-600 series. This instruction manual provides a description of the functions and handling of this ECR and should be read carefully to ensure optimum performance. -
Page 9: Appearance And Nomenclature
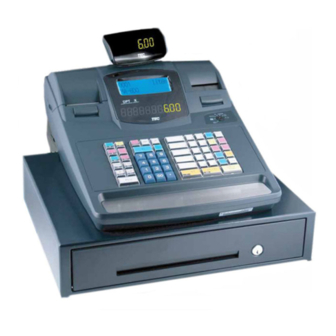
3. APPEARANCE AND NOMENCLATURE EO1-11154 3. APPEARANCE AND NOMENCLATURE 3. APPEARANCE AND NOMENCLATURE Operator Display Customer Display Receipt Cover Journal Cover Receipt Outlet Journal Window Release Button Release Button Mode Lock Keyboard Power Cord Drawer Connector Cover Brightness Control Interface Connectors Receipt Cover and Journal Cover The Receipt Cover is provided for the receipt paper holder and the receipt printer. -
Page 10: Mode Lock And Mode Selector Keys
SET, LOCK, REG, X, MGR, - and Z. S Key: The S key is used by the service person from TOSHIBA TEC representative to access any position. To prevent programmed data and sales data from being changed or cleared by mistake, do not use this key without instructions of our TOSHIBA TEC representative. - Page 11 5. DISPLAY EO1-11154 5. DISPLAY 5. DISPLAY The operator display is located at the top of the ECR just above the keyboard. OPERATOR DISPLAY (Front Display) LCD display AMOUNT 10-digit 7-segment Numeric display The customer display can be moved horizontally, and thus is fully adjustable according to the position of the customer.
- Page 12 The following table shows the cause of the error. If the error status cannot be cancelled or an error message not listed in the table on the next page is displayed, please contact your nearest TOSHIBA TEC representative. 5- 2...
- Page 13 Prohibition of the salesperson entry during a operation is attempted even when it is registration operation has been programmed. prohibited. Contact your nearest TOSHIBA TEC representative if necessary. TOTAL ONLY Total only error The depressed key has been programmed with the total-only status.
-
Page 14: Digit 7-Segment Numeric Display
CASHING PROHIBIT Cheque cashing prohibition error The depressed key has been programmed with the status of no-purchase cashing prohibition. Contact your nearest TOSHIBA TEC representative if necessary. NEGATIVE NUMBER Negative balance error when the credit balance Perform the discount operation within an is allowed by the program option. - Page 15 6. OUTLINE OF PREPARATION PROCEDURE BEFORE OPERATING THE ECR EO1-11154 6. OUTLINE OF PREPARATION PROCEDURE BEFORE OPERATING THE ECR 6. OUTLINE OF PREPARATION PROCEDURE BEFORE OPERATING THE ECR This chapter shows the outline of set-up procedure of the ECR before actually starting the register operation. WARNING! Be sure to connect the power plug into a rated wall outlet.
-
Page 16: Installing/Replacing The Receipt/Journal Roll
6. OUTLINE OF PREPARATION PROCEDURE BEFORE OPERATING THE ECR EO1-11154 6.1 Installing/Replacing the Receipt/Journal Roll 6.1 Installing/Replacing the Receipt/Journal Roll WARNING! Never touch the print head and around it just after printing. You may get burned as the print head becomes very hot during printing. Carefully close the receipt cover so as not to catch your fingers. - Page 17 6. OUTLINE OF PREPARATION PROCEDURE BEFORE OPERATING THE ECR EO1-11154 6.1 Installing/Replacing the Receipt/Journal Roll Installing/Replacing the Receipt Roll 1. Push the release button and open the receipt cover. Receipt Cover Release Button 2. Remove the remaining paper roll or paper core from Paper Core the receipt paper holder.
- Page 18 6. OUTLINE OF PREPARATION PROCEDURE BEFORE OPERATING THE ECR EO1-11154 6.1 Installing/Replacing the Receipt/Journal Roll 5. Fully close the receipt cover until it clicks. Recei p t Cove r 6. Press and hold the [RF] key for a few sconds and make sure that the the receipt paper is fed correctly.
- Page 19 6. OUTLINE OF PREPARATION PROCEDURE BEFORE OPERATING THE ECR EO1-11154 6.1 Installing/Replacing the Receipt/Journal Roll When the journal roll is installed for the first time or when the journal paper ends, the following error status is indicated both on the LCD display and on the 10-digit 7-segment Numeric display. In this case, install or replace the journal roll by following the procedure below.
- Page 20 6. OUTLINE OF PREPARATION PROCEDURE BEFORE OPERATING THE ECR EO1-11154 6.1 Installing/Replacing the Receipt/Journal Roll When installing the journal roll for the first time, go Paper Core to Step 5. When replacing the journal roll, remove the paper core from the journal paper holder. Load the journal roll as indicated with the figure on the left.
- Page 21 6. OUTLINE OF PREPARATION PROCEDURE BEFORE OPERATING THE ECR EO1-11154 6.1 Installing/Replacing the Receipt/Journal Roll Insert the paper end into the slit of the take-up reel Take-up Reel and wind it around the reel twice or three times. Journal Paper Set the take-up reel into the reel holder.
-
Page 22: Cashier Signing Or Cashier Key Operations
7. CASHIER SIGNING OR CASHIER KEY OPERATIONS EO1-11154 7.1 Cashier Code Entry 7. CASHIER SIGNING OR CASHIER KEY OPERATIONS 7.1 Cashier Code Entry Each cashier will sign-ON or sign-OFF through the [LOG/RECEIPT] (or [LOG]) key. OPERATION: Mode Lock: REG (or, MGR or “ - “ with Manager Intervention) ([LOG/RECEIPT] = [LOG]) (1) For Single-drawer Machines Sign-ON... - Page 23 7. CASHIER SIGNING OR CASHIER KEY OPERATIONS EO1-11154 7.1 Cashier Code Entry (3) Mode Changes with Signing Operations When Signed-ON: The Mode Lock position change is allowed within “LOCK”, “REG”, “MGR”, and “ - ”. Changing to any other position will be an error. When Signed-OFF: The Mode Lock may be turned to any position.
-
Page 24: Cashier Key Method ([Clk] Keys)
7. CASHIER SIGNING OR CASHIER KEY OPERATIONS EO1-11154 7.2 Cashier Key Method ([CLK] Keys) 7.2 Cashier Key Method ([CLK] Keys) When the [LOG/RECEIPT] (or [LOG]) key is not installed, [CLK] keys ([CLK 1] to [CLK 8]; max. 8 keys) may be provided on the ECR keyboard. -
Page 25: Cashier Interrupt Operation
7. CASHIER SIGNING OR CASHIER KEY OPERATIONS EO1-11154 7.3 Cashier Interrupt Operation 7.3 Cashier Interrupt Operation By switching the Cashier Key during a sale, interruptions by other cashiers with sale items are allowed. This function is available to the ECR adopting “CASHIER KEY METHOD ([CLK] keys)”, however, it is unavailable under the “CASHIER CODE ENTRY METHOD”. - Page 26 7. CASHIER SIGNING OR CASHIER KEY OPERATIONS EO1-11154 7.3 Cashier Interrupt Operation (1) Sale item entries started by Cashier 1. (2) Switching Cashier 1 Key to Cashier 2 Key (interruption by Cashier 2). (3) Sale item entries by Cashier 2. (4) Switching Cashier 2 Key to Cashier 3 Key (interruption by Cashier 3).
- Page 27 7. CASHIER SIGNING OR CASHIER KEY OPERATIONS EO1-11154 7.3 Cashier Interrupt Operation Depressing the [RECEIPT ISSUE] (Post-receipt) key after finalizing each cashier’s own entries will print and issue a receipt of his/her entries. The post-receipt of each cashier’s entries is available any time after finalizing his/her own entries until another sale is started by his/her Cashier Key.
-
Page 28: Training Mode Start And End
7. CASHIER SIGNING OR CASHIER KEY OPERATIONS EO1-11154 7.4 Training Mode Start and End Receipt Print by Post-receipt Operation STORE STORE STORE 1343 PEACH DRIVE 1343 PEACH DRIVE 1343 PEACH DRIVE PHONE: 87-6437 PHONE: 87-6437 PHONE: 87-6437 Open 8:00am to 7:00pm Open 8:00am to 7:00pm Open... -
Page 29: Entries In Training Mode
7. CASHIER SIGNING OR CASHIER KEY OPERATIONS EO1-11154 7.4 Training Mode Start and End ENTRIES IN TRAINING MODE Registering operations are allowed by the trainees: All sale or transaction entry operations are possible in the Training Mode, except: 1) The drawer will not open. 2) The Consecutive No. -
Page 30: Keyboard Layout
8. KEYBOARD LAYOUT The following are typical keyboard layouts for the MA-600 series. Since this series is designed to be capable of programming most of the keys to be placed in the desired place on the keyboard, these are merely examples. - Page 31 8. KEYBOARD LAYOUT EO1-11154 8. KEYBOARD LAYOUT -- Flat Type Keyboard (QP Standard) -- LOG/ RECEIPT RECEIPT ISSUE ↑ ↓ ITEM VOID CORR MDSE VOID ← → Enter TEND AT/TL PLU Preset-code keys Department keys Other keys not placed in the keyboard above: Additional Department Keys (15 to 40) [000] (Triple-zero Key) [CONSIGNMENT]...
-
Page 32: Functions Of Each Key
9. FUNCTIONS OF EACH KEY EO1-11154 9. FUNCTIONS OF EACH KEY 9. FUNCTIONS OF EACH KEY This section briefly describes functions of each key for your quick reference purposes. See the reference pages in Section 11. REGISTERING PROCEDURE AND PRINT FORMAT for detail operation sequences. TABLE OF KEY FUNCTIONS Reference Functions... - Page 33 9. FUNCTIONS OF EACH KEY EO1-11154 9. FUNCTIONS OF EACH KEY Reference Functions page Amount key 11-3,5,6 Used to enter a manual amount of PLU item. And also used to enter an amount or price for an open department when the department is accessed by the [DP#] key.
- Page 34 9. FUNCTIONS OF EACH KEY EO1-11154 9. FUNCTIONS OF EACH KEY Reference Functions page Subtotal key 11-12 Used to obtain subtotal of the current transaction. Cash Amount Tendered/Cash Total key 11-15 AT/TL Used to record all cash paid transactions, and will be able to finalize a sale operation.
- Page 35 9. FUNCTIONS OF EACH KEY EO1-11154 9. FUNCTIONS OF EACH KEY Reference Functions page VAT Print key 11-13 Used to print details of VAT collected in the current sale. Cashier 1 to Cashier 8 keys CLK 8 CLK 1 Used to declare start or end of normal operation by cashier (instead of using [LOG/RECEIPT] (or [LOG]) key).
-
Page 36: Daily Operation Flow
10. DAILY OPERATION FLOW EO1-11154 10. DAILY OPERATION FLOW 10. DAILY OPERATION FLOW The following shows a typical daily operation flow on the ECR. Before Opening the Store ... • Ensure that the ECR is firmly plugged in the wall outlet. -
Page 37: Registering Procedure And Print Format
11. REGISTERING PROCEDURE AND PRINT FORMAT EO1-11154 11. REGISTERING PROCEDURE AND PRINT FORMAT 11. REGISTERING PROCEDURE AND PRINT FORMAT WARNING! When opening the cash drawer, be careful not to let the drawer hit any person. Before starting sale entries, read through the following instructions: TRAINING MODE is available: If you are a beginner in operating this ECR, ask the store manager for practicing in the TRAINING MODE. - Page 38 11. REGISTERING PROCEDURE AND PRINT FORMAT EO1-11154 11.1 No-Sale CONDITION SETTING TO START SALE ENTRIES Mode Lock: Insert the REG key and set it to the REG position. Cashier Sign-ON or Cashier Key to ON status: If the [LOG/RECEIPT] (or [LOG]) key is installed, you must sign-ON. (See Section 7.1.) If Cashier Keys are installed, you must set your cashier key to the ON status.
-
Page 39: Department Entry
11. REGISTERING PROCEDURE AND PRINT FORMAT EO1-11154 11.2 Department Entry 11.2 Department Entry Each department is preprogrammed as the “PRESET” type (with a price programmed) or “OPEN” type (with no price programmed). Perform operation depending on the type selected. -- Receipt Print Format -- OPERATION Open Department Type •... -
Page 40: Plu Price Shift Entry
11. REGISTERING PROCEDURE AND PRINT FORMAT EO1-11154 11.4 PLU Price Shift Entry 11.4 PLU Price Shift Entry Up to three different unit prices can be programmed for each PLU and you can select either of the following two features. The price shit function is used when switching the PLU price by time period. Example) Regular price is programmed on the 1st price, bargain price is on the 2nd price, and discount price is on the 3rd price. -
Page 41: Repeat Entry
11. REGISTERING PROCEDURE AND PRINT FORMAT EO1-11154 11.5 Repeat Entry 11.5 Repeat Entry To repeat the same item of the last entry, simply depress the last key of the department or PLU entry sequence or depress the [RPT] key. OPERATION (1) Department Repeat -- Receipt Print Format -- Open Department Type... -
Page 42: Quantity Extension (Multiplication) For Depts/Plus
11. REGISTERING PROCEDURE AND PRINT FORMAT EO1-11154 11.6 Quantity Extension (Multiplication) for DEPTs/PLUs 11.6 Quantity Extension (Multiplication) for DEPTs/PLUs OPERATION 11.6.1 Quantity x Price (1) Department Multiplication Open Department Type • |Quantity| [X] |Price| [Open DEPT] • |Quantity| [X] |Open-Dept Code| [DP#] |Price| [AMT] Preset Department Type •... -
Page 43: Returned Merchandise
11. REGISTERING PROCEDURE AND PRINT FORMAT EO1-11154 11.7 Single-Item Department or Single-Item PLU Entry NOTES: 1. Quantity ....Max. 3 integral + 3 decimal digits (Use the [ . ] key for entering decimal digits.) Price (Unit Price) ... Max. 6 digits Product .... -
Page 44: Amount Discount
(Ask your TOSHIBA TEC representative.) 7. You can select the rounding process of the fractions of the product (result of % calculation) from ROUND OFF (initial setting), ROUND UP, and ROUND DOWN. (Ask your TOSHIBA TEC representative.) -- Receipt Print Format -- €3,40... -
Page 45: Store Coupon
11. REGISTERING PROCEDURE AND PRINT FORMAT EO1-11154 11.11 Store Coupon 11.11 Store Coupon OPERATION [STR CPN] Follow DEPARTMENT ENTRY QUANTITY EXTENSION for DEPTs -- Receipt Print Format -- S.CPN VEGETABLE -0,50 NOTES: 1. The [STR CPN] key operation is possible anytime before depressing the department key. 2. -
Page 46: Item Correct
11. REGISTERING PROCEDURE AND PRINT FORMAT EO1-11154 11.13 Item Correct 11.13 Item Correct OPERATION -- Journal Print Format -- DEPARTMENT ENTRY PLU ENTRY €2,00 VEGETABLE REPEAT ENTRY CORR ↑ QUANTITY EXTENSION RETURNED MERCHANDISE [ITEM CORR] AMOUNT DISCOUNT PERCENT CHARGE/DISCOUNT STORE COUPON VENDOR COUPON Previous Balance Entry RECEIVED-ON-ACCOUNT Item... -
Page 47: All Void
11. REGISTERING PROCEDURE AND PRINT FORMAT EO1-11154 11.15 All Void 11.15 All Void When the current transaction being entered is found to be canceled before finalizing it, All Void can be operated to delete all the items entered in the transaction. OPERATION [ITEM CORR] to execute ALL VOID [ALL VOID]... -
Page 48: Listing Capacity Open
11. REGISTERING PROCEDURE AND PRINT FORMAT EO1-11154 11.17 Listing Capacity Open 11.17 Listing Capacity Open For Departments and PLUs Depress [LC OPEN] (or [OPEN]) prior to or any time during an entry of an open-department, open-PLU, or preset-open department or PLU sequence (including REPEAT and QUANTITY EXTENSION entries). Please note that the [LC OPEN] (or [OPEN]) key must be pressed, at latest, before the final key of the entry sequence. -
Page 49: Vat Print
11. REGISTERING PROCEDURE AND PRINT FORMAT EO1-11154 11.20 VAT Calculation and Print 11.20 VAT Calculation and Print (VAT = Value Added Tax) If your ECR adopts the VAT feature, a proper tax rate has been programmed for each VAT and automatically calculated on finalizing a sale. -
Page 50: Tax Exemption (For Add-On Tax Feature)
11. REGISTERING PROCEDURE AND PRINT FORMAT EO1-11154 11.23 Tax Exemption (for Add-on Tax Feature) 11.23 Tax Exemption (for Add-on Tax Feature) OPERATION Selective Tax Exemption [TX1/M] [EX] Examples) Sale Finalization ... to exempt from Tax 1 only [TX1/M] [TX2/M] [EX] Sale Finalization ... -
Page 51: Finalizing A Sale
11. REGISTERING PROCEDURE AND PRINT FORMAT EO1-11154 11.25 Finalizing a Sale 11.25 Finalizing a Sale 11.25.1 Cash Tender A tendered amount entry is performed here. OPERATION [AT/TL] Sale Item Entries ([ST]) |Tendered Amount| Finalize with tendering and change calculation [AT/TL] finalize without tendering [CASH 1] to [CASH 3] (Cash payment 1 to 3) NOTE:... -
Page 52: Split Tendering
11. REGISTERING PROCEDURE AND PRINT FORMAT EO1-11154 11.26 Multi-Tendering 11.26 Multi-Tendering Short-tendering repeated multiple times by the same media (allowed only when the media key is programmed to allow short-tendering). OPERATION Example (1) (|Quantity| [X]) |1st Amount Tendered| [MEDIA] - - - ([ST]) (|Quantity| [X]) |2nd Amount Tendered| [MEDIA]... -
Page 53: Cheque Cashing (No-Sale Cashing Of A Non-Cash Media)
11. REGISTERING PROCEDURE AND PRINT FORMAT EO1-11154 11.28 Cheque Cashing (No-sale cashing of a non-cash media) 11.28 Cheque Cashing (No-sale cashing of a non-cash media) This operation is performed when a cheque is changed with cash. (Must be operated outside a sale) OPERATION |Cheque Amount to be Cashed| [CHK TEND] ... -
Page 54: Denmark Rounding
11. REGISTERING PROCEDURE AND PRINT FORMAT EO1-11154 11.30 Denmark Rounding Without [ST] Key Operation: Contents Key Operation Display Print 123 [DP1] Item Entry 1,23 DP01 1,23 [AT/TL] Cash Total CASH 1,25 SUBTL 1,23 CASH 1,25 Cash Tender 2,00 [AT/TL] 0,75 CHANGE SUBTL 1,23... - Page 55 11. REGISTERING PROCEDURE AND PRINT FORMAT EO1-11154 11.30 Denmark Rounding Media Total and Over-tendering Contents Key Operation Display Print 120 [DP1] Item Entry 1,20 DP01 1,20 [ST] Subtotal 1,20 SUBTL SUBTL 1,20 [AT/TL] Cash Total CASH 1,25 CASH 1,25 Cash Tender 2,00 [AT/TL] 0,75...
-
Page 56: Sale Paid In Foreign Currencies
11. REGISTERING PROCEDURE AND PRINT FORMAT EO1-11154 11.31 Sale Paid in Foreign Currencies 11.31 Sale Paid in Foreign Currencies OPERATION Sale is finalized by media total. (The media key must be programmed to allow totalling in this case.) [ST] [CUR1] - - - Amount Tendered in ([CUR1]) -
Page 57: No-Sale Exchange From Foreign Currency To Domestic Currency
11. REGISTERING PROCEDURE AND PRINT FORMAT EO1-11154 11.32 No-Sale Exchange from Foreign Currency to Domestic Currency 11.32 No-Sale Exchange from Foreign Currency to Domestic Currency OPERATION (Must be operated outside a sale) [CUR 1] |Amount of Foreign Currency 1 to be exchanged| [NS] ... - Page 58 11. REGISTERING PROCEDURE AND PRINT FORMAT EO1-11154 11.34 Paid-Out 11.34 Paid-Out A paid-out transaction is used when money is removed from the drawer without totalling to a sale. OPERATION (Must be operated outside a sale) |Amount to be paid out| [PO] [AT/TL] ([ST]) Repeatable if multiple amounts to be paid out are...
-
Page 59: Salesperson Entry (Salesperson Sign-On)
11. REGISTERING PROCEDURE AND PRINT FORMAT EO1-11154 11.36 Salesperson Entry (Salesperson Sign-ON) 11.36 Salesperson Entry (Salesperson Sign-ON) This operation is used for performing sales management of each salesperson. OPERATION |Salesperson Code| [SALES PERSON] - - - 1 to 30 ... The name of the person is displayed and printed on both journal and receipt. Programmable options relating to Salesperson Entries: •... -
Page 60: Receipt Post-Issue
11. REGISTERING PROCEDURE AND PRINT FORMAT EO1-11154 11.38 Receipt Post-Issue 11.38 Receipt Post-Issue After finalizing a sale, the [RECEIPT ISSUE] key depression leads to an issuance of an itemized receipt for previous entry. (Must be operated outside a sale) OPERATION [RECEIPT ISSUE] (A sale is finalized) Programmable options:... -
Page 61: Charge Posting: Previous Balance Manual Entry Type
11. REGISTERING PROCEDURE AND PRINT FORMAT EO1-11154 11.39 Charge Posting: Previous Balance Manual Entry Type 11.39 Charge Posting: Previous Balance Manual Entry Type OPERATION (1) To initiate charge posting for a new customer 0 [PB+] (or [PB-]) Follow the line marked with “*” in Operation 2 below. zero (2) Charge posting with a previous balance first entered (pre-select) with or without PAYMENT [PB+] (for credit balance) - Page 62 11. REGISTERING PROCEDURE AND PRINT FORMAT EO1-11154 11.39 Charge Posting: Previous Balance Manual Entry Type Charge Posting Operation Sample (Previous Balance Manual Entry Type) DISPLAY (Lower Row) OPERATION CONTENTS KEY OPERATION 0 [PB+] To open a new customer account: Sale Items: 350 [DEPT 1] €3,50 Dept.1 240 [DEPT 3]...
-
Page 63: Journal Print (Thailand Specification)
11. REGISTERING PROCEDURE AND PRINT FORMAT EO1-11154 11.40 Journal Print (Thailand Specification) 11.40 Journal Print (Thailand Specification) This operation prints the Store Name, Message, Date, and Register No. on the journal. -- Journal Print Format -- STORE 1343 PEACH DRIVE Print contents by depressing the [JP] key PHONE: 87-6437 (Store Name, Message, Date, Register No.) -
Page 64: Validation Print
11. REGISTERING PROCEDURE AND PRINT FORMAT EO1-11154 11.42 Consignment Print 11.42 Consignment Print Immediately after performing the Department/PLU entry or finalizing a sale, the [CONSIGNMENT] key depression leads to an issuance of a receipt only for the entry or sale finalization just performed. OPERATION Department (or PLU) entry [CONSIGNMENT]... -
Page 65: Remote Slip Printer (Hardware Option) Operation
11. REGISTERING PROCEDURE AND PRINT FORMAT EO1-11154 11.44 Remote Slip Printer (hardware option) Operation 11.44 Remote Slip Printer (hardware option) Operation (1) The EPSON Remote Slip Printer TM-U295 may be connected to the ECR as an optional device. (2) The remote slip printer will operate printing if a slip is properly inserted. (3) At a registration operation (in REG, MGR, or - mode) •... -
Page 66: When A Power Failure Occurs
11. REGISTERING PROCEDURE AND PRINT FORMAT EO1-11154 11.45 When a Power Failure Occurs... 11.45 When a Power Failure Occurs... If a power failure occurs, all sales data stored in the memory are automatically protected by the battery installed in the ECR. The battery is rechargeable and it is recharged when the AC power returns. As the power returns, the ECR revives to continue the work and displays the last item entered before the power failure. -
Page 67: Journal And Receipt Paper-End Detector
12. JOURNAL AND RECEIPT PAPER-END DETECTOR EO1-11154 12. JOURNAL AND RECEIPT PAPER-END DETECTOR 12. JOURNAL AND RECEIPT PAPER-END DETECTOR (1) This detects when either the journal or receipt paper is coming near the end. It is provided in order to prompt the operator to replace the old paper roll with a new one. -
Page 68: Remote Slip Printer Motor Lock Detector
14. REMOTE SLIP PRINTER MOTOR LOCK DETECTOR EO1-11154 13. PRINTER HEAD OPEN DETECTOR 13. PRINTER HEAD OPEN DETECTOR (1) This detects the printer head open condition. (2) When such a condition is detected, the front display indicates “COVER OPEN” (on the receipt printer side) or “HEAD OPEN”... -
Page 69: Removing The Drawer
15.3 When “VOLTAGE ERROR” is displayed... When “VOLTAGE ERROR” is displayed, a hardware error including printer error could occur. In this case, immediately disconnect the power plug from the wall inlet the contact your nearest TOSHIBA TEC representative. 15.4 Removing the Drawer 1. -
Page 70: Media Slot
15. GENERAL MAINTENANCE EO1-11154 15.5 Media Slot 2. Pull the drawer out, and when it stops by the stopper, lift the drawer up and pull it again. 15.5 Media Slot The Media Slot provided at the front of the drawer is used to put non-cash media such as cheque in the drawer without opening it. -
Page 71: Drawer Key
15. GENERAL MAINTENANCE EO1-11154 15.7 Drawer Key 2. Remove the Coin Case from the Money Case. 3. To remove the Partition from the Coin Case, pull the Partition upward. Set the Partition in the groove where you like, then push down the Partition. 4. -
Page 72: Specifications
16. SPECIFICATIONS EO1-11154 16. SPECIFICATIONS 16. SPECIFICATIONS ECR specifications Item Description Size 410 mm (width) x 442 mm (depth) x 291 mm (height) (height including rubber feet) Height when the customer display is fully raised: 351 mm Weight Approximately 13.6 Kg Power required AC 220 V to AC 230 V ±10 %;... - Page 73 16. SPECIFICATIONS EO1-11154 16. SPECIFICATIONS Paper roll specifications (receipt and journal rolls) Item Description Media Thermal roll paper Width 58 +0/-1 mm Thickness 0.06 mm to 0.08 mm Outside dimension 80 mm or less Recommended thermal paper Only paper rolled onto a core is acceptable, however, the paper end should not be pasted to the core.
- Page 74 MANAGER’S GUIDE...
- Page 75 EO1-11154 MA-600 SERIES TABLE OF CONTENTS Page 1. OPERATIONS IN “MGR” MODE ----------------------------------------------------------------- 1- 1 Items Programmed to Require Manager Interventions ----------------------------------------- 1- 1 Other Operations Required Manager Interventions --------------------------------------------- 1- 3 2. OPERATIONS IN “ - ” MODE --------------------------------------------------------------------- 2- 1 Ordinary Operations In “...
-
Page 76: Operations In "Mgr" Mode
1. OPERATIONS IN “MGR” MODE EO1-11154 1.1 Items Programmed to Require Manager Interventions 1. OPERATIONS IN “MGR” MODE This chapter describes operations to be performed in the “MGR” position of the Mode Lock, which the manager can access using the MGR or MA key. Items Programmed to Require Manager Interventions During daily sale entry operations, the cashier may call for Manager Interventions. - Page 77 [1st PRICE] [2nd PRICE] [3rd PRICE] Credit Balance These are program options for each store. (NOTE 1 below) Ask your TOSHIBA TEC representative for Negative-balance Sale information and these status changes. Finalization by Media Keys (except [AT/TL]) (NOTE 2) Negative Department or...
-
Page 78: Other Operations Required Manager Interventions
(5) The cashier calls for Manager Intervention. The procedure thereafter is the same as Steps 2) to 7) for the Items Programmed to Require Manager Interventions (Section 1.1). In need of information of Amount Limits, ask your TOSHIBA TEC representative. 1- 3... -
Page 79: Operations In " - " Mode
2. OPERATIONS IN “ - ” MODE EO1-11154 2.1 Ordinary Operation in “ – “ Mode 2. OPERATIONS IN “ - ” MODE Instead of using the [RTN MDSE] or [VOID] key in the “REG” or “MGR” mode for deleting individual items, the “ - ” mode automatically processes positive items into negative and negative into positive. -
Page 80: Read (X) And Reset (Z) Reports
3. READ (X) AND RESET (Z) REPORTS EO1-11154 3. READ (X) AND RESET (Z) REPORTS 3. READ (X) AND RESET (Z) REPORTS WARNING! When opening the cash drawer, be careful not to let the drawer hit any person. This chapter describes how to issue X and Z reports and how to read issued receipts. The X report is issued in X mode and the Z report is in Z mode. -
Page 81: Enabling Read (X) Or Reset (Z) Mode
(Z) report, turn the Mode Lock to the Z position with the MGR key. On the MA-600 series, the keyboard layout is automatically changed in three types according to operation to be performed (ordinary registration, read/reset, programming). The following shows keyboard layouts and functions of keys required for read/reset operation when the Mode Lock is turned to X or Z position. - Page 82 3. READ (X) AND RESET (Z) REPORTS EO1-11154 3.1 Enabling Read (X) or Reset (Z) Mode Read/Reset Menu Table Report Name ALL DEPARTMENT + FINANCIAL READ/RESET FINANCIAL READ/RESET ALL DEPARTMENT READ/RESET DEPARTMENT GROSS PROFIT READ HOURLY RANGE READ/RESET ALL MEDIA SALESTOTAL AND CASH-IN-DRAWER READ ALL CASHIER REASD/RESET INDIVIDUAL CASHIER READ/RESET ALL SALES PERSON READ/RESET...
- Page 83 3. READ (X) AND RESET (Z) REPORTS EO1-11154 3.1 Enabling Read (X) or Reset (Z) Mode TABLE OF OPERATIONS FOR X AND Z REPORTS Daily Reports Report Name Mode Lock Sample Page ALL DEPARTMENT AND FINANCIAL READ AND RESET • All Department and Financial Read •...
-
Page 84: General Notes On Report Takings
3. READ (X) AND RESET (Z) REPORTS EO1-11154 3.2 General Notes On Report Takings General Notes On Report Takings 1. The cashier signed-OFF condition is required for taking any Z reports in the Code Entry Method. (Otherwise, an error will result when the Mode Lock is turned to the “X” or “Z” position.) However, the read operation is available outside a sale (when the ECR used for registration) even after signed on. - Page 85 3. READ (X) AND RESET (Z) REPORTS EO1-11154 3.2 General Notes On Report Takings FINANCIAL READ or RESET (Daily or GT) Read Report Sample • Operation: Mode Lock: X for read Z for reset When the ECR is being outside a sale and in X mode, depress the [1] or [Enter] key.
- Page 86 3. READ (X) AND RESET (Z) REPORTS EO1-11154 3.2 General Notes On Report Takings (Financial Read or Reset) -- Continued -- ∗ Cash-in-drawer Amount €95.02 CASH ID ∗ €9,99 Cash-in-drawer (F.C. 1) Amount CASH CUR1 ID ∗ Cash-in-drawer (F.C. 2) Amount €9,99 CASH CUR2 ID ∗...
- Page 87 3. READ (X) AND RESET (Z) REPORTS EO1-11154 3.2 General Notes On Report Takings (Financial Read or Reset) -- Continued -- Percent Discount (on line items) Count €0,50 & Amount Amount Discount (on line items) Count DISC €2,00 & Amount €10,90 Transfer Balance GT (non-resettable) TRF TL...
- Page 88 3. READ (X) AND RESET (Z) REPORTS EO1-11154 3.2 General Notes On Report Takings All Department Read or Reset (Daily or GT) Reset Report Sample • Operation: Mode Lock: X for read Z for reset When the ECR is being outside a sale and in Z mode, depress the [1] or [Enter] key.
- Page 89 3. READ (X) AND RESET (Z) REPORTS EO1-11154 3.2 General Notes On Report Takings Department Gross Profit Read (Daily or GT) (Read only) Read Report Sample X for read • Operation: Mode Lock: When the ECR is being outside a sale and in X mode, depress the [1] or [Enter] key.
- Page 90 3. READ (X) AND RESET (Z) REPORTS EO1-11154 3.2 General Notes On Report Takings HOURLY RANGE READ or RESET (Daily) Reset Report Sample • Operation: Mode Lock: X for read Z for reset When the ECR is being outside a sale and in Z mode, depress the [1] or [Enter] key.
- Page 91 3. READ (X) AND RESET (Z) REPORTS EO1-11154 3.2 General Notes On Report Takings ALL MEDIA SALES TOTAL AND CASH-IN-DRAWER READ (Daily) (Read only) Read Report Sample • Operation: Mode Lock: X for read When the ECR is being outside a sale and in X mode, depress the [1] or [Enter] key.
- Page 92 3. READ (X) AND RESET (Z) REPORTS EO1-11154 3.2 General Notes On Report Takings ALL CASHIER READ or RESET (Daily or GT) Read Report Sample X for read • Operation: Mode Lock: Z for reset When the ECR is being outside a sale and in X mode, depress the [1] or [Enter] key.
- Page 93 3. READ (X) AND RESET (Z) REPORTS EO1-11154 3.2 General Notes On Report Takings INDIVIDUAL CASHIER READ or RESET (Daily or GT) Read Report Sample X for read • Operation: Mode Lock: Z for reset When the ECR is being outside a sale and in X mode, depress the [1] or [Enter] key.
- Page 94 3. READ (X) AND RESET (Z) REPORTS EO1-11154 3.2 General Notes On Report Takings SALESPERSON READ OR RESET (Daily) (all Salespersons) Reset Report Sample • Operation: Mode Lock: X for read Z for reset When the ECR is being outside a sale and in X mode, depress the [1] or [Enter] key.
- Page 95 3. READ (X) AND RESET (Z) REPORTS EO1-11154 3.2 General Notes On Report Takings All PLU Read or Reset (Daily) Reset Report Sample • Operation: Mode Lock: X for read Z for reset When the ECR is being outside a sale and in Z mode, depress the [1] or [Enter] key.
- Page 96 3. READ (X) AND RESET (Z) REPORTS EO1-11154 3.2 General Notes On Report Takings Zone PLU Read or Reset (Daily) Read Report Sample • Operation: Mode Lock: X for read Z for reset When the ECR is being outside a sale and in X mode, depress the [1] or [Enter] key.
-
Page 97: Money Declaration
3. READ (X) AND RESET (Z) REPORTS EO1-11154 3.2 General Notes On Report Takings MONEY DECLARATION (to be operated when the “Cashier Key” method and the “Money Declaration” option have been selected) When the Money Declaration feature is selected, each cashier who has operated the ECR on the day must end with his/her Money Declaration operation. - Page 98 3. READ (X) AND RESET (Z) REPORTS EO1-11154 3.2 General Notes On Report Takings A Money Declaration receipt is issued, printing the media amounts declared and the total of all the medias declared. It is automatically followed by a Cashier Report of that cashier (X or Z report depending on the Mode Lock position where the preceding Money Declaration has been performed).
-
Page 99: Programming Operations
ECR on the daily, weekly, or monthly basis. Usually, all the basic program data required for your store should be set before delivering the product by your local TOSHIBA TEC representative. However, in need of changing or adding program data, please refer to this chapter. It is also recommended to read the OPERATOR’S GUIDE as well as other chapters of the MANAGER’S GUIDE in order to thoroughly understand... -
Page 100: Instructions For Programming
4.1 Instructions for Programming Instructions for Programming On the MA-600 series adopting the LCD display, each programming operation is performed by selecting the corresponding menu item on the LCD display. The keyboard layout is automatically changed in three types according to operation to be performed (ordinary registration, read/reset, programming) when the Mode Lock is turned to the corresponding position. - Page 101 4. PROGRAMMING OPERATIONS EO1-11154 4.1 Instructions for Programming (2) Keyboard layout for read/reset Mode Lock Position: X for read, Z for reset • Ordinary Type Keyboard ↑ ↓ ← → Enter AT/TL • Flat Type Keyboard ↑ ↓ RECEIPT ← →...
- Page 102 4. PROGRAMMING OPERATIONS EO1-11154 4.1 Instructions for Programming (3) Keyboard layout for programming Mode Lock Position: SET • Ordinary Type Keyboard ↑ History ↓ VOID ← → Enter • Flat Type Keyboard ↑ ↓ ← → & VOID β Σ Œ...
-
Page 103: Basic Key Functions
4. PROGRAMMING OPERATIONS EO1-11154 4.1 Instructions for Programming 4.1.2 Basic Key Functions Programming operations in this chapter are performed with the keyboard layout for programming. The following are main keys and their functions to be used in programming operations. (1) Keys for selecting items on the menu screen Function [↑] This key is used for moving the cursor upward. -
Page 104: Character Entries
4. PROGRAMMING OPERATIONS EO1-11154 4.2 Character Entries To clarify the operation flow, definitions of keys of the ECR keyboard are as shown below. | --------- Selective numeric value which is entered through the Numeric keys. ] --------- Depression of the function key. xxxx----------- Fixed numeric value which is entered through the Numeric keys. -
Page 105: Character Code Entry Method
4. PROGRAMMING OPERATIONS EO1-11154 4.2 Character Entries 4.2.1 Character Code Entry Method Character Code Table 1: Standard Characters Column Code → € á Å ← é å Code ⎡ ↓ " í Ø ⎦ ↑ ó ø ú Æ ½ •... - Page 106 4. PROGRAMMING OPERATIONS EO1-11154 4.2 Character Entries Character Setting Operations • To set a one-byte character, enter the COL (column) code and then the ROW code, followed by the [#] key. To set “%”, enter 205 and depress the [#] key. ex.) To set “kg”, enter1508 and depress the [#] key.
-
Page 107: Direct Character Entry Method
4. PROGRAMMING OPERATIONS EO1-11154 4.2 Character Entries 4.2.2 Direct Character Entry Method Using Keyboard (installed as the ECR Main Keyboard): -- Keyboard layout for programming -- • Ordinary Type Keyboard ↑ History ↓ VOID ← → Enter • Flat Type Keyboard ↑... - Page 108 4. PROGRAMMING OPERATIONS EO1-11154 4.2 Character Entries Using PK-2 Keyboard (PLU Keyboard; hardware option) The PK-2 keyboard is used for entering a required PLU code by simply depressing the code-preset key on this keyboard in REG or MGR mode. In addition, the PK-2 can be used for directly entering characters during the programming operations that require character settings such as STORE NAME/MESSAGE AND COMMERCIAL MESSAGE PROGRAMMING and DEPARTMENT TABLE PROGRAMMING.
- Page 109 4. PROGRAMMING OPERATIONS EO1-11154 4.2 Character Entries 4.2.3 How to use the [History] key The [History] key is used for performing character entries with the name previously entered. Operation: [History] [Enter] ([↓]) 1) The [History] key depression will let the most recently programmed name displayed on the LCD display. 2) The [↓] key depression will let the second most recently programmed name displayed.
-
Page 110: Condition Required For Programming Operations
4. PROGRAMMING OPERATIONS EO1-11154 4.3 Condition Required for Programming Operations Condition Required for Programming Operations “CONDITION” is given at the top of each programming operation. The ECR must satisfy this condition to perform programming operations. There are two types of conditions: “Any time outside a sale”... -
Page 111: Set Mode Menu
4. PROGRAMMING OPERATIONS EO1-11154 4.4 SET Mode Menu SET Mode Menu When performing a programming operation, a desired programming item is selected from the menu which is shown on the LCD display. Programming menu tree is as shown below. Programming items indicated by boldface are described in this chapter. 1 MESSAGES 4 RATE, LIMIT AMOUNT 1 COMMERCIAL MESSAGE... -
Page 112: Time Setting Or Adjustment
4. PROGRAMMING OPERATIONS EO1-11154 4.5 Time Setting or Adjustment Time Setting or Adjustment CONDITION Any time outside a sale OPERATION Mode Lock: SET Menu Tree Operation Flowchart Main Menu ECR is being outside a sale and in SET mode. Depress [↓] four times then [Enter]. “5 BASIC”... -
Page 113: Date Setting Or Adjustment
4. PROGRAMMING OPERATIONS EO1-11154 4.6 Date Setting or Adjustment (continued from the previous page) Operation LCD Display Remarks Input 1315. The time “13:15” is set. The [End] key depression allows the A long receipt is issued and the display returns to Main Menu screen. ECR to end this setting. - Page 114 4. PROGRAMMING OPERATIONS EO1-11154 4.6 Date Setting or Adjustment Example To set Date “Monday 31 October, 2005” Operation LCD Display Remarks The cursor is moved on to “5 BASIC”. When the ECR is being outside a sale and in SET mode, depress the [↓] key four times.
-
Page 115: Commercial Message Programming
4. PROGRAMMING OPERATIONS EO1-11154 4.7 Commercial Message Programming Commercial Message Programming A maximum of 96 characters of Commercial Message (32 characters x 3 lines) to be printed on the receipt is programmed here. CONDITION Any time outside a sale Mode Lock: SET OPERATION Menu Tree Operation Flowchart... - Page 116 4. PROGRAMMING OPERATIONS EO1-11154 4.7 Commercial Message Programming Example To program the following Commercial Message. O p e n 8 : 0 0 a m 7 : 0 0 p m Line No. 1 C l o s e d : e v e r y W e d n e s d a y Line No.
- Page 117 4. PROGRAMMING OPERATIONS EO1-11154 4.7 Commercial Message Programming (continued from the previous page) Operation LCD Display Remarks The [Enter] key depression results in When the [Enter] key is depressed, the message programmed in the 2nd line is that the input message is entered and printed.
-
Page 118: Footer Message Programming
4. PROGRAMMING OPERATIONS EO1-11154 4.8 Footer Message Programming Footer Message Programming A maximum of 64 characters of Footer Message (32 characters x 2 lines) to be printed on the receipt is programmed here. CONDITION Any time outside a sale Mode Lock: SET OPERATION Menu Tree Operation Flowchart... - Page 119 4. PROGRAMMING OPERATIONS EO1-11154 4.8 Footer Message Programming Example: To program the following Footer Message. T h a n k y o u Line No. 1 C a l a g a i n Line No. 2 Operation LCD Display Remarks When the ECR is being outside a sale and in SET mode, depress the [1] or...
- Page 120 4. PROGRAMMING OPERATIONS EO1-11154 4.8 Footer Message Programming (continued from the previous page) Operation LCD Display Remarks The [Enter] key depression results in When the [Enter] key is depressed, the message programmed in the 2nd line is that the input message is entered and printed.
-
Page 121: Store Name Message Programming
4. PROGRAMMING OPERATIONS EO1-11154 4.9 Store Name Message Programming Store Name Message Programming A maximum of 128 characters of Store Name Message (32 characters x 4 lines) to be printed on the receipt is programmed here. This programming is possible only when the store message specification has been selected by the program option, however, it is not possible when the logo message has been selected. - Page 122 4. PROGRAMMING OPERATIONS EO1-11154 4.9 Store Name Message Programming NOTES: 1. For each line, a maximum of 32 one-byte characters or 16 two-byte characters can be entered. combination of both types is also available. 2. When blanks are entered for the whole one line, it results in one line feed. 3.
- Page 123 4. PROGRAMMING OPERATIONS EO1-11154 4.9 Store Name Message Programming Example To program the following Store Message. Line No. 1 1 3 4 3 P E A C H D R I V E Line No. 2 P H O N E : 8 7 - 6 4 3 7 Line No.
- Page 124 Main Menu screen. ECR to end this programming. NOTE: In the above example, characters except for alphabets are entered using the character code entry method. 31-10-2005 MON STORE NAME TEC STORE 1343 PEACH DRIVE PHONE: 87-6437 0017 16:59TM 4-26...
-
Page 125: Cashier Name And Status Programming
4. PROGRAMMING OPERATIONS EO1-11154 4.10 Cashier Name and Status Programming 4.10 Cashier Name and Status Programming Cashier Name and Cashier Status for each cashier can be programmed here. CONDITION Any time outside a sale Mode Lock: SET OPERATION Menu Tree Operation Flowchart Main Menu ECR is being outside a sale and in SET mode. - Page 126 4. PROGRAMMING OPERATIONS EO1-11154 4.10 Cashier Name and Status Programming NOTES: 1. Cashiers 1 to 8 are programmed with the names “1CL” to “8CL” as default setting. 2. For the name of each cashier, a maximum of 12 one-byte or 6 two-byte characters can be entered. A combination of both types is also available.
- Page 127 4. PROGRAMMING OPERATIONS EO1-11154 4.10 Cashier Name and Status Programming (continued from the previous page) Operation LCD Display Remarks The [Enter] key depression allows the Numbers of programmed characters and of programmable characters are displayed on ECR to enter the cashier 1 name input the 7-segment numeric display.
-
Page 128: Department Name Programming
4. PROGRAMMING OPERATIONS EO1-11154 4.11 Department Name Programming 4.11 Department Name Programming A maximum of 16 characters of department name is programmed here. Any time outside a sale CONDITION Mode Lock: SET OPERATION Menu Tree Operation Flowchart Main Menu ECR is being outside a sale and in SET mode Depress [↓] then [Enter]. - Page 129 4. PROGRAMMING OPERATIONS EO1-11154 4.11 Department Name Programming Example To program “FOOD” as the name of Department 01 Operation LCD Display Remarks The cursor is moved on to “2 NAMES”. When the ECR is being outside a sale and in SET mode, depress the [↓] key. Depress the [2] or [Enter] key.
-
Page 130: Department Group Name Programming
4. PROGRAMMING OPERATIONS EO1-11154 4.12 Department Group Name Programming 4.12 Department Group Name Programming In this operation, the name of each Group is programmed. Which Departments are linked to each Group has already been set in the DEPARTMENT TABLE PROGRAMMING operation. CONDITION Any time outside a sale OPERATION... - Page 131 4. PROGRAMMING OPERATIONS EO1-11154 4.12 Department Group Name Programming Example To program the following name on Department Group 1: Group 1 Operation LCD Display Remarks The cursor is moved on to “2 NAMES”. When the ECR is being outside a sale and in SET mode, depress the [↓] key.
-
Page 132: Plu Name Programming
4. PROGRAMMING OPERATIONS EO1-11154 4.13 PLU Name Programming 31-10-2005 MON GROUP 01 FRESH 0036 13:16TM 4.13 PLU Name Programming A maximum of 16 characters of PLU name is programmed here. Any time outside a sale CONDITION Mode Lock: SET OPERATION Menu Tree Operation Flowchart Main Menu... - Page 133 4. PROGRAMMING OPERATIONS EO1-11154 4.13 PLU Name Programming Example To program “Tomato” as the name of PLU Code No. 0001 Operation LCD Display Remarks The cursor is moved on to “2 NAMES”. When the ECR is being outside a sale and in SET mode, depress the [↓] key.
-
Page 134: Salesperson Name Programming
4. PROGRAMMING OPERATIONS EO1-11154 4.14 Salesperson Name Programming 31-10-2005 MON PLU NAME 0001 Tomato 0033 18:33TM 4.14 Salesperson Name Programming By programming Salesperson here, the name of each salesperson can be programmed in a maximum of 12 characters. CONDITION Any time outside a sale OPERATION Mode Lock: SET Menu Tree... - Page 135 4. PROGRAMMING OPERATIONS EO1-11154 4.14 Salesperson Name Programming Example To program “White” on Salesperson Code 01: Operation LCD Display Remarks When the ECR is being outside a sale The cursor is moved on to “2 NAMES”. and in SET mode, depress the [↓] key. Depress the [2] or [Enter] key.
-
Page 136: Department Table Programming
4. PROGRAMMING OPERATIONS EO1-11154 4.15 Department Table Programming (continued from the previous page) Operation LCD Display Remarks The [End] key depression allows the A long receipt is issued and the display returns to Main Menu screen. ECR to end this programming. 31-10-2005 MON SALES PERSON 01 White... - Page 137 4. PROGRAMMING OPERATIONS EO1-11154 4.15 Department Table Programming Operation Flowchart Main Menu ECR is being outside a sale and in SET mode Depress [↓] twice then [Enter]. “3 DP/PLU” for Department/PLU table programming is selected. Depress [3]. Depress [1] or [Enter] key. “1 DP”...
- Page 138 4. PROGRAMMING OPERATIONS EO1-11154 4.15 Department Table Programming *1: Department Group No. • Input a department group code (2 digits: 01 to 15), then depress the [Enter] key. • To cancel a department group, input 0 then depress the [Enter] key. •...
- Page 139 4. PROGRAMMING OPERATIONS EO1-11154 4.15 Department Table Programming *5: High Amount Limit • Enter a maximum of 7 digits to be set as the high amount to be locked out. Example) To prohibit any amount equal to or larger than 40,00: 4000 [Enter] (Allows any amount equal to or smaller than 39,99.) NOTES:...
- Page 140 4. PROGRAMMING OPERATIONS EO1-11154 4.15 Department Table Programming (continued from the previous page) Operation LCD Display Remarks Depress the [3] or [Enter] key. Depress the [1] or [Enter] key. “1 DP” is selected. Depress the [1] or [Enter] key. “1 DP SETTINGS” is selected. Depress the [Enter] key to select The [?] key depression results in that the following guidance message appears on the...
- Page 141 4. PROGRAMMING OPERATIONS EO1-11154 4.15 Department Table Programming (continued from the previous page) Operation LCD Display Remarks Move the cursor on to a desired status The [?] key depression results in that the following guidance message appears on the setting with the [↓] or [↑] key. LCD display.
-
Page 142: Plu Table Programming
4. PROGRAMMING OPERATIONS EO1-11154 4.16 PLU Table Programming (continued from the previous page) Operation LCD Display Remarks Depress the [Rtn] key. The display returns to the Department Setting screen. Move the cursor on to a desired department with the [↓] or [↑] key, then depress the [Enter] key. - Page 143 4. PROGRAMMING OPERATIONS EO1-11154 4.16 PLU Table Programming Operation Flowchart Main Menu ECR is being outside a sale and in SET mode. Depress [↓] twice then [Enter]. “3 DP/PLU” for Department/PLU table programming is selected. Depress [3]. Depress [↓] then [Enter]. “2 PLU”...
- Page 144 4. PROGRAMMING OPERATIONS EO1-11154 4.16 PLU Table Programming *1: Linked Department Code • Enter the 2-digit code of the department to which the PLU is linked. When the PLU is newly programmed, this entry is compulsory (an error will result if this entry is skipped.) [Enter] 1 to 40 *2: Preset Price...
- Page 145 4. PROGRAMMING OPERATIONS EO1-11154 4.16 PLU Table Programming Example To program the following PLU data: PLU Code: 0010 Linked Department: Department 1 Preset Price: €1,00 2nd Preset Price: €1,20 3rd Preset Price: €1,50 Tax Status: 12 (VAT 1 and VAT2) Operation LCD Display Remarks...
- Page 146 4. PROGRAMMING OPERATIONS EO1-11154 4.16 PLU Table Programming (continued from the previous page) Operation LCD Display Remarks Input 100, then depress the [Enter] The [?] key depression results in that the following guidance message appears on the key. LCD display. (Preset Price €1,00 is set.) Input 120, then depress the [Enter] The [?] key depression results in that the...
- Page 147 4. PROGRAMMING OPERATIONS EO1-11154 4.16 PLU Table Programming 4.16.2 Deletion To delete a PLU with sales data of zero: Any time outside a sale CONDITION To delete a PLU with sales data of not zero: After PLU Reset OPERATION Mode Lock: SET Individual PLU Deletion: The programmed PLU data is deleted individually.
- Page 148 4. PROGRAMMING OPERATIONS EO1-11154 4.16 PLU Table Programming Example To delete PLU No. 0501 (Tuna Can) that was once programmed. Operation LCD Display Remarks When the ECR is being outside a sale The cursor is moved on to “3 DP/PLU”. and in SET mode, depress the [↓] key twice.
- Page 149 4. PROGRAMMING OPERATIONS EO1-11154 4.16 PLU Table Programming All PLU Deletion: The programmed PLU data is deleted entirely. Menu Tree Operation Flowchart Operation LCD Display Remarks When the ECR is being outside a sale The cursor is moved on to “3 DP/PLU”. and in SET mode, depress the [↓] key twice.
-
Page 150: Department Preset Price Setting Or Changing
4. PROGRAMMING OPERATIONS EO1-11154 4.17 Department Preset Price Setting or Changing 4.17 Department Preset Price Setting or Changing The preset price of each department may be set in the DEPARTMENT TABLE PROGRAMMING already described. However, in setting or changing the price only but not other programmed data, the following operation will be more convenient. - Page 151 4. PROGRAMMING OPERATIONS EO1-11154 4.17 Department Preset Price Setting or Changing Example To preset the price €1,00 on Department 1 (FOOD): Operation LCD Display Remarks When the ECR is being outside a sale The cursor is moved on to “3 DP/PLU”. and in SET mode, depress the [↓] key twice.
- Page 152 4. PROGRAMMING OPERATIONS EO1-11154 4.17 Department Preset Price Setting or Changing (continued from the previous page) Operation LCD Display Remarks Input 100 for the preset price of While ? is shown on the upper-right corner of the LCD display screen, the [?] key Department 1 (FOOD).
-
Page 153: Plu Preset Price Setting Or Changing
4. PROGRAMMING OPERATIONS EO1-11154 4.18 PLU Preset Price Setting or Changing 4.18 PLU Preset Price Setting or Changing The preset price of each PLU may be set in the PLU TABLE PROGRAMMING already described. However, in setting or changing the price only but not other programmed data, the following operation will be more convenient. CONDITION Any time outside a sale OPERATION... - Page 154 4. PROGRAMMING OPERATIONS EO1-11154 4.18 PLU Preset Price Setting or Changing NOTES: 1. When no price is input then the [Enter] key is depressed, the PLU will be open (i.e. open-price PLU). 2. If inputting a nonexistent PLU code that was not programmed in the PLU Table Programming, this may cause an error.
- Page 155 4. PROGRAMMING OPERATIONS EO1-11154 4.18 PLU Preset Price Setting or Changing (continued from the previous page) Operation LCD Display Remarks Make sure the cursor is shown on The 1st preset price is changed from €1,05 to €3,15. 01PRICE. Then, input 315 and depress the [Enter] key.
-
Page 156: And %- Preset Rate Setting
4. PROGRAMMING OPERATIONS EO1-11154 4.19 %+ and %- Preset Rate Setting 4.19 %+ and %- Preset Rate Setting A preset rate may be set on each of the [%+] and [%-] keys, one independent rate for each key. Once a rate is preset, the % key will simply be depressed without a prior rate entry to active the preset rate. - Page 157 4. PROGRAMMING OPERATIONS EO1-11154 4.19 %+ and %- Preset Rate Setting Example To program the following rate on the [%-] key: [%-] key ………. Rate: 5,00% Operation LCD Display Remarks When the ECR is being outside a sale The cursor is moved on to “4 RATE, LIMIT AMOUNT”.
-
Page 158: Foreign Currency Exchange Rate Setting
4. PROGRAMMING OPERATIONS EO1-11154 4.20 Foreign Currency Exchange Rate Setting 4.20 Foreign Currency Exchange Rate Setting In this program, the rate of each foreign currency (corresponding to the [CUR1] to [CUR5] keys) will be set. By setting a rate on each Foreign Currency Key, reading the sale total and tendering in the foreign currency value will be possible for sale finalization. - Page 159 4. PROGRAMMING OPERATIONS EO1-11154 4.20 Foreign Currency Exchange Rate Setting Foreign Currency Exchange Rate Calculation The rate must be calculated in the subsidiary currency unit values for both the domestic and the foreign currencies. (In case of calculating the rate from the domestic to a foreign currency with the same zero- suppress form, such as from Euro to U.S.
- Page 160 4. PROGRAMMING OPERATIONS EO1-11154 4.20 Foreign Currency Exchange Rate Setting (continued from the previous page) Operation LCD Display Remarks Make sure the cursor is shown on The exchange rate from € to $ is set on the [CUR1] key. 01CUR1. Then, input 0.0120 and depress the [Enter] key.
-
Page 161: Verification Of Programmed Data
5. VERIFICATION OF PROGRAMMED DATA EO1-11154 5. VERIFICATION OF PROGRAMMED DATA 5. VERIFICATION OF PROGRAMMED DATA The programmed data entered in the preceding chapter can be read for verification purposes. The print format of each program reading is almost the same as on the program receipt, except that “X” is printed instead of printing Program Name. - Page 162 5. VERIFICATION OF PROGRAMMED DATA EO1-11154 5. VERIFICATION OF PROGRAMMED DATA PROGRAM DATA READ menu X mode 1 DAILY 2 GT 3 PROGRAM DATA READ 4 OTHER ITEMS 1 MESSAGES SET mode 1 COMMERCIAL MESSAGE 4 RATE, LIMIT AMOUNT SET 2 FOOTER MESSAGE 5 BASIC 3 STORE MESSAGE...
- Page 163 English Waste Recycling information for users: Following information is only for EU-member states: The crossed out wheeled bin symbol is used to indicate that the product must not be treated as general household waste. By ensuring that this product is disposed of correctly you will be helping to prevent potentially negative consequences for the environment and human health, which could otherwise be caused by incorrect waste handling of this product.
- Page 164 P a t e r s s t r a a t 1 0 6 - 1 0 8 i n f o @ v a n me c h e l e n . b e 2 3 0 0 T u r n h o u t w w w .