Table of Contents
Advertisement
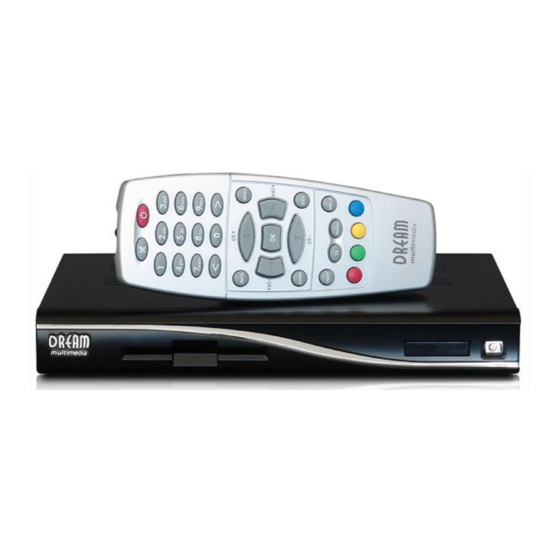
Dreambox DM 100
Bedienungsanleitung
User Manual
Digitaler Satellitenempfänger zum Empfang von freien
Digital satellite receiver for free and encrypted
und verschlüsselten DVB-Programmen.
Digital Video Broadcasting (DVB).
Communication-Port
Kommunikations-Schnittstelle
Smartcard Reader
Smartcard Leser
Real Time OS
Real Time OS
Advertisement
Table of Contents

Related Manuals for DREAM MULTIMEDIA Dreambox DM 100


Summary of Contents for DREAM MULTIMEDIA Dreambox DM 100
- Page 1 Dreambox DM 100 Bedienungsanleitung User Manual Digitaler Satellitenempfänger zum Empfang von freien Digital satellite receiver for free and encrypted und verschlüsselten DVB-Programmen. Digital Video Broadcasting (DVB). Communication-Port Kommunikations-Schnittstelle Smartcard Reader Smartcard Leser Real Time OS Real Time OS...
-
Page 2: Table Of Contents
U s e r M a n u a l D r e a m b o x D M 1 0 0 english Table of contents 1. Before initial operation of the receiver Safety instructions ..................4 Packaging contents ..................7 Views ....................... - Page 3 U s e r M a n u a l D r e a m b o x D M 1 0 0 english 6. Edit the channellist Channel list ....................24 Edit channels .................... 25 Edit favorites ..................... 25 Parental control ..................
-
Page 4: Before Initial Operation Of The Receiver
ATTENTION! We recommend not to remove SIM card inside Dreambox, it will lead to loss of warranty. Note: The Dreambox DM 100 carries the CE-sign and fulfills all requirements form the EU. Subject to change without prior notification. - Page 5 U s e r M a n u a l D r e a m b o x D M 1 0 0 english Shut down In case your Dreambox is in use for a longer period of time disconnect the power plug from the power outlet.
- Page 6 U s e r M a n u a l D r e a m b o x D M 1 0 0 english Disposal instructions The packaging of the Dreambox only consists of reusable materials. Please recycle if possible. This symbol on the product or on its packaging indicates that this product must not be disposed of with your other household waste.
-
Page 7: Packaging Contents
Packaging contents Please check the completeness of the box’s contents. Included in box: 2 Batteries Dreambox DM 100 (1,5V Mignon / AA / LR6) Remote control Power supply CWT 12V, 2A, 24W 1 Power cord 1 User manual (most recent version online:... -
Page 8: Views
U s e r M a n u a l D r e a m b o x D M 1 0 0 english Views Front panel RC LED Smartcard Reader Standby LED Standby On / off Rear panel Network Audio Power supply interface... -
Page 9: Explanation Front Panel
U s e r M a n u a l D r e a m b o x D M 1 0 0 english 1.3.1 Explanation Front Panel Smartcard Reader Insert your Dreamcrypt Smartcard with the golden chip facing down and forward into the Smartcard reader. - Page 10 U s e r M a n u a l D r e a m b o x D M 1 0 0 english Power supply connector Plug the power cable of the power supply that came with your Dreambox into power outlet. Connect your power supply to your Dreambox.
-
Page 11: Remote Control
U s e r M a n u a l D r e a m b o x D M 1 0 0 english Remote control MUTE-Button Standby-Button Numeric Keypad Back-Button TV/Radio-Button Channel-up-Button INFO-Button MENU-Button OK-Button Volume-down-Button Volume-up-Button EPG-Button EXIT-Button Channel-down-Button Favorite-Button Audio–Button... - Page 12 U s e r M a n u a l D r e a m b o x D M 1 0 0 english Important notes about operation All functions of the Dreambox can be controlled via OSD-Menu (On-Screen-Display). This makes the handling of the Dreambox very easy for you.
- Page 13 U s e r M a n u a l D r e a m b o x D M 1 0 0 english Explanation remote control buttons MENU-Button - INFORMATION - INSTALLATION - SYSTEM SETTINGS - EDIT - GAMES - CARDS You can switch to the needed option by pressing the Navigation-Buttons left or right.
- Page 14 U s e r M a n u a l D r e a m b o x D M 1 0 0 english INFO-Button If no OSD menu is visible on the screen and you are in TV or RADIO-Mode, pressing the INFO-Button will reveal the Infobar.
- Page 15 U s e r M a n u a l D r e a m b o x D M 1 0 0 english TEXT-Button The TEXT-Button activates the Teletext (TuxTxt). If you are in the stations list, pressing this button will directly take you to the FILE-Mode.
-
Page 16: Installation
U s e r M a n u a l D r e a m b o x D M 1 0 0 english Installation Turning the device on Place the batteries inside the battery compartment of the remote control keeping in mind the right polarity. -
Page 17: Start Wizard
U s e r M a n u a l D r e a m b o x D M 1 0 0 english Start wizard Language selection When you turn on Dreambox for the first time, or run ‘factory reset’ you have to choose OSD language first. -
Page 18: Basic Operation
U s e r M a n u a l D r e a m b o x D M 1 0 0 english Basic operation Turning your Dreambox on and off Use the Standby-Button to turn your Dreambox on and off. To put your Dreambox into Standby-Mode either press the Standby-Button on your remote control or on your Dreambox. -
Page 19: Audio Tracks
U s e r M a n u a l D r e a m b o x D M 1 0 0 english Audio tracks Press Audio-Button in TV or Radio mode will reveal the audio menu of the service. Use the Navigation-Buttons up and down to move to desired audio track. -
Page 20: Multi Picture
U s e r M a n u a l D r e a m b o x D M 1 0 0 english Multi-picture The Multi-picture menu appears by pressing the green Options-Button. You can select to see 4 or 9 pictures in one. Press the OK-Button to select. -
Page 21: History List
U s e r M a n u a l D r e a m b o x D M 1 0 0 english History list The History List menu appears by pressing the blue Options-Button. You can see all channels you watched so far. The first channel in the list is the most recent one. -
Page 22: Infobar
U s e r M a n u a l D r e a m b o x D M 1 0 0 english 4.11 Infobar The Infobar appears by pressing the OK-Button once, if no OSD menu is shown on your screen. -
Page 23: Electronic Program Guide - Epg
U s e r M a n u a l D r e a m b o x D M 1 0 0 english Electronic Program Guide – EPG The EPG menu appears by pressing the EPG-Button. If no OSD menu is visible on your screen and you are in TV mode press the TV-Button to access the service list. -
Page 24: Edit The Channellist
U s e r M a n u a l D r e a m b o x D M 1 0 0 english Edit the channellist Channel list When you press OK-Button in TV or Radio mode, you can see channel list menu Press the red Options-Button to sort channels alphabetically. -
Page 25: Edit Channels
U s e r M a n u a l D r e a m b o x D M 1 0 0 english Edit channels If no OSD menu is visible on your screen, press the Menu-Button to open the main OSD menu. -
Page 26: Parental Control
U s e r M a n u a l D r e a m b o x D M 1 0 0 english Parental control If no OSD menu is visible on your screen, press the Menu-Button to open the main OSD menu. -
Page 27: Setup
U s e r M a n u a l D r e a m b o x D M 1 0 0 english Setup Language If no OSD menu is visible on your screen, press the Menu-Button to open the main OSD menu. -
Page 28: Osd Settings
U s e r M a n u a l D r e a m b o x D M 1 0 0 english OSD settings If no OSD menu is visible on your screen, press the Menu-Button to open the main OSD menu. -
Page 29: Service Searching
U s e r M a n u a l D r e a m b o x D M 1 0 0 english Service searching Select the satellite You can select which satellites you want to scan in this menu. Use the Navigations-Buttons up/down to navigate and press the OK-Button to select or unselect the highlighted satellite. -
Page 30: Automatic Transponder Scan
U s e r M a n u a l D r e a m b o x D M 1 0 0 english 8.3.1 Automatic transponder scan Set the Mode option to Auto by using the Navigation-Buttons left/right to scan a preset list of transponders. -
Page 31: Pid Transponder Scan
U s e r M a n u a l D r e a m b o x D M 1 0 0 english 8.3.3 PID transponder scan Set the Mode option to PID by using the Navigation-Buttons left/right to scan a desired PIDs on a single transponder. -
Page 32: Channel Scan
U s e r M a n u a l D r e a m b o x D M 1 0 0 english Channel scan Once you have started the scan you will be taken to the Channel Scan menu. Wait until channel scan reaches 100%. -
Page 33: Usals
U s e r M a n u a l D r e a m b o x D M 1 0 0 english 8.5.2 USALS Use the Navigation-Buttons up/down and left/right to set the motor option to USALS. Press the OK-Button. My Longitude/Latitude: Enter the latitude and longitude of your position. -
Page 34: Technical Data
U s e r M a n u a l D r e a m b o x D M 1 0 0 english Technical data Fully MPEG-2 and DVB-S Compliant Input Frequency 950 ~ 2150MHz Tuner Symbol Rate: 1 ~ 45MS/s 1 x Smart Card-Reader &... - Page 35 U s e r M a n u a l D r e a m b o x D M 1 0 0 english Output digital: Output Level 0,5 Vss on 75 Ohm Sampled Data Filtering 32 kHz, 44.1 kHz, 48 kHz, 96 kHz S/PDIF-Output optical (AC3) Video parameter: Input Level FBAS 1 Vss +/- 0.3 dB on 75 Ohm...
-
Page 36: Contact & Support Information
U s e r M a n u a l D r e a m b o x D M 1 0 0 english Contact & support information Headquarter & Distribution: Dream-Multimedia GmbH Pierbusch 24-26 44536 Lünen Germany Dealer’s Hotline: (Dealers only) 3 85 85 90 112 Tel.: +49 (0)180 -...