Table of Contents
Advertisement
Quick Links
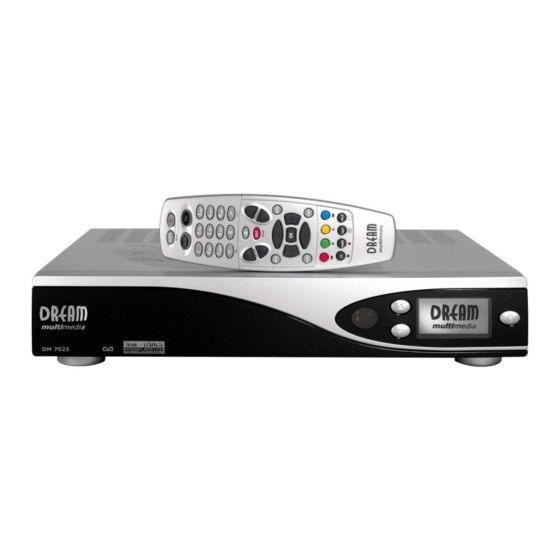
Dreambox DM 7025 / DM 7025+
Bedienungsanleitung
Digitaler Satellitenempfänger zum Empfang von freien und
verschlüsselten DVB-Programmen mit optionaler digitaler
Aufzeichnungsmöglichkeit.
Mit Kommunikations-Schnittstelle
und PCMCIA-Schnittstelle für CI-Module
Anschluss für interne Festplatte
Compact Flash Schacht
Grafisches LC-Display
Twin Tuner steckbar
Smartcard Leser
Linux OS
User Manual
Digital satellite receiver for free and encrypted Digital
Video Broadcasting (DVB) with
optional digital recording capability.
Communication-Port
PCMCIA-Slot for CI-Modules
Internal hard disk connector
Compact Flash Slot
Graphical LC-Display
Pluggable Twin Tuner support
2 Smartcard Readers
Linux OS
Advertisement
Table of Contents

Related Manuals for DREAM MULTIMEDIA Dreambox DM7025


Summary of Contents for DREAM MULTIMEDIA Dreambox DM7025
-
Page 1: User Manual
Dreambox DM 7025 / DM 7025+ Bedienungsanleitung User Manual Digital satellite receiver for free and encrypted Digital Digitaler Satellitenempfänger zum Empfang von freien und Video Broadcasting (DVB) with verschlüsselten DVB-Programmen mit optionaler digitaler optional digital recording capability. Aufzeichnungsmöglichkeit. Communication-Port Mit Kommunikations-Schnittstelle und PCMCIA-Schnittstelle für CI-Module PCMCIA-Slot for CI-Modules Anschluss für interne Festplatte... -
Page 2: Table Of Contents
U s e r M a n u a l D r e a m b o x D M 7 0 2 5 / D M 7 0 2 5 + Table of contents 1. Before initial operation of the receiver Safety instructions .................. - Page 3 U s e r M a n u a l D r e a m b o x D M 7 0 2 5 / D M 7 0 2 5 + 5. Electronic Program Guide - EPG Single-EPG....................28 Multi-EPG ....................
- Page 4 U s e r M a n u a l D r e a m b o x D M 7 0 2 5 / D M 7 0 2 5 + 9. Picture-in-Picture mode (PiP) ..............10. Sleep timer ......................
- Page 5 U s e r M a n u a l D r e a m b o x D M 7 0 2 5 / D M 7 0 2 5 + 13. Updating the software 13.1 Backing up your settings ................91 13.2 Restoring your settings ................
-
Page 6: Before Initial Operation Of The Receiver
U s e r M a n u a l D r e a m b o x D M 7 0 2 5 / D M 7 0 2 5 + Before initial operation of the receiver 1.1 Safety instructions Please read the safety instructions completely and carefully, before using the Dreambox. - Page 7 U s e r M a n u a l D r e a m b o x D M 7 0 2 5 / D M 7 0 2 5 + Shut down In case your Dreambox is in use for a longer period of time disconnect the power plug from the power outlet.
-
Page 8: Disposal Instructions
U s e r M a n u a l D r e a m b o x D M 7 0 2 5 / D M 7 0 2 5 + Disposal instructions The packaging of the Dreambox only consists of reusable materials. Please recycle if possible. -
Page 9: Packaging Contents
U s e r M a n u a l D r e a m b o x D M 7 0 2 5 / D M 7 0 2 5 + Packaging contents Please check the completeness of the box’s contents. Included in box: 2 Batteries Dreambox DM 7025... -
Page 10: Views
U s e r M a n u a l D r e a m b o x D M 7 0 2 5 / D M 7 0 2 5 + Views Front panel LC-Display or Remote control sensor OLED-Display CI-Slot Compact Flash Slot... -
Page 11: Explanation Front Panel
U s e r M a n u a l D r e a m b o x D M 7 0 2 5 / D M 7 0 2 5 + 1.3.1 Explanation Front Panel CI-Slot Plug in here any CI- Module of your choice. Compact Flash Slot The Compact Flash Slot is meant to hold a Compact Flash Module. -
Page 12: Explanation Rear Panel
U s e r M a n u a l D r e a m b o x D M 7 0 2 5 / D M 7 0 2 5 + 1.3.2 Explanation rear panel Mains switch The main power switch completely cuts power from your Dreambox. Mains connection Plug the power cable into the main power socket. - Page 13 Modem port (optional) You can optionally connect your Dreambox to your ISP via the Modem Socket using a phone line. The modem can be ordered from Dream Multimedia. Digital audio out (Toslink) You can connect your Dreambox with an optical (Toslink) cable to your HiFi-Amplifier or DSP.
-
Page 14: Remote Control
U s e r M a n u a l D r e a m b o x D M 7 0 2 5 / D M 7 0 2 5 + Remote control SHIFT / SETUP-Button Power-Button DREAM-Mode-Button TV-Mode-Button Numeric-Keypad Arrow-Right-Button Arrow-Left-Button... - Page 15 U s e r M a n u a l D r e a m b o x D M 7 0 2 5 / D M 7 0 2 5 + Important notes about operation All functions of the Dreambox can be controlled via OSD-Menu (On-Screen-Display). This makes the handling of the Dreambox very easy for you.
- Page 16 U s e r M a n u a l D r e a m b o x D M 7 0 2 5 / D M 7 0 2 5 + Explanation remote control buttons SHIFT / SETUP-Button The SHIFT/ SETUP-Button is used to preprogram the remote control to operate a TV. See chapter 15.
- Page 17 U s e r M a n u a l D r e a m b o x D M 7 0 2 5 / D M 7 0 2 5 + Mute-Button Pressing the MUTE-Button mutes the Volume. A crossed speaker symbol will appear on the TV screen.
- Page 18 U s e r M a n u a l D r e a m b o x D M 7 0 2 5 / D M 7 0 2 5 + MENU-Button If you are in TV- or RADIO-Mode, pressing this button will bring up the OSD main menu. The OSD main menu has the following options: You can switch to the needed option by pressing the Navigation-Buttons up or down.
- Page 19 U s e r M a n u a l D r e a m b o x D M 7 0 2 5 / D M 7 0 2 5 + TV-Button (PVR-Mode) Pressing the TV-Button activates the TV-Mode. In PVR-Mode this button is mapped with the stop function as indicated by the small square underneath it.
-
Page 20: Installation
U s e r M a n u a l D r e a m b o x D M 7 0 2 5 / D M 7 0 2 5 + Installation Turning the device on Place the batteries inside the battery compartment of the remote control keeping in mind the right polarity. -
Page 21: Start Wizard
U s e r M a n u a l D r e a m b o x D M 7 0 2 5 / D M 7 0 2 5 + Start wizard Language selection Select your desired and language with the Navigation-Buttons up and down. -
Page 22: Tuner Setup
U s e r M a n u a l D r e a m b o x D M 7 0 2 5 / D M 7 0 2 5 + Tuner setup Detailed information about the tuner setup can be found in chapter 11.1 DVB-S Tuner configuration Service scan Detailed information about the service scan can be found in chapter 11.2 Automatic scan... -
Page 23: Parental Control
U s e r M a n u a l D r e a m b o x D M 7 0 2 5 / D M 7 0 2 5 + Parental Control Refer to section 6.8 Parental control for further information about this feature. Entering the pincode Finalizing the basic setup - 23 -... -
Page 24: Basic Operation
U s e r M a n u a l D r e a m b o x D M 7 0 2 5 / D M 7 0 2 5 + Basic operation Turning your Dreambox on and off Use the Power-Button to turn your Dreambox on and off. -
Page 25: Service Selection
U s e r M a n u a l D r e a m b o x D M 7 0 2 5 / D M 7 0 2 5 + Service selection Pressing the Left/Right-Buttons on your Dreambox remote control will take you to the previous or next service. -
Page 26: Sub Services
U s e r M a n u a l D r e a m b o x D M 7 0 2 5 / D M 7 0 2 5 + Sub Services The green dot in the Infobar appears if the selected station transmits sub services. Pressing the green Options-Button in TV or Radio mode will reveal the sub services menu. -
Page 27: Infobar
U s e r M a n u a l D r e a m b o x D M 7 0 2 5 / D M 7 0 2 5 + 4.10 Infobar The Infobar appears and disappears by pressing the OK-Button once, if no OSD menu is shown on your screen or when you change channels. -
Page 28: Electronic Program Guide - Epg
U s e r M a n u a l D r e a m b o x D M 7 0 2 5 / D M 7 0 2 5 + Electronic Program Guide - EPG By pressing the INFO-Button in TV-Mode you are supplied with detailed information about the current show and by pressing the Right-Button afterwards about the next show. -
Page 29: Multi-Epg
U s e r M a n u a l D r e a m b o x D M 7 0 2 5 / D M 7 0 2 5 + Multi-EPG Use the blue and yellow Options-Buttons to switch between the now, next and more views. -
Page 30: Time/Date Input
U s e r M a n u a l D r e a m b o x D M 7 0 2 5 / D M 7 0 2 5 + 5.2.1 Time/Date Input Press the Menu-Button in the Multi-EPG view. A window will appear where you can enter a time and date. -
Page 31: Edit The Channellist
U s e r M a n u a l D r e a m b o x D M 7 0 2 5 / D M 7 0 2 5 + Edit the channellist What is a bouquet? A bouquet can be thought of something like a folder. Every channel equals a page in this folder and the pages are sorted into categories. - Page 32 U s e r M a n u a l D r e a m b o x D M 7 0 2 5 / D M 7 0 2 5 + By pressing the Menu-Button the "Channellist menu" will open up. Navigate to the option "add bouquet".
-
Page 33: Add A Service To Favorites
U s e r M a n u a l D r e a m b o x D M 7 0 2 5 / D M 7 0 2 5 + Add a service to favorites If you want to add a service to your Favorites-view you can choose from services in the All-, Satellites- and Provider-views. -
Page 34: Adding Multiple Services To A Bouquet
Adding multiple services to a bouquet You can select multiple services from the All-view to be added to the currently selected bouquet. Pressing the Up/Down-Buttons on your remote control activates the service list. Use the Bouquet +/- Buttons to switch to the desired bouquet. -
Page 35: Remove A Service From Favorites
Choose the "End bouquet edit" option. All highlighted services will now be added to the bouquet that you selected in the beginning. If you are only using one bouquet, which is the default setting, the selected services will be added to you favorites list. -
Page 36: Moving A Service To Favorites
Moving a service to favorites Pressing the Up/Down-Buttons on your remote control activates the service list. Use the Navigation-Buttons up/down to select the desired service and press the MENU-Button to open the “Channellist menu”. Navigate to the option “enable move mode” and press the OK-Button. -
Page 37: Adding A Marker To Favorites
M 7 0 2 5 / D M 7 0 2 5 + Adding a marker to favorites You have the option to add makers within the favorites bouquets. Pressing the Up/Down-Buttons on your remote control activates the service list. Use the Bouquet +/- Buttons to switch to the desired bouquet. -
Page 38: Alternative Services
U s e r M a n u a l D r e a m b o x D M 7 0 2 5 / D M 7 0 2 5 + Alternative services Incase you are using two different types of tuners in your Dreambox, for example a DVB-S and a DVB-T tuner, you can link services that you receive on both tuners in the alternative services list. - Page 39 U s e r M a n u a l D r e a m b o x D M 7 0 2 5 / D M 7 0 2 5 + Navigate to the option “Add alternatives“. The All view opens up. Use the Navigation-Buttons up/down to select the service that you want to move and press the OK- Button.
-
Page 40: Parental Control
U s e r M a n u a l D r e a m b o x D M 7 0 2 5 / D M 7 0 2 5 + Parental control Parental control makes it possible to lock selected channels. If no OSD menu is visible on your screen, press the Menu-Button to open the main OSD menu. - Page 41 U s e r M a n u a l D r e a m b o x D M 7 0 2 5 / D M 7 0 2 5 + You now will be prompted to enter the old pincode and afterwards the new one.
- Page 42 U s e r M a n u a l D r e a m b o x D M 7 0 2 5 / D M 7 0 2 5 + The Parental control services Editor will open up. All services beginning with the letter P are shown.
-
Page 43: Hard Disk Operation
U s e r M a n u a l D r e a m b o x D M 7 0 2 5 / D M 7 0 2 5 + Hard disk operation Mounting guidelines This chapter describes how to mount a hard disk inside your Dreambox DM 7025. Please always adhere to ESD (Electrostatic Discharge) regulations when handling electronic devices. - Page 44 1 Dreambox (including the 11 Phillips screws for the cover and the hard disk cage). The IDE cable and the hard disk power cord a already installed inside the Dreambox DM7025. 1 Phillips screwdriver 1 Hard disk of your choice...
- Page 45 U s e r M a n u a l D r e a m b o x D M 7 0 2 5 / D M 7 0 2 5 + Lift the cover on the sides on slide it backwards. Remove the 2 screws from the hard disk cage.
- Page 46 U s e r M a n u a l D r e a m b o x D M 7 0 2 5 / D M 7 0 2 5 + Bend the IDE cable as shown in this picture. Now you need the Phillips screwdriver, the hard disk cage, the 4 hard disk mounting screws and your hard disk.
- Page 47 U s e r M a n u a l D r e a m b o x D M 7 0 2 5 / D M 7 0 2 5 + Attach the hard disk cage to the hard disk. Pay attention to the correct mount of the hard disk in the hard disk cage.
- Page 48 U s e r M a n u a l D r e a m b o x D M 7 0 2 5 / D M 7 0 2 5 + Put the hard disk cage back into the Dreambox and connect the hard disk power cord and IDE cable to the hard disk.
-
Page 49: Management
U s e r M a n u a l D r e a m b o x D M 7 0 2 5 / D M 7 0 2 5 + Management If no OSD menu is visible on your screen, press the Menu-Button to open the main OSD menu. -
Page 50: Recording
U s e r M a n u a l D r e a m b o x D M 7 0 2 5 / D M 7 0 2 5 + Recording 7.3.1 Instant recording Press the red Options-Button. You have five available options: - Add recording (indefinitely) - Add recording (stop after current event) -
Page 51: Stop Recording
U s e r M a n u a l D r e a m b o x D M 7 0 2 5 / D M 7 0 2 5 + 7.3.2 Stop recording Switch to the service which recording you want to stop. - Page 52 U s e r M a n u a l D r e a m b o x D M 7 0 2 5 / D M 7 0 2 5 + Manual programming Press the green Options-Button to add a new timer.
-
Page 53: Timeshift
U s e r M a n u a l D r e a m b o x D M 7 0 2 5 / D M 7 0 2 5 + Programming via EPG Change into on of the EPG views as described in chapter 5. -
Page 54: Watch A Recording
U s e r M a n u a l D r e a m b o x D M 7 0 2 5 / D M 7 0 2 5 + Watch a recording Press the Video-Button to get to the selection of recordings. - Page 55 U s e r M a n u a l D r e a m b o x D M 7 0 2 5 / D M 7 0 2 5 + Red Options-Button = Rewind Green Options-Button = Play Yellow Options-Button = Pause Blue Options-Button = Forward TV-Button = Stop...
-
Page 56: Setting A Marker (Bookmarks)
U s e r M a n u a l D r e a m b o x D M 7 0 2 5 / D M 7 0 2 5 + Setting a marker (Bookmarks) Fast forward to the point where you want to add a marker and press the Shift-Button followed by the yellow Options-Button. -
Page 57: Delete A Recording
U s e r M a n u a l D r e a m b o x D M 7 0 2 5 / D M 7 0 2 5 + Delete a recording Press the Video-Button to get to the selection of recordings. -
Page 58: Movielist Options
U s e r M a n u a l D r e a m b o x D M 7 0 2 5 / D M 7 0 2 5 + / D M 7 0 2 5 + Movielist options To access the Movielist menu press the Video-Button and then the Menu-Button. - Page 59 U s e r M a n u a l D r e a m b o x D M 7 0 2 5 / D M 7 0 2 5 + / D M 7 0 2 5 + List styles List style default List style compact with desciption...
-
Page 60: Teletext
U s e r M a n u a l D r e a m b o x D M 7 0 2 5 / D M 7 0 2 5 + Teletext You are in the TV or Radio mode. Press the Text-Button to enter the Teletext. - Page 61 U s e r M a n u a l D r e a m b o x D M 7 0 2 5 / D M 7 0 2 5 + You have the following options: Teletext - Selection: Select the "Search"...
-
Page 62: Picture-In-Picture Mode (Pip)
U s e r M a n u a l D r e a m b o x D M 7 0 2 5 / D M 7 0 2 5 + Picture-in-Picture mode (PiP) The Dreambox has a so called PiP-Function. With PiP you can display a small TV picture on top of the main big TV picture. -
Page 63: Sleep Timer
U s e r M a n u a l D r e a m b o x D M 7 0 2 5 / D M 7 0 2 5 + Sleep timer Using the sleep timer you can put your Dreambox into standby or turn it off after a predetermined amount of time. -
Page 64: Setup
U s e r M a n u a l D r e a m b o x D M 7 0 2 5 / D M 7 0 2 5 + Setup 11.1 Language If no OSD menu is visible on your screen, press the Menu-Button to open the main OSD menu. -
Page 65: Customize
U s e r M a n u a l D r e a m b o x D M 7 0 2 5 / D M 7 0 2 5 + 11.2 Customize If no OSD menu is visible on your screen, press the Menu-Button to open the main OSD menu. - Page 66 U s e r M a n u a l D r e a m b o x D M 7 0 2 5 / D M 7 0 2 5 + Intermediate mode: These settings supplement the settings in simple mode. U s e r M a n u a l D r e a m b o x D M 7 0 2 5 /...
- Page 67 U s e r M a n u a l D r e a m b o x D M 7 0 2 5 / D M 7 0 2 5 + Expert mode: These settings supplement the settings in simple and intermediate mode. Show Infobar on channel change: If the option is set to “no”...
-
Page 68: Setting The Time Zone
U s e r M a n u a l D r e a m b o x D M 7 0 2 5 / D M 7 0 2 5 + 11.3 Setting the time zone If no OSD menu is visible on your screen, press the Menu-Button to open the main OSD menu. -
Page 69: A/V Settings
U s e r M a n u a l D r e a m b o x D M 7 0 2 5 / D M 7 0 2 5 + 11.4 A/V Settings If no OSD menu is visible on your screen, press the Menu-Button to open the main OSD menu. - Page 70 U s e r M a n u a l D r e a m b o x D M 7 0 2 5 / D M 7 0 2 5 + TV System: Choose the standard that your TV supports. PAL or NTSC. WSS on 4:3: Check the checkbox to disable zooming on some 16:9 TV’s during 4:3 transmissions.
-
Page 71: Rf Output
U s e r M a n u a l D r e a m b o x D M 7 0 2 5 / D M 7 0 2 5 + 11.5 RF output If no OSD menu is visible on your screen, press the Menu-Button to open the main OSD menu. -
Page 72: Display Setup (Lcd Or Oled)
U s e r M a n u a l D r e a m b o x D M 7 0 2 5 / D M 7 0 2 5 + 11.6 Display (LCD or OLED) If no OSD menu is visible on your screen, press the Menu-Button to open the main OSD menu. -
Page 73: Network
U s e r M a n u a l D r e a m b o x D M 7 0 2 5 / D M 7 0 2 5 + 11.7 Network If no OSD menu is visible on your screen, press the Menu-Button to open the main OSD menu. - Page 74 U s e r M a n u a l D r e a m b o x D M 7 0 2 5 / D M 7 0 2 5 + Use the Navigation-Buttons and the Numeric-Keypad to change the values. Use DHCP: If enabled your Dreambox will get its IP from a DHCP server.
-
Page 75: Common Interface
U s e r M a n u a l D r e a m b o x D M 7 0 2 5 / D M 7 0 2 5 + 11.8 Common Interface If no OSD menu is visible on your screen, press the Menu-Button to open the main OSD menu. -
Page 76: Skin
U s e r M a n u a l D r e a m b o x D M 7 0 2 5 / D M 7 0 2 5 + 11.9 Skin Selecting another skin will change the looks of your OSD(On-Screen-Display). If no OSD menu is visible on your screen, press the Menu-Button to open the main OSD menu. -
Page 77: Service Searching
U s e r M a n u a l D r e a m b o x D M 7 0 2 5 / D M 7 0 2 5 + Service searching 12.1 DVB-S Tuner configuration If no OSD menu is visible on your screen, press the Menu-Button to open the main OSD menu. -
Page 78: Single Satellite - Direct Connection
U s e r M a n u a l D r e a m b o x D M 7 0 2 5 / D M 7 0 2 5 + 12.1.1 Single satellite – direct connection (DVB-S) Use this type of configuration if you want to receive a single satellite with a Single Universal LNB. -
Page 79: Two Satellites Via Toneburst A/B
U s e r M a n u a l D r e a m b o x D M 7 0 2 5 / D M 7 0 2 5 + 12.1.2 Two satellites via Toneburst A/B (DVB-S) Use this type of configuration if you want to receive two satellites from one LNB each. It does not matter if you use one or two dishes to achieve this. -
Page 80: Two Satellites Via Diseqc A/B
U s e r M a n u a l D r e a m b o x D M 7 0 2 5 / D M 7 0 2 5 + 12.1.3 Two satellites via DiSEqC A/B (DVB-S) Use this type of configuration if you want to receive two satellites from one Twin Universal or Quad Universal LNB. -
Page 81: Four Satellites Via Diseqc A/B/C/D
U s e r M a n u a l D r e a m b o x D M 7 0 2 5 / D M 7 0 2 5 + 12.1.4 Four satellites via DiSEqC A/B/C/D (DVB-S) Use this type of configuration if you want to receive four satellites from one Single Universal or Twin Universal LNB for four or eight parties. -
Page 82: Stab Positioner Using Usals
U s e r M a n u a l D r e a m b o x D M 7 0 2 5 / D M 7 0 2 5 + 12.1.5 Stab Positioner using USALS (DVB-S) Use this type of configuration if you want to receive many satellites with a Stab positioner from a Single Universal LNB. -
Page 83: Stab Positioner Without Usals
U s e r M a n u a l D r e a m b o x D M 7 0 2 5 / D M 7 0 2 5 + 12.1.6 Stab Positioner without USALS (DVB-S) Use this type of configuration if you want to receive many satellites without a Stab positioner from a Single Universal LNB. -
Page 84: Tuner 2 Setup
U s e r M a n u a l D r e a m b o x D M 7 0 2 5 / D M 7 0 2 5 + 12.1.7 Tuner 2 setup (DVB-S) The same setup possibilities that applied for Tuner 1 also apply for Tuner 2. There are some additional configuration options. -
Page 85: Dvb-C Tuner Configuration
U s e r M a n u a l D r e a m b o x D M 7 0 2 5 / D M 7 0 2 5 + 12.2 DVB-C Tuner configuration If no OSD menu is visible on your screen, press the Menu-Button to open the main OSD menu. -
Page 86: Tuner 2 Setup (Dvb-C)
U s e r M a n u a l D r e a m b o x D M 7 0 2 5 / D M 7 0 2 5 + Frequency steps This type of searching scans the set frequencies step by step in a set increment. Use the Navigation-Buttons left/right to set the “Used service scan type”... -
Page 87: Dvb-T Tuner Configuration
U s e r M a n u a l D r e a m b o x D M 7 0 2 5 / D M 7 0 2 5 + 12.3 DVB-T Tuner configuration If no OSD menu is visible on your screen, press the Menu-Button to open the main OSD menu. -
Page 88: Automatic Scan
U s e r M a n u a l D r e a m b o x D M 7 0 2 5 / D M 7 0 2 5 + 12.4 Automatic scan If no OSD menu is visible on your screen, press the Menu-Button to open the main OSD menu. - Page 89 U s e r M a n u a l D r e a m b o x D M 7 0 2 5 / D M 7 0 2 5 + You can see the progress of the scan here. The scan is done once you see this menu.
-
Page 90: Manual Scan
U s e r M a n u a l D r e a m b o x D M 7 0 2 5 / D M 7 0 2 5 + 12.5 Manual scan If no OSD menu is visible on your screen, press the Menu-Button to open the main OSD menu. -
Page 91: Updating The Software
U s e r M a n u a l D r e a m b o x D M 7 0 2 5 / D M 7 0 2 5 + / D M 7 0 2 5 + Updating the software 13.1 Backing up your settings Before installing newer software on your Dreambox you should backup your settings,... -
Page 92: Restoring Your Settings
U s e r M a n u a l D r e a m b o x D M 7 0 2 5 / D M 7 0 2 5 + / D M 7 0 2 5 + 13.2 Restoring your settings Please read chapter 13.1 to find out how to get into this menu. -
Page 93: Installing New Software
U s e r M a n u a l D r e a m b o x D M 7 0 2 5 / D M 7 0 2 5 + / D M 7 0 2 5 + 13.3 Installing new software How do I install new software on my Dreambox DM 7025 / DM 7025+? Perquisites:... - Page 94 U s e r M a n u a l D r e a m b o x D M 7 0 2 5 / D M 7 0 2 5 + / D M 7 0 2 5 + The flash loader will now be transferred to your Dreambox.
- Page 95 U s e r M a n u a l D r e a m b o x D M 7 0 2 5 / D M 7 0 2 5 + / D M 7 0 2 5 + The new software is now being transferred to your Dreambox.
-
Page 96: Systeminformation
U s e r M a n u a l D r e a m b o x D M 7 0 2 5 / D M 7 0 2 5 + Systeminformation 14.1 Service If no OSD menu is visible on your screen, press the Menu-Button to open the main OSD menu. -
Page 97: About (Hard- And Software)
U s e r M a n u a l D r e a m b o x D M 7 0 2 5 / D M 7 0 2 5 + 14.2 About (Hard- and Software) If no OSD menu is visible on your screen, press the Menu-Button to open the main OSD menu. -
Page 98: Troubleshooting
U s e r M a n u a l D r e a m b o x D M 7 0 2 5 / D M 7 0 2 5 + Troubleshooting Problem Possible cause Solution No audio, no video, LCD or Faulty wiring Check wiring and connections OLED-Display lit... -
Page 99: Tv-Mode Setup
U s e r M a n u a l D r e a m b o x D M 7 0 2 5 / D M 7 0 2 5 + TV-Mode setup A four digit device code is selected from the device list and entered into the remote control. The most recent device list can be found in the download center on our website. -
Page 100: Device List
U s e r M a n u a l D r e a m b o x D M 7 0 2 5 / D M 7 0 2 5 + 16.2 TV- Device list Black Star 0277 A.R. Systems 0067 0382 Accent 0067... - Page 101 U s e r M a n u a l D r e a m b o x D M 7 0 2 5 / D M 7 0 2 5 + Domland 0424 Goodmans 0066 0102 0067 0039 0294 0546 Drean 0067 0404 0517 0401 0586 0373...
- Page 102 U s e r M a n u a l D r e a m b o x D M 7 0 2 5 / D M 7 0 2 5 + Micromaxx 0067 0698 Minerva 0517 0225 0100 0106 0221 0267 Minoka 0442 0067 0389 0683 0083 0066 0401 0248...
- Page 103 U s e r M a n u a l D r e a m b o x D M 7 0 2 5 / D M 7 0 2 5 + Pausa 0039 Sandra 0246 0247 Perdio 0102 0350 0193 0067 Sanela 0268 Sansui...
- Page 104 U s e r M a n u a l D r e a m b o x D M 7 0 2 5 / D M 7 0 2 5 + Tech Line 0067 0698 Waltham 0247 0448 0317 0415 0067 Technema 0350 Watson...
-
Page 105: Technical Data
U s e r M a n u a l D r e a m b o x D M 7 0 2 5 / D M 7 0 2 5 + Technical data 300 MHz MIPS Processor Linux open source (most parts under GPL) DVB Common-Interface Slot 2 x Smartcard-Reader Integrated Compact Flash Reader (Slot inside the front panel) - Page 106 U s e r M a n u a l D r e a m b o x D M 7 0 2 5 / D M 7 0 2 5 + Common-Interface: Common-Interface Power Consumption max. 0,3A/5V Video decoder: Video Compression MPEG-2 and MPEG-1 compatible Video Standard PAL G/ 25 Hz Video Formats 4:3 / 16:9...
- Page 107 U s e r M a n u a l D r e a m b o x D M 7 0 2 5 / D M 7 0 2 5 + USB: USB 1.1 connector UDMA66 IDE Interface: Internal HDD connector Compact Flash - Reader LNB power and polarization per tuner: LNB Current 500mA max.
-
Page 108: Features
U s e r M a n u a l D r e a m b o x D M 7 0 2 5 / D M 7 0 2 5 + Features Single-EPG (Electronic Program Guide): sortable by date or alphabetically Automatic search for additional air dates of a show and easy recording them by timer Multi-EPG: graphically and text-based... -
Page 109: Contact & Support Information
Mo - Fr. 09:00 am - 12:00 pm and 01:00 pm - 03:00 pm Dealers & Pricing: E-Mail: info@dream-multimedia-tv.de Technical Support: E-Mail: support@dream-multimedia-tv.de Website: Weblink: http://www.dream-multimedia-tv.de Support Forum: Weblink: http://www.dream-multimedia-tv.de/board Software Support (actual images): Weblink DM 7025: http://www.dm7025.de - 109 -... -
Page 110: Copyright Notes
U s e r M a n u a l D r e a m b o x D M 7 0 2 5 / D M 7 0 2 5 + Copyright notes © Dream-Multimedia 2007. All rights reserved. This product contains files that are distributed under different licenses, especially a Open Source License, the GNU General Public License. -
Page 111: Gnu Gpl (General Public License)
20.1 GNU GENERAL PUBLIC LICENSE Version 2, June 1991 Copyright (C) 1989, 1991 Free Software Foundation, Inc. 51 Franklin Street, Fifth Floor, Boston, MA 02110-1301, USA Everyone is permitted to copy and distribute verbatim copies of this license document, but changing it is not allowed. Preamble The licenses for most software are designed to take away your freedom to share and change it. - Page 112 2. You may modify your copy or copies of the Program or any portion of it, thus forming a work based on the Program, and copy and distribute such modifications or work under the terms of Section 1 above, provided that you also meet all of these conditions: a) You must cause the modified files to carry prominent notices stating that you changed the files and the date of any change.
- Page 113 6. Each time you redistribute the Program (or any work based on the Program), the recipient automatically receives a license from the original licensor to copy, distribute or modify the Program subject to these terms and conditions. You may not impose any further restrictions on the recipients' exercise of the rights granted herein. You are not responsible for enforcing compliance by third parties to this License.
-
Page 114: Menu Overview
Menu overview Main menu Subtitles VCR scart Information Games / Plugins Setup Standby / Restart Media Player Timer Service About Service searching System Common Interface Parental control Startwizard Tuner configuration Automatic scan Language Customize Manual scan Satfinder Timezone A/V settings Positioner Setup RF output Harddisk...