Table of Contents
Advertisement
Available languages
Available languages
SILENTMAX
1000
®
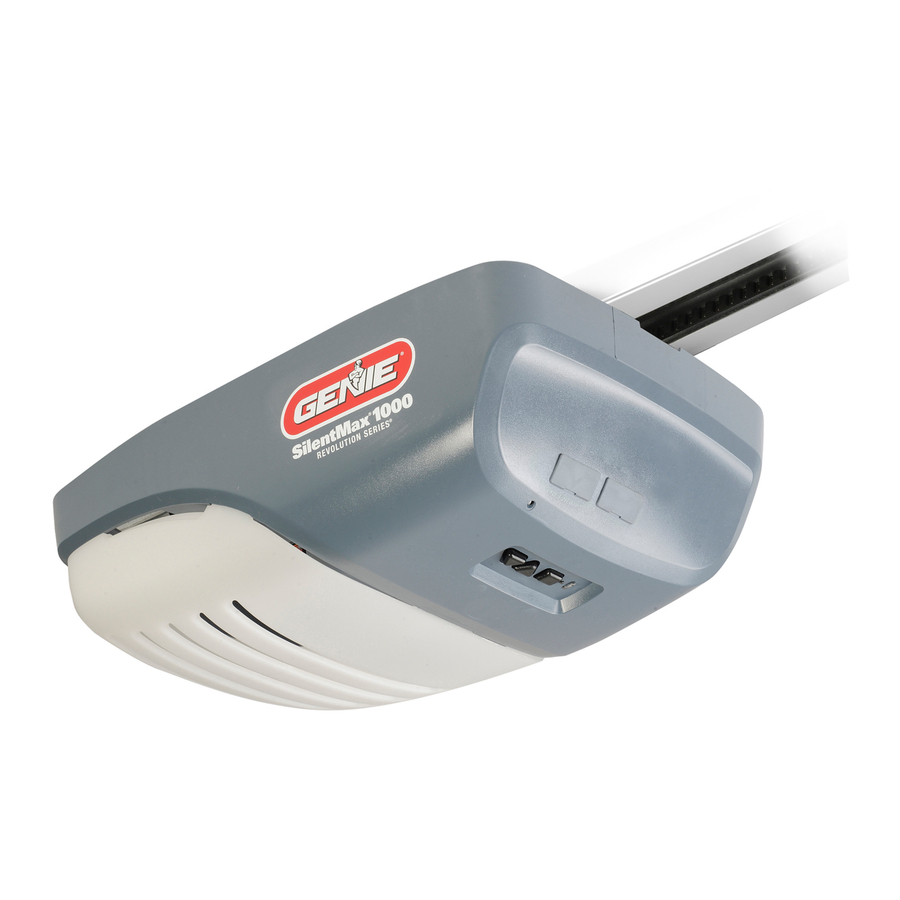
Model 3042
GARAGE DOOR OPENER
OPERATION AND MAINTENANCE MANUAL
Includes INTELLICODE
2 Remote Control. Safe-T-Beam
System must be installed to close door.
®
®
Homelink
and Car2U
compatible.
®
®
For Answers and Assistance:
1.800.354.3643
or visit www.geniecompany.com
WARNING: To reduce the risk of injury to persons or damage to property, use this opener only with a
one-piece or sectional residential door up to 7 ft in height. Extension kit is available for 8 ft. one-piece
or sectional residential doors.
SAVE THIS MANUAL FOR FUTURE REFERENCE.
INSTALLER:
LEAVE THIS MANUAL WITH HOMEOWNER.
Genie, Genie logo, Intellicode, Safe-T-Beam & SilentMax are registered trademarks of GMI Holdings, Inc., dba The Genie Company.
Homelink is a registered trademark of Johnson Controls Technology Company. Car2U is a registered trademark of Lear Corporation. © The Genie Company 2011 PN# 37321500118, 04/2011
Advertisement
Chapters
Table of Contents
Troubleshooting

Related Manuals for Genie SILENTMAX 1000 3042


Summary of Contents for Genie SILENTMAX 1000 3042
- Page 1 Genie, Genie logo, Intellicode, Safe-T-Beam & SilentMax are registered trademarks of GMI Holdings, Inc., dba The Genie Company. Homelink is a registered trademark of Johnson Controls Technology Company. Car2U is a registered trademark of Lear Corporation. © The Genie Company 2011 PN# 37321500118, 04/2011...
-
Page 2: Safety Information
Death or Serious Could result in Death or Serious Could result in Death or Serious ©2011 The Genie Company SAFETY INFORMATION CONVENTIONS USED IN THESE INSTRUCTIONS Keep people clear of opening while Door is moving. WARNING Do NOT allow children to play with the Door Opener. - Page 3 Select units have motion detection built into the powerhead. Lights automatically turn ON when motion is detected for much safer movement through the garage. Lights will turn OFF after 4 minutes of no motion. ©2011 The Genie Company (Not available on all models)
-
Page 4: Table Of Contents
Troubleshooting Guide - Powerhead LEDs ...25 Reference - Wiring Diagram ...26 Warranty ...27 OPENER MUST BE INSTALLED WITH THE INCLUDED WALL CONSOLE. TABLE OF CONTENTS Safe-T-Beam® SAFETY REVERSE SYSTEM MUST BE INSTALLED TO CLOSE DOOR. ©2011 The Genie Company 3/2011... -
Page 5: Important Installation Instructions
There are no assembly or installation steps included in this manual. Contact your Genie® Professional Dealer for an installation poster, if required, or visit www.geniecompany.com to download a PDF file. The following mechanical assembly tasks must be completed before continuing. -
Page 6: Programming Limits & Force
©2011 The Genie Company 3/2011... - Page 7 ©2011 The Genie Company 3/2011...
- Page 8 ©2011 The Genie Company 3/2011...
-
Page 9: Program Intellicode 2 Remote To Powerhead
©2011 The Genie Company 3/2011... -
Page 10: Programming Powerhead
©2011 The Genie Company 3/2011... - Page 11 REMARQUE: Utilisez la console sur le mur et les capteurs de sécurité fournis avec cet appareil. NE PAS substituer la console du mur ou les capteurs de sécurité. NOTA: Use la consola de pared y los sensores de seguridad proporcionados con esta unidad. NO sustituya la consola de pared ni los sensores de seguridad. ©2011 The Genie Company 3/2011...
-
Page 12: Typical Sectional Door Installation
6 po (15 cm) MAX. - 5 po (12,7 cm) MIN. MAX. 6" - MIN. 5" ©2011 The Genie Company ...POUR OBTENIR DE L’AIDE-1-800-35-GENIE ... PARA OBTENER AYUDA, LLAME AL 1-800-35-GENIE OPTIONAL - HEADER BRACKET MOUNTING BOARD PLANCHE DE MONTAGE FACULTATIVE POUR SUP- PORT D’EMBASE... -
Page 13: Typical One Piece Door Installation
SAFE-T-BEAM® SENSORS PALPEURS de SAFE-T-BEAM® SENSORES SAFE-T-BEAM® 3/2011 ... FOR HELP-1-800-35-GENIE OR WWW.GENIECOMPANY.COM ...POUR OBTENIR DE L’AIDE-1-800-35-GENIE ... PARA OBTENER AYUDA, LLAME AL 1-800-35-GENIE ST R ONE PIECE DOOR SECTIONAL DOOR PORTE D’UNE PIÈCE PORTE SECTIONELLE PUERTA DE UNA SOLA PIEZA... -
Page 14: Overview Of Powerhead Controls
Long Red Long Purple Long Blue ©2011 The Genie Company PROGRAM and hold until both BLUE lights come ON or the button you can navigate to Program LED Display Remote Round Blue... -
Page 15: Overview Of Remotes And Options
• Connect the opener into an outlet on a circuit different from that to which the receiver is connected. • Consult your local dealer. ©2011 The Genie Company LOST OR STOLEN REMOTE - CLEARING MEMORY Clearing remotes from powerhead memory will clear ALL programmed remotes and wireless keypad. -
Page 16: Intellicode® Features
IntelliCode® selection for this 2 and/or 1 button is set to IntelliCode® 1. Use IntelliCode® 5. Take the remote to the older Genie® garage door opener and follow that opener's instructions to program a new remote. Repeat for other Genie® garage remote(s) as necessary. -
Page 17: Maintenance & Troubleshooting
Bestimmungen der USA und Kanadas abweichen. MAINTENANCE & TROUBLESHOOTING If you have any questions, please do not hesitate to contact customer service at: 1-800-35-GENIE IMPORTANT SAFETY INSTRUCTIONS WARNING: To reduce the risk of severe injury or death: 1. -
Page 18: Routine Monthly Maintenance
Return to pages 6-7 and repeat steps 1 through 10 to correct down limit. • Test again. Repeat as necessary until door reverses upon contacting board. FIG. 6-2 ©2011 The Genie Company WARNING FROM STBs 3’ - 4’ One-Piece Door Door balance... -
Page 19: Change Light Bulbs
(pages 6-7) erases previous Limits/Force settings. NOTE: The opener will not close the door automatically unless the Safe-T-Beam® System is installed and Limits are programmed. ©2011 The Genie Company CARRIAGE ENGAGE/DISENGAGE Use Release Handle to manually connect or release belt bullet to Carriage. -
Page 20: Wall Console - Overview
Follow the instructions on this page. Wall consoles from other manufacturers may not work with openers of these serial number groups. Genie® Series I wall buttons and Series II wall consoles will not work with openers of this serial number group. -
Page 21: Remote Battery Replacement
1. Open the remote case using a washer or coin that fits into the slot at the top of the remote. 2. Replace battery. 3. Align components and snap case closed. ©2011 The Genie Company Adjustment required Belt Correctly adjusted... - Page 22 LED Speed indicator colors MAXIMUM SLOW SPEED SETTINGS FOR HELP-1-800-35-GENIE OR WWW.GENIECOMPANY.COM CHANGE SPEED SETTING Use this guide to ADJUST powerhead SPEED settings. There are three (3) Speed settings available on this unit for the open and close directions. Door type...
- Page 23 Force Level 3 Force Level 4 Force Level 6 Force Level 7 Force Level 9 ©2011 The Genie Company - FORCE SETTINGS FOR HELP-1-800-35-GENIE OR WWW.GENIECOMPANY.COM CHANGE FORCE SETTING Use this guide to ADJUST powerhead FORCE settings. NOTE: There are nine (9) force levels.
-
Page 24: Troubleshooting Guide - Operation
Press and hold the wall console button until door is completely closed. malfunction. • Check for interference from adjacent Safe-T-Beam® units. • Contact The Genie Company at 1-800-35-GENIE. Door starts down, • Check Safe-T-Beam® wire connections at powerhead. See page 18. -
Page 25: Troubleshooting Guide - Powerhead Leds
ON/PURPLE/ FLASHING ON/RED/ FLASHING ON/RED/ FLASHING ON/RED/ STEADY ©2011 The Genie Company OPERATION (CONTINUED) ... FOR HELP-1-800-35-GENIE POWERHEAD LEDs Possible Problem Normal operation No response from unit Limits NOT set properly Program error Component failure Remote NOT programmed IntelliCode® 1 remote NOT programmed Safe-T-Beam®... -
Page 26: Reference - Wiring Diagram
BOBINA DE CHOKE WHITE BLANC BLANCO FIG. 6-5 WARNING AVERTISSEMENT ADVERTENCIA ELECTRICAL SHOCK CHOC ÉLECTRIQUE CHOQUE ELÉCTRICO ... PARA OBTENER AYUDA, LLAME AL 1-800-35-GENIE BELT MOTOR CORREA MOTEUR COURROIE MOTOR STRIPED WHITE BLANC RAYÉ BLANCO RAYADO WHITE BLANC BLANCO SAFE-T-BEAM®... -
Page 27: Warranty
Claims under this warranty must be made promptly after discovery and within the applicable warranty period To obtain warranty service, you must contact Genie customer service and provide proof of the date and location of purchase and your identity as the original purchaser of the Product Call Genie ®... - Page 28 This page left blank.
- Page 29 This page left blank.
- Page 30 This page left blank.
- Page 31 Certains modèles sont dotés d'un moteur auquel est intégré un système de détection de mouvement. L'éclairage s'ALLUME automatiquement lorsqu'un mouvement est détecté, permettant ainsi un déplacement plus sécuritaire dans le garage. L'éclairage s'ÉTEINT après quatre minutes d'inactivité. ©2011 The Genie Company (Disponible sur certains modèles) 3/2011...
- Page 32 L’OUVREUR DOIT ÊTRE INSTALLÉ AVEC LA COMMAND MURALE INCLUSE. TABLE DES MATIÈRES (Voir les pages de l'anglais 11-13) LE SYSTÈME D’INVERSION DE SÉCURITÉ Safe-T-Beam® DOIT ÊTRE INSTALLÉ POUR POUVOIR FERMER LA PORTE. ©2011 The Genie Company (Voir la page 2 dans espagnole) 3/2011...
- Page 33 été accomplie commencent ici. Il n'y a aucune étape d'assemblée ou d'installation incluse en ce manuel. S'il y a lieu une affi che d'installation votre contact de professionnel de Genie® ou visite www. geniecompany.com pour télécharger un dossier de pdf.
- Page 34 ©2011 The Genie Company 3/2011...
- Page 35 ©2011 The Genie Company 3/2011...
- Page 36 ©2011 The Genie Company 3/2011...
- Page 37 ©2011 The Genie Company 3/2011...
- Page 38 ©...
- Page 39 VUE D'ENSEMBLE DES COMMANDES DE LA TÊTE D’ALIMENTATION Cette section décrit les simples fonctions de programmation. Utilisez cette page pour vous familiariser avec les boutons et voyants lumineux DEL utilisés pour programmer l’ouvre-porte. Emplacement des commandes sur la tête d’alimentation. FIG.
- Page 40 VUE D'ENSEMBLE - EXTÉRIEURS ET OPTIONS AVERTISSEMENT Une porte en mouvement peut causer des blessures graves ou la mort. 1. Garder les gens hors de l'ouverture de la porte pendant qu'elle est en mouvement. 2. Ne permettez PAS aux enfants de jouer avec l’ouvre-porte, y compris la console sur le mur, la télécommande, ou le clavier sans fi...
-
Page 41: Caractéristiques D'intellicode
UNIQUEMENT les signaux provenant d'une télécommande envoyant des signaux IntelliCode® 2 (voir la page 4) ou d'une télécommande IntelliCode® 1 de marque Genie® qui a été programmée pour le portier électrique utilisant une nouvelle télécommande IntelliCode® 2 (voir la page 7). -
Page 42: Entretien & Dépannage
ENTRETIEN ET DÉPANNAGE Si vous avez des questions, s'il vous plaît n'hésitez pas à contacter le service clientèle au: 1.800.35.GENIE IMPORTANTES CONSIGNES DE SÉCURITÉ AVERTISSEMENT:POUR RÉDUIRE LES RISQUES DE BLESSURES GRAVES OU DE MORT: 1. LIRE ET RESPECTER TOUTES LES INSTRUCTIONS. -
Page 43: Changer Les Ampoules
LE TEST D’INVERSION AU CONTACT (Essai mensuel) Les paramètres de la force et de la limite DOIVENT ÊTRE COMPLÉTÉS avant le test. 1. Le test. • Ouvrez la porte du garage à l'aide de la console sur le mur. – Placez une planche 2 "x 4" (à plat) sous le centre de l'ouverture de la porte de garage (Fig. -
Page 44: Détecteur De Mouvement - Vue D'ensemble
DÉTECTEUR DE MOUVEMENT* - VUE D'ENSEMBLE (N'est pas disponible sur tous les modèles) Les moteurs équipés d'un détecteur de mouvement offrent plus de sécurité lorsque l'on sort ou entre dans le garage. *La chaleur de corps détectant cette sonde fonctionne près. La portée de détection peut être réduite quand la température dans le garage est proche de la température corporelle. -
Page 45: Facultatif - Installation Duelle De Console De Mur
Les consoles de mur d'autres fabricants peuvent ne pas fonctionner avec des ouvreurs de ces groupes de numéro de série. Les séries I de Genie® murent des boutons et les consoles de mur de la série II ne fonctionneront pas avec des ouvreurs de ce groupe de numéro de série. -
Page 46: Chaîne Ou Ajustement De Tension De Courroie
CHAÎNE OU AJUSTEMENT DE TENSION DE COURROIE AVERTISSEMENT • Observez tous les avertissement et précautions de sûreté! • Démontez la puissance de l'ouvreur avant de commencer cette tâche. Inspecter visuellement la chaîne ou la courroie tous les 6 mois. REMARQUE : Les réglages de tension doivent être effectués avec la porte abaissée et le chariot dégagé. - Page 47 Les couleurs des voyants lumineux DEL du niveau de vitesse MAXIMUM MOYEN LENT © POUR OBTENIR DE L’AIDE-1.800.35.GENIE OR WWW.GENIECOMPANY.COM CHANGEMENT DU RÉGLAGE DE VITESSE Utilisez cette tâche pour AJUSTER les paramètres de VITESSE de la tête d’alimentation. Il y a trois (3) réglages de vitesse disponibles sur cet appareil.
- Page 48 L’affi chage DEL par apparence est le réglage de force actuel Couleurs d'indicateur de DEL © POUR OBTENIR DE L’AIDE-1.800.35.GENIE OR WWW.GENIECOMPANY.COM CHANGEMENT DU RÉGLAGE DE LA FORCE Utilisez cette tâche pour AJUSTER les paramètres de FORCE de la tête d’alimentation.
-
Page 49: Guide De Dépannage - Fonctionnement
• Vérifiez l'ajustement de la "FORCE" à l'ouverture. Voir la page 17. S’ARRÊTE avant d’être ATTENTION: Si vous soupçonnez un problème avec la quincaillerie de la porte du garage ou • complètement ouverte. des ressorts, contactez The Genie Company au 1.800.35.GENIE. © POUR OBTENIR DE L’AIDE-1.800.35.GENIE À... -
Page 50: Guide De Dépannage - Les Del De La Tête D'alimentation
• Vérifiez l'ajustement de la "FORCE" à l'ouverture. Voir la page 17. • ou des ressorts, contactez The Genie Company au 1.800.35.GENIE. • Un bouton est collé sur la console du mur ou de la télécommande. L’ouvre-porte démarre •... - Page 51 -1.800.35.GENIE AYUDA PARA 0 1 0 2 / 2 1 térmico bisagras Revise componente falla bajar subir para Retire contacto tiene otro Revise Safe-T- señal...
- Page 52 1-800-35-GENIE. puerta accesorios resortes puerta. normal. operación páginas 1-800-35-GENIE. puerta accesorios resortes lubricados condición, buena páginas páginas página motorizada. unidad Safe-T-Beam®. consola botón presionado forzar puede puertas abre cerrará. incorrecta alineación rayo página páginas letrero Consulte puerta. batería. reemplace botón...
- Page 53 ACTIVADO ACTIVADO Roja ACTIVADO Roja ACTIVADO APAGADO ACTIVADO ACTIVADO Púrpura ACTIVADO Púrpura ACTIVADO APAGADO ACTIVADO ACTIVADO Azul ACTIVADO Azul ACTIVADO APAGADO fuerza nivel indicador larga redonda eléctrico cabezal rmar. confi para serán Ambos fuerza. BAJAR para fuerza nivel gurar Paso omita fuerza baja...
- Page 54 ACTIVADO ACTIVADO Azul Azul ACTIVADO ACTIVADO Púrpura Púrpura ACTIVADO ACTIVADO Roja Roja Azul Azul Púrpura Púrpura Roja Roja largo redonda motorizada unidad rmar. confi para AZUL Ambos Velocidad. menú para velocidad nivel gurar rápidas. más puerta velocidades estén posible NOTA: dentro BAJAR para...
- Page 55 riel centro Banda correctamente pulg. mm/1/8 Aprox. Banda requerido Banda 0 1 0 2 / 2 1 presión parte arandela batería REMOTO CONTROL banda aumentar reemplazo capacitado banda? cadena reemplazo capacitado raídos riel. cadena/banda, apriete carro, ilustración deben banda liberado. hacer Ajustada cada...
- Page 56 PARED CONSOLA PARED CONSOLA STBs BIEN motorizada unidad mientras cable Conector mantendrá tiene vuelva PARED CONSOLA STBs comprarse debe Serie Genie® pared consola segunda agregue botón únicamente INSTALACIÓN CONSOLA forma Sure-Lock™ motorizada. unidad conectada conector cuando pared consola cable enrutamiento verifi...
- Page 57 carro Liberación transversal) (vista SUELTE ABAJO HACIA CARRO, CONECTAR VOLVER SUELTE DESPUÉS PUERTA, HACIA ABAJO HACIA JALE DESENGANCHAR, PARA instalación) (para DESENGANCHAR PUERTA PUERTA carro Liberación pared. consola remoto control fin. tornillo enganche carro hasta ARRIBA. posición esté CARRO: PUERTA manualmente.
- Page 58 puerta abertura centro debajo tablero. tenga cuando regrese puerta según Repita nuevo. inferior. para Límites guraciones confi páginas Regrese tablero. restablezca regresa, pero contacto hacer después DETIENE 0 1 0 2 / 2 1 motorizada. máximo motorizada. luz, puede FIG. límite "cierre"...
- Page 59 Después piso. 1-1/2 objeto algún contacto NADIE completamente. cerrado haya niños. alcance lejos remoto MUERTE: GRAVES IMPORTANTES 1.800.35.GENIE Cliente 0 1 0 2 / 2 1 FIG. carro. ensamble remoto control carro ROJO bloque CAPACITADO. COMUNÍQUESE levemente. libere. 4’ 3’a aproximadamente dirección.
- Page 60 Genie® garaje remotos controles remoto. control nuevo programar abre instrucciones siga garaje puertas abre remoto IntelliCode® botón este selección rmar botón IntelliCode® IntelliCode® selección alternar para veces botón mismo Presione encendidos. permanecen segundos. botón motorizada. unidad nueva remoto control IntelliCode®...
- Page 61 motorizada. unidad sido haya otro, cualquier control reciba señal ninguna puertas abre página nuevos restantes remotos controles pared. normalmente funcionará garaje puertas. abre activará control motorizada. unidad programó remoto control Presione limpia. esté memoria motorizada púrpura. color intermitentes luces ambas nuevo Presione PROGRAM...
- Page 62 actividad segundos tiempo terminará programación programación. salir para botón PROGRAM deseado, programa menú funciones ingresar para rojo Redondo Fuerza azul largo azul Redondo Velocidad azul Largo Limite azul Redondo remoto Control LED) (Visualización (Programa) Display Program visualización tiene programa corresponde. como cambiará...
- Page 63 0 1 0 2 / 2 1 y n a p m o C e i n e G e h T 0 1 0 2 ©...
- Page 64 0 1 0 2 / 2 1 y n a p m o C e i n e G e h T 0 1 0 2 ©...
- Page 65 0 1 0 2 / 2 1 y n a p m o C e i n e G e h T 0 1 0 2 ©...
- Page 66 0 1 0 2 / 2 1 y n a p m o C e i n e G e h T 0 1 0 2 ©...
- Page 67 0 1 0 2 / 2 1 y n a p m o C e i n e G e h T 0 1 0 2 ©...
- Page 68 • incorrecta puerta Cerca • consola Localice Company). hacerlo. indicado haya abre conecte RIESGO PARA IMPORTANTES ARCHIVO OBTENER PARA 1.800.35.GENIE DISPONIBLE ESTÁ VERSIÓN siguiente). página establecer programación aprobado tomacorriente inglesa) sección página banda cadena página muestra conectadas ensambladas suspendido...
- Page 69 CERRAR PARA SAFE-T-BEAM® INVERSIÓN SISTEMA INSTALAR ...26 ...25 motorizada 21-22 ...20 velocidad...19 ...18 ...18 ...17 ...17 ...16 ...16 recorrido ...16 ...15 ...15 ...14 ...14 ...14 ...14 14-22 ...13 ...13 ...12 12-13 opciones motorizada 11-13) inglés páginas ...10 remotos controles ...9 motorizada ...6-7 ...5...
- Page 70 movimiento. detectar seguro más mucho movimiento proporcionarle luces motorizada. unidad modelos) minutos automáticamente apaga entradas salidas brindarle para varía deseada, velocidad para emergencia otra energía falla problema. nuevo abrirá detendrá adecuada obtener para puerta completamente contacto segundos cerrando operacional. problema motorizada unidad posición...
- Page 71 à importantes n'est elle qui, dangereuse potentiellement n'est elle qui, dangereuse potentiellement évitée, n'est elle qui, imminente GARDE MISE AVERTISSEMENT Genie® distributeur votre Company questions avez vous appliquent. l'utilisateur propriétaire tension sous ressorts mouvement, à soumis ressorts l’aide à fonctionnent...
- Page 72 Genie. fabrica marca SilentMax Safe-T-Beam, Genie. marque SilentMax Safe-T-Beam, basculantes. superiores. dueño. manual este propriétaire. manuel Laissez puertas para extensión sólo abrepuertas este propiedad, basculantes monobloc sectionelles maximale hauteur d’une résidentiel ouvre-porte uniquement utilisez Car2U ® ® puerta. cerrar para instalado porte.