Table of Contents
Advertisement
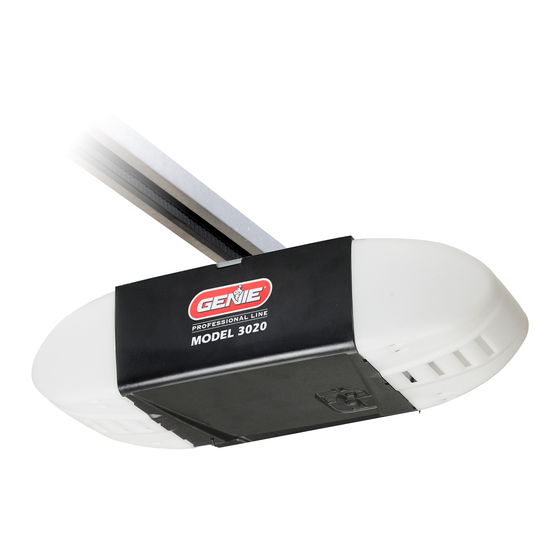
Refer to the assembly poster
for opener assembly and
installation instructions. Return
to this manual for programming,
operation and maintenance.
BELT/CHAIN DRIVE GARAGE DOOR OPENERS
PROGRAMMING, OPERATION & MAINTENANCE MANUAL
DO NOT use photocells from other manufacturers or openers with this opener.
INSTALLER: LEAVE THIS MANUAL WITH HOMEOWNER
HOMEOWNER: SAVE THIS MANUAL FOR FUTURE REFERENCE
To reduce the risk of injury to persons or damage to property, use this opener only with a sectional residential
door.
Por reduire le risque de blessures ou de dommages materials, utillsez cet ouvre-porte uniquement pour une porte
a section re sidentielie.
STOP
or call Customer Service at: 1-800-35-GENIE
SERIAL NUMBER DECAL
• Single Bulb Models
• Dual Bulb Models
• BBU Models
• iDCM Models
• Integrated LED lighted Models
WARNING
!
AVERTISSEMENT
!
DO NOT return product to store,
visit www.GenieCompany.com
iDCM SERIAL NUMBER DECAL
39786503812, 03/2018
Advertisement
Table of Contents

Related Manuals for Genie Single


Summary of Contents for Genie Single
- Page 1 Por reduire le risque de blessures ou de dommages materials, utillsez cet ouvre-porte uniquement pour une porte a section re sidentielie. DO NOT return product to store, STOP visit www.GenieCompany.com or call Customer Service at: 1-800-35-GENIE iDCM SERIAL NUMBER DECAL SERIAL NUMBER DECAL 39786503812, 03/2018...
-
Page 2: Table Of Contents
INDEX Safety & General Information Introduction .............. 1 Safety Notifications ..........2 Scan this code for a video Important Installation Instructions ....3 of this installation or visit: www.GenieCompany.com Standard & Safety Features ....... 4 Programming Information Introduction to opener programming .... 5 Setting the DOWN Limit ........ -
Page 3: Introduction
©2018 GMI Holdings, Inc d/b/a The Genie Company, the Genie logo, Intellicode, Safe-T-Reverse, SmartSet, Sure- Lock, Door Detect, and Safe-T-Beam, Aladdin Connect, iDCM, are trademarks of The Genie Company. All other trademarks are property of their rightful owners. Consistent with our policy of continuing product improve- ments, we reserve the right to change product specifications without prior notice or obligations. -
Page 4: Safety Notifications
SAFETY NOTIFICATIONS & INSTRUCTIONS OVERVIEW OF POTENTIAL HAZARDS READ THIS SAFETY INFORMATION Garage doors are large, heavy objects that move with the help of springs under high tension and electric motors. Since moving objects, springs under tension, and electric motors can cause injuries, your safety and the safety of others depend on you reading the information in this manual. If you have questions or do not understand the information presented, call your nearest trained door system technician or visit our website at www.geniecompany.com. -
Page 5: Important Installation Instructions
MORTELLES LIRE ET SUIVRE ATTENTIVEMENT TOUTES LES INSTRUCTIONS D’INSTALLATION ET DE FONCTIONNEMENT AINSI QUE TOUTES LES CONSIGNES DE SÉCURITÉ. Si vous avez des questions ou si vous ne comprenez pas une instruction, veuillez contacter directement The Genie Company. • NE PAS installer l’opérateur sur une porte mal équilibrée. Celle-ci pourrait entraîner de graves blessures. Les réparations et les réglages des câbles, ensembles de ressort ou tout autre article de quincaillerie doivent être effectués par un pro-... -
Page 6: Standard & Safety Features
• Lighting system turns ON when door is activated and automatically turns OFF 4 minutes later. • Can be activated/deactivated manually from the wall console. 5. Genie Battery Backup (BBU): • Included or optional with select models. Provides power to opener in the event of a power failure. -
Page 7: Programming Information Introduction To Opener Programming
OPENER PROGRAMMING & ACCESSORY INSTALLATIONS NOTE: Before programming the opener, check to make sure there are no objects in the garage door opening. DO NOT allow persons to enter the area of the door while programming and operating. The following steps list the order of programming the opener’s functional settings and install any accessories that were included with the opener or purchased separately. -
Page 8: Setting The Down Limit
La tendeur DOIT être engagée dans le chariot AVANT de régler les limites. Voir le poster d’installation (si fourni) ou RELEASE appelez le service clientèle au 1-800-35-GENIE ou visitez le site www.GenieCompany.com. • NE PAS fixer de limites en mode batterie de secours. -
Page 9: Setting The Up Limit
PROGRAMMING UP TRAVEL LIMIT Programming UP Limit: 1-2. Enter Programming Mode HOLD 1. Press and hold the UP arrow button. UNTIL • Long LED will light BLUE. 2. Release UP arrow button. Lights • Round LED will flash BLUE. 3. Press and hold the UP arrow button until door is Steady Blue fully open. -
Page 10: Setting The Force Control
PROGRAMMING FORCE AND CONTACT REVERSE Force Control Contact Reverse Test NOTE: The limit and Force settings MUST BE COMPLETED The force controls are automatically set when the wall before performing the Contact Reverse Test. control is used for the first time with garage door opener. The door MUST complete one full cycle, from full open 1. -
Page 11: Remote Control Programming
PROGRAMMING ADDITIONAL REMOTE CONTROLS 1. Activate Remote THE REMOTE CONTROLS INCLUDED WITH THIS OPENER HAVE BEEN PROGRAMMED AT THE FACTORY FOR YOUR CONVENIENCE. NOTE: The following instructions are for remote control transmitters purchased separately in addition to those provided with this opener, but can also be used if any remote(s) may require re-programming. -
Page 12: Keypad Programming
Program Keypad before mounting. used to open the door. • Hold down the Genie remote button. While STEP 1) PROGRAMMING A PIN NUMBER (Single Door) holding, press and hold the chosen HomeLink Program the keypad for the first time* with a Personal button. -
Page 13: Wireless Wall Console Programming
WIRELESS WALL CONSOLE PROGRAMMING (ABBREVIATED) Please see instructions that accompany wireless wall console. Open cover & Battery Tab remove battery prior to programming. STEP 1) Program Wall Console to Garage Door Opener Press and hold the program button on the opener until the round LED turns blue, then release. -
Page 14: Aladdin Connect Programming
• Opener light system and an audible signal will activate as a warning that the opener is about to operate. To use the Genie Aladdin Connect® app to control this garage door system follow these steps. Other home automation apps may also control this garage door opener system. Check our website at www.geniecompany.com for updates pertaining to compatible 3rd party apps. - Page 15 • Set up opener(s) • Add users • Set rules and notifications. For help at any time contact The Genie Company at 1-866-599-4995 or visit our website. www.geniecompany.com/aladdinconnect Scan the Aladdin Connect® QR Code on the front of this Refer to the assembly poster for opener assembly and installation instructions.
-
Page 16: Important Safety Instructions
MAINTENANCE IMPORTANT SAFETY INSTRUCTIONS WARNING To reduce the risk of severe injury or death, read and follow all instructions. NEVER let children operate or play with the door controls. Keep remote away from children. ALWAYS keep the moving door in sight and away from people and objects until door is completely closed. NO ONE SHOULD CROSS THE PATH OF THE MOVING DOOR. -
Page 17: Regular Maintenance Schedule
Regular inspection/maintenance for the door and opener should be performed at regular intervals to ensure the system runs at peak safety, performance and efficiency. MAINTENANCE ITEM INTERVALS DETAILS Contact Reverse Test Monthly See Page 8 to run system test. Lubricate Door Hardware Monthly Lubricate Rollers &... -
Page 18: Chain/Belt Tension
2. Open powerhead lens covers by pressing down on upper locking tabs and pull away from powerhead. 3. Replace old light bulbs with 60 Watt MAXIMUM. incandescent, CFL or LED equivalent**. * Genie LED light bulbs, which are specifically made for garage door openers, are recommended. 4. Install lens cover(s). -
Page 19: Special Installation Information
SPECIAL INSTALLATION INFORMATION Force Setting Guide: WARNING AVERTISSEMENT Pour éviter les blessures ou des dommages TO AVOID INJURY OR DAMAGE • NE JAMAIS régler la force pour compenser des • NEVER adjust the force settings to adjust for damage, dommages, y compris une porte mal équilibrée, un rail including an unbalanced door, binding door track or de porte coinçant ou des ressorts cassés. -
Page 20: Clearing Remote Memory
Adjust Carriage for (optional) Emergency Release System The carriage on this opener can be adjusted to work with the Emergency Release Cable Lock System (available at your local Genie® Retailer). 1. Operate door to mid position. 2. Pull emergency release cord and manually close door. -
Page 21: Locating Safe-T-Beam® Pairs
Perform these steps only after opener is fully installed, programmed and tested. Battery backup devices from other manufacturers will not operate with this opener. Use only Genie Battery Backup type battery that was provided. Genie P/N 111658.0002.S (Battery only) Installing the Battery Backup: For units that included the optional battery backup (BBU) 1. -
Page 22: Troubleshooting & Led Signals
Use the guide below along with the self diagnostic powerhead LEDs to help troubleshoot any problems. Need help or have questions? DO NOT RETURN to the store. Visit www.genicompany.com or call Customer Service at 1-800-35-GENIE. PROBLEM: WHAT TO DO: Opener does NOT • Turn Sure-Lock™ OFF See page 6. - Page 23 POWERHEAD LEDS Powerhead LED Solution Possible Problem Round LED Long LED Normal operation. None required. Check power supply. No response from unit. Contact a trained door system professional. ON/RED/ ON/RED/ Limits NOT set properly. Re-program limits, see pages 6-7. STEADY STEADY Program error.
-
Page 24: Replacement Parts
REPLACEMENT PARTS Specify model number of opener when ordering parts Some hardware listed here shows size and/or type so they may be sourced locally if lost. Complete hardware bags can be ordered separately. KIT BAGS 39010R.S PARTS PK,MOUNTING,ORANGE 39011R.S PARTS PK,MOUNTING,BLUE Clevis Pin (x2) Cotter Pin (x2) Screw Self Tap (x3) 5/16"... - Page 25 RAIL AND ACCESSORY PARTS Specify model number of opener when ordering parts Item # Description Qty. 5-pcs. Rail Assembly Complete (Chain) 5-pcs. Rail Assembly Complete (Belt) Sprocket Support Assembly (Chain) Sprocket Support Assembly (Belt) Carriage Assembly Idler Pulley Chain Assembly (7Ft) Belt Assembly(7Ft) Door Arm,Curved Door Arm,Straight...
- Page 26 SINGLE BULB POWERHEAD PARTS Item # Description QTY. COVER,SINGLE BULB LENS MOTOR ASSEMBLY SOCKET,LIGHT,30 DEG ANG TRANSFORMER,120VAC PCBA,DC CONTROLLER POWER CORD,45” SCR,M6-1 X 12 HWH THDF (3pk.) SCR,HHD,SLTD,TAP,#8X5/1 (3pk) Optical Encoder Assembly Specify model number of opener when ordering parts...
- Page 27 DUAL BULB POWERHEAD PARTS WHITE(+) Specify model number of opener when ordering parts Item Description QTY. COVER, MAIN LENS COVER(S) MOTOR ASSEMBLY, DUAL BULB (BBU COMPATIBLE) SOCKET,ANGLED LIGHT INTEGRATED LED LIGHT KIT (Integrated LED lighted systems only) TRANSFORMER,120VAC PCB, DC CONTROLLER WITH BBU POWER CORD,72”...
-
Page 28: Dasma Information
DASMA SAFETY GUIDELINES Look for this Safety Alert Symbol below. This symbol indicates a potential personal safety hazard that can result in injury or death. A GARAGE DOOR IS THE LARGEST MOVING OBJECT IN THE HOME. These doors are often operated by electric door openers. Proper installation, operation, maintenance, and testing of the garage door and automatic opener are necessary to provide safe, trouble-free operation. - Page 29 DASMA SAFETY GUIDELINES WHEN USING THE PUSH BUTTON OR The push button wall control should TRANSMITTER, KEEP THE DOOR IN SIGHT be out of reach of children. UNTIL IT COMPLETELY STOPS MOVING. (at least 5 feet from the floor) and Teach children never to play under or near an away from all moving parts.
- Page 32 The Genie Company 1 Door Drive Mount Hope Ohio 44660 1-800-35-GENIE (354-3643) www.GenieCompany.com...