Table of Contents
Advertisement
Quick Links
Advertisement
Table of Contents

Related Manuals for Xblue Networks Xplus100


Summary of Contents for Xblue Networks Xplus100
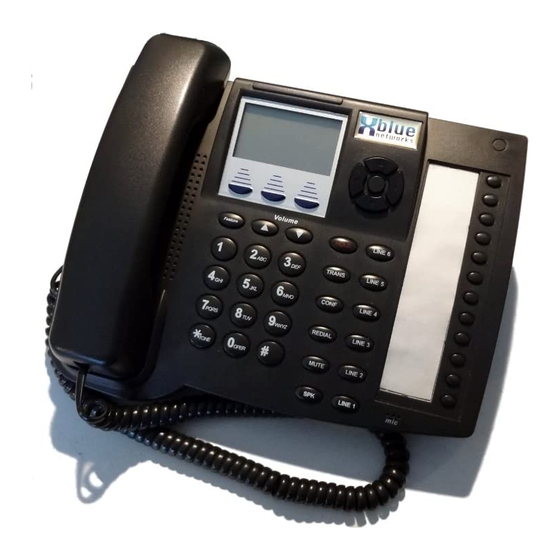
- Page 1 Xplus100 Digital Extension User Guide...
- Page 2 © Copyright XBLUE Networks, LLC 2006 XBLUE Networks reserves the right to make changes in specifications at any time without notice. All of the information in this document is believed to be accurate and reliable, but is not warranted to be true in all cases.
-
Page 3: Table Of Contents
Table of Content Telephone Operation ......................1 Navigation Keys ....................1 Feature Codes....................... 3 Account Codes ...................... 7 Alarm Clock (Reminder) ..................7 Alarm Key......................9 Answering Machine Emulation ................10 Attendant Administration ..................11 Automatic Hold ..................... 15 Automatic Line Select .................... 17 Auxiliary Lamp / LED Status Bar ................ - Page 4 Hot Line ....................... 69 Intercom Key (Intercom Calling) ................71 Intercom Mode/ Voice Announce (HF/Tone)............71 Intrusion ......................74 Last Number Redial ....................75 Loud Bell (Optional) ....................76 Memo (Note Pad)....................76 Message Waiting ....................77 Messages (Text Message) ..................80 Monitor (Extension) ....................
-
Page 5: Telephone Operation
Navigation keys, begin by pressing the Right navigation key, to access Call Log, and then press the down navigation key to view incoming and the up navigation key to view outgoing calls. Press the center activation key to dial the displayed telephone number. XBLUE Networks... - Page 6 Press the Select Key to enable or Disable Back- ground Music Down - N/A Door Phone Up - Answer Door Phone 1 The Door Phone must be connected and active to access Down - Answer Door Phone 2 XBLUE Networks...
-
Page 7: Feature Codes
Call Park Pick-up (SLT) #73 + ext Page 34 Page 35 Call Pickup - Directed (Suffix Code) ext + *6 ext + 6 Call Pickup - group Page 36 Page 36 Caller ID Table -- Call Back Feature 6# XBLUE Networks... - Page 8 #23 + 1-icm or 2 co/icm or 3 co #*23 Deactivate Page 26 Follow To: Call Forward #25 + 1-icm or 2 co/icm or 3 co #*25 Deactivate Page 60 Forced Intercom Call Forwarding (while ringing) Feature 4 XBLUE Networks...
- Page 9 Page 87 Page 89 Page Group Numbers 201 - 208 201 - 208 Page - All Call Tenant Group 1 Page 86 Paging Answer Key (Meet Me Page) Feature 59 Page 90 Page 90 Paging Receive (Meet Me Page) XBLUE Networks...
- Page 10 UCD Agent Log Off Feature 91 Page 107 Page 107 UCD Agent Log On Feature *91 UCD Group Numbers 230 - 253 230 - 253 Page 46 Page 46 Virtual Numbers 830 - 859 830 - 859 Volume Beep Feature 53 XBLUE Networks...
-
Page 11: Account Codes
3. A CO line will automatically be selected and a call may be placed. Operational Notes • All entries are verified against the account code database. • Account codes will be recorded on SMDR. Alarm Clock (Reminder) Feature 93, Feature Code: XBLUE Networks... - Page 12 Extension : bksp show chg 3. The Attendant enters the extension number 101 - 148, 181 - 188. The display will update: REMINDER: bksp save chg 4. The Attendant enters the alarm/wake up time in 24 hour format. XBLUE Networks...
-
Page 13: Alarm Key
The alarm key is designed for diagnostic purposes and has no practical application. Operational Notes • The Alarm Key must be programmed on a Flexible Button. • Alarms are reported by a flashing light, and updates in the display. XBLUE Networks... -
Page 14: Answering Machine Emulation
“Voicemail” button LED turns Green. 2. Press the button, while the LED is flashing Vivid Blue and the following is displayed: MONITOR VM CALL 3. Press “yes” to monitor the call. Press “no” to exit monitor mode. XBLUE Networks... -
Page 15: Attendant Administration
N/A - Requires the Auto Attendant module System Speed No. There are a total of 1000 speed bins, 100 of which are system speed bins, which are used for frequently dialed telephone numbers that are used by multiple extensions on the system. XBLUE Networks... - Page 16 Time mode automatically puts the system into Day or Night mode, based on the programmed timed schedule found in database programming (Time Switching). • Day Mode is when it is not night, as defined in Time Switching. • Night Mode is all other times, not defined as day mode in Time Switching XBLUE Networks...
- Page 17 12. Continue this process for each Automated Attendant greeting/message. 13. When finished recording greetings/messages, exit Administration by pressing the speaker button twice or return to the previous Administrative level by pressing the Hold button XBLUE Networks...
- Page 18 Noon Mode works only with the VAA Card. If the system does not have the VAA Card installed, all of the extension parameters will continue to operate as though the system were in Day mode. However, the bottom line on display telephones, will read “Noon”. XBLUE Networks...
-
Page 19: Automatic Hold
CO line button, the intercom call will automatically be placed on Exclusive Hold. There is no need to press Hold button unless you would rather place the call on System Hold (See “Hold” Page 66). Default Settings: Auto Hold Disabled XBLUE Networks... - Page 20 • Auto Hold places a call on Exclusive Hold. • If you have the Auto Hold feature programmed on a Feature/DSS Button, the Feature/DSS Button LED will light when the feature is enabled. XBLUE Networks...
-
Page 21: Automatic Line Select
2. Select and the extension accepts the input and returns to idle. 3. Select and the display updates: TRUNK DIR #: back save chg 4. Enter a valid Trunk number 700 - 719, 744 -747, the press save XBLUE Networks... -
Page 22: Auxiliary Lamp / Led Status Bar
For example, if the extension is in Do Not Distrub, then the status bar will be lit solid. Auxiliary Lamp / LED Status Bar TABLE 1.5 Function Fast Flicker Slow Lit Solid Ringing - CO Line Ringing - Extension XBLUE Networks... -
Page 23: Background Music (Bgm)
Any programmable Feature (Flexible) button can be programmed as a Direct Station Select (DSS), also known as a Busy Lamp Field (BLF), which will monitor an extension’s status. When an extension is off hook, on the handset, the programmed BLF button LED, for that extension, lights solid. XBLUE Networks... - Page 24 • The DSS function can be used to transfer calls to other extensions or directly to a specific voice mailbox if the voice mail button is pressed first. • Each Digital Speakerphone has a default feature button mapping. XBLUE Networks...
-
Page 25: Busy Ring (Allow/Deny)
Activate (Allow) Busy Ring Feature Press #2. The display shows: BUSY RING DENY Operational Notes Feature • This feature can be programmed #2 for any Feature/DSS Button. However, the LED (Lamp) will not light when this feature is enabled or disabled. XBLUE Networks... -
Page 26: Call Back - Cancel All
The Call Back process begins when both your extension and the called party’s extension are in an idle, on-hook mode. Call Back (CO Line) Feature Code: N/A Description The Call Back feature allows you to queue a busy outside line for use when it becomes available. Default Settings: XBLUE Networks... - Page 27 CBCK TO LINE XXX reply 6. Press the softkey beneath reply to be connected to the available outside line and dial as usual Or... 7. Press the softkey beneath to delete the outside line callback. XBLUE Networks...
-
Page 28: Call Back (Extension)
1. Dial the extension number of the busy extension. 2. If the dialed extension is in hands free mode press * to activate Tone ringing. Once the dialed extension is in Tone Ringing Mode, the display shows: EXT XXX CALL cbck XBLUE Networks... - Page 29 CALL BACK TO XXX reply speaker button a. Lift the handset or press Or… Call Back b. Press the softkey beneath reply to activate To cancel all active call backs prior to receiving Call Back Alert ringing: Feature 1. Press XBLUE Networks...
-
Page 30: Call Forward (Extension)
CO/ICM = Type of calls to be forwarded. 1=CO only, 2=Both CO and Intercom, 3=Intercom only. t = Time = After this time expires calls will be fowarded to the new destination. frmpswd = Extension password where calls are forwarded from XBLUE Networks... - Page 31 Busy Ring (Feature #2) is enabled, you will hear a muted ring; if Busy Ring (Feature #2) is disabled, the call will systemically ring, and then forward. See “Busy Ring (Allow/Deny)” Page 21 Default Settings: Operation Digital Speakerphone Feature 1. Dial the Call Forward Code direct busy next XBLUE Networks...
- Page 32 1. Select Direct to forward all calls: bksp save 2. Enter the destination, for example, voice mail would be 453, press save: icm/co 3. Select from CO Line calls, Intercom calls, or both Intercom and CO Line calls. XBLUE Networks...
- Page 33 No Answer to forward unanswered calls: bksp save 2. Enter the destination, for example, voice mail would be 453, press save: icm/co 3. Select from CO Line calls, Intercom calls, or both Intercom and CO Line calls. XBLUE Networks...
- Page 34 CO Line Calls: n_ans ext follow 2. Enter the telephone number to be dialed when a CO Line call is transferred to this extension: bksp save 4. Press save to complete the programming XBLUE Networks...
- Page 35 3. The Extension user selects preset when programming forwarding a call from their extension to another destination: bksp save 4. Enter the destination, that the calls will be forwarded to: bksp save 5. Press Save to retain the programming. XBLUE Networks...
- Page 36 7. Enter the extension number so that calls will follow you to this new location. Press save: bksp save 8. If set is selected, the extension user can select from CO Line calls, Intercom calls, or both Intercom and CO Line calls icm/co 9. Enter the extension password, of the extension to be forwarded: XBLUE Networks...
- Page 37 The third extension within a chain cannot forward their telephone. For example, if extension 102 forwards to 103, which is forward to 104, extension 104 cannot be forwarded. • Follow me forwarding must be cancelled from the extension that initiated the forwarding option. XBLUE Networks...
-
Page 38: Call Park/Call Park Answer
Each telephone/extension has one personal extension number used to park one CO line call. • From your telephone you can park a call at any active extension number. • The Call Park feature code may be programmed on any Flexible Feature/DSS Button. • Calls can be retrieved from any extension. XBLUE Networks... -
Page 39: Call Pickup - Directed
Options at a Digital Speakerphone 1. Dial the ringing Extension: next 2. Dial the Directed Call Pickup Code, to connect to the ringing call: 3. If the pickup fails, there will be a double ring tone and the display will update: XBLUE Networks... -
Page 40: Call Pickup Group
“Caller ID equipped” Single Line Device. Digital extension users may review the last fifty (50) calls which rang at their extension by pressing the center interactive button or using the navigation keys (See “Navigation Keys” Page XBLUE Networks... - Page 41 If no name is delivered from the telephone line provider, the number only will be displayed. • If Caller ID is not received in the correct sequence, no caller ID will be displayed. • Any Digital Speakerphone, programmed to ring, will receive and be able to review the Caller ID Table. XBLUE Networks...
-
Page 42: Camp On (Extension)
. The user of the busy extension hears the Camp On alert tone and the display shows: 4. When the busy extension goes on hook or places the current call on hold, the extension will automatically begin ringing. XBLUE Networks... -
Page 43: Co Line And Slt Flash
CO Line Calling & I Use Indication Feature Code: N/A Description CO Line calling is the placement of a telephone call on the Public Switched Telephone Network (PSTN). CO Line calling includes: dialing local, national long distance and international telephone numbers. XBLUE Networks... -
Page 44: Co Line Queuing /Call Back
CO Line Queuing allows a user to request use of a busy CO line. When the CO Line goes idle (current user hangs up), that CO Line rings the user that queued the line. While the line is ringing XBLUE Networks... - Page 45 Queue Callback. The CO Line is ready to make a call. However, all toll restrictions remain in place. Operational Notes • The extension must have access to the CO Line, in database programming, to queue on a busy CO Line. XBLUE Networks...
-
Page 46: Conference
This timer may be extended by enter a code Operation Supervised and Unsupervised Conference Up to 4 parties (one must be internal) can be joined in a conference by an internal party, known as the initiator. XBLUE Networks... - Page 47 5. To create an Unsupervised Conference, just dial 77, the display will update, and the calls are released: Conference Room (Meet Me Conference) 1. Internal extensions dial 860 - 867, CO line calls can be transferred directly into the conference room 860 - 867: XBLUE Networks...
-
Page 48: Day, Night, Service Modes (Attendant Only)
Feature Code: Feature Description The Default extension parameter is used to clear all active settings at an extension (Call Forward, DND, etc.) Default Settings: Operation Feature 1. Press 2. The display shows the following screen to confirm the intention: XBLUE Networks... -
Page 49: Dial Pad Confirmation / Toch Tone
Whenever a dial pad button is pressed while this feature is enabled (default) a low- volume tone is emitted through the telephone speaker indicating that this dial pad button has been pressed. This feature code allows the function to be disabled. Default Settings: At default the tone is on XBLUE Networks... -
Page 50: Directory Numbers
The directory numbers are the numbers dialed to access extensions, CO Lines and features. The system comes with a default directory numbering plan, which is found in table 1.7. Default Directory Numbers TABLE 1.7 Number Description of Default Directory Numbering Operator Dial Code Line Group 1 Account Code Entry Least Cost Routing XBLUE Networks... -
Page 51: Distinctive Rining Extension
Therefore, a CO Line with a distinctive ring, will override the your selected ringing tone. Default Settings: Distinctive Ringing is set to 1. (Range is 1-4.) XBLUE Networks... -
Page 52: Do Not Disturb (Dnd)
If one of the flexible buttons is programmed with Do Not Disturb, it will light whenever the feature is active. In addition, the status bar will be lit solid. Default Settings: Do Not Disturb - Not Active XBLUE Networks... -
Page 53: Do Not Disturb
3. When the display reverts back to idle condition, Do Not Disturb is removed from the display. Operational Notes • An Extension can have either Do Not Disturb or Station Call Forwarding (See “Call Forward (Extension)” Page 26), but not both at the same time. XBLUE Networks... -
Page 54: Do Not Disturb (On Call)
The Do Not Disturb (On Call) feature code may be programmed on a Feature/DSS Button. • A Feature/DSS Button programmed for the Do Not Disturb code will flash at a fast rate while Do Not Disturb is active. XBLUE Networks... -
Page 55: Do Not Disturb (Override)
An extension in Do Not Disturb that has been overriden may invoked Forced Intercom Call For- ward. • The Do Not Disturb feature code may be programmed on a programmable flexible DSS But- ton. • Override will not be visible to an extension that does not have Override capabilities. XBLUE Networks... -
Page 56: Extenson Feature Status
Operation Feature 1. Press 2. The display first shows the contents of (Last Number Redial). 3. Use the right Interactive button next to advance through all of the various features. Operational Notes • The telephone must be idle. XBLUE Networks... -
Page 57: Extension Password
All extensions, with the exception of the Attendant, have the same default password, . The 9999 Attendant’s, which by default is extension 101, default password is Operation Change Your Password Feature 1. Press 2. Enter the current password and then press show XBLUE Networks... -
Page 58: External Paging
Any Extension on the system can dial the External Paging Code 820 to access the external paging unit. Operational Notes • A Pre-Amplified ancillary paging device is needed. • The External Page access code may be programmed on any feature button. XBLUE Networks... -
Page 59: Feature/Dss Button Reset
This will default all of the programmed feature buttons back to factory default. The Code Feature #3 is used to reprogram the buttons. (See “Flexible (Feature) button inquiry and programming” Page • Each Flexible (Programmable) button can be defaulted individually, by press either feat and pressing save. The button will become unassigned. XBLUE Networks... -
Page 60: Feature - Directory - Suffix Code Look-Up
The display will update and show FTR CODE:F plus the entered code number. • suffix code, is a code which is dialed after the telephone extension number. • The codes are listed in numerical order. XBLUE Networks... -
Page 61: Flexible (Feature) Button Inquiry And Programming
This code is also used to review the button programming. The following table shows how the digital speakerphone is programmed at default. Default Settings: Line 6 Line 5 Line 4 Line 3 Line 2 Line 1 Record Voice Mail XBLUE Networks... - Page 62 4. Continue checking other buttons, for example press Line 1 to reveal 700. Continue to press other buttons to see what is programmed. Press the speaker button to exit the Button Inquiry feature. Programming a Flexible (Feature) Button: XBLUE Networks...
- Page 63 ” button to operate correctly. Therefore, when programing a “feat” (feature), remember to start it with the “ feat ” button. For feature example, the entry to place DND on a button is a. To program a directory number, press XBLUE Networks...
-
Page 64: Forced Intercom (Call Forward)
Buttons with no features programed on them will display AVAILABLE KEY Forced Intercom (Call Forward) Feature Code: Feature Description Using the Forced Intercom-Call Forward feature, you may immediately forward a tone ringing intercom call to the attendant by pressing the Do Not Disturb button. XBLUE Networks... - Page 65 Operational Notes • When Forced Intercom-Call Forward is activated, the calling party will be connected to the attendant as a standard intercom call. • Forced Intercom Call Forward cannot activated if another Extension Call Forward is already enabled. XBLUE Networks...
-
Page 66: Forced Intercom Tone Ring
3. A Tone Ring alert signal is sent and continues at the called extension until it is answered or the call is forwarded to the preprogrammed destination. Prior to forwarding, the calling party can dial * again to return to Voice Call Announce mode. XBLUE Networks... -
Page 67: Get Held Trunk (Co Line)
Default Settings: Operation 1. Answer each call 2. Place the calls on hold Feature 3. Dial 7* to pick up the oldest held call. 4. Take action on that call. Continue this procedure for all holding calls. Operational Notes XBLUE Networks... -
Page 68: Headset Mode
For example, to use the hidden code feature, you may press your voice mail button, or dial Feature 64 to call the voice mail system. When the system answers, press the Hidden Code Feature Button to enter the 4 digit password. Default Settings: XBLUE Networks... - Page 69 Using the Hidden Code: 1. When the 4 digit code is need, press the preprogrammed button. For example, Press the VM button on the telephone. When the voice mail answers, press the Hidden Code button. 2. The stored code is dialed. XBLUE Networks...
-
Page 70: Hold
4. Other extensions within the system can press the flashing CO Line or Intercom button to pick up the held call. Exclusive Hold: 2. Press the Feature and then the h button to place the call on exclusive hold. XBLUE Networks... -
Page 71: Holding Call Answer
3. Press again to answer the next oldest holding call. 4. Repeat as required for any calls on hold. (From your extension) Operational Notes • Holding Call Answer will also operate for intercom calls placed on hold. XBLUE Networks... -
Page 72: Hot Key (Dial Pad) Enable/Disable
While the telephone is idle, press #6. The display will momentarily show the feature status as follows: Hot Key Pad Enable: Feature While the telephone is idle, press #6. The display will momentarily show the feature status as follows: XBLUE Networks... -
Page 73: Hot Line
Default Settings: Hot line is disabled. Operation Setup: Feature 1. While the telephone is idle, press 2. Press (Press save to delete a currently active Hot Line): XBLUE Networks... - Page 74 Feature • The Hotline feature code 9* can be programmed on an available Feature/DSS Button. • An intercom button may be placed on the extension to by pass this hot line feature. (See “Intercom Key (Intercom Calling)” Page XBLUE Networks...
-
Page 75: Intercom Key (Intercom Calling)
The calling party presses the DSS/BLF button or dials the extension number (101~147) and the receiving party will hear an alert tone. The calling party will can be heard, but the called party cannot be heard unit their mute button is pressed, or they lift the handset. XBLUE Networks... - Page 76 Default Settings: All Digital Speakerphones that are set to Voice Announce – Hands-free mode. Operation Setup Feature 1. While the extension is idle, press 98. A confirmation tone is heard and the display indicates the new mode set: XBLUE Networks...
- Page 77 If a DSS button has been programmed with the Intercom Mode Selection Code ( 98) the LED associated to that button will indicate the current mode selection as follows: • Voice Announce – Hands-free, LED will light steady green. XBLUE Networks...
-
Page 78: Intrusion
By Default, no extensions can receive an intrusion. • All parties can hear the extension user that intrudes on a conversation. • An extension that is Direct or Busy Call Forwarded, cannot be intruded. • The attendant cannot be intruded upon. XBLUE Networks... -
Page 79: Last Number Redial
The LNR feature code can be programmed on a Feature/DSS Button. • LNR will redial dial a speed dial number, and any subsequent manually dialed digits. • In the event that all CO lines are busy you will hear busy tone and the telephone will display: XBLUE Networks... -
Page 80: Loud Bell (Optional)
Default Settings: Operation 1. The loud bell can also be activated by dialing 429. Memo (Note Pad) Feature Code: Feature Description The Memo (Note) Pad feature enables you to enter a telephone number, while on a call, for later use. XBLUE Networks... -
Page 81: Message Waiting
The message waiting feature, which is similar to Text Messaging is used to alert an extension (busy or idle) of a message. There are several preprogrammed messages and one that you can custom at the time it is sent. XBLUE Networks... - Page 82 Leaving a message for a busy extension: 1. Dial an extension number, the display will update: 2. The display will update, revealing three choices: 3. Press the softkey beneath callme to leave a “call me” message waiting indication: XBLUE Networks...
- Page 83 1. An extension user can, from an idle phone, send a message to a station without calling the Feature station first. From the idle phone dial 96:. 2. Enter the desired extension number 101 - 148, and press save 3. Follow from above, step 2 XBLUE Networks...
-
Page 84: Messages (Text Message)
Out for Lunch, Will return soon, Gone for the day, In a meeting, Out of office, On vacation, and Empty. After the appropriate message is stored, everyone who calls your extension will receive the saved message in their display. Default Settings: Operation Digital Speakerphone: Feature 1. Dial the Messages, text message Code 90:. XBLUE Networks... -
Page 85: Monitor (Extension)
When granted in programming, an extension user can monitor an existing conversation by dialing a code or pressing a flexible button. A busy extension can only be monitored by an authorized extension. Default Settings: At default extensions cannot monitor each other. XBLUE Networks... -
Page 86: Mute
This makes is possible to have a private conversation. Default Settings: Mute is one of the fixed buttons, and it is inactive. Operation 1. While connected to any call, press the button. The display momentarily shows: XBLUE Networks... -
Page 87: Night Mode/Active
The system is in Day mode. The time switching settings, which control the “timed” mode is set from 9:00 am to 6:00 pm Monday through Friday. The system remains in night mode on the weekends. Operation Change Service Mode 1. At the attendant or alternate attendant extension: XBLUE Networks... -
Page 88: On-Hook Dialing
This feature will not work if hot key is disabled. (See “Hot Key (Dial Pad) Enable/ Disable” Page Default Settings: Operation 1. Dial any extension number directly from the keypad without lifting the handset. The Hotkey feature must be active. Or… XBLUE Networks... -
Page 89: One Touch Record
Default Settings: All extensions may use one touch record Operation 1. While connected to a call, press the preprogrammed One Touch Record button. The display momentarily shows: When the recording session is established the display will update and display: XBLUE Networks... -
Page 90: Page All - Tenant Group 1
Make the page announcement and hang up or wait for a meet me page connection. (See “Page - Meet Me” Page Operational Notes • Only idle extensions will receive the page. • To stop receiving pages, extensions may select to deny paging. (See “Page Allow/Deny” Page XBLUE Networks... -
Page 91: Page All Tenants, All Extensions
Only idle extensions will receive the page. • To stop receiving pages, extensions may select to deny paging. (See “Page Allow/Deny” Page Page Allow/Deny Feature Code: Feature Description Page Allow/Deny allows extension users can select to, or not to, receive a page. XBLUE Networks... - Page 92 Feature 2. From an Idle extension dial #9 the display will temporarily update: Operational Notes • Extensions with page deny active will not receive any pages. • Meet me page is available even if page deny is active. XBLUE Networks...
-
Page 93: Page Groups
1. From an Idle extension dial 401 to 408 he display will temporarily update (where xxx = page group): 2. Make the page announcement and hang up or wait for a meet me page connection. (See “Page - Meet Me” Page Operational Notes • Only idle extensions will receive the page. XBLUE Networks... -
Page 94: Page - Meet Me
• A page may be answered at any telephone using the Meet Me Page code, even if the page announcement is not heard over the telephone speaker. • The page may be any zone page or all page. XBLUE Networks... -
Page 95: Pause
*72*709135992583 the display will show *72P9135992583 A pause will appear as on a Digital Speakerphone display. Default Settings: Operation Feature 1. To enter a Pause in a Speed Dial Bin, press 70, a will appear in the display.: Operational Notes XBLUE Networks... -
Page 96: Phantom Lines / Virtual Numbers
2. The Phantom Line called will begin to rapidly flash at the extensions where the dialed Phantom Line appears. Transferring a Call to a Phantom Line 1. While connected (intercom or CO Line), press the Transfer button. 2. Dial the Phantom Line number. 3. Hang up to complete the transfer. XBLUE Networks... -
Page 97: Phone Lock / Unlock
Each extension is assigned a 4-digit password which is required to lock and unlock the telephone. PHONE LOCK, WHEN ENABLED, WILL BLOCK ALL EXTERNAL CALLS INCLUDING 911! CAUTION SHOULD BE USED WHEN ENABLING THIS FEATURE. Default Settings: All phones are unlocked at default. Operation To Lock a Telephone Feature 1. Press XBLUE Networks... - Page 98 “0000”) and then press show 3. Press 4. No outside line calls can be made at this extension. To Unlock a Telephone Feature 1. Press 2. Enter the current password and then press show XBLUE Networks...
-
Page 99: Pickup Groups
(Ext + 6), to pick up an audibly ringing call from another group. (See “Call Pickup - Directed” Page Default Settings: All Extensions are in Pickup Group 1. The following is a list of pickup groups and their default dial codes. Pickup Groups TABLE 1.11 Pickup Group Dial Code XBLUE Networks... -
Page 100: Pulse To Dtmf Conversion
3. All digits dialed after this code will be sent in DTMF (Touch Tone ® ). Operational Notes • The dialing conversion can only be from pulse mode to DTMF mode. You cannot go from DTMF to pulse. XBLUE Networks... -
Page 101: Recall
During recall, the CO line returns to System Hold allowing any extension with normal CO line receive privileges to retrieve the recalling line. • If the call goes unanswered by the extension, the call will begin ringing at the attendant. If the timer expires again, the call will be disconnected. XBLUE Networks... -
Page 102: Release Key
“Clean” the LED will be lit solid green. This visual indication is only available on a DSS Console. NOTE: Before any extension is able to make a CO Line call that extension, even administrative extensions, must be checked In. Default Settings: The Hotel/Motel feature is disabled All extensions are checked out. XBLUE Networks... - Page 103 4. Select the action to be taken - Checked In, Out or Clean - A confirmation tone is heard. 5. Enter the next extension number to be modified, or the speaker button to exit programing. XBLUE Networks...
-
Page 104: Reminder Tones
If the extension has automatic line select enabled, no stutter dial tone will be heard. Operational Notes • Once a digit is dialed the reminder tone is removed until the next time the intercom is accessed. XBLUE Networks... -
Page 105: Ringing Level / Muted Ringing
Ringing levels are adjusted from the lowest level (1) to the highest level (4). • When an extension is set to the highest or lowest level, a double tone is heard. • As ringing levels are adjusted the volume setting is displayed on the telephone XBLUE Networks... -
Page 106: Ringing Line Priority
Incoming – ICM call Lowest proitory Default Settings: Operation Operational Notes Saved Number Redial Feature Code: Feature Description The Saved Number Redial, or SNR feature is used whenever you want to store the telephone number that you just dialed, for later use. XBLUE Networks... -
Page 107: Single Line Telephone / Analog Device Support
All analog ports support Calling Party and Telephone Company Caller ID. Caller ID telephones will receive calling party, internal station-to-station caller ID, and requires no additional hardware. A subscription to a Telephone Company’s Caller ID service is required to receive Caller ID on the desired CO Line. Default Settings: XBLUE Networks... -
Page 108: Speakerphone
1. If an extension is in hands-free mode, an intercom call will connect, without pressing any speakerspeaker buttons. Press the button to answer a ringing call. speaker 2. The button LED lights immediately and the speakerphone is active. speaker 3. Press to hang up the call. XBLUE Networks... -
Page 109: Speed Dial
Operation Storing a number: 1. From an idle telephone dial Feature 1 and then enter the speed bin to be programmed to be programmed (500 - 549). At default extensin may only have access to 500 - 509. XBLUE Networks... -
Page 110: Transfer And Answer Calls
1. While on a CO Line call and another call is ringing, initiate the transfer process. a. Press the Transfer button. b. Dial the destination intercom extension number. Or... c. Press the Feature/DSS button of the destination extension number. XBLUE Networks... -
Page 111: Transfer Beep
All Ring Method - rings all extensions programmed into the group simultaneously. • Distributed Method - finds the member that has been on-hook and idle the longest, and rings that extension; the hope is to distribute the calls evenly throughout all of the members. XBLUE Networks... - Page 112 If a Feature/DSS Button is programmed as the Agent Log Off/On button, the LED associated to the button will light steady to indicate the Agent is Logged Off. Feature • A Feature/DSS (Flexible) button programmed with the code 91 will toggled the Agent Log Off / Log On. XBLUE Networks...
- Page 113 Index Call Park Answer 31, 32 Account Code 2, 7 Call Park pick up 31 Administrative Code 11 Call Pickup Group 3 Alarm Clock 7 Callback Extension 2 CO Line 96 Alarm Key 3 Extension Highest 96 All Call Page 52 Caller ID 34 Alternate Attendant 92, 93 Table 35...
- Page 114 Index System Modem 4 Flexible Button Categories 54 Telephones 4 Flexible Button Clear 58 Voicemail 4 Flexible Button Programming 54 Distinctive 44 Flexible Button Review 54 Distinctive Ringing 44, 95 Follow from DND 17, 18, 45, 57 SLT Forward 24 Forced Intercom Call Forwarding 45 Follow to Override 47...
- Page 115 Index Intercom Mode Selection 5 Page Receive 43 Intercom Mode Selection Code 70 Paging Answer Key 5 Internal Page 85 Paging Receive 6 Internal Paging Zones 52 Partitioning Intrusion 70 Tenant 90 Intrusion Active 47, 48 Pause Speed Dial 86 Last Number Redial 5, 71 Pause Insertion 86 LNR 42, 71...
- Page 116 Index Station Lock 88 Linear 100 Status Message 6 Members 100 Stutter Dial Tone 95 Un-assigning a Feature Button 58 Suffix Code 54 Unified Call Distribution 100 Call Back 3 Unsupervised Conference 40 Call Pickup Directed 3 User Password 51 Camp On 3 DND Override 4 Virtual Numbers 6, 86...
- Page 117 Index Busy Ring, Activate (allow) 21 Busy Ring, Cancel (deny) 21 Day Mode 12, 14, 83 Default Extension 44 Call Back 22 Default Set 4 Answer 25 Dial Directory Code 59 Cancel 3, 22, 25 Dial Pad 64 CO Lines 22 Confirmation 45 Extension 24 Touch Tone 45...
- Page 118 Index EKT Hold Recall 97 Hidden Code 5, 64, 66 Exclusive Hold 15, 16 Hold 5, 16, 63 Exclusive Hold Time 97 Exclusive 66 Hold 66 Extension System 66 Distinctive Ring 4 Hold Exclusive 5 User Password 53 Hold Reminder 97 Extension Feature Status 4, 52 Holding Call Answer 67 Extension lock 93...
- Page 119 Index Night Mode 12, 14, 83 Ringing Line Priority 102 No Answer Ringing Priority SLT Forward 26 CO Line Callback 102 No Answer Call Forward 5 CO Line Transfer 102 Extension Call Back 102 Noon Mode 13, 14 Incoming Note Pad 76 CO Line 102 Intercom Call 102 Off hook Preference 69...
- Page 120 Index Text Messaging 77 Time Mode 12 Time Switching Mode 12 Timed Mode 83 Tone Ring 61, 73 Tone Ring Conversion 62 Tone Ring Mode 74 Tone Ringing 71 Tone Ringing Mode 24 Tone Signaling 96 Transfer and Answer 6, 106 Transfer Beep 107 Transfer Beep Enabled 6 Transfer CO Line Recall 97...
- Page 121 Part Number: 8599-00 © Copyrigh XBLUE Networks, LLC 2006...