Xblue Networks x16 Installation Manual
Hide thumbs
Also See for x16:
- User manual (52 pages) ,
- Installation manual (32 pages) ,
- Quick start manual (2 pages)

Related Manuals for Xblue Networks x16


Summary of Contents for Xblue Networks x16
-
Page 1: Installation Guide
X16 Installation Guide XBLUE Networks Installation Guide XBLUE Networks © Copyright 2007 - 72 - Issue 2... -
Page 2: Notes
The information contained in this document is subject to change without notice and should not be construed as a commitment by XBLUE Networks, LLC,; XBLUE Networks, reserves the right, without notice, to make changes to equipment design as advances in engineering and manufacturing methods warrant. -
Page 3: Table Of Contents
: ............ 7 AFETY OMPLIANCE FCC I ..............8 NFORMATION NOTES: ..................8 INTRODUCTION ................ 9 FEATURES ................9 GETTING TO KNOW THE X16 TELEPHONE ......10 X16 T ..........10 ELEPHONE ISPLAY ............11 EFAULT UTTON AYOUT ..............11 ... - Page 4 X16 Installation Guide Notes: TELEPHONE WALL MOUNT ............22 FEATURE DESCRIPTION ............23 ................23 ..........23 NSWERING ACHINE MULATION ) ....... 23 TTENDANT OICE TANDARD LCD D ....24 ACKLIT ISPLAY WITH OWER AVER ................. 24 ICK UP ................24 ...
- Page 5 X16 Installation Guide Privacy Release, 33 System Configuration and ........31 ULTILINGUAL ISPLAY PER XTENSION Programmable Buttons, 33 Layout, 12 ............31 USIC ON NPUT Programmable Pause System Programming, 54 ............ 32 UTE WITH INDICATION Speed Dial Bins, 33 ) ............32 ...
- Page 6 X16 Installation Guide PHONE SETUP ................ 39 Flash Key, 44 —L— Flash Timer, 28 Line Access ..........44 ROGRAMMING EATURE UTTONS Key, 57 Dial 9, 26 ..........45 EATURE UTTON ROGRAMMING Flexible Button Line In Use, 30 Programming Steps, 45 SYSTEM SETUP ...............
-
Page 7: Notices
DSS, 27 DSS/BLF Key, 44 UL/CSA Safety Compliance: —C— DTMF Dialing, 35 The X16 system has met all safety requires, and found to be in compliance with the Underwriters Cable Pair Colors, 17 —E— Cable Run, 15 Laboratories (UL) 60950-1. -
Page 8: Fcc Information
® standard DTMF (Touchtone ) dialing. FCC Information Provide the following information to the Telephone Company prior to connection the X16 system to the Remote Access network. Item Specification Call into the system and let the Auto Attendant answer the call and then dial the... -
Page 9: Introduction
4 Central Office (CO) Lines, with caller ID choices, Press the center navigation button to select the “Personal OGM” and Call Waiting Caller ID, and sixteen (16) X16 digital telephone endpoints. parameter. The system can be expanded to accommodate two (2) additional CO Lines,... -
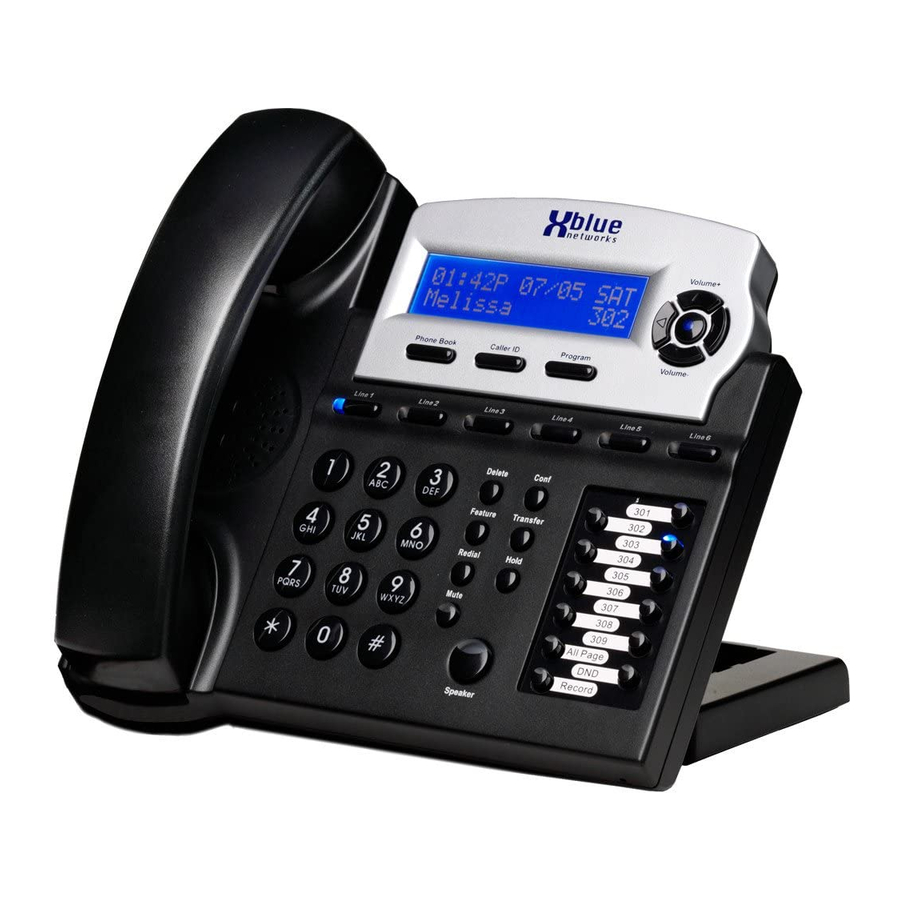
Page 10: Getting To Know The X16 Telephone
X16 Installation Guide Notes: Messages will play in order that they are received. Getting to Know the X16 Telephone Backlit Display While a message is playing, use the up or down navigation key to scroll through Pause, Volume, and Exit. Press the select navigation button to select, the desired action. -
Page 11: Default Button Layout
X16 Installation Guide Default Button Layout Answering Machine Emulation (AME) This feature “Mimics” the call screening feature of an answering machine. Five seconds after a call is answered by an extension users’ voice mailbox, that user can monitor/screen the caller as they leave a message. -
Page 12: System Configuration
System Configuration Voice Mail Operation The X16 system is equipped to accommodate up to four central office The System comes equipped with a 4 channel auto attendant and voice lines and 16 X16 digital telephone endpoints and uses an advanced mail system, which can answer up to 4 different calls simultaneously. -
Page 13: Installation
X16 Installation Guide Idle LCD Display Installation Step 1 - Location The X16 system should be located close to the telephone company interface (RJ21X), and have a dedicated outlet with an isolated ground. 07:19P 10/12 FRI 07:19P 10/12 FRI Accounting Accounting The system can be mounted on the wall or placed on a table. -
Page 14: Step 2 - Co Line Connections
X16 Installation Guide Troubleshooting Step 2 – CO Line Connections The X16 system supports a single CO Line per port, or two CO lines in Trouble Possible Causes Action ports labeled 1/2 and 3/4 The Blue LED “Heartbeat” AC Cord or Power adaptor Remove all of the plugs and is not functioning. -
Page 15: Step 3 - Telephone Endpoint Connection
Step 3 – Telephone Endpoint Connection Speaker Unlit: Speaker or Intercom Link Idle The X16 comes standard with four RJ11 extension ports. Each port supports Fast: Receiving incoming call up to 4 proprietary digital telephone endpoints, for a total of sixteen (16) Lit: Talking with the Digital Telephone Endpoint endpoints. -
Page 16: Star Topology
Functions Home Run wiring, also known as star topology can be found in office buildings and newer homes. In this wiring scheme each of the four X16 telephones are plugged into a “4 Telephone Connector”, which is then Features and LED function connected into one of the ports on the X16 system. -
Page 17: X16 Cable Pair
AA Answer Delay Timer expires. If the timer is set to 10 seconds, for Connect the X16 telephone endpoints to the system using one RJ11 example, the attendant extension will ring up to two times before the auto port, for up to four different endpoints, with a maximum cable length of attendant answers. -
Page 18: Endpoint Device
X16 Installation Guide Leaving any ports punched down but not connected to a telephone, may result in erratic operation. Correct Installation process Mail System Clear All VMSG Yes?/No? Auto Attend Ring All Ext Off All Ext On AA Only Attendant Extension... -
Page 19: Punch Down
X16 Installation Guide Punch Down In this example, system ports 10 through 16 do not have telephones connected to them but they are still “punched down” on the system. Generally, this will not be a problem unless the cable is over 200 feet in... -
Page 20: Step 4 - Power Up And Initialization
X16 Installation Guide Programming Guide Step 4 – Power up and Initialization To power up the system, and bring it on line, connect the external power supply to the system. To initialize the system, once the blue LED begins Phone Setup... -
Page 21: Co Line Expansion Module
X16 Installation Guide 2 CO Line Expansion Module The X16 system comes with four CO Lines, and can be expanded to six CO Lines, when the 2 CO Line expansion module is installed. Holiday Mode – When set to On, the system Weekend Mode will play a special holiday OGM. -
Page 22: Step 2 - Insert The Expansion Module
Telephone Wall Mount weekend outgoing greeting. When wall mounting an X16 Digital Telephone Endpoint be sure to use Weekend End – This is the time that the the inner posts (3.26 inches) on an adjustable wall mount plate. If this... -
Page 23: Feature Description
X16 Installation Guide Feature Description All Page At default, one of the flexible buttons is preprogrammed as an “All Page” button. Message Length – This setting determines the From an Idle telephone, the user may press this button or dial the feature code... -
Page 24: Backlit Blue Lcd Display With Power Saver Mode
X16 Installation Guide Backlit Blue LCD Display with Power Saver Mode Each digital telephone endpoint (speakerphone) comes equipped with a backlit display, which can be programmed to go into power saver after it has being idle Mail System – Voice mail comes standard with for 60 seconds. -
Page 25: Co Line Busy/Idle Status (Led)
X16 Installation Guide CO Line Busy/Idle Status (LED) Each Preprogrammed CO Line button has an associated dual color Light Emitting Diode (LED), which lights when the line is in use and remains unlit when the line is idle. When the user presses a Line button the LED will illuminate green (I-use) Music Source –... -
Page 26: Conference - Express Conference
X16 Installation Guide Conference – Express Conference System Setup Express Conference is a quick and easy way to allow another extension to join in on an existing CO Line call. While speaking with an outside party, the extension user presses the Line button, which is lit green, allowing another party to press... -
Page 27: Direct Mailbox Transfer - Voice Mail (Standard)
X16 Installation Guide Notes: Direct Mailbox Transfer - Voice Mail (Standard) Callers may be transferred directly into another extension’s mailbox, so that the caller does not have to wait for the telephone to ring before forwarding. Outside Calls While speaking with the outside caller Press the voice mail button –... -
Page 28: Flash
X16 Installation Guide Feature Button Programming Flash Feature + The flash command ( 3) is used to invoke features on telephone lines such as call waiting and three-way calling. The Flash command may be Step 1 – Press the program button programmed on one of the programmable buttons. -
Page 29: Hands-Free Calling
X16 Installation Guide Programming Feature Buttons If an ancillary device (single line before the system) is on a CO Line, and the system does not detect that line as being busy, the system will forward the call, and dial over the call. -
Page 30: Headset Activation
X16 Installation Guide Headset Activation Each digital telephone endpoint comes with a 1/8 inch (2.55 mm) standard Personal OGM – This greeting is heard by a “cellular” style telephone headset jack, which can be activated by dialing the caller once they are forwarded to someone’s... -
Page 31: Memo Recording - Voice Mail (Standard)
X16 Installation Guide Non-system phone picking up the call – When the call is picked up by a non- system phone, the system will, after 2 seconds, light the line button and show Waiting Time – The call waiting time is the that the line as busy. -
Page 32: M Ute With Led Indication
60 button to active one-way paging to make an announcement to all extension seconds. The X16 telephone will illuminate if users. If the extension answers an inbound call, and dials the code or presses it rings or a button is pressed. -
Page 33: Privacy Release
X16 Installation Guide Pause The system has a programmable pause, which can be used in speed bins, redial numbers, etc. to insert a short delay before more numbers are dialed. This can Preference Call – The user may select AUTO MUTE Preference Call be very helpful when using special features such as “Call Waiting Cancel”. -
Page 34: Phone
X16 Installation Guide Phone Setup Operation: Press the redial button to display the list Press the up or down navigation key to scroll through the list. Phone Setup – These parameters are used by When the desired number is in the display, press the select button. -
Page 35: Pulse Dialing
X16 Installation Guide Scroll Up Navigation Keys Speakerphone (Digital Telephone Endpoint) with LED OK/Select/Confirm Each digital telephone endpoint is equipped as a speakerphone. When the speakerphone is active, the LED will be illuminated. Speed Dial Bins Backup a level The station has 12 speed dial bins; each can take up to 24 digits to be dialed. -
Page 36: Voice Mail
X16 Installation Guide Programming Speakerphone Network Volume While using your speakerphone, use the volume up key to increase or the volume down key to decrease the speakerphone volume. The system has two areas of programming; Phone and System Setup. The...