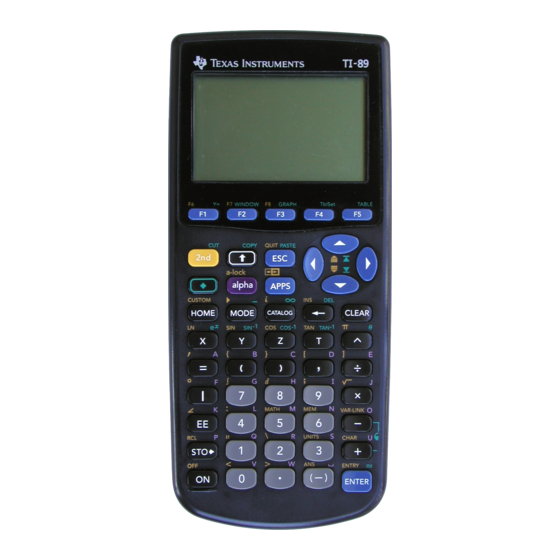
Texas Instruments TI-89 User Manual
Texas instruments calculator software user guide
Hide thumbs
Also See for TI-89:
- Developer's manual (1398 pages) ,
- User manual (1009 pages) ,
- Manual book (623 pages)
Table of Contents
Advertisement
Quick Links
Advertisement
Table of Contents

Related Manuals for Texas Instruments TI-89


Summary of Contents for Texas Instruments TI-89
- Page 1 TI-89 / TI-92 Plus / Voyage™ 200 Cabri Geometry Important Information Where to Find Installation Instructions How to contact Support and Service End-User License Agreement Cabri Geometry Application User Guide Copyright © 1999–2002 Texas Instruments Incorporated...
-
Page 2: Important Information
“as-is” basis. In no event shall Texas Instruments be liable to anyone for special, collateral, incidental, or consequential damages in connection with or arising out of the purchase or use of these materials, and the sole and exclusive liability of Texas Instruments, regardless of the form of action, shall not exceed the purchase price of this product. - Page 3 The software program(s) and/or calculator program(s) and any related documentation (collectively referred to as the Program) are licensed, not sold, by Texas Instruments Incorporated (TI) and/or any applicable licensors (collectively referred to as Licensor). By installing or otherwise using the Program, you agree to be bound by the terms of this license.
- Page 4 Government pursuant to a solicitation issued prior to December 1, 1995, the Program is provided with "Restricted Rights" as provided for in FAR, 48 CFR 52.227-14 (JUNE 1987) or DFAR, 48 CFR 252.227-7013 (OCT 1988), as applicable. Manufacturer is Texas Instruments Incorporated, 7800 Banner Drive, M/S 3962, Dallas, Texas 75251.
-
Page 5: Table Of Contents
Index......................71 This document describes the Cabri Geometry application for the TI-89 / TI-92 Plus / Voyage™ 200 PLT. It provides descriptions, procedures, illustrations, and examples for using the TI-89 / TI-92 Plus / Voyage 200 PLT to perform analytic, transformational, and Euclidean geometric functions . -
Page 6: Preview Of Geometry
5. Observe what happens when the Press and hold Press and hold j then press ‚ then press endpoint of the segment is dragged around the circle. TI-89 / TI-92 Plus / Voyage™ 200 PLT Cabri Geometry App... -
Page 7: Learning The Basics
The active menu is framed as shown by the first menu item in the previous figure. The table on the next page lists the menu function keys TI-89 / TI-92 Plus / Voyage™ 200 PLT Cabri Geometry App... - Page 8 ‚ key, the cursor moves TI.89: TI.92 Plus / Voyage 200 PLT: one pixel for each keypress and five pixels in repeat mode (cursor pad is held down). TI-89 / TI-92 Plus / Voyage™ 200 PLT Cabri Geometry App...
- Page 9 3. Move the cursor to another location, and press ¸ to define the second first point second point point. 4. Move the cursor to the third location and press ¸ again to complete the triangle. TI-89 / TI-92 Plus / Voyage™ 200 PLT Cabri Geometry App...
- Page 10 2. Release TI-89: ‚ TI-92 Plus / Voyage 200 PLT: (The circle, triangle, and their points are selected in this example.) All selected objects appear as a marquee outline. TI-89 / TI-92 Plus / Voyage™ 200 PLT Cabri Geometry App...
- Page 11 An independent object is an object created using only basic points. Independent objects can be moved (dragged) but cannot be modified directly. By moving the basic points used for their construction, you can modify them indirectly. TI-89 / TI-92 Plus / Voyage™ 200 PLT Cabri Geometry App...
- Page 12 Lines require one point Constructions and a direction, line segments require two points, triangles and arcs require three points, and polygons require n points where n is greater than two. TI-89 / TI-92 Plus / Voyage™ 200 PLT Cabri Geometry App...
- Page 13 Modify the lines. perpendicular bisectors from solid to dotted lines by pressing 2‰ TI-89: ‰ and TI-92 Plus / Voyage 200 PLT: select 9:Dotted 8. Select a line and press ¸. TI-89 / TI-92 Plus / Voyage™ 200 PLT Cabri Geometry App...
- Page 14 TI-92 Plus / Voyage™ 200 PLT: selecting 1:Distance & Length 14. Position the cursor near the circle until the message “ CIRCUMFERENCE ” appears and press OF THIS CIRCLE ¸. TI-89 / TI-92 Plus / Voyage™ 200 PLT Cabri Geometry App...
- Page 15 Learning the Basics (continued) Using Undo To undo the last fully constructed object or operation, press 2Š TI-89: Š TI-92 Plus / Voyage™ 200 PLT: Hint: Press ¥ and select D:Undo TI-89 / TI-92 Plus / Voyage™ 200 PLT Cabri Geometry App...
-
Page 16: Managing File Operations
¸ twice. Saving a To preserve memory, the TI-89 / TI-92 Plus / Voyage 200 PLT uses an “edit-in-place” method while you are constructing objects. This Construction as means the variable that you named when you first opened the Another Name geometry session is constantly updated during your constructions. -
Page 17: Managing File Operations (Continued)
Managing File Operations (Continued) Press D and enter a name, up to eight characters, for your new construction and press ¸ twice. A blank construction area appears. TI-89 / TI-92 Plus / Voyage™ 200 PLT Cabri Geometry App... -
Page 18: Setting Application Preferences
B. 3. Select the desired option. (Press the appropriate digit or highlight the option and press ¸.) 4. To save your changes and close the dialog box, press ¸. TI-89 / TI-92 Plus / Voyage™ 200 PLT Cabri Geometry App... - Page 19 To modify this value dynamically in your construction, select © the locus and press « to increase the number of locus points or | to decrease the number of locus points. TI-89 / TI-92 Plus / Voyage™ 200 PLT Cabri Geometry App...
- Page 20 Mode Determines the format for displayed line equations. Line Equations 1:y=ax+b 2:ax+by+c=0 Determines the format for displayed circle equations. Circle Equations 1:(x.a) +(y.b) +ax+by+c=0 TI-89 / TI-92 Plus / Voyage™ 200 PLT Cabri Geometry App...
-
Page 21: Selecting And Moving Objects
( ) cursor instead of dragging hand cursor. TI-89: ‚ TI-92 Plus / Voyage™ 200 PLT: once. The points that you can drag will flash. TI-89 / TI-92 Plus / Voyage™ 200 PLT Cabri Geometry App... -
Page 22: Deleting Objects From A Construction
TI-92 Plus / Voyage 200 PLT: and select 8:Clear All A dialog box displays for you to confirm this command. 2. Press ¸ to clear the entire construction area or press N to cancel. TI-89 / TI-92 Plus / Voyage™ 200 PLT Cabri Geometry App... -
Page 23: Creating Points
Create a point as defined in step 2 or text (five-character 3 then press an appropriate maximum) from the alphabetic character key to create a keyboard immediately after creating a point. label for the point. TI-89 / TI-92 Plus / Voyage™ 200 PLT Cabri Geometry App... - Page 24 ¸. 4. Select the second object then press ¸ to create the intersection point or points. Select the second object. Points are created at each intersection. TI-89 / TI-92 Plus / Voyage™ 200 PLT Cabri Geometry App...
-
Page 25: Creating Lines, Segments, Rays, And Vectors
3. Move the pointer to the location for Create the final point. 15-degree increments, the final endpoint of the segment. press ¤ while pressing the cursor pad. 4. Press ¸. TI-89 / TI-92 Plus / Voyage™ 200 PLT Cabri Geometry App... - Page 26 Tip: To limit the slope to 3. Move the pointer to the location for Create the head. 15-degree increments, the head. press ¤ while pressing the cursor pad. 4. Press ¸. TI-89 / TI-92 Plus / Voyage™ 200 PLT Cabri Geometry App...
- Page 27 4. Move the pointer and select the Select the second vector. second vector. 5. Select the initial point for the Select a tail point for the vector sum. resultant vector then press ¸. TI-89 / TI-92 Plus / Voyage™ 200 PLT Cabri Geometry App...
-
Page 28: Creating Circles And Arcs
Note: The first two points determine the radius; the steps to create a compass circle third point becomes the using points. Select three points to center point of the circle. perform the construction. TI-89 / TI-92 Plus / Voyage™ 200 PLT Cabri Geometry App... - Page 29 2. Press and hold TI-89: ‚ TI-92 Plus / Voyage 200 PLT: while pressing the cursor pad to move the arc. TI-89 / TI-92 Plus / Voyage™ 200 PLT Cabri Geometry App...
-
Page 30: Creating Triangles
Note: An outline of the third the final vertex. side is displayed as you move the cursor. 5. Press ¸ to create the final vertex Create the triangle. to complete the triangle. TI-89 / TI-92 Plus / Voyage™ 200 PLT Cabri Geometry App... -
Page 31: Creating Polygons
Grab and move the point. 3. Press and hold TI-89: ‚ TI-92 Plus / Voyage™ 200 PLT: while pressing the cursor pad to move the point along the perimeter of the polygon. TI-89 / TI-92 Plus / Voyage™ 200 PLT Cabri Geometry App... - Page 32 Continue to move the cursor denominator is the number of times the star is crossed. until the desired number of sides is reached. Completed polygon. 7. Press ¸ to complete the star polygon. TI-89 / TI-92 Plus / Voyage™ 200 PLT Cabri Geometry App...
-
Page 33: Constructing Perpendicular And Parallel Lines
TI-89 / TI-92 Plus / Voyage™ 200 PLT Cabri Geometry App... - Page 34 TI-89 / TI-92 Plus / Voyage™ 200 PLT Cabri Geometry App...
-
Page 35: Constructing Perpendicular And Angle Bisectors
The angle bisector is created when you select the third vertex. angle bisector TI-89 / TI-92 Plus / Voyage™ 200 PLT Cabri Geometry App... -
Page 36: Creating Midpoints
3. Move the pointer to one of the following and press ¸. Note: For two points, select A segment. The side of a polygon. Two points (create or select). and press for each ¸ point. midpoints TI-89 / TI-92 Plus / Voyage™ 200 PLT Cabri Geometry App... -
Page 37: Transferring Measurements
¸ set the position. A point is created that is an equivalent distance from the Transfer the measurement. endpoint of the ray. TI-89 / TI-92 Plus / Voyage™ 200 PLT Cabri Geometry App... - Page 38 6. Press ¸ to create a point on the circle that is a proportional arc length away from the initial point. TI-89 / TI-92 Plus / Voyage™ 200 PLT Cabri Geometry App...
-
Page 39: Creating A Locus
¸. When you select a point on a path (object), the locus is constructed in The locus is constructed. its entirety and is considered a defined object. TI-89 / TI-92 Plus / Voyage™ 200 PLT Cabri Geometry App... -
Page 40: Redefining Object Definitions
For example, The point is redefined. defining the center point of a circle to be a point on the The segment is attached to the circle. circle is not allowed. TI-89 / TI-92 Plus / Voyage™ 200 PLT Cabri Geometry App... -
Page 41: Translating Objects
Grab and drag the vector tail to translated image directly. change the magnitude of the pre-image translation. translated The translated image changes according image to the changes made to the vector. TI-89 / TI-92 Plus / Voyage™ 200 PLT Cabri Geometry App... -
Page 42: Rotating And Dilating Objects
¸ to deselect the rotation point. 4. Point to the object and drag in the direction that you want to rotate the object. Complete the rotation. TI-89 / TI-92 Plus / Voyage™ 200 PLT Cabri Geometry App... - Page 43 6:Numerical Edit 2. Change the number to a different value and press ¸. The rotated image moves according to the numerical value that defines the rotation. TI-89 / TI-92 Plus / Voyage™ 200 PLT Cabri Geometry App...
- Page 44 5. Drag the object away from its center Complete the dilation. through the dilation point to expand or toward its center to causes a negative dilation. contract. The cursor must travel through the dilation point. TI-89 / TI-92 Plus / Voyage™ 200 PLT Cabri Geometry App...
- Page 45 The dilated image is modified. dependent object, you object. cannot change the dilated image directly. The dilated image moves according to the changes made to the original object. dilated image TI-89 / TI-92 Plus / Voyage™ 200 PLT Cabri Geometry App...
- Page 46 Complete the rotation and dilation. TI-89 / TI-92 Plus / Voyage™ 200 PLT Cabri Geometry App...
-
Page 47: Creating Reflections And Inverse Objects
1. Select, reposition, and rotate the line. The reflected image is modified. image is a dependent The reflected image moves according object, you cannot change it directly. to the changes made to the line. TI-89 / TI-92 Plus / Voyage™ 200 PLT Cabri Geometry App... - Page 48 (Upper right vertex of the dependent object, you original object shown in step 1.) cannot change it directly. The symmetrical image is modified according to the changes made to the original object. TI-89 / TI-92 Plus / Voyage™ 200 PLT Cabri Geometry App...
- Page 49 The inverse point is modified. point is a dependent point, The inverse point inside the circle you cannot change it directly. moves according to the changed position of the original point. TI-89 / TI-92 Plus / Voyage™ 200 PLT Cabri Geometry App...
-
Page 50: Measuring Objects
TI-92 Plus / Voyage 200 PLT: and select 2:Area 3. Select the polygon or circle whose Select an object. area you want to measure then press ¸. The result is displayed. TI-89 / TI-92 Plus / Voyage™ 200 PLT Cabri Geometry App... - Page 51 TI-92 Plus / Voyage 200 PLT: and select 4:Slope 3. Select the segment, ray, vector, or Select an object. line whose slope you want to measure. The result is displayed. TI-89 / TI-92 Plus / Voyage™ 200 PLT Cabri Geometry App...
-
Page 52: Determining Equations And Coordinates
3. Select the circle whose equation you want to find. Select a point to display its coordinates. 4. Select the center point of the circle to find the coordinates of the point. TI-89 / TI-92 Plus / Voyage™ 200 PLT Cabri Geometry App... -
Page 53: Performing Calculations
7. To see interactive calculations, grab calculations. a vertex of the polygon and drag it to another location. Observe the dynamic changes in the result ( ) as the object is changed. TI-89 / TI-92 Plus / Voyage™ 200 PLT Cabri Geometry App... -
Page 54: Collecting Data
Note: You can collect defined data entries automatically if the icon appears in the Store Data toolbar while you are animating your construction. (See “Putting Objects in Motion” on page 55). TI-89 / TI-92 Plus / Voyage™ 200 PLT Cabri Geometry App... -
Page 55: Checking Properties Of Objects
Note: The displayed property changes when the segment a few pixels up and a few third point (center point) is pixels down. no longer collinear with the endpoints of the segment. TI-89 / TI-92 Plus / Voyage™ 200 PLT Cabri Geometry App... - Page 56 2. Press 2ˆ TI-89: ˆ TI-92 Plus / Voyage 200 PLT: select and then 8:Check Property, select 3:Perpendicular 3. Point to each segment, pressing Select the objects. ¸ each time. TI-89 / TI-92 Plus / Voyage™ 200 PLT Cabri Geometry App...
- Page 57 This may not be easy to do by simply dragging the point of the circle. To position the in the † point mathematically, use Redefine Object Construction toolbar menu. TI-89 / TI-92 Plus / Voyage™ 200 PLT Cabri Geometry App...
- Page 58 Then use Redefine Object the † Construction toolbar menu to position the point on the perpendicular bisector. TI-89 / TI-92 Plus / Voyage™ 200 PLT Cabri Geometry App...
-
Page 59: Putting Objects In Motion
Press and release TI-89: ‚ TI-92 Plus / Voyage 200 PLT: twice quickly. The small circle moves around the circumference of the large circle. Press N to stop the animation. TI-89 / TI-92 Plus / Voyage™ 200 PLT Cabri Geometry App... - Page 60 2‰ TI-89: ‰ TI-92 Plus / Voyage 200 PLT: and select . Then 2:Trace On / Off select the object displayed in marquee outline. TI-89 / TI-92 Plus / Voyage™ 200 PLT Cabri Geometry App...
-
Page 61: Controlling How Objects Are Displayed
Thickness of pixels) outlines. Objects 1. Construct several objects such as those shown in this example. 2. Press 2‰ TI-89: ‰ TI-92 Plus / Voyage 200 PLT: and select 8:Thick TI-89 / TI-92 Plus / Voyage™ 200 PLT Cabri Geometry App... - Page 62 2. Press 2Š TI-89: Š TI-92 Plus / Voyage 200 PLT: and select A:Show Page 3. Drag the small window to move the drawing view to a new location. TI-89 / TI-92 Plus / Voyage™ 200 PLT Cabri Geometry App...
- Page 63 Clear Data View File back to full-screen mode. Press Full-screen mode. 2Š TI-89: Š TI-92 Plus / Voyage 200 PLT: and select C:Clear Data View TI-89 / TI-92 Plus / Voyage™ 200 PLT Cabri Geometry App...
-
Page 64: Adding Descriptive Information To Objects
4. Type the label text on the keyboard Enter a label. the label by selecting it and and press N. then dragging it to the desired location. Reposition and complete the labels. TI-89 / TI-92 Plus / Voyage™ 200 PLT Cabri Geometry App... - Page 65 Assign a unit of measurement. add a unit description to a number, 2 ‰ press: TI-89: A:Units TI-92 Plus / Voyage 200 PLT: ‰ A:Units and select from: Number Length Area Volume Angle TI-89 / TI-92 Plus / Voyage™ 200 PLT Cabri Geometry App...
- Page 66 TI-92 Plus / Voyage 200 PLT: and select 3:Angle then select the marked angle. Measure the exterior angle. 5. To measure the exterior angle, drag the angle mark through the vertex of the angle. TI-89 / TI-92 Plus / Voyage™ 200 PLT Cabri Geometry App...
-
Page 67: Creating Macros
When they are the same their types. type, the macro uses them in the order in which they were selected as initial objects. TI-89 / TI-92 Plus / Voyage™ 200 PLT Cabri Geometry App... - Page 68 (final object) through all vertices of the triangle. 2. Press † and select Select the initial object. 6:Macro Construction 3. Select then select the 2:Initial Objects triangle as the initial object. TI-89 / TI-92 Plus / Voyage™ 200 PLT Cabri Geometry App...
- Page 69 ¸ This macro determines the center Execute the macro. and radius of the circle and constructs a circle thorough all vertices of the triangle. TI-89 / TI-92 Plus / Voyage™ 200 PLT Cabri Geometry App...
-
Page 70: Geometry Toolbar Menu Items
6:Macro Construction ú see page 63 7:Vector Sum see page 23 8:Compass see page 24 9:Measurement Transfer see page 33 A:Locus see page 35 B:Redefine Object see page 36 TI-89 / TI-92 Plus / Voyage™ 200 PLT Cabri Geometry App... -
Page 71: Display Menu
58 Note: Some shortcut keys B:Data View see page 59 do not appear on the TI-89 C:Clear Data View see page 59 D:Undo ¥Z see page 11 TI-89 / TI-92 Plus / Voyage™ 200 PLT Cabri Geometry App... -
Page 72: Pointing Indicators And Terms Used In Cabri Geometry
Geometry Cabri Geometry II operations. Definitions ¸ Press any of the three ¸ keys on the TI-89 / TI-92 Plus / Voyage 200 PLT or the one ¸ key on the to execute a command or to confirm an action. -
Page 73: Helpful Shortcuts
The label is limited to five characters and can only be edited with the Label tool. ¦ Creating a measurement to add a comment to the measurement. TI-89 / TI-92 Plus / Voyage™ 200 PLT Cabri Geometry App... - Page 74 Note: TI-92 Plus / TI-89. Voyage 200™ PLT: 2 ¢ ¦ Press To lock drag mode when moving objects. TI-89: TI-92 Plus / Voyage 200 PLT: 2 ™ TI-89 / TI-92 Plus / Voyage™ 200 PLT Cabri Geometry App...
-
Page 75: Index
Index —C— (continued) —A— creating Angle Bisector tool, 31 perpendicular bisectors, 31 angle measurement, 47 perpendicular lines, 29 Angle tool, 47 point on an object, 20 animating objects, 55 points, 5, 19 Animation tool, 55 polygons, 27 Arc tool, 25 rays, 22 arrow pointer, 68 reflections, 43... - Page 76 Index (continued) —E— (continued) —L— examples (continued) Label tool, 60 lines, creating, 21 labeling objects, 7, 19, 60 locus, creating, 35 line equation format, 16 macros, creating, 64 Line tool, 21 measurement transfers, 33 locus points midpoints, creating, 32 linking, 16 moving objects, 17 setting number of, 15 multi-step constructions, 9–11...
- Page 77 Index (continued) —P— —S— page/plane definition, 68 Save As command, 12 paint brush pointer, 68 scrolling the drawing window, 9 Parallel Line tool, 30 Segment tool, 21 Parallel tool, 51 selecting Perpendicular Bisector tool, 31 objects, 6, 17 Perpendicular Line tool, 29 tools from the toolbar, 3 placing points, 5 selection-pencil pointer, 68...