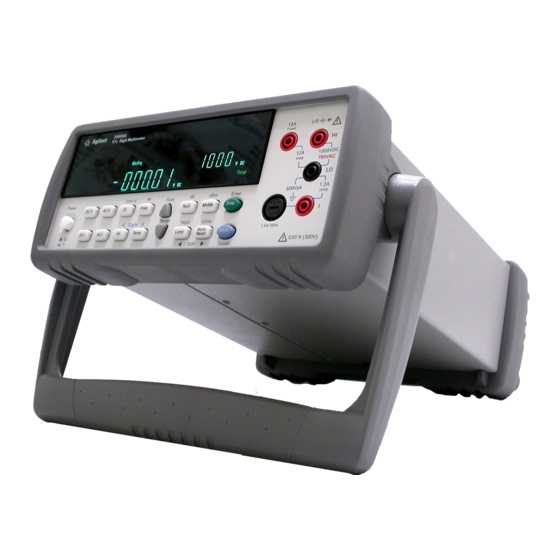
Agilent Technologies 34405A User's And Service Manual
5 1/2 digit multimeter
Hide thumbs
Also See for 34405A:
- User's and service manual (148 pages) ,
- Quick start manual (8 pages) ,
- User's and service manual (143 pages)
Table of Contents
Advertisement
Quick Links
Advertisement
Table of Contents

Related Manuals for Agilent Technologies 34405A


Summary of Contents for Agilent Technologies 34405A
- Page 1 Agilent 34405A 5 ½ Digit Multimeter User’s and Service Guide Agilent Technologies...
-
Page 2: Restricted Rights Legend
Agilent Technologies, Inc. information contained herein. Should 3501 Stevens Creek Blvd. Agilent and the user have a separate Santa Clara, CA 95052 USA written agreement with warranty terms covering the material in this WA R N I N G... -
Page 3: Safety Information
Protection Limits defined in uct. Return the product to an Agilent Tech- nologies Sales and Service Office for service terminals before servicing. Only the following section. - Page 4 To main- 1.2A or socket. The 34405A may be used to make 500Vpk tain protection, replace this fuse only with a measurements with the HI and LO inputs fuse of the specified type and rating.
- Page 5 Agilent 34138A Test Lead Set. cal/electronic product in domestic household waste. The Agilent 34405A is provided with an Agi- WA R N I N G Product Category: With reference to the lent 34138A Test Lead Set, described below.
- Page 6 The Declaration of Conformity (DoC) for this instrument is available on the Web site. You can search the DoC by its product model or description. http://regulations.corporate.agilent.com/DoC/search.htm If you are unable to search for the respective DoC, please contact your local Agilent N O T E representative.
-
Page 7: Table Of Contents
Contents Getting Started Tutorial Introducing the Agilent 34405A Multimeter Checking the Shipping Contents Connecting Power to the Multimeter Adjusting the Handle The Front Panel at a Glance The Display at a Glance The Rear Panel at a Glance Remote Operation... - Page 8 DC Current Measurements Capacitance Measurements Temperature Measurements Other Sources of Measurement Error Performance Tests and Calibration Calibration Overview Closed - Case Electronic Calibration Agilent Technologies Calibration Services Calibration Interval Time Required for Calibration Recommended Test Equipment VIII 34405A User’s and Service Guide...
- Page 9 To Read the Calibration Count Calibration Errors Disassembly and Repair Operating Checklist Types of Service Available Repackaging for Shipment Cleaning To Replace the Power Line Fuse To Replace a Current Input Fuse Electrostatic Discharge (ESD) Precautions 34405A User’s and Service Guide...
- Page 10 Mechanical Disassembly Replaceable Parts Rack Mounting Specifications DC Specifications AC Specifications Temperature and Capacitance Specifications Operating Specifications Supplemental Measurement Specifications General Characteristics To Calculate Total Measurement Error Accuracy Specifications Configuring for Highest Accuracy Measurements Index 34405A User’s and Service Guide...
-
Page 11: Getting Started Tutorial
Agilent 34405A 5 ½ Digit Multimeter User’s and Service Guide Getting Started Tutorial Introducing the Agilent 34405A Multimeter Checking the Shipping Contents Connecting Power to the Multimeter Adjusting the Handle The Front Panel at a Glance The Rear Panel at a Glance... -
Page 12: Introducing The Agilent 34405A Multimeter
Getting Started Tutorial Introducing the Agilent 34405A Multimeter The multimeter’s key features are: • 5 ½- digit dual display measurements • Ten measurement functions: • AC voltage • DC voltage • Two- wire resistance • AC current • DC current •... -
Page 13: Checking The Shipping Contents
• An Agilent IO Library CD- ROM If anything is missing, contact your nearest Agilent Sales Office. Connecting Power to the Multimeter Connect the power cord and press the Power switch to turn on the multimeter. -
Page 14: Adjusting The Handle
Getting Started Tutorial Adjusting the Handle To adjust the handle, grasp the handle by the sides and pull outward. Then, rotate the handle to the desired position. Benchtop Positions Carrying Position 34405A User’s and Service Guide... -
Page 15: The Front Panel At A Glance
State Store/Recall, Utility and Edit Keys On/Off Switch Shift (selects blue shifted keys) and Measurement Function and Resolution Keys Local key Autorange and Manual Range Secondary Display Key Math Operations and Edit Input Terminals and Current Fuse 34405A User’s and Service Guide... -
Page 16: The Display At A Glance
Fixed range selected (autoranging disabled). Hold Reading hold function enabled. Limit Limit math feature enabled Null Null math feature enabled. MnMx Min/Max feature enabled. Continuity test function selected. Diode test function selected. Shift Shift key has been pressed. 34405A User’s and Service Guide... -
Page 17: The Rear Panel At A Glance
Getting Started Tutorial The Rear Panel at a Glance USB Interface Connector AC Power Connector Model and Serial Number Label AC Line Voltage Selector Chassis Ground Lug AC Line Fuse 34405A User’s and Service Guide... -
Page 18: Remote Operation
Just connect the instrument to your PC using the USB 2.0 cable included with the instrument. To easily configure and verify an interface connection between the 34405A and your PC, N O T E use the Automation–Ready CD, which is shipped with your 34405A. This CD includes the Agilent IO Libraries Suite and the Agilent Connection Expert application. - Page 19 • You can query the SCPI version from the remote interface only. • The SCPI version is returned in the form “YYYY.V”, where “YYYY” represents the year of the version, and “V” represents a version number for that year (for example, 1994.0). 34405A User’s and Service Guide...
-
Page 20: Making Measurements
The following pages show how to make measurement connections and how to select measurement functions from the front panel for each of the measurement functions. For remote operation, refer to the MEASure Subsystem in the Agilent 34405A Online Programmer’s Reference online help. Measuring AC or DC Voltage AC Voltage: •... -
Page 21: Measuring Resistance
• Input Protection: Front Panel 1.25A, 500V FH fuse for I terminal Fused Typical ACI Display: 1000VDC 750VAC Range AC or DC Current Source Typical DCI Display: 1.2A 500Vpk m A DC Range m A DC 1.25A/500V FH CAT II (300V) 34405A User’s and Service Guide... -
Page 22: Measuring Ac (Rms) Or Dc Current Up To 12A
• Gate Time: 0.1 second or 1 period of the input signal, whichever is longer. • Input Protection: 750V rms on all ranges (HI terminal) Fused Typical Display: 1000VDC Frequency Freq Freq 750VAC Source Range 1.2A 500Vpk 1.25A/500V FH CAT II (300V) 34405A User’s and Service Guide... -
Page 23: Testing Continuity
• Input Protection: 1000 V (HI terminal) Test Current Fused Reverse Bias or Open Diode Display: 1000VDC 750VAC Forward Bias Shift Freq Freq Typical Forward Biased Diode Display: 1.2A 500Vpk 1.25A/500V FH V DC CAT II (300V) 34405A User’s and Service Guide... -
Page 24: Measuring Capacitance
• Measurement Method: 2-wire Ohms measurement of 5 kΩ thermistor sensor (E2308A) with computed conversion • Input Protection: 1000 V (HI terminal) Test Current Fused Typical Display: 1000VDC 5k Ohm 750VAC Temp Temp °C Thermistor 1.2A 500Vpk 1.25A/500V FH CAT II (300V) 34405A User’s and Service Guide... -
Page 25: Selecting A Range
• Autorange thresholds – The multimeter shifts ranges as follows: Down range at <10% of current range Up range at >120% of current range • For remote operation, refer to the MEASure Subsystem in the Agilent 34405A Online Programmer’s Reference online help. 34405A User’s and Service Guide... -
Page 26: Setting The Resolution
• Capacitance and temperature have a fixed 3½- digit display. Shift Selects 4½- digit mode. Shift Temp Temp Selects 5½- digit mode. • For remote operation, refer to the MEASure Subsystem in the Agilent 34405A Online Programmer’s Reference online help. 34405A User’s and Service Guide... -
Page 27: Features And Functions
Agilent 34405A 5 ½ Digit Multimeter User’s and Service Guide Features and Functions Math Operations Using the Secondary Display Using the Utility Menu Editing Values in the Secondary Display Storing and Recalling Instrument States Reset/Power-On State Triggering the Multimeter This chapter contains detailed information on the multimeter and how to use the front panel. -
Page 28: Math Operations
• All math operations are automatically turned- off when changing measuring functions. • Range changing is allowed for all math operations. • For remote operation, refer to the CALCulate Subsystem in the Agilent 34405A Online Programmer’s Reference online help. 34405A User’s and Service Guide... -
Page 29: Null
Numeric results are in the range of ± 120.000 dBm with 0.01 dBm resolution shown, independent of the number of digits setting. You can view and select the R value in the secondary display as described in “Editing Values in the Secondary Display” on page 40. 34405A User’s and Service Guide... -
Page 30: Min/Max
• Max- - maximum reading since Min/Max was enabled • Min- - minimum reading since Min/Max was enabled • Avg- - average of all readings since Min/Max was enabled • N- - number of readings taken since Min/Max was enabled 34405A User’s and Service Guide... -
Page 31: Limit
The secondary display shows the present reading. When enabled, the Hold operation turns on the Hold annunciator and begins evaluating readings using the rules described below: ≤ Primary Display = Reading IF Max() - Min() 0.1% x Reading 34405A User’s and Service Guide... -
Page 32: Math Annunciators
Math Value Annunciators Math Operation When Viewing/Editing Editable Math Annunciator Null Offset Ref Value Ref R Value dB Ref Ref Value MnMx Maximum Minimum Average Reading Count Limit HI Limit Hi Limit LO Limit Lo Limit 34405A User’s and Service Guide... -
Page 33: Using The Secondary Display
As another example, a typical primary display showing ACV and a secondary display showing the measured frequency of the input signal is: The secondary display is based on the selected primary measurement function and how many times you press: Disp 34405A User’s and Service Guide... - Page 34 All math operations offer predefined displays that can be presented on the secondary display as described on the next page. • For remote operation, refer to the DISPlay:WINDow2 commands in the Agilent 34405A Online Programmer’s Reference online help. 34405A User’s and Service Guide...
-
Page 35: Math Operations And The Secondary Display
Nulled Reading Reference Value Present Reading Present Reading dB Ref (in dBm) Min/Max Reading Max value Min value Avg value N (count) value Limit Reading PASS HI Limit LO Limit Hold Held Reading Present Reading 34405A User’s and Service Guide... -
Page 36: Using The Utility Menu
*IDN? (from remote also returns numbers. manufacturer's name, model number, 1= Measurement processor revision. and the serial number) 2= IO processor revision. UtitY donE Display donE on primary display for 1 None second then return to normal operation 34405A User’s and Service Guide... -
Page 37: Changing Configurable Settings
5 Repeat steps 4 and 5 for all items in the Utility Menu. 6 When you reach the end of the Utility Menu, the primary display shows utitY and the secondary display briefly shows donE, after which the multimeter returns to normal operation. 34405A User’s and Service Guide... -
Page 38: Reading Error Messages
Features and Functions Reading Error Messages The following procedure shows you to read error messages from the front panel. For remote operation, refer to the SYSTem:ERRor? command in the Agilent 34405A Online Programmer’s Reference online help. Utility Store Store Shift... -
Page 39: The Beeper
When a new stable reading is updated on display for Math Hold operation • When a measurement exceeds the HI or LO Limit value • When a forward- biased is measured in the Diode function 34405A User’s and Service Guide... -
Page 40: Editing Values In The Secondary Display
Utility menu. You can edit the values used for the Null, Limit, dB or dBM math function. For remote operation, refer to the CALCulate Subsystem in the Agilent 34405A Online Programmer’s Reference online help. Selecting the Value to Edit Disp... -
Page 41: Storing And Recalling Instrument States
For remote operation, refer to the MEMory Subsystem, the *SAV, and *RCL commands in the Agilent 34405A Online Programmer’s Reference online help. The store function in the utility menu must be enabled (On) before you can store states. -
Page 42: Recalling A Stored State
To escape the recall operation without recalling a state, select ESC in step 4 above and N O T E Store Store to escape. After escaping, the secondary display briefly shows - - - press Recall Recall 34405A User’s and Service Guide... -
Page 43: Reset/Power-On State
Features and Functions Reset/Power-On State The table below summarizes the 34405A's settings as received from the factory, following power cycling, and following the *RST command received over the USB remote interface. Non- volatile, user customizable behavioral differences are shown in BOLD type. - Page 44 Cleared if power-on status clear Filters* enabled; no change otherwise Serial Number Unique value per-instrument No Change Calibration Calibration state Secured User Setting Calibration value No Change Calibration String Cleared No Change *State managed by IO Processor firmware. 34405A User’s and Service Guide...
-
Page 45: Triggering The Multimeter
TRIGger:SOURce IMMediate The CONFigure and MEASure? commands automatically set the trigger source to IMMediate. Refer to the Agilent 34405A Programmer’s Reference for complete description and syntax for these commands. Software (Bus) Triggering The bus trigger mode is available from the remote interface only. - Page 46 • The INITiate command only initiates the measurement and needs a trigger (BUS or IMMEdiate) to make the actual measurement. Refer to the Agilent 34405A Programmer’s Reference for complete description and syntax for these commands. 34405A User’s and Service Guide...
-
Page 47: Measurement Tutorial
True RMS AC Measurements Other Primary Measurement Functions Other Sources of Measurement Error The Agilent 34405A multimeter is capable of making very accurate measurements. In order to achieve the greatest accuracy, you must take the necessary steps to eliminate potential measurement errors. This chapter describes common errors found in measurements and gives suggestions to help you avoid these errors. -
Page 48: Dc Measurement Considerations
Copper to – Approx. mV / °C Copper to – Approx. mV / °C Cadmium-Tin Solder Aluminum Copper <0.3 Tin-Lead Solder Gold Kovar or Alloy 42 Silver Silicon Brass Copper-Oxide 1000 Beryllium Copper 34405A User’s and Service Guide... -
Page 49: Noise Rejection
You should be especially careful when working near conductors carrying large currents. Use twisted–pair connections to the multimeter to reduce the noise pickup loop area, or dress the test leads as close together as possible. Loose or 34405A User’s and Service Guide... - Page 50 If the multimeter must be earth–referenced, connect it and the device under test to the same common ground point. Also connect the multimeter and device under test to the same electrical outlet whenever possible. 34405A User’s and Service Guide...
-
Page 51: Resistance Measurement Considerations
Test Current Power at Full Scale 100 Ω 100 mW 1 mA 689 mW 1 kΩ 0.83 mA 100 mA 100 mW 10 kΩ 10 mA 10 mW 100 kΩ 1 MΩ 900nA 810 nW 34405A User’s and Service Guide... -
Page 52: Ac Measurements
25 sequential samples which comprise the AC reading data set. The final AC reading result is computed from the acquired data set as shown by the equation below: √ AC Reading = Average [Data (1:25)] 34405A User’s and Service Guide... -
Page 53: True Rms Ac Measurements
This multimeter accurately measures true RMS voltage or current, as long as the wave shape contains negligible energy above the instrument’s effective bandwidth. Note that the 34405A uses the same techniques to measure true RMS voltage and true RMS current. Waveform Shape... - Page 54 Traditionally, DMMs include a crest factor derating table that applies at all frequencies. The measurement algorithm used in the 34405A multimeter is not inherently sensitive to crest factor, so no such derating is necessary.
- Page 55 3 V (that is, a Crest Factor of 3) and duration 111 ms. The prf can be calculated to be 1000 Hz, as follows: Thus, from the table above, this AC waveform can be measured with 0.18 percent additional error. 34405A User’s and Service Guide...
-
Page 56: Other Primary Measurement Functions
Ideal Meter = Source Voltage -100% x V = DUT Source Resistance Error (%) = = Multimeter Burden Voltage R = Multimeter Current Shunt 34405A User’s and Service Guide... -
Page 57: Capacitance Measurements
100 kHz. In most cases, neither method measures the capacitor at its exact frequency of application. For the best accuracy, take a zero null measurement with open probes, to null out the test lead capacitance, before connecting the probes across the capacitor to be measured. 34405A User’s and Service Guide... -
Page 58: Temperature Measurements
–80 C to 150 Thermistors have highly non–linear temperature–resistance relationships; therefore their conversion algorithms are more complex. Agilent multimeters use the standard Hart–Steinhart Approximation to provide accurate conversions. 34405A User’s and Service Guide... -
Page 59: Other Sources Of Measurement Error
If you apply more than 300 V , self–heating occurs in the multimeter's internal signal–conditioning components. These errors are included in the multimeter's specifications. Temperature changes inside the multimeter due to self–heating may cause additional error on other AC voltage ranges. 34405A User’s and Service Guide... - Page 60 Correlated noise, while rare, is especially detrimental. Correlated noise always adds directly to the input signal. Measuring a low–level signal with the same frequency as the local power line is a common situation that is prone to this error. 34405A User’s and Service Guide...
- Page 61 T. Error may occur when the pulse signal is measured at low voltage range due to saturation of the multimeter’s analog- to- digital (ADC) rail voltage. 34405A User’s and Service Guide...
- Page 62 Measurement Tutorial 34405A User’s and Service Guide...
-
Page 63: Performance Tests And Calibration
Agilent 34405A 5 ½ Digit Multimeter User’s and Service Guide Performance Tests and Calibration Calibration Overview Recommended Test Equipment Test Considerations Performance Verification Tests Overview Performance Verification Tests Calibration Security Calibration Process Adjustments Calibration Errors This chapter contains performance test procedures and calibration procedures. -
Page 64: Calibration Overview
Agilent Technologies Calibration Services When your instrument is due for calibration, contact your local Agilent Service Center for a low- cost recalibration. The 34405A is supported on automated calibration systems, which allow Agilent to provide this service at competitive prices. -
Page 65: Time Required For Calibration
Performance Tests and Calibration Time Required for Calibration The 34405A can be automatically calibrated under computer control. With computer control you can perform the complete calibration procedure and performance verification tests in less than 30 minutes once the instrument is warmed- up (see “Test Considerations”... -
Page 66: Recommended Test Equipment
A suggested alternate method would be to use the Agilent 3458A 8½ - Digit Digital Multimeter to measure less accurate yet stable sources. The output value measured from the source can be entered into the instrument as the target calibration value. -
Page 67: Test Considerations
Shielded, twisted- pair, PTFE interconnect cables of minimum length are recommended between the calibrator and the multimeter. Cable shields should be earth ground referenced. This configuration is recommended for optimal noises and settling time performance during calibration. 34405A User’s and Service Guide... -
Page 68: Performance Verification Tests Overview
• If the self- test fails, an error is reported on the front panel. You can also use the SYSTem: ERRor? command query from the remote interface. If repair is required, contact an Agilent Service Center. • If all tests pass, you have a high confidence (~90%) that the instrument is operational. -
Page 69: Quick Performance Check
• Perform a self- test as described in the preceding section. • Perform only the performance verification tests indicated in the following tables with the letter Q. If the instrument fails the quick performance check, adjustment or repair is required 34405A User’s and Service Guide... -
Page 70: Performance Verification Tests
'guard band', using no more than 80% of the specifications, as the verification limits. Make sure you have read “Test Considerations” on page 67 before doing the performance N O T E verification tests. 34405A User’s and Service Guide... -
Page 71: Zero Offset Verification
Quick Check 1 year Open DC Current 10mA ±1.5µA Open 100mA ±5 µA Open ±70µA Open ±0.7mA Open Capacitance ±8pF Open 10nF ±0.05nF Open 100nF ±0.5nF Open 1µF ±5nF Open 10µF ±0.05µF Open 100µF ±0.5µF 34405A User’s and Service Guide... - Page 72 [1] Select 5½- digit measurement resolution [2] Specifications are for 2- wire ohms function using the Null math function enabled to eliminate lead resistance. Without Null, add 0.2 Ω additional error. Q = Quick performance verification test points 34405A User’s and Service Guide...
-
Page 73: Gain Verification
±30 mV 1000V 1000 V ±0.3 V Caution: Set the calibrator output to 0V before disconnecting it from the multimeter input terminals. [1] Select 5½- digit measurement resolution Q = Quick performance verification test points 34405A User’s and Service Guide... - Page 74 100 mA ± 55µA ± 2.07mA Caution: Connect calibrator to multimeter’s 12A and LO terminals before applying 10A 10 A ± 25.7mA [1] Select 5½- digit measurement resolution Q = Quick performance verification test points 34405A User’s and Service Guide...
- Page 75 [1] Select 5½- digit measurement resolution [[2] Specifications are for 2- wire ohms function using the Null math function enabled to eliminate lead resistance. Without Null, add 0.2 Ω additional error. Q = Quick performance verification test points 34405A User’s and Service Guide...
- Page 76 Frequency Gain Verification Test Input Error from Nominal Voltage Frequency Function Range Quick Check 1 year 200mVrms 1kHz Frequency ±0.23Hz 200mVrms 10kHz ±2.3Hz [1] Select 5½- digit measurement resolution Q = Quick performance verification test points 34405A User’s and Service Guide...
- Page 77 ± 3.2 V 750V 1kHz 750V ± 2.25 V Caution: Set the calibrator output to 0V before disconnecting it from the multimeter input terminals. [1] Select 5½- digit measurement resolution Q = Quick performance verification test points 34405A User’s and Service Guide...
- Page 78 Caution: Connect calibrator to multimeter’s 12A and LO terminals before applying 10A 10 A 1 kHz 10 A ± 60 mA 5 kHz 10 A ± 0.06 A [1] Select 5½- digit measurement resolution Q = Quick performance verification test points 34405A User’s and Service Guide...
-
Page 79: Optional Ac Voltage Performance Verification Test
Error from Nominal Vrms Input Frequency Function Range 1 year 45Hz AC Voltage ±11mV 1kHz ±3mV 10kHz ±3mV 30kHz ±11mV 100kHz ±32mV 1kHz ±30mV 1kHz ±12mV 0.1V 1kHz ±10.2mV [1] Select 5½- digit measurement resolution 34405A User’s and Service Guide... -
Page 80: Optional Ac Current Performance Verification Test
10mA ± 0.16mA 10mA 45Hz 10mA ± 0.16mA 10mA 1kHz 10mA ± 60µA 10mA 10kHz 10mA ± 0.22mA 1kHz ± 6mA 100mA 1kHz ± 1.5mA 10mA 1kHz ± 1.05mA [1] Select 5½- digit measurement resolution 34405A User’s and Service Guide... -
Page 81: Optional Capacitance Performance Verification Test
± 15µF 10000µF 10000µF ± 0.25mF [1] For the best accuracy, take a zero null measurement with open test leads, to null out the test lead capacitance, before connecting the test leads to the calibrator. 34405A User’s and Service Guide... -
Page 82: Calibration Security
The security code can only be changed from the remote interface after the instrument has been unsecured. Refer to the CAL:SEC:CODE command in the 34405A Programmer's Reference Help File for more details. The security code may contain up to 12 alphanumeric characters. The first character must be a letter. -
Page 83: Unsecuring The Instrument For Calibration
In our example, the code now becomes: 01A40 From the front panel, any letters (A in this example) are represented by 0. Use this code to unsecure: 01040 34405A User’s and Service Guide... - Page 84 Range Use the range keys to select each character. Enter Disp 4 Press (Enter) when done. 5 If the correct security code was entered, the CAL annunciator illuminates and the primary display briefly shows PASS. 34405A User’s and Service Guide...
-
Page 85: Calibration Process
5 Secure the instrument against calibration. 6 Note the new security code and calibration count in the instrument's maintenance records. Make sure to quit the Adjustment Mode then turn off the instrument. N O T E 34405A User’s and Service Guide... -
Page 86: Using The Front Panel For Adjustments
Performance Tests and Calibration Using the Front Panel for Adjustments This section describes the process used to perform adjustments from the front panel. Refer to the 34405A Programmer's Reference online help for remote interface commands. Selecting the Adjustment Mode Unsecure the instrument see “Unsecuring the Instrument for... - Page 87 742 through 748 (whichever is applicable). If this occurs, you should not use the instrument until a complete re–adjustment has been performed. A list of the possible calibration errors is given on page 103. 34405A User’s and Service Guide...
-
Page 88: Adjustments
68) between the HI and LO front panel input terminals. Leave the current inputs open. To minimize thermal effects wait at least 1 minute after connecting the Shorting Plug before N O T E executing the zero adjustment. 34405A User’s and Service Guide... -
Page 89: Gain Adjustments
Most measuring functions and ranges have gain adjustment procedures. Ω The 100 M range does not have gain calibration procedures. Adjustments for each function should be performed ONLY in the order shown. 34405A User’s and Service Guide... - Page 90 10 mV, 100 mV, 1 V, 10 V, 100 V, 750 V 0.9 to 1.1 x Full Scale Capacitance 0.4 nF, 1 nF, 10 nF, 100 nF, 1 µF, 10 µF, 0.9 to 1.1 x Full Scale 100 µF, 1000 µF, 10000 µF 34405A User’s and Service Guide...
-
Page 91: Dc Voltage Gain Adjustment Procedure
Check the input value, range, function, and entered adjustment value to correct the problem and repeat the adjustment step. 8 Repeat steps 3 through 7 for each gain adjustment point shown in the table. 34405A User’s and Service Guide... -
Page 92: Dc Current Gain Adjustment Procedure
N O T E calibration procedure, the Cal Item 'Open' can be neglected. 4 Use (Auto) or (Range) to select the Cal Item. 5 Apply the input signal shown in the "Input" column of the table. 34405A User’s and Service Guide... - Page 93 Remove test leads from Input terminals DC Current Open 10 mA 10 mA 100 mA 100 mA 1000 mA 1000 mA Caution: Connect calibrator to multimeter’s 12A and LO terminals before applying 10A 10 A 10 A 34405A User’s and Service Guide...
-
Page 94: Ac Voltage Gain Adjustment Procedure
8 Repeat steps 3 through 7 for each gain adjustment point shown in the table. 9 Verify the AC Voltage Gain adjustments using the “AC Voltage Verification Test” on page 77. 34405A User’s and Service Guide... -
Page 95: Ac Current Gain Adjustment Procedure
(Range) to select the Cal Item. 5 Apply the input signal shown in the Input and Frequency columns of the table below. Always complete tests in the same order as shown in the appropriate table. N O T E 34405A User’s and Service Guide... - Page 96 1kHz 10 mA 100 mA 1kHZ 100 mA 1000 mA 1kHz 1000 mA Caution: Connect calibrator to multimeter’s 12A and LO terminals before applying the following 1A and 10A 1kHz 10 A 1kHz 10 A 34405A User’s and Service Guide...
-
Page 97: Ohms Gain Adjustment Procedure
Check the input value, range, function, and entered adjustment value to correct the problem and repeat the adjustment step. 8 Repeat steps 3 through 7 for each gain adjustment point shown in the table. 34405A User’s and Service Guide... -
Page 98: Frequency Gain Adjustment Procedure
(Range) to select the Cal Item. 5 Apply the input signal shown in the Input Voltage and Frequency column of the table. Always complete tests in the same order as shown in the appropriate table. N O T E 34405A User’s and Service Guide... -
Page 99: Capacitance Gain Adjustment Procedure
Capacitance Gain Calibration. 2 The primary display will show the calibration value and the secondary display will show the reference value of Cal Item. 3 Configure each Cal Item shown in the adjustment table below. 34405A User’s and Service Guide... - Page 100 8 Repeat steps 3 through 7 for each gain adjustment point shown in the table. 9 Verify the Capacitance Gain adjustments using the “Optional Capacitance Performance Verification Test” on page 81. 34405A User’s and Service Guide...
-
Page 101: Finishing The Adjustments
2 Reset the Calibration Message (see below). 3 Record the new Calibration Count (see page 102). Shift 4 Press simultaneously to exit the Adjustment Mode. The instrument will be secured and returns to DC Voltage, autoranging measurements. 34405A User’s and Service Guide... -
Page 102: Calibration Message
1 In Adjustment Mode (CAL annunciator illuminated) MnMx press . The secondary display shows the calibration count. 2 Make note of the count. MnMx 3 Press again to exit the calibration count mode. 34405A User’s and Service Guide... -
Page 103: Calibration Errors
Cal signal measurement out of range Cal checksum failed ACI corrections Cal DCV offset out of range Cal checksum failed FREQ corrections Cal DCI offset out of range Cal checksum failed CAP corrections Cal RES offset out of range 34405A User’s and Service Guide... - Page 104 Performance Tests and Calibration 34405A User’s and Service Guide...
-
Page 105: Disassembly And Repair
Agilent 34405A 5 ½ Digit Multimeter User’s and Service Guide Disassembly and Repair Operating Checklist Types of Service Available Repackaging for Shipment Cleaning To Replace the Power Line Fuse To Replace a Current Input Fuse Self-Test Errors Electrostatic Discharge (ESD) Precautions... -
Page 106: Operating Checklist
Disassembly and Repair Operating Checklist Before returning your multimeter to Agilent for service or repair check the following items: Is the multimeter inoperative? q Verify the power line voltage setting. q Verify the power line fuse is installed. q Verify that the power cord is connected to the multimeter and to AC line power. -
Page 107: Types Of Service Available
If you have such a service contract and your instrument fails during the covered period, Agilent Technologies will repair or replace it in accordance with the contract. Obtaining Repair Service (Worldwide) To obtain service for your instrument (in–warranty, under service... -
Page 108: Repackaging For Shipment
Disassembly and Repair Repackaging for Shipment If the unit is to be shipped to Agilent for service or repair, be sure to: • Attach a tag to the unit identifying the owner and indicating the required service or repair. Include the model number and full serial number. -
Page 109: To Replace The Power Line Fuse
The multimeter is shipped from the factory with a power–line fuse installed. The supplied fuse is a time- lag, low- breaking, 0.2A/ 250V, 5x20mm fuse, Agilent part number 2110- 1395. If you determine that the fuse is faulty, replace it with one of the same size and rating. -
Page 110: To Replace A Current Input Fuse
1.2A input terminal is located on the front panel (see page 15). The fuse is a 1.25A, 500V fuse, Agilent part number 2110- 1394. If you determine that the fuse is faulty, replace it with one of the same size and rating. -
Page 111: Self-Test Errors
AC path attenuated 1000 and amplified 10 error Frequency measurement path failed Constant Current 0.2V/1kohm error Constant Current 0.2V/10kohm or amplification of 11 error Constant Current 0.8V/100kohm or amplification of 11 error Constant Current 1V/1.1Mohm or amplification of 11 error 34405A User’s and Service Guide... -
Page 112: Electrostatic Discharge (Esd) Precautions
• Use a conductive wrist strap to reduce static charge accumulation. • Minimize handling. • Keep replacement parts in original static–free packaging. • Remove all plastic, foam, vinyl, paper, and other static–generating materials from the immediate work area. • Use only anti–static solder suckers. 34405A User’s and Service Guide... -
Page 113: Mechanical Disassembly
General Disassembly 1 Remove power and all cables from the instrument. 2 Remove the carrying handle by rotating the handle upright and pulling out from the sides of the instrument. 34405A User’s and Service Guide... - Page 114 3 Remove the instrument bumpers. Pull from a corner and stretch the bumpers off the instrument. 4 Remove the rear bezel. Loosen the two captive screws in the rear bezel and remove the rear bezel. 34405A User’s and Service Guide...
- Page 115 6 Remove on/off switch push rod. Gently move the power switch push rod toward the front of the instrument to disengage it from the switch. Be careful not to twist or bend the push rod. 34405A User’s and Service Guide...
- Page 116 Disassembly and Repair 7 Remove the two screws holding the front panel. 8 Disconnect the two ribbon cable connectors from the front panel. 34405A User’s and Service Guide...
- Page 117 Disassembly and Repair 9 Disconnect the individual front panel wires shown below. 10 There is now enough play to allow the side of the front panel to be pried from the chassis and removed as an assembly. 34405A User’s and Service Guide...
- Page 118 1 Remove the keyboard and display assembly. Using a flat blade screwdriver, gently pry up on the circuit board tab (shown below) and slide the board to disengage from the tabs. Lift the keyboard and display assembly from the plastic housing. Slide 34405A User’s and Service Guide...
- Page 119 Disassembly and Repair a The rubber keypad can now be pulled from the plastic housing. 34405A User’s and Service Guide...
-
Page 120: Replaceable Parts
To order replaceable parts from Agilent, do the following: 1 Contact your nearest Agilent Sales Office or Service Center. 2 Identify the parts by the Agilent part number shown in the replaceable parts list. 3 Provide the instrument model number and serial number. -
Page 121: Rack Mounting
1 /2 Digit Multimeter To rack mount two instruments side- by- side, order lock- link kit 5061- 9694 and flange kit 5063- 9212. 34405A 34405A Agilent Agilent 1 /2 Digit Multimeter 1 /2 Digit Multimeter 34405A User’s and Service Guide... - Page 122 Disassembly and Repair 34405A User’s and Service Guide...
-
Page 123: Specifications
Agilent 34405A 5 ½ Digit Multimeter User’s and Service Guide Specifications DC Specifications AC Specifications Temperature and Capacitance Specifications Operating Specifications Supplemental Measurement Specifications General Characteristics This chapter describes the multimeter’s specifications and operating specifications. Agilent Technologies... - Page 124 Specifications These specifications apply when using the 34405A multimeter in an environment that is free of electromagnetic interference and electrostatic charge. When using the multimeter in an environment where electromagnetic interference or significant electrostatic charge is present, measurement accuracy may be reduced. Particularly note: •...
-
Page 125: Dc Specifications [1]
0.25+0.005 0.0250+0.0005 100.000MΩ 205nA||10MΩ 2.00+0.005 0.3000+0.0005 DC Current 10.0000mA <0.2V 0.05+0.015 0.0055+0.0005 100.000mA <0.2V 0.05+0.005 0.0055+0.0005 1.00000A <0.5V 0.20+0.007 0.0100+0.0005 10.0000A <0.6V 0.25+0.007 0.0150+0.0005 Continuity 1000Ω 0.83mA 0.05+0.005 0.0050+0.0005 Diode Test 1.0000V 0.83mA 0.05+0.005 0.0050+0.0005 34405A User’s and Service Guide... -
Page 126: Ac Specifications [1]
0.18+0.003 0.005 <20Hz 0.04+0.003 0.005 [11] 20Hz - 100kHz 0.02+0.003 0.005 [12] 100kHz - 300kHz 0.02+0.003 0.005 [17] 10.0000 mA to 10.0000 A <2Hz 0.18+0.003 0.005 <20Hz 0.04+0.003 0.005 [16] 20Hz - 10kHz 0.02+0.003 0.005 34405A User’s and Service Guide... -
Page 127: Temperature And Capacitance Specifications [1]
[14] For input < 200V rms. [15] For input < 300V rms. [16] For 20Hz - 10kHz, the sensitivity is AC input current from 10% to 120% of range except where noted. [17] Minimum measured frequency is 1 Hz. 34405A User’s and Service Guide... -
Page 128: Operating Specifications
[4] Time to automatically change one range and to take at least one reading using SCPI “CONF AUTO” and “READ?” commands. [5] Number of measurements per second that can be read through USB using SCPI “ READ?” command. [6] Reading rate depends on signal frequency >10Hz. 34405A User’s and Service Guide... -
Page 129: Supplemental Measurement Specifications
• Shunt Resistance: • 0.1Ω to 10Ω for 10mA to 1.2A ranges • 0.01Ω for 12A range • Input Protection: • Front Panel 1.25A, 500V fuse for I terminal • Internal 15A, 600V fuse for 12A terminal 34405A User’s and Service Guide... - Page 130 • NMR (Normal Mode Rejection) For 60 Hz (50 Hz) ± 0.1% • 5½ digits 65 dB (55 dB) • 4½ digits 0 dB AC Voltage • Measurement Method: • AC coupled true-rms - measure the AC component with up to 400 VDC bias any range 34405A User’s and Service Guide...
- Page 131 10% of range to full scale input on all ranges • Auto or manual range selection • Gate Time: • 0.1 second or 1 period of the input signal, whichever is longer. • Input Protection: • 750V rms on all ranges (HI terminal) 34405A User’s and Service Guide...
- Page 132 Math Functions • Null, dBm, dB, Min/Max/Avg, Hold, Limit Test Triggering and Memory • Single trigger, 1 reading memory Remote Interface • USB 2.0 full speed, USBTMC-USB488 device class Programming Language • SCPI, IEEE-488.1, IEEE-488.2 34405A User’s and Service Guide...
-
Page 133: General Characteristics
CISPR 11:2003 / EN 55011:2007 Group 1 Class A • Canada: ICES-001:2004 • Australia/New Zealand: AS/NZS CISPR 11:2004 Shock and Vibration • Tested to IEC/EN 60086-2 Dimension (HxWxD) • Rack: 88.5mm x 212.6mm x 272.3mm 34405A User’s and Service Guide... - Page 134 Specifications Table 30 General Characteristics • Bench: 103.8mm x 261.1mm x 303.2 mm Weight • 3.75 kg (8.27 lb.) approximate Warm Up Time • 30 minutes Warranty • 3 years 34405A User’s and Service Guide...
-
Page 135: To Calculate Total Measurement Error
• If you are operating the multimeter outside the temperature range specified, apply an additional temperature coefficient error. • For AC voltage and AC current measurements, you may need to apply an additional low frequency error or crest factor error. 34405A User’s and Service Guide... -
Page 136: Accuracy Specifications
This is a common temperature range for many operating environments. You must add additional temperature coefficient errors to the accuracy specification if you are operating the multimeter outside the ± 5 °C temperature range (the specification is per °C). 34405A User’s and Service Guide... -
Page 137: Configuring For Highest Accuracy Measurements
– enabled to ensure proper full scale range selection. • Select 5½ digits. • Null the test lead resistance for 2 wire ohms measurements, and to – remove any interconnection offset for DC voltage measurements. 34405A User’s and Service Guide... - Page 138 Specifications 34405A User’s and Service Guide...
-
Page 139: Index
Bus Triggering, Frequency Measurements DC Accuracy, Errors In, DC Characteristics, Front Panel DC Current Adjustments, Gain Adjustment Procedure, Calculate Total Measurement Error, At a Glance, Gain Verification Test, Unsecuring, DC Current Measurements Errors In, 34405A User’s and Service Guide... - Page 140 Ohms Gain Verification Test, Manual Part Number, Recalling a Stored a State, Operating Characteristics, Math Annunciators, Recommended Test Equipment, Operating Checklist, Math Operations, Remote Operation, Operating Environment, Math Operations and the Secondary Repackaging for Shipment, Display, Measurement Category, 34405A User’s and Service Guide...
- Page 141 Transfer Accuracy, UtitY, Storage Compliance, StorE, Storing a State, Storing and Recalling Instrument Valid Gain Adjustment Input Values, States, Verification Tests, Supplemental Measurement Verification Tests Overview, Characteristics, Warm Up Period, Calibration, Technology Licenses, Warm Up Time, 34405A User’s and Service Guide...
- Page 142 Index 34405A User’s and Service Guide...
- Page 143 (tel) 0800 047 866 (fax) 0800 286 331 Other Asia Pacific Countries: (tel) (65) 6375 8100 (fax) (65) 6755 0042 Or visit Agilent World Wide Web at: www.agilent.com/find/assist Product specifications and descriptions in this document are subject to change without notice. Always refer to Agilent Web site for the latest revision.