Table of Contents
Advertisement
Quick Links
WARNING:
Improper installation, adjustment, alteration, service or
maintenance can cause injury or property damage. Refer to
this manual. For assistance or additional information consult
an authorized installer, service agency or the gas supplier.
FOR YOUR SAFETY
Do not store or use gasoline or other fl ammable vapours and
liquids in the vicinity of this or any other appliance.
Installation and service must be performed by an authorized
installer, service agency or the gas supplier.
Tested by:
918-527
www.Regency-fi re.com
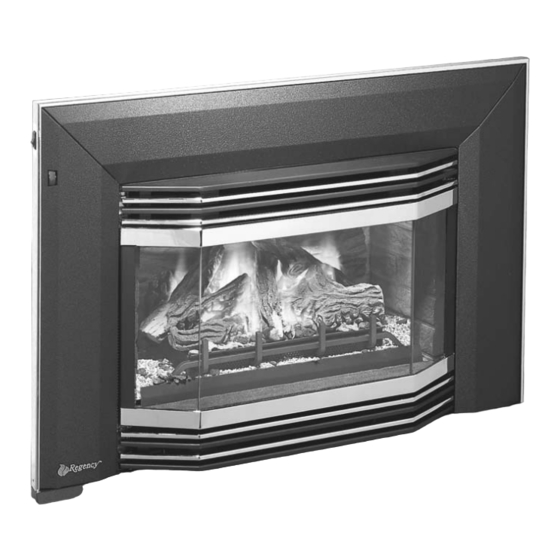
U32 Gas Insert
MODELS: U32-NG4 Natural Gas U32-LP4 Propane
Installer: Please complete the details on the back cover
and leave this manual with the homeowner.
Homeowner: Please keep these instructions for future reference.
FPI FIREPLACE PRODUCTS INTERNATIONAL LTD. 6988 Venture St., Delta, BC Canada, V4G 1H4
www.Hampton-fi re.com
FOR YOUR SAFETY
What to do if you smell gas:
Do not try to light any appliance
Do not touch any electrical switch:
do not use any phone in your
building.
Immediately call your gas supplier
from a neighbour's phone. Follow
the gas supplier's instructions.
If you
supplier, call the fi re department.
www.Palace-fi re.com
Owners &
Installation Manual
cannot reach your gas
TM
07/17/06
Advertisement
Table of Contents

Related Manuals for FPI U32-LP4


Summary of Contents for FPI U32-LP4
- Page 1 Tested by: Installer: Please complete the details on the back cover and leave this manual with the homeowner. Homeowner: Please keep these instructions for future reference. 918-527 FPI FIREPLACE PRODUCTS INTERNATIONAL LTD. 6988 Venture St., Delta, BC Canada, V4G 1H4 07/17/06...
- Page 2 The FPI Gas Insert Series of hand crafted appliances has been designed to provide you with all the warmth and charm of a fi replace, at the fl ick of a switch. The models U32-NG4 and U32-LP4 of this series have been approved by Warnock Hersey for both safety and effi...
-
Page 3: Table Of Contents
® The Kensington Front Installation ......21 ® The Kensington 2-panel Door Installation ....22 ® The Kensington 3-panel Door Installation ....23 Optional Wall Thermostat ...........23 Optional Remote Control ..........23 Final Check ..............23 Wiring Diagrams ............24 U32-4 FPI Direct Vent Gas Insert... -
Page 4: Safety Label
SAFETY LABEL This is a copy of the labels that accompany each U32-4 Gas Insert. We NOTE: FPI units are constantly being improved. Check the label have printed a copy of the contents here for your review. The safety label... -
Page 5: Requirements
(e) A copy of all installation instructions for all Product Approved side wall horizontally vented gas fueled equipment, all venting instructions, all parts lists for venting instructions, and/or all venting design instructions shall remain with the appliance or equipment at the completion of the installation. U32-4 FPI Direct Vent Gas Insert... -
Page 6: Installation
The appliance must be isolated from the gas the National Fuel Gas Code ANSI Z223.1 in supply piping system by closing its individual The FPI Gas Insert must be installed in the U.S.A. This appliance should be installed manual shut off valve during any pressure accordance with these instructions. -
Page 7: Installation Checklist
System"). 8) Install standard and optional features. Refer The minimum fi replace clearances & dimensions to the following sections: for the FPI gas insert are shown in the following diagrams: a. Brick Panel b. Lot Set c. Faceplate & Trim d. -
Page 8: Gas Connection
8) Connect the marked end of the liner to System (923GK adapter and 991 high-wind the inlet collar of the vent connector plate cap). marked with an "I", seal connection with high temperature silicone. Secure with gear clamp. U32-4 FPI Direct Vent Gas Insert... -
Page 9: Gas Pipe Pressure Testing
Note: To properly check gas pressure, both Note: Aeration Adjustment should only inlet and manifold pressures should be performed by an authorized FPI be checked using the valve pressure Installer at the time of installation or ports on the valve. -
Page 10: Log Set Installation
F)02-48 Logs A)02-43, C)02-56, Vermiculite Vermiculite Vermiculite and B)02-45 in position and embers. and embers. and embers. B)02-45 Notch Bracket U32-4 FPI Direct Vent Gas Insert... -
Page 11: Regency Faceplate & Trim Installation
10) Attach the faceplate panels to the insert body using the 4 remaining black screws. 4) Place the trim on the assembled faceplate panels, aligning the wire connections from U32-4 FPI Direct Vent Gas Insert... -
Page 12: Standard Flush Door
1) The top louver is held in place by friction fi t, piece, then attach trim to the top and bottom if the louver needs to be adjusted; bend the of Flush door. bracket out as shown in the diagram. Diagram 1a Diagram 1b U32-4 FPI Direct Vent Gas Insert... -
Page 13: Optional Bay Door
Bay door. 3) Slide the valve extension knobs onto the valve knobs. Match each extension knob with the corresponding valve knob. Extension knobs are for Bay Front installations only. U32-4 FPI Direct Vent Gas Insert... -
Page 14: Conversion Kit #514-969 From Ng To Lp
Burner Tray to the left, and lift off. Remove the louvers (and bay door if it is installed). Open the fl ush door and remove the door. Remove the logs and embers (if used). U32-4 FPI Direct Vent Gas Insert... -
Page 15: Installation Of The Dc Sparker
"LPG" label. Fig.4 24) Install the 3/4" nylon plug to cover up the hole on the mounting bracket. WARNING! Do not over tighten the screw. Recommended to grip the wrench by the short side. U32-4 FPI Direct Vent Gas Insert... - Page 16 38) Check operation of fl ame control. 39) Check for proper fl ame appearance and glow on logs. NOTE: The battery in the DC Sparker Box will need to be replaced an- nually. U32-4 FPI Direct Vent Gas Insert...
-
Page 17: Full Screen Doors
Bracket and slide under unit. Unit should touch tabs on Bottom Trim Bracket. Inside fl ange of Side Trim goes over the inner side of the unit fl ange. Push in Corners Bottom Trim Bracket U32-4 FPI Direct Vent Gas Insert... - Page 18 6) The Top Frame is held in place by friction fi t, if the frame needs to be adjusted; bend the bracket accordingly. Top Frame U32-4 FPI Direct Vent Gas Insert...
-
Page 19: Hampton Cast Faceplate Installation
4) Use a measuring tape to ensure that the distance between the left ensure that the wires do not touch the side of the unit. and right side pieces is 28" (711mm). 28" 10) The power cord should be run behind the faceplate panel. U32-4 FPI Direct Vent Gas Insert... -
Page 20: Hampton Cast Grill Installation
12) To put on the Hampton logo, peel the sticker from the back of the logo and place it centered on the bottom left hand corner of the faceplate. Left Side ® Hampton Logo Faceplate U32-4 FPI Direct Vent Gas Insert... -
Page 21: The Kensington Front Installation
The power cord should be run behind the faceplate panel. Left Side Shown Screws 3) Slide the Tabs on the Blanking Plate into the slots located on Front and secure using 2 screws. Blanking Plate Tabs Kensington ® Front Blanking Plate Screw Screw U32-4 FPI Direct Vent Gas Insert... -
Page 22: The Kensington 2-Panel Door Installation
The spacer is to be placed over the bottom pin before installing the Screen Door. 2) Mount the 2-panel Door Frame to the fl ange on Sub-Frame, ensuring to line up holes. Secure using the 6 screws provided. Spacer U32-4 FPI Direct Vent Gas Insert... -
Page 23: The Kensington 3-Panel Door Installation
fi ring A wall thermostat may be installed if desired, correctly. This includes: follow the wiring diagram below. FPI offers an optional programmable thermostat but any 1) Install the Sub-Frame by hooking the top... -
Page 24: Wiring Diagrams
This appliance is equipped with a three pronged (grounding) plug for your protection against shock hazard and should be plugged directly into a properly grounded three- prong receptacle. Do not cut or remove the grounding prong from this plug. U32-4 FPI Direct Vent Gas Insert... - Page 25 INSTALLATION PROPANE Units and Units Equipped with DC Spark Boxes* *For installation of the DC Spark Box refer to the LP Conversion instructions in this manual. U32-4 FPI Direct Vent Gas Insert...
-
Page 26: Operating Instructions
FIRST FIRE Blower: Only when the pilot holds, without pressure FPI gas appliances use high tech blowers to being applied to the control knob, reapply the push heated air farther into the room. It is not The fi rst fi re in your stove is part of the paint tension springs to the door. -
Page 27: Maintenance Instructions
DO NOT REMOVE THIS INSTRUCTION PLATE 918-474a resistant paint (not with wall paint). FPI uses StoveBrite Paint - Metallic Black #6309. 6) Each time the appliance is lit, it may cause... -
Page 28: Maintenance
DOOR GLASS immediately. Incorrect fl ame pattern will have small, probably Your FPI insert is supplied with high temperature, yellow fl ames, not coming into proper contact 2) Remove the Termination Cap, and shine a 5 mm Neoceram ceramic glass that will withstand with the rear of the burner or thermopile. -
Page 29: Fan Maintenance
Wiring errors can cause improper and Seal fan access panel using high temperature silicone (sparingly). dangerous operation. Verify proper 9) Remove the Fan Air Duct by loosening the operation after servicing. 3 screws, squeeze the sides together to remove. U32-4 FPI Direct Vent Gas Insert... -
Page 30: Valve Replacement
3) Reconnect the "gas out" fl are nut with a . 13/16" wrench. 16) Fire up the unit again and check for proper 4) Reconnect the quick drop out thermocouple fl ame appearance and glow on logs. nut with a 9mm wrench. U32-4 FPI Direct Vent Gas Insert... -
Page 31: Parts List
- Herringbone Brown 422-904 Brick Panel Set - Herringbone Red 33) * Brick Panel - Right Side 34) * Brick Panel - Left Side 35) * Brick Panel - Back 36) 400-090 Brick Clip U32-4 FPI Direct Vent Gas Insert... -
Page 32: Burner Assembly & Log Set
Burner Assembly (NG/LP) 73) * Log Tray Mount Bracket 74) * Log Tray Rear 90) 910-421 Pilot ON/OFF 3" (SIT) Extension Knob 91) 910-422 HI/LOW 3" (SIT) Extension Knob *Not available as a replacement part. U32-4 FPI Direct Vent Gas Insert... -
Page 33: Bay & Flush Front Assembly
135) 940-307/P Flush Glass 137) 904-691 U Clip 139) 936-155 Tadpole Glass Gasket 149) 420-932 Flush Trim Top/Btm (Set) -Gold 422-943 Double Screen Door (Optional) 171) 512-546 Door Latch Assembly 173) 430-133 Handle 904-712 U-clip for frame U32-4 FPI Direct Vent Gas Insert... -
Page 34: Faceplate Assembly
HE RE 144) * Mounting Bracket - Right CUSTOM FACEPLATES FRONT VIEW 145) * Filler Bracket CUSTOM FACEPLATES 146) * Mounting Bracket - Left REAR VIEW 147) * Screw #8 x 3/4" Pan Head U32-4 FPI Direct Vent Gas Insert... -
Page 35: Hampton Cast - Faceplate Assembly
195) Hampton ® Logo Plate 207) 402-981** Cast Grill (Set) - Top & Bottom *Not available as a replacement part. ** Last digit of part number represents colour: 1=Black Metallic, 5=Enamel Brown, 6=Enamel Black U32-4 FPI Direct Vent Gas Insert... - Page 36 NOTES ___________________________________________________ ___________________________________________________ ___________________________________________________ ___________________________________________________ ___________________________________________________ ___________________________________________________ ___________________________________________________ ___________________________________________________ ___________________________________________________ ___________________________________________________ ___________________________________________________ ___________________________________________________ U32-4 FPI Direct Vent Gas Insert...
- Page 37 NOTES ___________________________________________________ ___________________________________________________ ___________________________________________________ ___________________________________________________ ___________________________________________________ ___________________________________________________ ___________________________________________________ ___________________________________________________ ___________________________________________________ ___________________________________________________ ___________________________________________________ ___________________________________________________ U32-4 FPI Direct Vent Gas Insert...
- Page 38 NOTES ___________________________________________________ ___________________________________________________ ___________________________________________________ ___________________________________________________ ___________________________________________________ ___________________________________________________ ___________________________________________________ ___________________________________________________ ___________________________________________________ ___________________________________________________ ___________________________________________________ ___________________________________________________ U32-4 FPI Direct Vent Gas Insert...
-
Page 39: Warranty
Conditions: Any part or parts of this unit which in our judgement show evidence of such defects will be repaired or replaced at FPI's option, through an accredited distributor or agent provided that the defective part be returned to the distributor or agent Transportation Prepaid, if requested. - Page 40 Installer: ___________________________________________________________ Phone #: ___________________________________________________________ Date Installed: ______________________________________________________ Serial No.: __________________________________________________________ ® ® ® FPI, Regency , Hampton and Palace are trademarks of FPI Fireplace Products International Printed in Canada © Copyright 2006, FPI Fireplace Products International Ltd. All rights reserved.