Advertisement
Table of Contents
- 1 Before You Begin
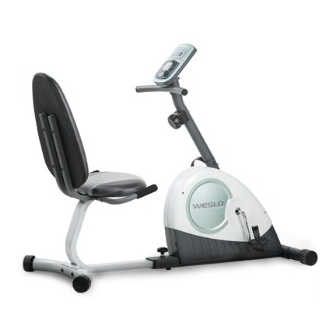
- 2 Product View
- 3 Assembly
- 4 To Adjust Seat Frame
- 5 Features of the Console
- 6 To Adjust Pedaling Resistance
- 7 How to Use Manual Mode
- 8 To Use Pace Workout
- 9 Battery Replacement
- 10 To Adjust Reed Switch/Belt
- 11 Exercise Intensity/Frequency
- 12 Workout Guidelines
- 13 Exploded Drawing
- Download this manual
Advertisement
Table of Contents

Related Manuals for Weslo PURSUIT CT 3.8R


Summary of Contents for Weslo PURSUIT CT 3.8R
- Page 1 Model No. 83t.2t8tt.0 BIKE EXERCISER Serial No. User's Manual Write the serial number in the space above for reference. Serial Number Decal • Assembly • Operation • Maintenance • Part List and Drawing Sears, Roebuck and Co., Hoffman Estates, IL 60179...
- Page 2 TABLE OF CONTENTS WARNING DECAL PLACEMENT .............. IMPORTANT PRECAUTIONS ..............BEFORE YOU BEGIN ..............ASSEMBLY ................HOW TO USE THE EXERCISE CYCLE ............MAINTENANCE AND TROUBLESHOOTING ........... EXERCISE GUIDELINES ..............PART LIST ................EXPLODED DRAWING ..............ORDERING REPLACEMENT PARTS ..........Back Cover 90 DAY FULL WARRANTY ............
- Page 3 IMPORTANT PRECAUTIONS...
-
Page 4: Before You Begin
BEFORE YOU BEGIN Congratulations for selecting the new WESLO ® after reading this manual, please see the back cover PURSUIT CT 3.8 R exercise cycle. Cycling is one of of this manual. To help us assist you, note the product... -
Page 5: Assembly
ASSEMBLY Assembly requires two persons. Place all parts of the exercise cycle in a cleared area and remove the pack- ing materials. Do not dispose of the packing materials until assembly is completed. In addition to the included tools, assembly requires a Phillips screwdriver _-_, two adjustable wrenches Q_,... - Page 6 Turn the Front Stabilizer (2) so that the large holes are facing the Frame (1). Attach the Front Stabilizer to the Frame with two M10 x 60mm Button Screws (33). Holes Attach the Rear Stabilizer (6) to the Seat Frame (5) with two M10 x 75ram Carriage Bolts (30) and two M10 Locknuts (65).
- Page 7 Attach the Left and Right Seat Brackets (14, 15) to the Seat Frame (5) with two M8 x 125mm Bolts (62), four M8 Washers (54), and two M8 54 10 54 10 Locknuts (10) as shown. Do not tighten Locknuts yet.
- Page 8 Attach the Seat (12) to the Seat Brackets (14, 15) with four M6 x 35mm Button Screws (61) and four M6 Washers (68). While another person holds the Upright (13) in the position shown, connect the Extension Wire (52) to the Reed Switch Wire (43). Next, con- nect the Resistance Cable (19) to the Lower Avoid pinching the Cable (45) in the following way:...
- Page 9 Attach the Handlebar (53) to the Upright (13) with two M8 x 65mm Button Bolts (72), two M8 Curved Washers (46), and two M8 Locknuts (10). 10. The Console (16) requires four "AA" batteries (not included); alkaline batteries are recom- mended.
- Page 10 12. Identify the Left Pedal (24), which is marked with an "L" sticker. Using an adjustable wrench, firmly tighten the Left Pedal counterclockwise into the left arm of the Crank (21). Tighten the Right Pedal (not shown) clockwise into the right arm of the Crank.
-
Page 11: To Adjust Seat Frame
HOW TO USE THE EXERCISE CYCLE HOW TO ADJUST THE SEAT FRAME FEATURES OF THE CONSOLE For effective exercise, the seat should be in the proper position. As you pedal, there should be a slight bend SCAN PULSE CALORIES in your knees when the pedals are in the most forward position. -
Page 12: How To Use Manual Mode
HOW TO USE THE MANUAL MODE When you turn on the console, the Indicators Turn on the console. scan mode will be selected automat- To turn on the console, press the On/Reset button ically. One indica- or begin pedaling. The entire display and the pace tor will appear below the word guide will light for a moment;... -
Page 13: To Use Pace Workout
HOW TO USE A PACE WORKOUT Measure your heart rate if desired. 1. Turn on the console. To measure your SCAN PULSE CALORIES heart rate, stop ,33M pedaling See step 1 on page 12. place your thumb on the Select a pace workout. pulse sensor. -
Page 14: Battery Replacement
MAINTENANCE AND TROUBLESHOOTING HOW TO ADJUST THE BELT Inspect and tighten all parts of the exercise cycle reg- ularly. Replace any worn parts immediately. If you can feel the pedals slip while you are pedaling, To clean the exercise cycle, use a damp cloth and a even when the resistance is at the highest level, the small amount of mild detergent. -
Page 15: Exercise Intensity/Frequency
EXERCISE GUIDELINES Burning Fat--To burn fat effectively, you must exer- cise at a low intensity level for a sustained period of time. During the first few minutes of exercise, your body uses carbohydrate calories for energy. Only after the first few minutes of exercise does your body begin to use stored fat calories for energy. - Page 16 SUGGESTED STRETCHES The correct form for several basic stretches is shown at the right. Move slowly as you stretch--never bounce. 1. Toe Touch Stretch Stand with your knees bent slightly and slowly bend forward from your hips. Allow your back and shoulders to relax as you reach down toward your toes as far as possible.
- Page 17 NOTES...
- Page 18 PART LIST-- Model No. 831.21 811.0 R0608A Key No. Qty. Description Key No. Qty. Description Frame Magnet Front Stabilizer Flywheel Axle Left Shield Cover M10 Small Washer Front Stabilizer Cap M4 x 25mm Screw Seat Frame M8 Split Washer Rear Stabilizer Reed SwitchANire Seat Handle Cap Crank Bearing Set...
-
Page 19: Exploded Drawing
EXPLODED DRAWING-- Model No. 831.21 811.0 R0608A... - Page 20 For Sears professional installation of home appliances and items like garage door openers and water heaters. 1-800-4-MY-HOME ® (1-800-469-4663) Call anytime, day or night (U.S.A. and Canada) www.sears.com www.sears.ca Our Home For repair of carry-in items like vacuums, lawn equipment, and electronics, call or go on-line for the location of your nearest...