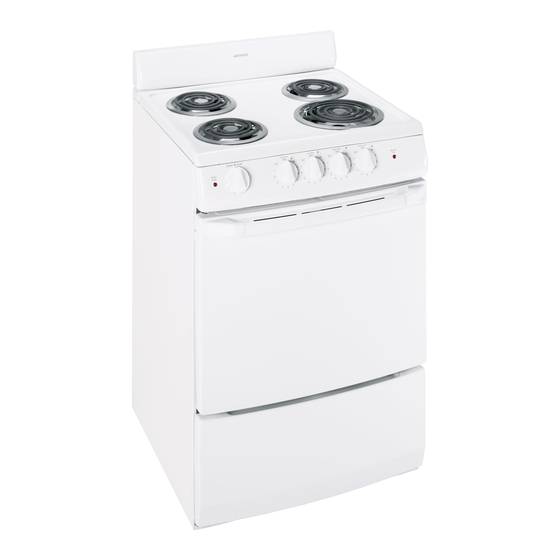
Hotpoint RA720 Owner's Manual & Installation Instructions
20" and 24" compact electric ranges
Hide thumbs
Also See for RA720:
- Owner's manual and installation instructions (24 pages) ,
- Owner's manual and installation manual (56 pages) ,
- Owner's manual and installation instructions (24 pages)
Table of Contents
Advertisement
Available languages
Available languages
Quick Links
GEAppliances.corn
0
01
0
-
0
Safety
Instructions
........
2-e
Operating
Instructions
Oven .........................
8-11
Surface
Units ....................
7
Care
and Cleaning
Aluminum
Foil ....................
8
Cooktop ....................
12, iS
Knobs ..........................
14
Oven Door ......................
13
Oven Heoting Elements ..........
13
Oven Interior ....................
14
Painted Surfoces ................
14
Shelves .........................
12
Surfoce Units end Drip Pens .....
12
Installation
Instructions
Anti-Tip Device ..............
15, 21
Dimensions
end Cleoronces .....
16
Electricol Connections ........
17-20
Flooring .........................
16
Leveling ........................
22
Preparation
.....................
16
Tools You Will Need .............
16
Troubleshooting
Tips .......
23
Accessories
..................
24
Consumer
Support
Consumer
Support
.....
Back Cover
Warranty
.......................
27
HOTPOINT
RA 720
RA 724
RA820
RA824
For e Spanish
version
of this
manual,
visit our Website
at
GEAppliances.com.
Para consulter
una
version
en espafiol
de este
manual
de instrucciones,
visite
nuestro
sitio
de internet
GEAppliances.com.
Write the model
and serial
numbers
here:
Model #
Serial #
You cGn find them on G IGbel under
the cooktop. See the
Lift-Up Cooktop section in this
mGnuGIfor instructions on how
to lift the cooktop.
49-88053-1
04-12 GE
Advertisement
Table of Contents

Related Manuals for Hotpoint RA720


Summary of Contents for Hotpoint RA720
- Page 1 GEAppliances.corn HOTPOINT ..Safety Instructions Operating Instructions Oven ......8-11 RA 720 Surface Units ....RA 724 RA820 Care and Cleaning RA824 Aluminum Foil ....Cooktop ....12, iS Knobs ......Oven Door ...... Oven Heoting Elements ..Oven Interior ....
-
Page 2: Important Safety Information
IMPORTANT SAFETY INFORMATION. READ ALL INSTRUCTIONS BEFORE USING. [A WARNING j Read all safety instructions before using the product. Failure to follow these instructions may result in fire, electric shock, serious injury or death. ANTI-TIP DEVICE To reduce the risk of tipping the range, the range must be secured Tip-Over Hazard by a properly installed anti-tip... - Page 3 GEAppliances.com IA WARNING 1GENERALSAFETY INSTRUCTIONS iiiil}i Use this appliance for its intended purpose as described Do not touch the surface units, the heating elements in this Owner's Manual. or the interior surface of the oven. These surfaces may be hot enough to burn even though they are dark in Be sure your appliance is properly installed and color.
- Page 4 IMPORTANT SAFETY INFORMATION. READ ALL INSTRUCTIONS BEFORE USING. [A WARNING 1IN THE EVENT OF A FIRE, TAKE THE FOLLOWING STEPS TO PREVENT THE FIRE FROM SPREADING: *:, Do not use water on grease fires. Never pick up a If there is a fire in the oven during self-clean, turn the flaming pan.
- Page 5 GEAppliances.com IAWARNING I RADIANT COOKTOPSAFETYINSTRUCTIONS (Some models) iiiil}i Use care when touching the cooktop. The glass surface Use CERAHA BRYTE ® ceramic Cooktop Cleaner and of the cooktop will retain heat after the controls have CERAHA BRYTE ® Cleaning Pad to clean the cooktop. been turned off.
- Page 6 IMPORTANT SAFETY INFORMATION. REAo ALL I NSTRUCTIONS BEFORE USING. JAWARNING ovEN S aFm INStRUCtIONS ISELF-CLEaNING (Some models) The self-cleaning feature operates the oven at temperatures high enough to burn away food soils in the oven. Follow these instructions for safe operation. If the self-cleaning mode malfunctions, turn the oven Before operating the self-clean cycle, remove pans, shiny metal oven racks and other utensils from the...
-
Page 7: Using The Surface Units
Using the surface units, GEApUi°nces.c Throughout this manual, features and appearance may vary from your model. Surface Cooking Controls Your surface units and controls are designed to In a quiet kitchen, you may hear slight clicking giveyou a variety of heat settings for surface sounds during cooking, indicating heat settings unit cooking. -
Page 8: Using The Oven
Using the oven. TheOVENTEMPknob is located on the control panel on the front oft:he range. Oven Temperature Control OVEN ®TEMP To use the oven, simply turn the knob to the TheOven CyclingLight glows until the oven reachesyour selectedtemperature, then goes desired cooking temperatures, which are off and on with the oven unit(s)during cooking. - Page 9 Using the oven for baking or roasting. GEAppliances.c To avoid possible burns, place the shelves in the desired position before you turn the oven on. How to Set Your Oven for Baking or Roasting Placefood in oven on center of shelf. Allow Positionthe shelf or shelves in the oven.
-
Page 10: The Type Of Margarine Will Affect Baking Performance
Adjust the oven thermostat--Easy to do yourself! You may find that your new oven cooks differently than the one it replaced. Use your new oven for a few weeks to become more familiar with it. If you still think your new oven is too hot or too cold, you can adjust the thermostat yourself. Do not use thermometers, such as those found in grocery stores, to check the temperature setting of your oven. - Page 11 Using the oven for broiling. GEApUia ces.c Broiling may be slightly different from any previous broiling you may be acquainted with, so be sure to read this section completely. How to Set Your Oven for Broiling Broiling is cooking food by intense radiant heat Placethe shelf in position C for most from the upper element in the oven.
-
Page 12: Care And Cleaning Of The Range
Care and cleaning of the range, Be sure electrical power is off and all surfaces are cool before cleaning any part of the range. Proper care and cleaning are important so your range will give you efficient and satisfactory service. Follow these directions carefully in caring for your range to assure safe and proper maintenance. - Page 13 GEAppliances.com Lift-Up Cooktop Cleanthe area under the cooktop often. Built-up After cleaning underneath the cooktop with soil, especiallygrease, may catch on fire. hot, soapy water and a clean cloth, hold the cooktop up, return the prop rod to its storage To make cleaning easier, the cooktop may be position and lower the cooktop until it snaps lifted up and propped open.
- Page 14 Care and cleaning of the range, Control Knobs The knobs can be cleaned in a dishwasher or Thecontrol knobs may be removed Foreasier cleaning. they may also be washed with soap and water. Make sure the insides of the knobs are dry Make sure the knobs are in the OFFpositions before replacing.
- Page 15 I stallatio 20" and 24" Compact I struction Electric Ranges Questions? Call 800.GE.CARES 1800A32.2737) or Visit our Website at: GEAppliances.com BEFORE YOU BEGIN FOR YOUR SAFETY: Read these instructions completely and carefully. All rough-in and spacing dimensions must be met for safe use of your range.
-
Page 16: Installation
Installation Instructions PREPARETO INSTALL THE RANGE MATERIALS YOU MAY NEED PREPARE THE OPENING . Allow 2" spacing from the range to adjacent vertical walls above the cooktop surface. Allow 30" minimum clearance between the surface units and the bottom of unprotected wood or metal top cabinet, and 15" (UL Approved 40 AMP) minimum between the countertop and adjacent... -
Page 17: Electrical Connections
Installation Instructions ELECTRICAL CONNECTIONS ELECTRICAL REQUIREMENTS ELECTRICAL REQUIREMENTS (cont.) When installing an electric range in new A CAUTION: For personal safety, do not construction, follow Steps 3 and 5 for 4-wire use an extension cord with this appliance. connection. Remove house fuse or open circuit breaker You must use a 3-wire, single-phase A.C. -
Page 18: Power Cord And Strain Relief Installation
Installation Instructions ELECTRICAL CONNECTIONS (CONT.) For power cord installations only (see the POWER CORD AND STRAIN RELIEF next step if using conduit), assemble the strain INSTALLATION relief in the hole. Insert the power cord through the strain relief and tighten. Allow Remove the wire cover (on the lower back of enough slack to easily attach the cord the range) by removing its top center screw. - Page 19 Installation Instructions 3-WIRE POWER CORD 4-WIRE POWER CORD INSTALLATION INSTALLATION WA RN!NG: The n eutral wire WA RNING: The n eutral wire o fthe or ground of the power cord must be connected to the supplycircuit must be connectedto theneutral neutral terminal located in the center of the terminal located inthelowercenter ofthe terminal...
- Page 20 Installation Instructions ELECTRICAL CONNECTIONS (CONT.) 3-WIRE CONDUIT INSTALLATION 4-WIRE CONDUIT INSTALLATION Loosen the 3 lower terminal screws from the Loosen the three lower terminal screws from the terminal block. Insert the center bare wire (white/ terminal block. Remove the ground screw and neutral) tip through the bottom center terminal ground plate and retain them.
-
Page 21: Install The Range
Installation Instructions INSTALL THE RANGE LEVEL THE RANGE ANTI-TIP DEVICE INSTALLATION For proper cooking and baking, the range must be leveled. Leveling legs are located on each Tip-Over Hazard corner at the base of the range. • A child or adult can tip the range and be killed. - Page 22 Before You Call For Service... Troubleshooting Tips Save time and money! Review the chart on this page rst and you may not need to call for service. Problem Possible Causes What To Do Surface units not The surface units are .
- Page 23 Accessories. GEAppliances.com Looking For Something More? (Not all accessories are available for all models.) You can find these accessories and many more at GEAppliances.com (U.S.) or www.GEAppliances.ca (Canada), or call 800.626.2002 (U.S.) or 800.661.1616 (Canada) (during normal business hours). Have your model number ready. Grates Surface Burner Heads and Caps Surface Elements and Drip...
- Page 24 Notes.
- Page 25 GEAppliances.com...
- Page 26 Notes.
- Page 27 Electric Range Warranty. All warranty service provided by our Factory Service Centers, or an Staple your receipt here. authorized Customer Care ®technician. To schedule service, on-line, Proof of the original purchase date is needed to obtain service 24 hours a day, visit us at GEAppliances.com, or call 800.GE.CARE5 (800.432.2737).
- Page 28 Consumer Support. GEAppliances Website GEAppliances.com Have a question or need assistance with your appliance? Try the GEAppliances Website 24 hours a day, any day of the year! For greater convenience and faster service, you can now download Owner's Manuals, order parts or even schedule service on-line. ScheduleService GEAppliances.com Expert GErepair service is only one step away from your door.
- Page 29 GEAppliances.com HOTPOINT Instrucciones de Seguridad Instrucciones de Funcionamiento Homo ......8-11 RA 720 Unidades de Superficie .... RA 724 Cuidado y Aseo RA820 Papel de Aluminio ....RA824 Cubierta ...... 12, 15 Perillas ......Puerta de homo ....Elementos de calentamiento del homo .....
-
Page 30: Dispositivo Anti-Volcaduras
INFORNIACiON IMPORTANTE DE SEGURIDAD. LEA TODAS LAS INSTRUCCIONESANTES DE SU USO. ADVERTENCIA Lea todas las instrucciones de seguridad antes de utilizar este producto. No seguir estas instrucciones puede generar un incendio, una descarga el#ctrica, lesiones corporales o la muerte. DISPOSITIVO ANTI-VOLCADURAS Para reducir el riesgo de volcar la cocina, 6sta debe sujetarse mediante... - Page 31 GEAppliances.com ADVERTENCIA ] INSTRUCCIONES GENERALESDE 5EGURIDAD iii,Use este aparato s61ocon el objetivo para el que fue creado, 111, No toque las unidades de superficie, los elementos calentadores coma se describeen este Manualdel Propietario. o la superficie interior del homo. Estas superficies pueden estar Io suficientemente calientes para quemar a0n cuando tengan Aseg0resede que un t6cnico calificadorealiceuna correcta un color oscuro.
- Page 32 INFORNIACiON IMPORTANTE DE SEGURIDAD. LEA TODAS LAS INSTRUCCIONESANTES DE SU USO. [A ADVERTENCIA i EN CASODE INCENDIO,SIGA LOS SIGUIENTES PASOSPARAEVITAR LA PROPAGACIONDEL FUEGO: iii,No utilice agua en incendiosde grasa.Nunca levante una sart6n Sihay un incendioen el horno durante la auto-limpieza, en llamas.Apague los controles.Apague una sart6n en llamas apague el homo y esperea que el incendiose consuma.
- Page 33 GEAppliances.com IAADVERTENCIA INSTRUCCIONES DE SEGURIDAD DE LA ESTUFA RADIANTE mod o l Tenga cuidado al tocar la estufa. La superficie de vidrio de la Use el limpiador de estufas cer6micas CERAMA BRYTE ®y la esponjilla de limpieza CERAMA BRYTE ®para limpiar la estufa. estufa retendr6 calor despu6s de que los controles se hayan Esperehasta que la estufa se enfrie y la luz indicadora se apag ado.
- Page 34 INFORMACiON IMPORTANTE DE SEGURIDAD. LEA TODAS LAS INSTRUCCIONESANTES DE SU USO. I,_ADVERTENCIA j INSTRUCCIONES DE SEGURIDAD DEL HORNO AUTO-LIMPIANTE co_gunos mode/osl La caractefistica de auto-limpieza funciona en el homo a temperaturas Io suficientemente elevadas como para quemar los restos de alimentos que quedaron dentro del homo. Siga estas instrucciones para una operaci6n segura. Si el modo de auto-limpieza no funciona, apague el homo Antes de inicial el ciclo de autolimpieza remueva los sartenes, y desconecte el suministro de energ[a.
- Page 35 C6mo usar los quemadores superiores. A Io largo de este manual, las caracteristicas y la apariencia pueden variar de su modelo. Control de los Quemadores Superiores En una cocina con un funcionamiento Los quemadores superioresy las perillas para controlarlos estdn disehados para darle una tranquilo, es posible que escuche un ligero variedad de tangos de temperatura para chasquido que indique que las temperaturas...
- Page 36 Usando el homo. La perilla de tempemtura del homo se Iocaliza en el panel de control en el frente de la estufa. Perilla de Temperatura del Homo OVEN ®TEMP Gire esta perilla a la configuraci6n deseada. La luz indicadora de homo encendido parpadear6 hasta que el horno alcance la temperatura deseada, despu6s enciende y apagajunto con las resistencias del homo...
- Page 37 Usando el homo para asar y hornearo GEAppliances.c Para evitar posibles quemaduras, coloque las parrillas en la posici6n deseada antes de encender el homo. Como preparar su homo para hornear o asar Coloque la parrilla o parrillas en el homo. Coloque la comida en el centro de la Si cocina en dos parrillas al mismo tiempo, parrilla.
- Page 38 Ajustando el termostuto de homo- Hugulo usted! Puede clarse cuenta que su nuevo homo cocina diferente al que fue reemplazado. Use el nuevo homo par algunas semanas para familiarisarse con el..fi aun cree que su nuevo homo es demasiado caliente o demasiado frio, usted puede ajustar el termostato.
- Page 39 Usando el homo para asar. GEAppliances.com Asar a la parr@ puede set ligeramente diferente de caulquier asado a la parr@ con el que este familiarizado, segurese de leer esta secci6n completa. Para ajustar el homo para asar. Coloque la parrilla en la posicion C para la Asar es cocinar la comida con una radiacion intensa de calor de la resistenciasuperior del mayoria de los asados.
-
Page 40: Cuidado Y Limpieza De La Estufa
Cuidado y limpieza de la estufa. Asegurese de que la corriente electrica este apagada y todas las superficies esten frias antes de limpiar cualquier parte de la estufa. E! cuidado y limpieza apropiados son importantes para que su estufa le proporcione un servicio eficiente y satisfactorio, Siga estas instrucciones... - Page 41 GEAppliances.com Cubierta Abatible Limpie el drea debajo de la cubierta con levc_ntela, m ant6ngala en esta posici6n con regularidad. La suciedad acumulada, en especial ayuda de la varilla. la grasa, puede incendiarse. Despu6s de limpiar con aguajabonosa caliente Para facilitar el aseo, la cubierta puede y un trapo, detenga la cubierta, regrese la levantarse y abrirse, varilla a su posici6n de guardado y baje la...
- Page 42 Cuidado y limpieza de la estufa. Control Knobs Pare una limpieza mds sencilla,las perillas de Las perillas pueden limpiarse en el lavavajillas control pueden quitarse. o tambi6n pueden lavarse conjab6n y agua. AsegOresede que la parte interna de las Verifique que las perillas est6n en la posici6n perillas est6 seca antes de volver a colocarse.
- Page 43 Instrucciones ESTUFAS ELECTRICAS Instalaci6n COMPACTAS20"¥ 24" _LPreguntas? Uame a 800.GE.CARES {800.432.2737) o visite nuestra p6gina: www. GEAppJiances.com PaR SU SEGURIDAD: ADVERTENCIA Antes de Comenzar Para reducir el riesgo de quemaduras o incendios Leas estas instrucciones cuidadosamente. cuando se extienda el brazo sabre superficies calientes, .
- Page 44 Instrucciones d e Instoloci6n PARA INSTALAR EL APARATO. PREPARESE HERRAMIENTAS QUE NECESITAR/_ PREPARE LA APERTURA Permita 2" de espacio entre el aparato y paredes adyacentes por encima de la superficie de la cubierta. Permita 30" de espacio minimo entre las Taladro con broca de 1/8"...
-
Page 45: Conexiones Electricas
Instrucciones d e Instalaci6n CONEXIONES ELECTRICAS REQUISITOS ELI_CTRICOS (Cont.) REQUISITOS ELECTRICOS PRECAUCION: Para Deber6 usar un sistema de cable de Z fichas de S U seguridad, no utilice una extensi6n ei_ctrica con este fase simple y C.A.208Y/120 Voltios o 240/120 Voltios, 60 Hertz. - Page 46 Instrucciones d e Instalaci6n CONEXIONES ELECTRICAS (CONT.) INSTALACION DEL CABLE Y Solo pard instalaciones de cable (ve(] el siguiente paso si est6 us(]ndo tuba port(] cable (conduit), DISPOSITIVO PARA REDUCIR ens(]mble el reductor de tensi6n en el hueco. TENSION Inserte el cable (] troves del reductor de tensi6n y (]priete.
- Page 47 Instrucciones d e Instalaci6n INSTALACI6N DE CABLE DE 3 HILOS INSTALACI6N DE CABLE DE 4 HILOS ADVERTENCIA: ADVERTENCIA: El c able neutro Elhilo de tierra o neutral del cable debe ser conectado a la drcuito de suministro d e energiadebe ser terminal neutral que se encuentra en el centro conectadoa laterminal delneutrolocalizado en...
- Page 48 Instrucciones d e Instalaci6n CONEXIONES ELECTRICAS (CONT.) INSTALACION CON TUBa PORTA- []Z] INSTALACION CON TUBa PORTACABLE (CONDUIT) DE4-HILOS CABLE (CONDUIT) DE 3-HILOS Afloje los tres tornillos inferiores del bloque de Afloje los tres tornillos inferiores del bloque de conexiones. conexiones. Inserte la punta del cable pelado (Blanco/Neutro) a tray,s del oricio de la terminal Carte y tire la ploquita de aterrizaje a tierra...
- Page 49 Instrucciones d e Instalaci6n INSTALE LA ESTUFA INSTALACION DE DISPOSITIVO ANTI- NIVELE LA ESTUFA VOLCADU RAS Para una apropiado horneado y cocinado, la estufa debe estar nivelada, las paras niveladoras estan Iocalizadas en cada esquina de la base de Riesqo de Volcaduras la estufa.
- Page 50 Antes de que llame para pedir servicio... Consejos para resolver problemas Ahorre tiempo y dinero! Revise los estatutos de las siguientes pdginas primero y puede que no necesite Ilamar para pedir servicio. Problema Posible causa Soluci6n Las resistencias el6ctricas no Las resistencias el6ctricas no est@n bien Con las perillas apagadas revise que las conectadas...
- Page 51 ACC_SOF_OS. GEAppliances.com _Desea algo m(Ts? (No todos los accesorios se encuentran disponibles para todos los modelos.) Usted puede encontrar estos accesorios y muchos m_s en GEAppliances.com,o Ilame al 800.626.2002 (en horatio de trabajo normal). Tenga listo el n0mero de modelo. Perillas Rejillas Cabezales o tapasde...
- Page 52 Notas.
- Page 53 GEAppliances.com...
- Page 54 Notas.
- Page 55 Garantia de la Estufa El ctrica Todos los servicios de gorantia los proporcionan nuestros Centros Pegue aqui su recibo. de Reparaci6n de Fdbrica o nuestros tdcnicos Customer Core ® Se requiem facilitar prueba autorizados. Pare concertar una cite de reparaci6n, visftenos de la fecha de compra original en Ifnea en GEApplionces.com,...
- Page 56 Ayuda a! cliente. Pdgina Web de GEAppliances GEAppliances.com _LTiene a lguna pregunta sabre su electrodom6stico? iPruebe la p6gina Web de GEAppliances 24 horas al d[a, cualquier d[a del aho! Para mayor conveniencia y servicio m6s r6pido, ya puede descargar los ivlanualesde los Propietarios, pedir piezas o incluso hacer una cita en I[nea para que vengan a realizar una reparaci6n.