Table of Contents
Advertisement
GCO SERIES GAS CONVECTION OVENS
MODEL
GCO4S
GCO4D
GCO4C
GCO6D
GCO6C
V U L C A N - H A R T C O M P A N Y , P . O . B O X 6 9 6 , L O U I S V I L L E , K Y 4 0 2 0 1 - 0 6 9 6 , TEL. (502) 7 7 8 - 2 7 9 1
FORM 30903 Rev. B (2-98)
ML-52425
ML-52354
ML-52357
ML-114729
ML-114730
INSTALLATION &
OPERATION MANUAL
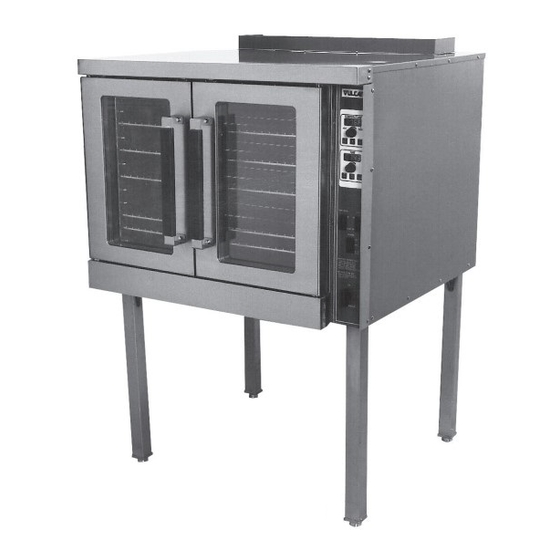
GCO4C
Advertisement
Table of Contents

Related Manuals for Vulcan-Hart GCO4C ML-52357


Summary of Contents for Vulcan-Hart GCO4C ML-52357
- Page 1 INSTALLATION & OPERATION MANUAL GCO SERIES GAS CONVECTION OVENS MODEL GCO4S ML-52425 GCO4D ML-52354 GCO4C ML-52357 GCO6D ML-114729 GCO6C ML-114730 GCO4C V U L C A N - H A R T C O M P A N Y , P . O . B O X 6 9 6 , L O U I S V I L L E , K Y 4 0 2 0 1 - 0 6 9 6 , TEL. (502) 7 7 8 - 2 7 9 1 FORM 30903 Rev.
-
Page 2: Important For Your Safety
IMPORTANT FOR YOUR SAFETY THIS MANUAL HAS BEEN PREPARED FOR PERSONNEL QUALIFIED TO INSTALL GAS EQUIPMENT, WHO SHOULD PERFORM THE INITIAL FIELD START-UP AND ADJUSTMENTS OF THE EQUIPMENT COVERED BY THIS MANUAL. POST IN A PROMINENT LOCATION THE INSTRUCTIONS TO BE FOLLOWED IN THE EVENT THE SMELL OF GAS IS DETECTED. -
Page 3: Table Of Contents
TABLE OF CONTENTS GENERAL ................4 INSTALLATION . -
Page 4: General
Installation, Operation And Care Of GCO SERIES GAS CONVECTION OVENS KEEP THESE INSTRUCTIONS FOR FUTURE USE Your Vulcan Gas Convection Oven is produced with quality workmanship and material. Proper installation, usage and maintenance of your oven will result in many years of satisfactory performance. The manufacturer suggests that you thoroughly read this entire manual and carefully follow all of the instructions provided. -
Page 5: Installation
INSTALLATION UNPACKING Immediately after unpacking the oven, check for possible shipping damage. If this oven is found to be damaged, save the packaging material and contact the carrier within 15 days of delivery. Prior to installation, verify that the electrical service and type of gas (natural or propane) agree with the specifications on the oven data plate, located on the inside of the bottom front cover. -
Page 6: Assembling The Legs To The Oven
NOTICE: When the oven is mounted on casters, it must be installed with the casters supplied, a connector (not supplied by Vulcan-Hart) complying with either ANSI Z21.69 (latest edition) or CAN/CGA-6.16 (latest edition), and a quick-disconnect device complying with either ANSI Z21.41 (latest edition) or CAN1-6.9 (latest edition). -
Page 7: Assembling Stacked Ovens
ASSEMBLING STACKED OVENS Unpack the ovens and stack kit. Position one oven on its back for access to the oven bottom, taking care not to scratch or damage it. The gas pipe protrudes beyond the back; provide for this when the oven is tipped back by resting it on suitable spacers (2 x 4's, etc.). -
Page 8: Assembling The Oven To The Stand
ASSEMBLING THE OVEN TO THE STAND Unpack the oven and stand. Position oven on its back, taking care not to scratch or damage it. The gas pipe connection protrudes beyond the back; provide for this when the oven is tipped back by resting it on suitable spacers (2 x 4's, etc.). -
Page 9: Testing The Gas Supply System
The oven should be connected to the gas line after leveling. The gas supply line must be at least the equivalent ⁄ " (19mm) iron pipe. Make sure piping is clean and free of obstructions, dirt or pipe joint compound. WARNING: PRIOR TO LIGHTING, CHECK ALL JOINTS IN THE GAS SUPPLY LINE FOR LEAKS. -
Page 10: Operation
OPERATION CONTROLS — MODELS GCO4S AND GCO4D/GCO6D (Fig. 4) MASTER SWITCH MASTER SWITCH ON LIGHT ON LIGHT HEAT LIGHT HEAT LIGHT NO IGNITION LIGHT NO IGNITION LIGHT OVEN COOL SWITCH OVEN COOL SWITCH 2-SPEED MOTOR 2-SPEED MOTOR SWITCH SWITCH LIGHT SWITCH LIGHT SWITCH THERMOSTAT THERMOSTAT... -
Page 11: Lighting The Gco4S And Gco4D/Gco6D Ovens
LIGHTING THE GCO4S AND GCO4D/GCO6D OVENS Turn manual Gas Valve ON. Turn Master Switch ON and turn Thermostat to its maximum setting. Both the ON and HEAT lights should come on. If HEAT light is not on, make sure door is closed. After 5 seconds, the spark ignition system will start and the solenoid valve will open, allowing gas to flow to the burner for 7 seconds. -
Page 12: Controls - Model Gco4C/Gco6C
CONTROLS — MODEL GCO4C/GCO6C (Fig. 5) THERMOSTAT TIMER 2 SPEED FAN - HI / LO LIGHT SWITCH ON / OFF / OVEN COOL SWITCH GAS VALVE PL-51606 MODEL GCO4C/GCO6C Fig. 5 THERMOSTAT CONTROL Temperature Display (When Not Timing Product) Displays set cook temperature while the light in the Roast Button is lit. Will be overridden to display actual cavity temperature for 8 seconds when Thermometer Button is pushed. - Page 13 Temperature Knob (When Not Timing Product) 1. Sets the roast temperature when the Roast Button light is lit. The Roast Button light can be turned on by pressing the Roast Button. 2. Sets the hold temperature when the Hold Button light is lit. The Hold Button light can be turned on by pressing the Hold Button.
- Page 14 Thermometer Button When pressed, causes actual cavity temperature to display for about 8 seconds, then display returns to set temperature. Heat Light When lit, indicates that power is being supplied to the burner. Ready Light Will be lit any time the actual temperature is within +/- 5 F (+/- 2.7 C) of the set temperature for the current mode.
- Page 15 Gentle Bake Button Selects the gentle bake time setting. A roast time must be set first. The gentle bake time can then be set equal to or less than the roast time. The gentle bake time will be the portion of roast time to operate in the gentle bake mode. Gentle bake mode will start first.
-
Page 16: Lighting The Gco4C/Gco6C Oven
ON/OFF/OVEN COOL SWITCH 1. ON turns oven control circuits on. 2. OFF turns oven control circuits off. 3. OVEN COOL allows the fan motor to run with the doors ajar to speed oven cooling. 2-SPEED FAN SWITCH Adjusts air velocity in the oven. LIGHT SWITCH Turns lights in the oven on or off. -
Page 17: Using The Gco4C/Gco6C Oven
USING THE GCO4C/GCO6C OVEN Preheating 1. Turn On/Off/Oven Cool switch to ON position. The Heat light will come on, indicating that power to the oven is on. 2. Set Thermostat as desired. Refer to COOKING GUIDELINES for suggested temperatures and times for various products. -
Page 18: Roast And Hold Operation
ROAST AND HOLD OPERATION Roast and Hold cooks the product in two stages. During First Stage Cooking, the oven temperature is regulated by the Roast thermostat for the amount of time set on the Timer. After the lapsed time counts down to 00:00, Second Stage Cooking begins. -
Page 19: Proper Utensils
PROPER UTENSILS The use of proper utensils can enhance oven operation. Medium and light weight pans allow the product to warm faster. Roast meats in shallow pans deep enough to hold all juices yet allow free air circulation. CONSERVING ENERGY •... -
Page 20: Cooking Guidelines
COOKING CHARTS Models GCO4S, GCO4D/GCO4C and GCO6D/GCO6C BAKED PRODUCTS Product Temp. Time (min.) No. Shelves Fan Speed ( F) ( C) Sheet Cakes (5 lb. each) (2.3 kg) (149) Soda Biscuits (163) Yeast Rolls (163) 15-20 Corn Bread (149) Gingerbread (149) Chocolate Cake (163) - Page 21 MEAT & FISH PRODUCTS Product Temp. Time (min.) No. Shelves Fan Speed ( F) ( C) Prime Rib (20 lb. rare (9 kg) (121) ⁄ High Rolled Roast Beef (135) ⁄ High Veal Roast Boned (15 lb.) (7 kg) (135) ⁄...
-
Page 22: Maintenance
To obtain service and parts information concerning your GCO Series Oven, contact the Vulcan-Hart Service Depot in your area (refer to listing supplied with this oven), or Vulcan-Hart Company Service Department at the address or phone number shown on the front cover of this manual. -
Page 23: Troubleshooting
TROUBLESHOOTING If NO IGNITION LIGHT remains lit for more than 20 seconds after three trials (Models GCO4S AND GCO4D/ GCO6D), or "E-05" appears in the display after three trials (Model GCO4C/GCO6C): • Turn oven off for 5 minutes before attempting to relight. •... - Page 24 NOTES – 24 – FORM 30903 Rev. B (2-98) PRINTED IN U.S.A.