Vulcan-Hart VC4ED Service Manual
Full size electric convection ovens
Hide thumbs
Also See for VC4ED:
- Service manual (60 pages) ,
- Installation and operation manual (16 pages) ,
- Replacement parts catalog (12 pages)
Table of Contents
Advertisement
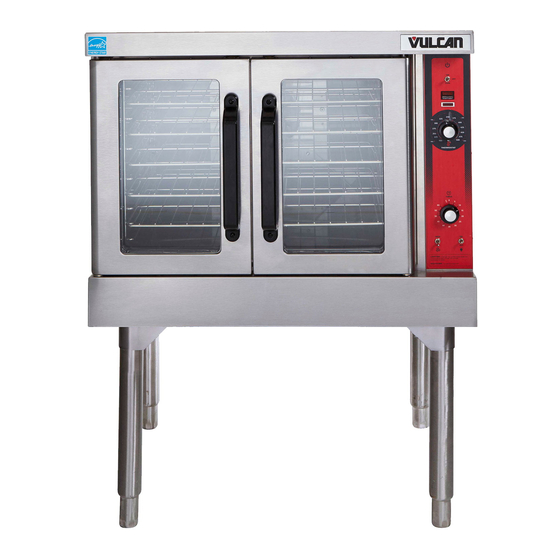
VC4ED SHOWN
This Manual is prepared for the use of trained Vulcan Service
Technicians and should not be used by those not properly
qualified. If you have attended a Vulcan Service School for this
product, you may be qualified to perform all the procedures
described in this manual.
This manual is not intended to be all encompassing. If you have
not attended a Vulcan Service School for this product, you should
read, in its entirety, the repair procedure you wish to perform to
determine if you have the necessary tools, instruments and skills
required to perform the procedure. Procedures for which you do
not have the necessary tools, instruments and skills should be
performed by a trained Vulcan Service Technician.
Reproduction or other use of this Manual, without the express
written consent of Vulcan, is prohibited.
A product of VULCAN-HART
SERVICE MANUAL
VC4E & VC6E
SERIES
ELECTRIC CONVECTION
MODEL
VC4ES
VC4ED
VC4EC
VC6ES
VC6ED
VC6EC
- NOTICE -
FULL SIZE
OVENS
ML
126743
126744
126745
126746
126747
126748
LOUISVILLE, KY 40201-0696
F25105 (December 2001)
Advertisement
Table of Contents

Related Manuals for Vulcan-Hart VC4ED


Summary of Contents for Vulcan-Hart VC4ED
- Page 1 Vulcan Service Technician. Reproduction or other use of this Manual, without the express written consent of Vulcan, is prohibited. A product of VULCAN-HART SERVICE MANUAL VC4E & VC6E SERIES...
-
Page 2: Table Of Contents
VC4ED, VC6ED with Solid State Temperature Control, 208-240V ......39 VC4ED, VC6ED with Solid State Temperature Control, 480V ......40... - Page 3 VC4ED, VC6ED with Solid State Temperature Control, 208-240V ......48 VC4ED, VC6ED with Solid State Temperature Control, 480V ......50 VC4EC, VC6EC Computer Control, 208-240V (Roast &...
-
Page 4: General
Models MODEL CAVITY TEMPERATURE DEPTH CONTROL VC4ES 26.5" Mechanical (KX) Independent 26.5" Solid State VC4ED VC4EC 26.5" Computer VC6ES 30.5" Mechanical (KX) Independent VC6ED 30.5" Solid State VC6EC 30.5" Computer NOTES: 1. -
Page 5: Specifications
SPECIFICATIONS Electrical MODEL VC4ES VC4ED VC4EC VC6ES VC6ED VC6EC NOTES: MODEL VC4ES VC4ED VC4EC VC6ES VC6ED VC6EC NOTES: AMPERAGE - 3 PHASE/ 60HZ TOTAL POWER PER LINE (KW) 208V 240V 480V 12.5 1. Amperage values in the table are nominal. -
Page 6: Removal And Replacement Of Parts
REMOVAL AND REPLACEMENT OF PARTS COVERS AND PANELS WARNING: DISCONNECT THE ELECTRICAL POWER TO THE MACHINE AT THE MAIN CIRCUIT BOX. PLACE A TAG ON THE CIRCUIT BOX INDICATING THE CIRCUIT IS BEING SERVICED. Top Front Cover The top front cover is secured with four (4) screws, two on each side of cover. -
Page 7: Control Panel Components
Left Side Panel Remove the screws which secure the left side of the top front cover, bottom front cover and control panel. Remove the seven screws securing the left side panel. Pull the left side panel out at the bottom then down to remove. -
Page 8: Component Panel Components
COMPONENT PANEL COMPONENTS WARNING: DISCONNECT THE ELECTRICAL POWER TO THE MACHINE AT THE MAIN CIRCUIT BOX. PLACE A TAG ON THE CIRCUIT BOX INDICATING THE CIRCUIT IS BEING SERVICED. Removable Components Remove the right side panel as outlined under "COVERS AND PANELS". NOTE: If right side panel is not accessible, this component can be serviced by removing the control panel as outlined under "COVERS AND PANELS". -
Page 9: Heating Elements
Remove probe by pushing it through the oven wall and into the control panel area. NOTE: The hole in the oven cavity wall does not line up straight with the oven cavity outer shell, therefore the probe must be removed at an angle. Reverse the procedure to install the replacement probe. -
Page 10: Blower And Motor
LEFT SIDE ELEMENTS SHOWN NOTE: The mounting bracket is sealed with RTV which may still hold the element after the screws are removed. Also, in some cases, the ring terminal connected to the element may interfere with easy removal. If access to the left side panel and/or the top panel is available, see "ALTERNATE ACCESS". -
Page 11: Door Switch
Reverse procedure to install and adjust blower position as outlined under "BLOWER ADJUSTMENT" in "SERVICE PROCEDURES AND ADJUSTMENTS". Motor - perform step 3A and continue procedure. Remove the nuts that secure the motor mounting plate to the rear wall. Place a piece of cardboard on the bottom of the oven cavity to protect its surface from any damage during motor assembly removal. -
Page 12: Door Window
Reverse procedure to install the replacement switch and check for proper adjustment as outlined under "DOOR SWITCH ADJUSTMENT" in "SERVICE PROCEDURES AND ADJUSTMENTS". DOOR WINDOW WARNING: DISCONNECT THE ELECTRICAL POWER TO THE MACHINE AT THE MAIN CIRCUIT BOX. PLACE A TAG ON THE CIRCUIT BOX INDICATING THE CIRCUIT IS BEING SERVICED. -
Page 13: Oven Doors (Simultaneous Doors)
Remove the lower door seal strip to expose the mounting screws of the door assembly. Remove the two (2) lower sill bolts by the lower door shaft and the four (4) counter-sunk screws from the lower sill. NOTE: The door assembly is heavy and will drop down once the last screw is removed. -
Page 14: Door Catch Roller Assembly (Independent Doors)
Lift up on the door assembly and swing the right side out then move the assembly to the left to clear the slots in the upper door sill. Lay the door assembly on a flat cushioned surface for disassembly. Reverse procedure to install door assembly and check for proper adjustment as outlined under "DOOR ADJUSTMENT", "DOOR CHAIN ADJUSTMENT (SIMULTANEOUS DOORS)"... -
Page 15: High Limit Thermostat
NOTE: When installing probe guard, the probe should not extend beyond the guard. Remove the thermostat bulb from the oven cavity by pushing it through the oven wall and into the control panel area. NOTE: The hole in the oven cavity wall does not line up straight with the oven cavity outer shell, therefore the probe must be removed at an angle. -
Page 16: Cooling Fan
Depress the retaining tabs and pull the socket out from the oven, far enough to disconnect the lead wires. Remove the socket from the oven. Attach the lead wires to the replacement socket. Insert the socket into the hole in the oven and push until the socket is held in place by the retaining tabs. -
Page 17: Service Procedures And Adjustments
SERVICE PROCEDURES AND ADJUSTMENTS WARNING: CERTAIN PROCEDURES IN THIS SECTION REQUIRE ELECTRICAL TEST OR MEASUREMENTS WHILE POWER IS APPLIED TO THE MACHINE. EXERCISE EXTREME CAUTION AT ALL TIMES. IF TEST POINTS ARE NOT EASILY ACCESSIBLE, DISCONNECT POWER, ATTACH TEST EQUIPMENT AND REAPPLY POWER TO TEST. SOLID STATE TEMPERATURE CONTROL CALIBRATION Place a thermocouple in the geometric center... -
Page 18: Mechanical (Kx) Thermostat Calibration
Rotate the knob to the lowest temperature setting then back to 350°F. Repeat the average temperature calculation in step 7. NOTE: Allow the oven to cycle at least two times between adjustments before performing the calculation. If the average temperature still differs more than 10 °F from the dial setting, adjust the thermostat calibration... -
Page 19: Solid State Temperature Control Test
After the final adjustment is made and the average temperature is within tolerance, remove the knob and apply a non- permanent type sealer around the head of the set screw. 10. If the above adjustment cannot be obtained: Turn the power switch OFF. WARNING: DISCONNECT THE ELECTRICAL POWER TO THE MACHINE AT THE MAIN CIRCUIT BOX. -
Page 20: Temperature Probe Test (Solid State Control)
TEMPERATURE PROBE TEST (SOLID STATE CONTROL) WARNING: DISCONNECT THE ELECTRICAL POWER TO THE MACHINE AT THE MAIN CIRCUIT BOX. PLACE A TAG ON THE CIRCUIT BOX INDICATING THE CIRCUIT IS BEING SERVICED. NOTE: The temperature probe used in conjunction with the Solid State Temperature control is an RTD (resistance temperature detector) of the Thermistor type. -
Page 21: Blower Adjustment
BLOWER ADJUSTMENT WARNING: DISCONNECT THE ELECTRICAL POWER TO THE MACHINE AT THE MAIN CIRCUIT BOX. PLACE A TAG ON THE CIRCUIT BOX INDICATING THE CIRCUIT IS BEING SERVICED. Remove the blower motor and mounting assembly by following steps 1 through 7 as outlined under "BLOWER AND MOTOR"... -
Page 22: Door Adjustment
DOOR ADJUSTMENT Check the doors to make sure they have an equal gap between them and that the vertical edge of the door is parallel to the vertical door seal. If the doors are not positioned in this manner, adjust the doors as described. Remove the top front cover. -
Page 23: Door Switch Adjustment
With the doors closed, observe the position of the catch roller "ball" in relation to the door strike. Ensure the catch roller "ball" is centered (left to right) to the door strike. Adjust alignment, if necessary. Open the right side door and view the left side door catch roller and strike. -
Page 24: Computer Control
Turnbuckles should be 5 to 5 ½ inches apart. Short eye bolt should be connected to the end of the chain that goes to the front of the sprocket. 2 links of the chain should not be engaged at the rear of the sprocket. Chain must be tight enough that the doors move simultaneously when opened or closed. - Page 25 ALTERNATING ON MENU PARAMETER Celsius_Fahrenheit Guard Band Temperature tcnP Compensation Input Type 1 InP1 Range Low 1 Range High 1 Hysteresis HYS1 Calibration Offset CAL1 set point temperature is Exit Setup Mode and displayed or if call for return to Operation heat, dashes (----) Mode.
-
Page 26: Computer Control Temperature Calibration
If voltage is correct, SSR is functioning properly. If no voltage is present on the load side of SSR terminal 2, the SSR is not functioning properly. Turn the power switch OFF. WARNING: DISCONNECT THE ELECTRICAL POWER TO THE MACHINE AT THE MAIN CIRCUIT BOX. - Page 27 Listed below are the parameters and data you should find in the calibration Mode. ALTERNATING ON DISPLAY MENU PARAMETER Calibrate CALY (must display no) LgOt* Logic Output Test (see step 3) *g displays as a 9 Logic Inputs "LI" (Factory Only) Keyboard (see step 4) Display Test...
- Page 28 If the code displayed is not correct for the key pressed, then the keyboard is malfunctioning. Turn the power switch OFF. WARNING: DISCONNECT THE ELECTRICAL POWER TO THE MACHINE AT THE MAIN CIRCUIT BOX. PLACE A TAG ON THE CIRCUIT BOX INDICATING THE CIRCUIT IS BEING SERVICED.
-
Page 29: Electrical Operation
Signals the end of a "Cook" cycle when cooking time expires. Counts the "Cook" time of the product and signals the buzzer at the end of the cycle (VC4ES/6ES and VC4ED/6ED only). Allows the oven to operate when the doors are closed but stops the oven from operating when the doors are opened. -
Page 30: Component Location
Temperature Probe ... Mechanical Temperature Control KX thermostat ....Cooling Fan ....Fuses . - Page 31 FULL SIZE ELECTRIC CONVECTION OVENS - ELECTRICAL OPERATION VC4ES/6ES with Mechanical KX thermostat - Plug, Socket and Components Page 31 of 60 F25105 (December 2001)
- Page 32 FULL SIZE ELECTRIC CONVECTION OVENS - ELECTRICAL OPERATION VC4ED/6ED with Solid State Control - Plug, Socket and Components F25105 (December 2001) Page 32 of 60...
- Page 33 FULL SIZE ELECTRIC CONVECTION OVENS - ELECTRICAL OPERATION VC4EC/6EC - Plug, Socket and Components (Cook & Hold Standard) Page 33 of 60 F25105 (December 2001)
-
Page 34: Sequence Of Operation
(S1) is turned to the OFF or COOL DOWN position. VC4ED, VC6ED with Solid State Temperature Control Schematic diagram 6534 will be used to explain the electrical sequence of operation. -
Page 35: Timer Cycle, Cooking (Kx Thermostat Or Solid State Control)
Timer Cycle, Cooking (KX Thermostat or Solid State Control) NOTE: The "Cook" timer operates independently of the heating cycle. Additional time can be set or the timer can be turned OFF throughout the cooking cycle. With the power switch turned ON, power is supplied to "Cook"... -
Page 36: Temperature And Time Cycle (Cooking)
Heating elements powered and heating starts. The controls 5VDC output from pins C2-2 (-) and C2-8 (+) is activated and SSR1 relay is energized. Convection fan motor is energized (High speed). Oven reaches set point temperature. Computer control de-activates the output from pin C3-2. -
Page 37: Schematics
FULL SIZE ELECTRIC CONVECTION OVENS - ELECTRICAL OPERATION SCHEMATICS VC4ES, VC6ES with Mechanical (KX) Controls, 208-240V Page 37 of 60 F25105 (December 2001) -
Page 38: Vc4Es, Vc6Es With Mechanical (Kx) Controls, 480V
FULL SIZE ELECTRIC CONVECTION OVENS - ELECTRICAL OPERATION VC4ES, VC6ES with Mechanical (KX) Controls, 480V F25105 (December 2001) Page 38 of 60... -
Page 39: Vc4Ed, Vc6Ed With Solid State Temperature Control, 208-240V
FULL SIZE ELECTRIC CONVECTION OVENS - ELECTRICAL OPERATION VC4ED, VC6ED with Solid State Temperature Control, 208-240V Page 39 of 60 F25105 (December 2001) -
Page 40: Vc4Ed, Vc6Ed With Solid State Temperature Control, 480V
FULL SIZE ELECTRIC CONVECTION OVENS - ELECTRICAL OPERATION VC4ED, VC6ED with Solid State Temperature Control, 480V F25105 (December 2001) Page 40 of 60... -
Page 41: Vc4Ec, Vc6Ec Computer Control, 208-240V (Roast & Hold Standard)
FULL SIZE ELECTRIC CONVECTION OVENS - ELECTRICAL OPERATION VC4EC, VC6EC Computer Control, 208-240V (Roast & Hold Standard) Page 41 of 60 F25105 (December 2001) -
Page 42: Vc4Ec, Vc6Ec Computer Control, 480V (Roast & Hold Standard)
FULL SIZE ELECTRIC CONVECTION OVENS - ELECTRICAL OPERATION VC4EC, VC6EC Computer Control, 480V (Roast & Hold Standard) F25105 (December 2001) Page 42 of 60... - Page 43 FULL SIZE ELECTRIC CONVECTION OVENS - ELECTRICAL OPERATION THIS PAGE PURPOSELY LEFT BLANK Page 43 of 60 F25105 (December 2001)
-
Page 44: Wiring Diagrams
FULL SIZE ELECTRIC CONVECTION OVENS - ELECTRICAL OPERATION WIRING DIAGRAMS VC4ES, VC6ES with Mechanical (KX) Control, 208-240V F25105 (December 2001) Page 44 of 60... - Page 45 FULL SIZE ELECTRIC CONVECTION OVENS - ELECTRICAL OPERATION Page 45 of 60 F25105 (December 2001)
-
Page 46: Vc4Es, Vc6Es With Mechanical (Kx) Control, 480V
FULL SIZE ELECTRIC CONVECTION OVENS - ELECTRICAL OPERATION VC4ES, VC6ES with Mechanical (KX) Control, 480V F25105 (December 2001) Page 46 of 60... - Page 47 FULL SIZE ELECTRIC CONVECTION OVENS - ELECTRICAL OPERATION Page 47 of 60 F25105 (December 2001)
-
Page 48: Vc4Ed, Vc6Ed With Solid State Temperature Control, 208-240V
FULL SIZE ELECTRIC CONVECTION OVENS - ELECTRICAL OPERATION VC4ED, VC6ED with Solid State Temperature Control, 208-240V F25105 (December 2001) Page 48 of 60... - Page 49 FULL SIZE ELECTRIC CONVECTION OVENS - ELECTRICAL OPERATION Page 49 of 60 F25105 (December 2001)
-
Page 50: Vc4Ed, Vc6Ed With Solid State Temperature Control, 480V
FULL SIZE ELECTRIC CONVECTION OVENS - ELECTRICAL OPERATION VC4ED, VC6ED with Solid State Temperature Control, 480V F25105 (December 2001) Page 50 of 60... - Page 51 FULL SIZE ELECTRIC CONVECTION OVENS - ELECTRICAL OPERATION Page 51 of 60 F25105 (December 2001)
-
Page 52: Vc4Ec, Vc6Ec Computer Control, 208-240V (Roast & Hold Standard)
FULL SIZE ELECTRIC CONVECTION OVENS - ELECTRICAL OPERATION VC4EC, VC6EC Computer Control, 208-240V (Roast & Hold Standard) F25105 (December 2001) Page 52 of 60... - Page 53 FULL SIZE ELECTRIC CONVECTION OVENS - ELECTRICAL OPERATION Page 53 of 60 F25105 (December 2001)
-
Page 54: Vc4Ec, Vc6Ec Computer Control, 480V (Roast & Hold Standard)
FULL SIZE ELECTRIC CONVECTION OVENS - ELECTRICAL OPERATION VC4EC, VC6EC Computer Control, 480V (Roast & Hold Standard) F25105 (December 2001) Page 54 of 60... - Page 55 FULL SIZE ELECTRIC CONVECTION OVENS - ELECTRICAL OPERATION Page 55 of 60 F25105 (December 2001)
-
Page 56: Troubleshooting
WARNING: CERTAIN PROCEDURES IN THIS SECTION REQUIRE ELECTRICAL TESTS OR MEASUREMENTS WHILE POWER IS APPLIED TO THE MACHINE. EXERCISE EXTREME CAUTION AT ALL TIMES. IF TEST POINTS ARE NOT EASILY ACCESSIBLE, DISCONNECT POWER, ATTACH TEST EQUIPMENT AND REAPPLY POWER TO TEST. SYMPTOMS Blower motor doesn’t run with power switch in “ON”... -
Page 57: Computer Control Models Only
SYMPTOMS No power to oven controls. No heat, convection fan motor runs. No power to temperature control. Door does not seal or shut properly COMPUTER CONTROL MODELS ONLY SYMPTOM Oven does not heat. High limit thermostat shutting OFF heat. Oven not hot enough. Blower motor doesn’t run with power switch in “ON”... - Page 58 Error Codes In the display window, the error code will alternate between the code and the oven cavity temperature or dashes if the oven is calling for heat (heat light on). The exact error code displayed will depend on the priority assigned to the problem in the EPROM’S software.
- Page 59 FULL SIZE ELECTRIC CONVECTION OVENS - TROUBLESHOOTING - N O T E S - Page 59 of 60 F25105 (December 2001)
-
Page 60: Condensed Spare Parts List
SST Relay, 50amp Switch, 2sp Fan Switch, Door Switch, On-Off-Cooldown Switch, On-Off-Cooldown Temperature Control Board ** Temperature Probe (RTD) ** Temperature Probe (J - T/C) Thermostat, KX * Transformer, 240/24 volt, 40va VC4ES* VC4ED VC4EC VC6ES* VC6ED VC6EC Printed in U.S.A.