Table of Contents
Advertisement
Quick Links
Advertisement
Table of Contents

Related Manuals for Olivetti Fax-Lab 480


Summary of Contents for Olivetti Fax-Lab 480
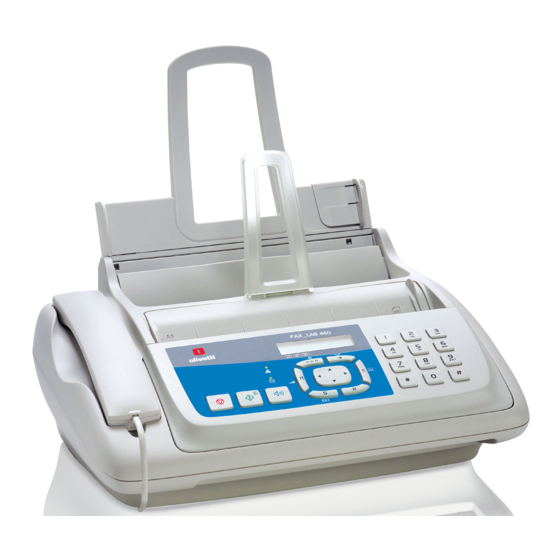
- Page 1 Ink Jet Fax Fax-Lab 460/480 INSTRUCTIONS...
- Page 2 Printed in Thailand. EDITED/PUBLISHED/PRODUCED BY: Code of user manual: 259732J Olivetti, S.p.A. con unico azionista Gruppo Telecom Italia Date of publication: July 2006. Direzione e coordinamento di Telecom Italia S.p.A. Copyright © 2006, Olivetti All rights reserved. No parts of this manual may be photocopied, reproduced or translated into other languages without prior written authorization from Olivetti S.p.A.
- Page 3 HORT GUIDE This chapter contains a simplified description of the installation, transmission, reception and copying procedures. For more detailed instructions, see the relevant sections. NSTALLATION For further details, see the “Delivery contents, connecting up and first-time operation” chapter. 1 2 3 4 5 6 7 8 9 0 1 2 3 4 5 6 7 8 9 0 1 2 3 4 5 6 7 8 9 0 1 2 1 2 3 4 5 6 7 8 9 0 1 2 3 4 5 6 7 8 9 0 1 2 3 4 5 6 7 8 9 0 1 2 1 2 3 4 5 6 7 8 1 2 3 4 5 6 7 8 9 0 1 2 3 4 5 6 7 8 9 0 1 2 3 4 5 6 7 8 9 0 1 2 1 2 3 4 5 6 7 8 9 0 1 2 3 4 5 6 7 8 9 0 1 2 3 4 5 6 7 8 9 0 1 2 1 2 3 4 5 6 7 8 1 2 3 4 5 6 7 8 9 0 1 2 3 4 5 6 7 8 9 0 1 2 3 4 5 6 7 8 9 0 1 2 1 2 3 4 5 6 7 8 9 0 1 2 3 4 5 6 7 8 9 0 1 2 3 4 5 6 7 8 9 0 1 2 1 2 3 4 5 6 7 8 Connect the fax machine to the telephone line...
- Page 4 HORT GUIDE RANSMITTING For further details, see “Transmitting a document” in the “Basic transmission and reception operations” chapter. 1 2 3 4 5 6 7 8 9 0 1 2 3 4 5 6 7 8 9 0 1 2 3 4 5 6 7 8 9 0 1 2 1 2 3 4 5 6 7 8 9 0 1 2 3 4 5 6 7 8 9 0 1 2 3 4 5 6 7 8 9 0 1 2 1 2 3 4 1 2 3 4 5 6 7 8 9 0 1 2 3 4 5 6 7 8 9 0 1 2 3 4 5 6 7 8 9 0 1 2 1 2 3 4 5 6 7 8 9 0 1 2 3 4 5 6 7 8 9 0 1 2 3 4 5 6 7 8 9 0 1 2 1 2 3 4 1 2 3 4 5 6 7 8 9 0 1 2 3 4 5 6 7 8 9 0 1 2 3 4 5 6 7 8 9 0 1 2 1 2 3 4 5 6 7 8 9 0 1 2 3 4 5 6 7 8 9 0 1 2 3 4 5 6 7 8 9 0 1 2 1 2 3 4 1 2 3 4 5 6 7 8 9 0 1 2 3 4 5 6 7 8 9 0 1 2 3 4 5 6 7 8 9 0 1 2 1 2 3 4 5 6 7 8 9 0 1 2 3 4 5 6 7 8 9 0 1 2 3 4 5 6 7 8 9 0 1 2 1 2 3 4...
-
Page 5: Table Of Contents
ONTENTS BEFORE YOU START MAKING A COPY CONSULTING THE MANUAL ............1 WHAT DOCUMENTS CAN BE COPIED ........27 ENVIRONMENTAL RECYCLING ........... 1 COPYING ..................27 SAFETY PRECAUTIONS .............. 1 THE TELEPHONE ANSWERING DEVICE (TAD) ABOUT THE INSTALLATION AND SETUP PARAMETERS ... 2 THE TAD CONSOLE .............. - Page 6 ONTENTS MAINTENANCE OPERATIONS REPLACING PRINT CARTRIDGE ..........47 RE-ENABLING THE PRINT CARTRIDGE AND CHECKING THE NOZZLES ............47 CLEANING THE PRINT CARTRIDGE ELECTRICAL CONTACTS ................. 48 CLEANING OPTICAL READ HEAD ..........49 CLEANING SEATING ..............49 CLEARING JAMMED DOCUMENTS ........... 49 CLEARING PAPER JAMS ............
-
Page 7: Before You Start
ISK OF ACCIDENT waste; - Olivetti guarantees the activation of the treat- ment, collection, recycling and disposal pro- • Place it on a stable, flat surface free of all vibrations so as to... -
Page 8: About The Installation And Setup Parameters
PERATING PRECAUTIONS • Keep the fax machine in a dust-free place away from sources of water, steam and excessive heat. Do not expose it to direct sunlight. • Ensure that no books, documents, or other objects obstruct normal ventilation in any way. •... -
Page 9: Package Contents
ELIVERY CONTENTS CONNECTING UP AND FIRST TIME OPERATION ACKAGE CONTENTS ONNECTING FAX MACHINE 1. Lay the fax machine on its right side. In addition to the fax machine and this manual, you will find the following 2. Insert one end of the telephone line cable into the “LINE” socket parts in the package: on the base of the fax machine (see example). -
Page 10: Connecting Handset
ONNECTING HANDSET AKING IMPORTANT PREDETERMINED SETTINGS For the fax machine to work properly, set your language and your country. Once the fax is connected to the mains, it automatically runs a short function test to check that its components are working and the language in which the messages will appear is shown on the display. -
Page 11: Entering The Date And Time
NTERING THE DATE AND TIME 5. To confirm the setting, press the key: You must enter the date and time - when you connect the fax machine for the first time to 6. To exit settings, press the key: the mains - after every power failure. -
Page 12: Inserting Paper
1. Push the paper support into the slots on the unit (1). 10. To confirm the setting, press the key: 2. Push it until it clicks into position. 3. Open the automatic sheet feeder (ASF) panel as indicated by the arrow (2). -
Page 13: Installing The Print Cartridge
NSTALLING THE PRINT CARTRIDGE EACTIVATING THE PRINT CARTRIDGE AND TESTING THE NOZZLES N O T E Once the cartridge provided with the machine has run out, remember Once the print cartridge has been inserted, the fax machine starts the only to use original cartridges (see code printed at the end of print cartridge reactivation and nozzle check procedure. -
Page 14: Entering Name And Fax Number
10. To confirm the name, press the key: NTERING NAME AND FAX NUMBER Name (max. 16 letters) and number (max. 20 digits) will The display shows: remain unchanged until they are intentionally changed and will be printed on each page received by your Now enter the fax number as indicated below: correspondent’s fax machine. -
Page 15: Setting Up For Line Characteristics
4. Press the key 8. To return the fax machine to the stand-by mode, press the until the display shows: 5. To select the other parameters, press the key: ONNECTING TO A PRIVATE LINE The display shows: To connect the fax machine to a private line and be able to 6. - Page 16 9. To confirm the selection, press the key: If you confirmed, by pressing the key , the “EXT.LINE:PREFIX” mode, the fax machine prompts you to enter the number corresponding to the area code (max. 3 digits). 10. Press the key: The display shows: 11.
-
Page 17: Components
OMPONENTS The figure shows the external and internal parts of the fax machine. Plain paper automatic sheet feeder (ASF) Adjustable to the following paper sizes: A4, Letter and Legal. Maximum capacity: 100 sheets (80gr/m Paper support Connection sockets Paper adjusting lever (see base) Document support Received or copied document... -
Page 18: Console
ONSOLE • Adjusts the resolution of the documents to be sent and copied (only with the document inserted in the ADF). • Puts the line on hold during a telephone conversation (with the handset off the hook). • Dials the fax or telephone number. •... - Page 19 Unloads a document from the ADF. • Display The display consists of two lines of 16 Turns off the “ ” LED indicator. • characters each. It shows the date and • Used to dial a telephone or fax number without Returns the fax machine to the stand-by mode.
-
Page 20: Basic Transmission And Reception Operations
ASIC TRANSMISSION AND RECEPTION OPERATIONS Now that your fax machine has a name and number, it is ready to LACE THE DOCUMENT IN THE ADF operate and be used for the following functions: • Transmitting documents (also in broadcast mode, from the memory, or by polling) •... - Page 21 N o t e 6. To confirm the selection, press the key: If you want you can dial the recipient’s number using the quick dialling procedures, see “Setting one-touch and speed dialling”, “Sending with one-touch dialling” and “Sending with speed dialling”. 7.
- Page 22 RANSMITTING ORIGINAL AT A PRESET TIME OR TRANSMISSION LIFT THE HANDSET DELAYED TRANSMISSION 1. Place the original document in the ADF. The display shows on the top line: This function enables you to solve time zone problems if your correspondent is located thousands of kilometres away and to avoid paying high prices by choosing time bands and on the bottom line, the default contrast value: NORMAL.
- Page 23 HANGING OR DELETING DELAYED TRANSMISSION ALREADY 10. To do so, press the keys: SET UP Confirm the entry or the existing number displayed. 11. To do so, press the key: 1. Press the key until the display shows: The display shows: 2.
- Page 24 5. To do so, press the key: ROGRAMMED TRANSMISSION FROM THE MEMORY CHANGING REPEATING OR DELETING The display shows: 1. Press the key: until the display shows: Dial your recipient’s number in any of the available methods: directly on the numeric keypad or using the one-touch keys or speed dialling codes (see “Setting one-touch and speed dialling”).
-
Page 25: Receiving A Document
ECEIVING A DOCUMENT 3. then hang up. You can set up the fax machine in four separate reception modes: The fax machine starts receiving. The display shows some information about the reception in progress, including your • Manual reception . For all occasions in which the user is present correspondent’s fax number or, if programmed, his name. - Page 26 2. Press the key: 12. To do so, press the key: You can now overwrite the wrong character. The display shows: 13. To delete the entire name, press the key: 3. Press the key 14. To confirm the entry, press the key: until the display shows: 4.
- Page 27 ENDING WITH SPEED DIALING HANGING A ONE TOUCH DIALLING KEY OR SPEED DIALLING CODE 1. Place the original document in the ADF. The display shows on the top line: 1. Follow the one-touch dialling or speed dialling procedure until the display shows: and on the bottom line, the default contrast value: NORMAL.
-
Page 28: Printing Reports And Lists
• Last transmission report: contains information about the last RANSMITTING A DOCUMENT BY RECALLING ONE OF transmission and can be printed, once programmed, always and automatically after each transmission or on request at the desired THE LAST INCOMING NUMBERS OR ONE OF moment. - Page 29 NABLING AND DISABLING AUTOMATIC PRINTING OF 3. Press the key: TRANSMISSION AND FAILED TRANSMISSION REPORTS The display shows: 1. Press the key 4. Press the key until the display shows: until the display shows: 2. Press the key: 5. To select the “BROADC. REP.:OFF” option, press the key: The display shows: 6.
- Page 30 4. Press the key: RINTING TRANSMISSION ACTIVITY BROADCAST TRANSMISSION AND CALLER ID REPORTS ON REQUEST The display shows: 1. Press the key 5. To view the other available options: “PRINT:BLACK LIST” and “MENU EXIT”, press the key: until the display shows: 6.
-
Page 31: Making A Call
AKING A CALL When you engage the line by lifting the telephone handset, you ELEPHONING WITH SPEED DIALLING may use all the telephone functions available on ordinary telephones sold on the market. CASE 1 These also include the R function (REGISTER RECALL, activated by Do not place the original document in the ADF. -
Page 32: Telephoning With The Help Of The Phone Book
ELEPHONING WITH THE HELP OF THE EDIALLING ONE OF THE LAST PHONE BOOK INCOMING NUMBERS OR ONE OF THE LAST OUTGOING NUMBERS CASE 1 Do not place the original document in the ADF. CASE 1 1. Lift the handset to engage the line. Do not place the original document in the ADF. -
Page 33: Making A Copy
AKING A COPY 9. To display the other two types of contrast available: HAT DOCUMENTS CAN BE COPIED “CONTRAST: LIGHT” or “CONTRAST: DARK”, press the key: Before making a copy, make sure that the document respects the characteristics described in “What documents may be used”, section 10. -
Page 34: The Telephone Answering Device (Tad)
HE TELEPHONE ANSWERING DEVICE This key starts recording a memo. If you have purchased the model of fax equipped with a built-in Press the key to move, while playing messages and memos, telephone answering device you can perform the same functions to the start of the next message or memo. -
Page 35: Outgoing Messages And Memos
4. Press the key: UTGOING MESSAGES AND MEMOS The display shows the default code “1234”: You can record several different types of outgoing messages: • OGM 1, which has a maximum length of 20 seconds, prompts the caller to leave a message on the TAD. For example: “You have called the telephone number ... - Page 36 6. To start recording the outgoing message, press the key: 5. To return the fax machine to the stand-by mode, press the key: The display shows: ECORDING OUTGOING MESSAGE You have 20 seconds (counted on the display from 19 to 00) to record your outgoing message.
-
Page 37: Setting The Length Of Memos And Incoming
O RECORD MEMOS LAYING INCOMING MESSAGES AND MEMOS As mentioned previously, the telephone answering device may be used to record one or more memos, which are If there is one or more incoming messages in the TAD handled in the same way as incoming messages. memory that have not yet been played back, the 1. -
Page 38: Transferring Incoming Messages And Memos
The TAD moves to the next message and the display shows: 5. To select the other “FORWARD.ONE TIME” or “FORWARD.DAILY” options, press the key: 6. To confirm the selection, press the key: 3. To delete the next message, press the key: Proceed in the same way for all the messages you want to The display shows: delete. -
Page 39: Operating The Tad From A Remote Location
PERATING THE TAD FROM A REMOTE PECIAL TAD FUNCTIONS LOCATION You can set up the TAD for the following special functions: • TOLL SAVER You can operate the TAD not only directly using specific keys on the • ANNOUNCE ONLY fax machine console, but also from any other location. -
Page 40: Printing The Tad Configuration Parameters
UTGOING MESSAGE ONLY ILENT RECEPTION OF INCOMING MESSAGES Using this function, whenever an incoming call is received, When this function is enabled, you can receive messages the TAD plays outgoing message 1 but does not record any confidentially. In other words, the TAD receives messages incoming messages. -
Page 41: More Sophisticated Operations
ORE SOPHISTICATED OPERATIONS 3. Press the key THER USEFUL RECEPTION SETTINGS until the display shows: RINTING AREA FOR A RECEIVED DOCUMENT REDUCING 4. Press the key until the display shows: 1. Press the key You can choose one of the other available settings: until the display shows: “SURPLUS:OFF”... - Page 42 3. Press the key: 2. Press the key: The display shows: The display shows: 3. Press the key: 4. Press the key until the display shows: The display shows: You can choose the following options: “SILENT RX:ALWAYS” or “SILENT RX: DAILY”. 4.
- Page 43 1. Press the key ING VOLUME CHANGING until the display shows: 1. Press the key until the display shows: 2. Press the key: 2. Press the key: The display shows: 3. Press the key The display shows: until the display shows: 3.
- Page 44 2. Press the key HANGING THE FAX MACHINE REMOTE OPERATION CODE until the display shows: You can enable reception on the fax machine from a remote telephone. The fax machine must be set up for manual reception and the remote telephone must use tone dialling. You can choose one of the following reaction times: Type in the code ** for remote fax operation on the remote “15”, “20”, “30”, “40”,...
-
Page 45: Other Useful Transmission Settings
THER USEFUL TRANSMISSION SETTINGS NABLING OR DISABLING NEW DOCUMENT TRANSMISSION FROM MEMORY HANGING POSITION OF NAME AND FAX NUMBER 1. Press the key The information in the heading of the document to be sent (name/logo, fax number, date and time and number of pages) until the display shows: may be received by your correspondent’s fax machine outside the text area or inside the text area. - Page 46 ETTING LOUDSPEAKER VOLUME OWERING TRANSMISSION SPEED If the volume of the dialling tones and connection signals is The fax machine normally transmits at a speed of 14400 bps (bits per second). A transmission speed of too low or too high, regulate it using the key.
-
Page 47: Transmitting And Receiving In Polling Mode
You can confirm the current time or overwrite with a new 3. Press the key: one, for example “06:20 PM”. 3. To overwrite the current time, press the keys: The display shows: 4. To confirm the entry or the current time, press the key: 4. - Page 48 5. To confirm the selection, press the key: The display shows: From here on, proceed as described in “Transmitting a document in polling mode”. REPARING THE DOCUMENT FOR TRANSMISSION POLLING TRANSMISSION 1. Place the original document in the ADF. The display shows on the top line: and on the bottom line, the default contrast value: NORMAL.
-
Page 49: Troubleshooting Guide
ROUBLESHOOTING GUIDE INOR PROBLEMS F THERE IS A POWER FAILURE If there is a power failure, the fax machine keeps the following The list below may be used as a guide to the solution of minor data in the memory: the numbers set for one-touch and problems. -
Page 50: Error Codes
RROR CODES The error codes printed both on the transmission report and the activity report consist of two digits indicating the cause of the error. To save space, the two-digit code without any message is printed on the activity report. CODE MESSAGE CAUSE OF FAULT... -
Page 51: Signals And Messages
IGNALS AND MESSAGES • You aborted the copy operation by pressing the key. Any problems that may arise are generally indicated by acoustic • An error occurred during the document copying phase, preventing signals (accompanied, in some cases, by visual signals: error it from being printed: check the type of error on the display and LED “... - Page 52 Reception continues in the memory because an error occurred during the reception of a document, preventing it from being printed: check You have put a telephone call on hold by pressing the key: the type of error on the lower line of the display and correct it. press the key again to resume the conversation with the correspondent.
-
Page 53: Delivery Contents, Connecting Up And First-Time Operation
AINTENANCE OPERATIONS N o t e EPLACING PRINT CARTRIDGE If you have replaced the print cartridge because the ink ran out, when the print cartridge compartment cover and the operator console are closed, the fax machine will automatically recognize that the print cartridge has been replaced and the display will show the message “NEW PRINT CART.? 1=YES 0=NO”. -
Page 54: Cleaning The Print Cartridge Electrical
4. To confirm the selection, press the key: LEANING THE PRINT CARTRIDGE ELECTRICAL CONTACTS The display shows: The fax machine cleans the print cartridge and tests the nozzles, printing out the result of the diagnostic test. Examine the diagnostic test result by consulting “Installing the print cartridge”, chapter “Delivery contents, connecting up and first-time operation”. -
Page 55: Cleaning Optical Read Head
LEANING OPTICAL READ HEAD LEARING PAPER JAMS Dust accumulating on the glass surface of the optical read head may If the paper used to print the documents received or to copy documents cause problems in the scanning of documents. To avoid these becomes jammed, this condition is signalled on the display by the problems, the glass should be cleaned regularly. -
Page 56: Manufacturer And Service
ANUFACTURER AND SERVICE ANUFACTURER Olivetti, S.p.A. con unico azionista Gruppo Telecom Italia Direzione e coordinamento di Telecom Italia S.p.A. USTOMER SERVICE If the fax machine is not working as it should, or you want to ask the manufacturers something, call the number indicated on the "Warranty Card". -
Page 57: Technical Data
ECHNICAL DATA ENERAL CHARACTERISTICS ECEIVING SPECIFICATIONS Model ......Desktop fax machine Printing system .... Printing on plain paper, bubble ink jet Display ....... LCD 16 + 16 char. printer Memory capacity ..2 MB Max. printing width ......204 mm Dimensions Printing paper........ -
Page 58: Index
NDEX Customer Service Customer Service telephone number 50 Aborting Customer Service telephone number 50 transmission 15 Additional telephone connecting 3 Date Automatic printing changing 7 broadcast report 23 entering 5 delayed transmission 23 Delayed transmission Automatic redial 16 automatic printing 23 changing 16 deleting 16 Broadcast report... - Page 59 Fax reception manually enabling 38 One-touch dialling 21 Fixing errors 43 printing configuration parameters 24 Originally provided 7 Outgoing messages 29 Handset playing 30 connecting 4 recording 29 Header changing 39 matching 39 Package contents 3 Header line Paper changing 39 inserting 6 matching 39 Paper format 6...
- Page 60 Redial Telephone connection 3 automatic 16 Telephone numbers Reducing printing area 35 incoming calls 26 Remote operation outgoing calls 26 TAD 33 viewing 26 Reports Telephoning broadcast transmission request 22 to an incoming number 26 power failure report 22 to an outgoing number 26 printing 24 Test sheet 7 transmission and reception transactions 22...
- Page 61 2) The Quality System is in compliance with the UNI EN ISO 9000 series of Standards Olivetti S.p.A. Sede Sociale Ivrea, Via Jervis, 77 - Cap. Soc. Euro 78.000.000 - C.C.I.A.A. Torino n. 547040 - Trib. Ivrea Reg. Soc. n.1927 - Cod. Fisc. e Part. IVA 02298700010...
- Page 63 Mass Merchandising Distribution Chain present in you country, as well as Retailers and Dealers. You can easily know where to buy Olivetti cartridges just making a phone call to the number reported on the yellow sheet (available in the fax documentation envelope).
- Page 64 259732J...