Xerox Phaser 3200MFP User Manual
Xerox phaser 3200mfp: user guide
Hide thumbs
Also See for Phaser 3200MFP:
- Service manual (270 pages) ,
- Evaluator manual (12 pages) ,
- Service manual (105 pages)
Table of Contents
Advertisement
Quick Links
Download this manual
See also:
Service Manual
Advertisement
Table of Contents

Related Manuals for Xerox Phaser 3200MFP


Summary of Contents for Xerox Phaser 3200MFP
-
Page 1: User Guide
Phaser 3200MFP User Guide 604E39320... - Page 2 The information in this document is correct at the time of publication. Xerox reserves the right at any time to change the information without notice. Changes and technical updates will be added in subsequent editions of the documentation.
-
Page 3: Table Of Contents
The Firmware Update Tab ........2-25 Xerox Phaser 3200MFP... - Page 4 Printing a Reduced or Enlarged Document ......6-18 Fitting Your Document to a Selected Paper Size ..... .6-19 Table of Contents-2 Xerox Phaser 3200MFP...
- Page 5 (Phaser 3200MFP/N only) ........
- Page 6 Replacing the ADF Rubber Pad ........9-11 Table of Contents-4 Xerox Phaser 3200MFP...
- Page 7 Scanning Problems ..........10-23 Network Scan Problems (Phaser 3200MFP/N Only) ....10-23 Fax Problems .
- Page 8 1 Table of Contents Table of Contents-6 Xerox Phaser 3200MFP...
-
Page 9: Welcome
1 Welcome Welcome Thank you for choosing the Xerox Phaser 3200MFP. This product has been designed for ease of use, but to use your machine to its fullest potential take some time to read this User Guide. • About This Guide – page 1-2 •... -
Page 10: About This Guide
Paper is synonymous with media. • Document is synonymous with original. • Page is synonymous with sheet. • Xerox Phaser 3200MFP is synonymous with the machine. The following table offers further information about the conventions used within this Guide. Convention Description Example Xerox Phaser 3200MFP. -
Page 11: Getting To Know Your Machine
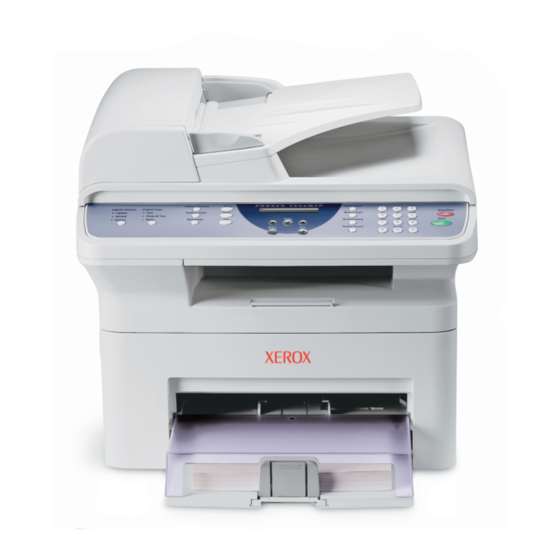
These are the main components of your machine: Front View Document Guide Document Cover Document Automatic Input Tray Document Feeder Document Output Tray Document Glass Control Panel Print Cartridge Paper Output Extension Paper Input Tray Front Door Output Tray (Face Down) Manual Tray Xerox Phaser 3200MFP... -
Page 12: Rear View
Rear View Rear Cover Power Switch EXT. Jack AC Power Cord Connector Line Jack USB port Network port* NOTE: If your country has a different telephone connection system, this socket may be blocked. * Phaser 3200MFP/N Only Xerox Phaser 3200MFP... -
Page 13: Control Panel Functions
Scan Allows you to access a list of your PC software programs that an image can be scanned to. You must create the scan list using the Xerox software (ControlCentre) provided with Using ControlCentre on this machine. For details see page 2-22 Select to Activate the Fax Mode. - Page 14 Used to scroll through the available options for the selected menu items on the display. Enter Confirms the selection on the display. Menu Enters Menu mode and scrolls through the menus available. Exit Sends you back to the upper menu level. Used to Exit menu functions. Xerox Phaser 3200MFP...
-
Page 15: Special Features
You can print multiple pages on one single sheet of paper to save paper. • You can use preprinted forms and letterhead on plain paper. • This machine automatically conserves electricity by substantially reducing power consumption when not printing. • This machine meets Energy Star guidelines for energy efficiency. Xerox Phaser 3200MFP... - Page 16 Print in various environments • You can print in Windows 98/Me/2000/XP(32/64bit)/2003(32/64bit)/Vista. • Compatible with Linux and Macintosh (Phaser 3200MFP/N only). • Zoran IPS Emulation* is compatible with PostScript 3 (PS) and enables PS printing (Phaser 3200MFP/N only). * Zoran IPS Emulation is compatible with PostScript 3 •...
-
Page 17: Customer Support
Xerox website for online solutions and support: http://www.xerox.com If you require further assistance, call our experts at the Xerox Welcome Center, or contact your local representative. When telephoning please quote the machine serial number. Use the space below to make a note of the... -
Page 18: Safety Notes
Read these safety notes carefully before using this product to ensure you operate the equipment safely. Your Xerox product and recommended supplies have been designed and tested to meet strict safety requirements. These include safety agency approval, and compliance to established environmental standards. Please read the following instructions carefully before operating the product and refer to them as needed to ensure the continued safe operation of your product. -
Page 19: Warning - Electrical Safety Information
– A wall panel circuit breaker, fuse, or other safety device has been tripped. – Liquid is spilled into the copier/printer. – The equipment is exposed to water. – Any part of the equipment is damaged. Xerox Phaser 3200MFP 1-11... -
Page 20: Laser Safety Information
Class 1 laser product. It does not emit hazardous light, as the beam is totally enclosed during all phases of customer operation and maintenance. Operational Safety Information To ensure the continued safe operation of your Xerox equipment, follow these safety guidelines at all times. Do These: •... -
Page 21: Maintenance Information
Xerox installation procedure will ensure that the concentration levels meet safe limits. If you need additional information about ozone, please request the Xerox publication Ozone by calling 1-800-828-6571 in the United States and Canada. -
Page 22: For Consumables
This product is certified by the following Agency using the Safety standards listed. Agency Standard Underwriters Laboratories Inc. UL60950-1 1st (2003) (USA/ Canada) Intertek ETL Semko IEC60950-1 Edition 1 (2001) This product was manufactured under a registered ISO9001 Quality system. 1-14 Xerox Phaser 3200MFP... -
Page 23: Regulatory Information
1 Welcome Regulatory Information CE Mark The CE mark applied to this product symbolizes Xerox's declaration of conformity with the following applicable Directives of the European Union as of the dates indicated: December 12, 2006: Council Directive 2006/95/EEC amended by Council Directive 93/68/EEC, approximation of the laws of the member states related to low voltage equipment. -
Page 24: Data Coupler Information
Company may request that you disconnect the equipment until the problem is resolved. Repairs to the machine should be made only by a Xerox representative or an authorized Xerox service agency. This applies at any time during or after the service warranty period. - Page 25 1 Welcome If your office has specially wired alarm equipment connected to the telephone line, ensure the installation of this Xerox equipment does not disable your alarm equipment. If you have questions about what will disable alarm equipment, consult your Telephone Company or a qualified installer.
- Page 26 Bulgaria Romania Hungary In the event of problems, you should contact your local Xerox representative in the first instance. This product has been tested to and is compliant with TBR21, a technical specification for terminal equipment for use on analogue-switched telephone networks in the European Economic Area.
-
Page 27: Environmental Compliance
Xerox ENERGY STAR equipment is preset at the factory. Your machine will be delivered with the timer for switching to Power Save Mode from the last copy/print out, set at 15 minutes. -
Page 28: Illegal Copies
Copyright Office, Library of Congress, Washington, D.C. 20559. Ask for Circular R21. Certificates of Citizenship or Naturalization. (Foreign Naturalization Certificates may be photographed.) Passports. (Foreign Passports may be photographed.) 1-20 Xerox Phaser 3200MFP... - Page 29 Government of Canada or of a province or of a government of a state other than Canada. Impressed or adhesive stamps used for the purpose of revenue by the Government of Canada or of a province or by the government of a state other than Canada. Xerox Phaser 3200MFP 1-21...
-
Page 30: Other Countries
Copyright material or trademarks without the consent of the owner Postage stamps and other negotiable instruments This list is not inclusive and no liability is assumed for either its completeness or accuracy. In case of doubt, contact your legal counsel. 1-22 Xerox Phaser 3200MFP... -
Page 31: Product Recycling And Disposal
1 Welcome Product Recycling and Disposal If you are managing the disposal of your Xerox product, please note that the product may contain lead, mercury, perchlorate and other materials whose disposal may be regulated due to environmental considerations. The presence of lead, mercury and perchlorate is fully consistent with regulations applicable at the time that the product was placed on the market. - Page 32 1 Welcome 1-24 Xerox Phaser 3200MFP...
-
Page 33: Getting Started
Selecting a Location – page 2-3 • Loading Paper – page 2-6 • Making Connections – page 2-8 • Switching On the Machine – page 2-11 • Installing Printer Software – page 2-12 • Using ControlCentre – page 2-22 Xerox Phaser 3200MFP... -
Page 34: Unpacking The Machine
The Power Cord must be plugged into a grounded power socket. NOTE: The CD-ROMs contain the Xerox printer driver, scan drivers, software, Network Scan, User Guide, Status Monitor and ControlCentre. NOTE: Components may differ from country to country. You should use the telephone line cord which is supplied with your machine. -
Page 35: Selecting A Location
Do not set the machine close to the edge of a desk or table. Clearance Space The diagram shows the space that should be left around the machine for access and ventilation. Xerox Phaser 3200MFP... -
Page 36: Installing The Print Cartridge
Cover it with a piece of paper if left exposed for more than a few minutes. CAUTION: Do not touch the green underside of the Print Cartridge. Use the handle on the cartridge when lifting the cartridge to avoid touching this area. Xerox Phaser 3200MFP... - Page 37 NOTE: When printing text at 5% coverage, you can expect a print cartridge life of approximately 2,000/3,000 pages. (1,500 pages for the print cartridge that is shipped with the machine.) Xerox Phaser 3200MFP...
-
Page 38: Loading Paper
Make sure that all four corners lay flat in the tray. NOTE: Do not put too much paper in the tray. Over filling the tray may cause paper jams. Xerox Phaser 3200MFP... - Page 39 NOTE: Do not push the guides hard against the paper stack to cause the stack to bend. If you do not adjust the paper side guide correctly, paper jams may occur. Xerox Phaser 3200MFP...
-
Page 40: Making Connections
EXT. jack on the back of the machine. NOTE: Use the TAM lead and the telephone line cord supplied with your machine. In the United Kingdom, if a three-wire TAM lead type (SHUNT-wire, older equipment) telephone or answering machine is Xerox Phaser 3200MFP... - Page 41 To prevent this incompatibility, use two-wire (newer equipment) telephones or answering machines. For Users in Germany For Users in France Xerox Phaser 3200MFP...
- Page 42 Connect a USB cable to the USB port on your machine. Connect to the USB port on your computer. If you want to use a LAN cable, purchase LAN cable and connect it to the LAN connector on your machine.(Phaser 3200MFP/N only) 2-10 Xerox Phaser 3200MFP...
-
Page 43: Switching On The Machine
The fusing area inside the machine is hot. Be careful not to touch hot surfaces when accessing this area. CAUTION: Do not disassemble the machine with power on. If you do, you may receive an electric shock. Xerox Phaser 3200MFP 2-11... -
Page 44: Installing Printer Software
Network Scan: This program allows you to scan a document on your machine and save it to a network-connected computer (Phaser 3200MFP/N only). Macintosh Driver (Phaser 3200MFP/N only) You can print and scan to and from Macintosh operating systems using your machine. -
Page 45: System Requirements
Windows 98/Me/2000/ 5.0 or higher Explorer XP(32/64bit)/2003(32/64bit) 7.0 or higher Windows Vista Macintosh 10.3 ~ 10.4 - See Installing Software for Macintosh – page 6-46 Various Linux - See Installing the Unified Linux Driver – page 6-32. Xerox Phaser 3200MFP 2-13... -
Page 46: Printer Driver Features
Linux Toner Save Print quality option Poster printing Multiple pages per Y(2,4) sheet (N-up) Fit to page printing Scale printing Watermark Overlay NOTE: For details about installing software and using its features, see Chapter 6, Printing. 2-14 Xerox Phaser 3200MFP... -
Page 47: Changing The Display Language And Country
Entering Characters Using the Number Keypad – page 2-16. If you want to enter the same letter or number in succession (e.g. SS, AA, 777), enter one digit, move the cursor by pressing the button and enter the next digit. Xerox Phaser 3200MFP 2-15... -
Page 48: Entering Characters Using The Number Keypad
The cursor will move to the right and the next letter will appear on the display. You can enter a space by pressing 1 once, and by using the cursor button. When you finish entering letters, press Enter. 2-16 Xerox Phaser 3200MFP... -
Page 49: Setting The Date And Time
(Approx. 72 hours), you need to reset date and time. Press Menu until “Machine Setup” appears on the top line of the display. Press the scroll button ( or ) to display “Date & Time” on the bottom line and press Enter. Xerox Phaser 3200MFP 2-17... -
Page 50: Changing The Clock Mode
The clock mode currently set for the machine displays. Press the scroll button ( or ) to select the other mode and then press Enter to save the selection. To return to Standby mode, press Stop/Clear. 2-18 Xerox Phaser 3200MFP... -
Page 51: Changing The Dial Mode
“Paper Type” and press Enter to access the menu item. Use the scroll button ( or ) to find the paper type you are using and press Enter to save it. To return to Standby mode, press Stop/Clear. Xerox Phaser 3200MFP 2-19... -
Page 52: Setting Sounds
Press the scroll button ( or ) until you hear the volume you want. The display shows the current volume level. Press Manual Dial to save the change and return to Standby mode. NOTE: You can adjust the speaker volume only when the telephone line is connected. 2-20 Xerox Phaser 3200MFP... -
Page 53: Using The Save Modes
Press the scroll button ( or ) until the time setting you want appears. The available options are 5, 10, 15, 30, 60 and 120 (minutes). Press Enter to save the selection. To return to Standby mode, press Stop/Clear. Xerox Phaser 3200MFP 2-21... -
Page 54: Using Controlcentre
You can also update the firmware of the machine. To install the Xerox ControlCentre, insert the supplied Xerox Drivers CD. The CD-ROM should automatically run, and an installation window appears. -
Page 55: The Scan Settings Tab
Available Scan Destinations and click to add it to the Front Panel Destination List. To delete the selected program, click Restore Defaults Click to restore the default settings. Send Downloads the settings made in the ControlCentre to your machine. Xerox Phaser 3200MFP 2-23... -
Page 56: The Phonebook Tab
Shows the Phonebook entries you can include in the group. Select a number and click Add to move it to the Included numbers list. Click to save the group dial number after adding or removing numbers for the group. 2-24 Xerox Phaser 3200MFP... -
Page 57: The Printer Tab
PCL Settings Allows you to set the PCL emulation configuration. Apply Downloads the settings made in the ControlCentre to your machine. The Firmware Update Tab Click the Firmware Update tab to update the firmware of your machine. Xerox Phaser 3200MFP 2-25... -
Page 58: Xerox Phaser 3200Mfp
2 Getting Started 2-26 Xerox Phaser 3200MFP... -
Page 59: Network Setup
3 Network Setup Network Setup Connecting your machine to a network is available only on the Phaser 3200MFP/N. This chapter gives you step-by-step instructions for setting up your machine for network connections. This chapter includes: • Introduction – page 3-2 •... -
Page 60: Introduction
Driver on page 32) • Macintosh OS 10.3~10.4 Network • TCP/IP on Windows protocols • EtherTalk Dynamic • DHCP, BOOTP addressing server • TCP/IP: Transmission Control Protocol/Internet Protocol • DHCP: Dynamic Host Configuration Protocol • BOOTP: Bootstrap Protocol Xerox Phaser 3200MFP... -
Page 61: Configuring Tcp/Ip
Enter a byte between 0 and 255 using the number keypad and press the scroll button ( or ) to move between bytes. Repeat this to complete the address from the 1st byte to the 4th byte. When you have finished, press Enter. Xerox Phaser 3200MFP... -
Page 62: Configuring Ethertalk
You can reset the embedded network interface when a network problem occurs. Press Menu until "Network Setup" appears on the top line of the display. Press Enter when "Reset Network" appears. The machine resets the network interface. Xerox Phaser 3200MFP... -
Page 63: Paper Handling
This chapter explains how to select print materials and load them into your machine. This chapter includes: • Selecting Print Materials – page 4-2 • Loading Paper – page 4-5 • Copy Output Tray – page 4-6 Xerox Phaser 3200MFP... -
Page 64: Selecting Print Materials
Plain paper Envelopes Labels Transparencies Card stock NOTE: If you experience excessive jamming, load one sheet at a time through the tray or manual tray. NOTE: Maximum capacity may differ depending on media weight, thickness, and environmental conditions. Xerox Phaser 3200MFP... -
Page 65: Guidelines For Paper And Special Materials
– To avoid smudging caused by fingerprints, handle them carefully. – To avoid fading, do not expose printed transparencies to prolonged sunlight. – Only use transparencies recommended for use in laser printers. – Ensure that transparencies are not wrinkled, curled, or have any torn edges. Xerox Phaser 3200MFP... - Page 66 During the fusing process, wet ink can come off preprinted paper. • Do not use Carbonless paper and Tracing paper. Use of these types of paper could result in chemical smells and could damage your machine. Xerox Phaser 3200MFP...
-
Page 67: Loading Paper
Start on the machine to start feeding. Printing is started. If you have multiple pages to be printed, the display shows “Add Paper & Press Start” again. Load the next sheet and press Start. Repeat this step for every page to be printed. Xerox Phaser 3200MFP... -
Page 68: Copy Output Tray
The output tray collects printed paper face down, in the order in which the sheets were printed. NOTE: Pull the paper output extension out so that the output does not drop out of the tray. Paper output extension Xerox Phaser 3200MFP... -
Page 69: Copying
This chapter gives you step-by-step instructions for copying documents. This chapter includes: NOTE: The machine defaults to Copy mode. • Making Copies – page 5-2 • Selecting Copy Options – page 5-5 • Copy Setup – page 5-11 Xerox Phaser 3200MFP... -
Page 70: Making Copies
Do not load documents that include different sizes or weights of paper. • Do not load booklets, pamphlets, transparencies, or documents having other unusual characteristics. If you wish to copy any of the documents listed here, use the Document Glass. Xerox Phaser 3200MFP... -
Page 71: Making Copies On The Document Glass
To clear the settings, use the Stop/Clear button. If necessary, you can use special copy features, such as Poster, Auto Fit, Clone, and ID Card copying. See Special Copy Features on page 5-7 Press Start to begin copying. The display shows the copy processing. Xerox Phaser 3200MFP... -
Page 72: Making Copies From The Automatic Document Feeder
Press Start to begin copying. The display shows the copy processing. NOTE: Dust on the ADF glass may cause black lines on the printout. Always keep the ADF glass clean. See Cleaning the Scan Unit on page 9-5. Xerox Phaser 3200MFP... -
Page 73: Selecting Copy Options
When you copy a document containing color on the background, such as a newspaper or a catalog, the background will appear on your copy. If you want to reduce the background, change the Lighten/Darken setting to Lighten and/or the Original Type setting to Text. Xerox Phaser 3200MFP... -
Page 74: Copy Quantity
Press the number you want to enter on the display: You can press and hold the button to quickly scroll the number you want to enter. You can also enter the value using the number keypad. Press Enter to save the selection. Xerox Phaser 3200MFP... -
Page 75: Special Copy Features
If necessary, customize the copy settings, including Lighten/Darken and original type, by using the control panel buttons. See “Selecting Copy Options” on page 5-5. Press Start to begin copying. NOTE: You cannot adjust the copy size using the Reduce/Enlarge button while making a clone copy. Xerox Phaser 3200MFP... -
Page 76: Collation Copying
See “Selecting Copy Options” on page 5-5. Press Start to begin copying. NOTE: You cannot adjust the copy size using the Reduce/Enlarge button while Auto Fit copying is enabled. Xerox Phaser 3200MFP... -
Page 77: Id Card Copying
See “Selecting Copy Options” on page 5-5. 4-up copying Press Start to begin copying. NOTE: You cannot adjust the copy size using the Reduce/Enlarge button for making a 2 or 4 Up copy. Xerox Phaser 3200MFP... -
Page 78: Poster Copying
Your original document is divided into 9 portions. Each portion is scanned and printed one by one in the following order: NOTE: You cannot adjust the copy size using the Reduce/ Enlarge button when making a poster. 5-10 Xerox Phaser 3200MFP... -
Page 79: Copy Setup
You can select from 15, 30, 60, 120 and 180 (seconds). Selecting “Off” means that the machine does not restore the default settings until you press Start to begin copying, or Stop/Clear to cancel. Press Enter to make your selection. To return to Standby mode, press Stop/Clear. Xerox Phaser 3200MFP 5-11... - Page 80 5 Copying 5-12 Xerox Phaser 3200MFP...
-
Page 81: Printing
Sharing the Printer Locally – page 6-27 • Using Windows PostScript Driver (Phaser 3200MFP/N Only) – page 6-28 • Using Your Printer in Linux – page 6-32 • Using Your Machine with a Macintosh (Phaser 3200MFP/N only) – page 6-46 Xerox Phaser 3200MFP... -
Page 82: Installing Printer Software In Windows
Plug the USB cable into the Printer and connect it to your Personal Computer (PC). Start your PC and turn on the Printer. Insert the Xerox Drivers CD into the CD-ROM drive. If you use Windows Vista, when you are asked to allow the installation, click Continue. - Page 83 Make sure that the printer is connected to your network and powered on. For details about connecting to the network, see Making Connections on page 2-8 Insert the Xerox Drivers CD into the CD-ROM drive. If you use Windows Vista, when you are asked to allow the installation, click Next.
- Page 84 6 Printing When the language selection window appears, select the appropriate language and then click Next. Choose the components you want to install and then click Next. Click Next. Click Finish. The driver installation is now complete. Xerox Phaser 3200MFP...
- Page 85 6 Printing Selecting the Xerox Network Printer Port To print to the Xerox Network Printer port, you need to select it in the printer driver. From the Windows Start menu, selecting Settings and then Printer to open the Printer folder.
-
Page 86: Printing A Document
The basic print settings are selected within the Print window. These settings include the number of copies and print range. Make sure that your printer is Select your printer selected. driver from the Name drop-down list. Xerox Phaser 3200MFP... -
Page 87: Printer Settings
Windows User's Guide or online help. Click the Windows Start button. Select Printers and Faxes. Select your printer driver icon. Right-click on the printer driver icon and select Printing Preferences. Change the settings on each tab, click OK. Xerox Phaser 3200MFP... -
Page 88: Layout Tab
You can choose Multiple Pages per Side and Poster Printing. For details, see Printing Multiple Pages on One Sheet of Paper (N-Up Printing) on page 6-16. For details, see Printing Posters on page 6-17. Xerox Phaser 3200MFP... -
Page 89: Paper Tab
Size box, click Custom. When the Custom Paper Setting window appears, set the paper size and click OK. The setting appears in the list so that you can select it. Enter the custom name you want to use. Enter the paper size. Xerox Phaser 3200MFP... - Page 90 You can choose from None, Reduce/Enlarge, and Fit to Page. • For details, see Printing a Reduced or Enlarged Document on page 6-18. • For details, see Fitting Your Document to a Selected Paper Size on page 6-19. 6-10 Xerox Phaser 3200MFP...
-
Page 91: Graphics Tab
On: Select this option to allow the printer to use less toner on each page. Off: If you don’t need to save toner when printing a document, select this option. Xerox Phaser 3200MFP 6-11... - Page 92 TrueType fonts, printing performance (speed) may be enhanced in this setting. Print All Text Black: When the Print All Text Black option is selected, all text in your document prints solid black, regardless of the color it appears on the screen. 6-12 Xerox Phaser 3200MFP...
-
Page 93: Extras Tab
Reverse All Pages (3,2,1): Your printer prints all pages from the last page to the first page. Print Odd Pages: Your printer prints only the odd numbered pages of the document. Print Even Pages: Your printer prints only the even numbered pages of the document. Xerox Phaser 3200MFP 6-13... -
Page 94: About Tab
These help screens give detailed information about the printer features provided by the printer driver. You can also click from the upper right corner of the window, and then click on any setting. 6-14 Xerox Phaser 3200MFP... -
Page 95: Canceling A Print Job
You can also access this window by simply double-clicking the printer icon at the bottom right corner of the Windows desktop. You can also cancel the current job by pressing the Stop/Clear button on the control panel of your printer. Xerox Phaser 3200MFP 6-15... -
Page 96: Advanced Printing
From the Layout tab, choose Multiple Pages per Side in the Layout Type drop-down list. Select the number of pages you want to print per sheet (1, 2, 4, 6, 9, or 16) in the Pages per Side drop-down list. 6-16 Xerox Phaser 3200MFP... -
Page 97: Printing Posters
To change the print settings from your software application, access printer properties. See Basic Printing on page 6-6. Click the Layout tab, select Poster Printing in the Layout Type drop- down list. Xerox Phaser 3200MFP 6-17... -
Page 98: Printing A Reduced Or Enlarged Document
You can change the size of a page’s content to appear larger or smaller on the printed page. To change the print settings from your software application, access printer properties. See Basic Printing on page 6-6. From the Paper tab, select Reduce/Enlarge in the Printing Type drop- down list. 6-18 Xerox Phaser 3200MFP... -
Page 99: Fitting Your Document To A Selected Paper Size
To change the print settings from your software application, access printer properties. See Basic Printing on page 6-6. From the Paper tab, select Fit to Page in the Printing Type drop-down list. Xerox Phaser 3200MFP 6-19... -
Page 100: Using Watermarks
See Creating a Watermark on page 6-21. Using an Existing Watermark To change the print settings from your software application, access printer properties. See Basic Printing on page 6-6. 6-20 Xerox Phaser 3200MFP... -
Page 101: Creating A Watermark
To change the print settings from your software application, access printer properties. See Basic Printing on page 6-6. Click the Extras tab, and click the Edit button in the Watermark section. The Edit Watermark window appears. Xerox Phaser 3200MFP 6-21... -
Page 102: Editing A Watermark
From the Extras tab, click the Edit button in the Watermark section. The Edit Watermark window appears. Select the watermark you want to delete from the Current Watermarks list and click Delete. Click OK until you exit the Print window. 6-22 Xerox Phaser 3200MFP... -
Page 103: Using Overlays
To save the document as an overlay, access printer properties. See Basic Printing on page 6-6. Click the Extras tab, and click Edit button in the Over- lay section. Preview Image Xerox Phaser 3200MFP 6-23... - Page 104 The file is not printed. Instead it is stored on your computer hard disk drive. NOTE: The overlay document size must be the same as the documents you print with the overlay. Do not create an overlay with a watermark. 6-24 Xerox Phaser 3200MFP...
-
Page 105: Using A Page Overlay
If this box is not selected and an overlay has been selected, the overlay automatically prints with your document. Xerox Phaser 3200MFP 6-25... -
Page 106: Deleting A Page Overlay
Click the Edit button in the Overlay section. Select the overlay you want to delete from the Overlay List box. Click Delete Overlay. When a confirming message window appears, click Yes. Click OK to exit the Print window. 6-26 Xerox Phaser 3200MFP... -
Page 107: Sharing The Printer Locally
From the Ports tab, click Add Port. Select Local Port and click New Port. Fill in the Enter a Port Name field with the shared name. Click OK and click Close. Click Apply and click OK. Xerox Phaser 3200MFP 6-27... -
Page 108: Using Windows Postscript Driver (Phaser 3200Mfp/N Only)
1) Click the Windows button. Start 2) Select Printers and Faxes. 3) Select your printer driver icon. 4) Right-click on the printer driver icon and select Printing Preferences. 5) Change the settings on each tab, click OK. 6-28 Xerox Phaser 3200MFP... -
Page 109: Advanced
• Document Options this options allow you to set the PostScript options or printer features. Using Help You can click from the upper right corner of the window, and then click on any setting. Xerox Phaser 3200MFP 6-29... -
Page 110: Using Status Monitor
• You can use the Status Monitor in Windows 98/Me//2000/XP(32/64bit)/ 2003(32/64bit)/Vista. To install the Status Monitor, insert the supplied Xerox Drivers CD. The CD-ROM should automatically run, and an installation window appears. If the installation window does not appear, click Start and then Run. Type X:\Setup.exe, replacing "X"... -
Page 111: Opening The Troubleshooting Guide
If you select Cancel Printing, turn the printer off and then click OK. It may take several minutes. Note that this will lose data which is being sent to the printer via network. Xerox Phaser 3200MFP 6-31... -
Page 112: Using Your Printer In Linux
You can use your machine in a Linux environment. Getting Started The supplied CD-ROM provides you with the Xerox’s Unified Linux Driver package for using your machine with a Linux computer. The Xerox’s Unified Linux Driver package contains printer and scanner drivers, providing the ability to print documents and scan images. - Page 113 If the CD-ROM is secondary master and the location to mount is /mnt/ cdrom, [root@localhost root]#mount -t iso9660 /dev/hdc /mnt/cdrom [root@localhost root]#cd /mnt/cdrom/Linux [root@localhost root]#./install.sh NOTE: The installation program runs automatically if you have an autorun software package installed and configured. Xerox Phaser 3200MFP 6-33...
-
Page 114: Uninstalling The Unified Linux Driver
When the installation is complete, click Finish. The installation program has added the Unified Driver Configurator desktop icon and Xerox Unified Driver group to the system menu for your convenience. If you have any difficulties, consult the onscreen help that is... -
Page 115: Using The Unified Driver Configurator
6-32), the Unified Linux Driver Configurator icon will automatically be created on your desktop. Opening the Unified Driver Configurator Double-click Unified Driver Configurator on the desktop. You can also click the Startup Menu icon and select the Unified Driver Configurator. Xerox Phaser 3200MFP 6-35... -
Page 116: Printers Configuration
Shows the status, model name and URI of your printer. You can use the following printer control buttons: • Refresh: renews the available printers list. • Add Printer: allows you to add a new printer. 6-36 Xerox Phaser 3200MFP... - Page 117 • Refresh : Renews the classes list. • Add Class... : Allows you to add a new printer class. • Remove Class : Removes the selected printer class. Xerox Phaser 3200MFP 6-37...
-
Page 118: Scanners Configuration
6 Printing Scanners Configuration In this window, you can monitor the activity of scanner devices, view a list of installed Xerox MFP devices, change device properties, and scan images. Switches to Scanners configuration. Shows all installed scanners. Shows the vendor, model name and type of your scanner. -
Page 119: Configuring Printer Properties
I/O port. The Xerox Unified Linux Driver package provides an appropriate port sharing mechanism that is used by the Xerox printer and scanner drivers. The drivers address their devices via so-called MFP ports. The current status of any MFP port can be viewed via the MFP Ports Configuration. -
Page 120: Printing A Document
From the application you are using, select Print from the File menu. Select Print directly using lpr. In the LPR GUI window, select the model name of your machine from the Printer list and click Properties. Click. 6-40 Xerox Phaser 3200MFP... -
Page 121: Printing Files
To abort the current job, click Cancel. Printing Files You can print many different types of files on the Xerox machine device using the standard CUPS way - directly from the command line interface. The CUPS lpr utility allows you do that. But the drivers package replaces the standard lpr tool by a much more user-friendly LPR GUI program. -
Page 122: Scanning A Document
The scanner name shown in Scanners configuration can be different from the device name. Click Properties. Load the document to be scanned face up into the ADF (Automatic Doc- ument Feeder) or face down on the document glass. Click Preview in the Scanner Properties window. 6-42 Xerox Phaser 3200MFP... - Page 123 When you have finished, click Scan to start scanning. The status bar appears on the bottom left of the window to show the progress of the scan. To cancel scanning, click Cancel. The scanned image appears in the new Image Editor window. Xerox Phaser 3200MFP 6-43...
-
Page 124: Adding Job Type Settings
To delete a Job Type setting: Select the setting you want to delete from the Job Type drop-down list. Click Delete. The setting is deleted from the list. 6-44 Xerox Phaser 3200MFP... -
Page 125: Using The Image Editor
Allows you to flip the image vertically or horizontally. Allows you to adjust the brightness or contrast of the image, or to invert the image. Shows the properties of the image. For further details about the Image Editor program, refer to the onscreen help. Xerox Phaser 3200MFP 6-45... -
Page 126: Using Your Machine With A Macintosh (Phaser 3200Mfp/N Only)
Turn on your computer and the machine. Insert the PostScript driver CD-ROM which came with your machine into the CD-ROM drive. Double-click the Xerox MFP on your Macintosh desktop. Double-click the MAC_Installer folder. Double-click the MAC_Printer folder. Double-click the Xerox Phaser 3200MFP_OSX icon. - Page 127 Uninstall is required if you are upgrading the software, or if installation fails. Insert the PostScript driver CD-ROM which came with your machine into the CD-ROM drive. Double-click the Xerox MFP on your Macintosh desktop. Double-click the MAC_Installer folder. Double-click the MAC_Printer folder.
-
Page 128: Setting Up The Printer
Click Add. If Auto Select does not work properly, select Xerox in Printer Model and your printer name in Model Name. Your machine appears on the Printer List and is set as the default printer. -
Page 129: Printing
Select the USB tab. Select your printer name and click Add. If Auto Select does not work properly, select Xerox in Printer Model and your printer name in Model Name. Your machine appears on the Printer List and is set as the default printer. -
Page 130: Changing Printer Settings
You can print multiple pages on one sheet of paper. Select Layout from the Presets drop-down list to access the following features. For details, see “Printing Multiple Pages on One Sheet of Paper” on the next column. Mac OS 10.3 or later 6-50 Xerox Phaser 3200MFP... - Page 131 The Resolution options you can select may vary depending on your printer model. You can select the printing resolution. The higher the setting, the sharper the clarity of printed characters and graphics. The higher setting also may increase the time it takes to print a document. Xerox Phaser 3200MFP 6-51...
- Page 132 Open the TWAIN window and set the scan options. • Scan and save your scanned image. NOTE: You need to follow the program’s instructions for acquiring an image. Please refer to the User Guide of the application. 6-52 Xerox Phaser 3200MFP...
-
Page 133: Scanning
Thus, depending on your system and what you are scanning, you may not be able to scan at certain resolutions, especially using enhanced dpi. You need to press Scan to activate Scan mode. Xerox Phaser 3200MFP... -
Page 134: Scanning Basics
To scan with your machine, you must install the software. For details, see the installing printer software in windows section of Chapter 6, Printing to install the scan software. Your Phaser 3200MFP offers the following ways to scan an image: • From the control panel on your machine to an application: Use the Scan button on the control panel to initiate scanning. -
Page 135: Scanning Process With Twain-Enabled Software
Open an application, such as PhotoDeluxe or Photoshop. Open the TWAIN window and set the scan options. Scan and save your scanned image. NOTE: You need to follow the program’s instructions for acquiring an image. Please refer to the User Guide of the application. Xerox Phaser 3200MFP... -
Page 136: Scanning Using The Wia Driver
Enter a picture name, and select a file format and destination to save the picture. Follow the on-screen instructions to edit the picture after it is copied to your computer. NOTE: If you want to cancel the scan job, press the Cancel button on the Scanner and Camera Wizard. Xerox Phaser 3200MFP... -
Page 137: Scanning Using A Network Connection (Phaser 3200Mfp/N Only)
Programs Xerox Network Scan Network Scan. The Xerox Network Scan Manager window opens. Click the Add Device button or double-click the Add Device icon. Click Next. Select Browse for a scanner. (recommended), or select Connect to this scanner. and enter the IP address of your machine. -
Page 138: Registering Authorized Users
7 Scanning NOTE: You can change the scanner properties of your machine and the scan settings from the Xerox Network Scan Manager window. Click Properties and set the options in each tab. Registering authorized users You can add up to 50 authorized users using CentreWare IS. -
Page 139: Scanning To A Network Client
Select the scroll button ( or ) until the User ID you have set in the Xerox Network Scan Manager window and press Enter. Enter the PIN you have set in the Xerox Network Scan Manager window and press Enter. - Page 140 Enter or Start. The machine begins scanning and then sends the email. If the machine asks if you want to log off your account, press the scroll button ( or ) to select “Yes” or “No” and press Enter. Xerox Phaser 3200MFP...
-
Page 141: Changing The Settings For Each Scan Job
Press the scroll button ( or ) until the desired status appears and press Enter. Repeat steps 4 and 5 to change other settings. To change the default settings for other scan types, press Exit and repeat from step 4. Press Stop/Clear to return to Standby mode. Xerox Phaser 3200MFP... -
Page 142: Enabling Network Scan
Setting up Address Book You can set up Address Book with the email addresses you use frequently via CentreWare IS. NOTE: You can also click Import to upload your address book from your computer. A .csv file is required. 7-10 Xerox Phaser 3200MFP... -
Page 143: Configuring Group Email Numbers
To use a group email entry, you need to search for and select it from memory. When you are prompted to enter a destination address while sending an email, press Phone Book. Please refer to Searching Address Book for an entry on page 7-12 Xerox Phaser 3200MFP 7-11... -
Page 144: Searching Address Book For An Entry
Press the scroll button ( or ) until “E-mail” appears of the display and press Enter. Press the scroll button ( or ) until the address category you want appears and press Enter. The selected address book prints out. 7-12 Xerox Phaser 3200MFP... -
Page 145: Faxing
Automatic Dialing – page 8-13 • Other Ways to Fax – page 8-18 • Additional Features – page 8-22 • Sending a fax from a PC – page 8-28 NOTE: You need to press Fax to activate Fax mode. Xerox Phaser 3200MFP... -
Page 146: Setting Up The Fax System
You can select the default contrast mode to fax your documents lighter or darker. Lighten works well with dark print. Normal works well with standard typed or printed documents. Darken works well with light print or faint pencil markings. Xerox Phaser 3200MFP... - Page 147 In this menu, you can set the machine to recognize which ring patterns to answer. For details about Receiving Faxes Using the DRPD this feature, see Mode on page 8-11 Xerox Phaser 3200MFP...
-
Page 148: Sending A Fax
ADF to match the width of the document. NOTE: Dust on the ADF glass may cause black lines on the printout. Use the recommend materials to keep the ADF glass clean. Refer to Cleaning the Scan Unit on page 9-5. Xerox Phaser 3200MFP... -
Page 149: Adjusting The Document Resolution
Press Resolution on the control panel. By pressing Resolution or the scroll button ( or ), you can choose from Standard, Fine, Super Fine, Photo, and Color. When the mode you want to use displays, press Enter to make your selection. Xerox Phaser 3200MFP... -
Page 150: Sending A Fax Automatically
When a document is placed on the document glass, the display shows “Another Page?” on the top line after the document is scanned into the memory. If you have the next page, remove the scanned page and place Xerox Phaser 3200MFP... -
Page 151: Sending A Fax Manually
To add more documents, press the scroll button ( or ) to display "Yes" and press Enter. To send the fax immediately, press the scroll button ( or ) to display "No" and press Enter. Xerox Phaser 3200MFP... -
Page 152: Confirming Transmission
When the display shows “Retry Redial?”, press Enter to redial the number without waiting. To cancel the automatic redialing, press Stop/Clear. To change the time interval between redials and the number of redial attempts. See Redial Term on page 8-3. Xerox Phaser 3200MFP... -
Page 153: Receiving A Fax
Faxes can only be printed on Letter-, A4-, Legal-, Folio-, Executive-, or B5- sized paper. For details about loading paper and setting the paper size in the tray, see Loading Paper on page 2-6 and Setting the Paper Size and Type on page 2-19. Xerox Phaser 3200MFP... -
Page 154: Receiving Automatically In Fax Mode
If you are in Tel mode (manual reception) when the answering machine is connected to your machine, you must switch off the answering machine, or the outgoing message from the answering machine will interrupt your phone conversation. 8-10 Xerox Phaser 3200MFP... -
Page 155: Receiving Manually Using An Extension Telephone
Enter. When “Set” displays on the bottom line, press Enter. “Waiting Ring” appears on the display. Call your fax number from another telephone. It is not necessary to place the call from a fax machine. Xerox Phaser 3200MFP 8-11... -
Page 156: Receiving Faxes In The Memory
If you receive a fax while you are copying or printing, your machine stores incoming faxes in memory. Then, as soon as you finish copying or printing, the machine automatically prints the fax. 8-12 Xerox Phaser 3200MFP... -
Page 157: Automatic Dialing
If you do not want to assign a name, skip this step. Press Enter when the name appears correctly or without entering a name. To store more fax numbers, repeat steps 4 through 7. To return to Standby mode, press Stop/Clear. Xerox Phaser 3200MFP 8-13... -
Page 158: Group Dialing
Press the scroll button ( or ) to display “Group Dials” on the bottom line and press Enter. Press Enter when “New” displays on the bottom line. The display prompts you to enter a location number, showing the first available number. 8-14 Xerox Phaser 3200MFP... -
Page 159: Editing Group Dial Numbers
Press the scroll button ( or ) to display “Edit” on the bottom line and press Enter. Enter the group number you want to edit or select the group number by pressing the scroll button ( or ) and press Enter. Xerox Phaser 3200MFP 8-15... -
Page 160: Searching For A Number In Memory
You can either scan from A to Z sequentially, or you can search using the first letter of the name associated with the number. Searching Sequentially through the Memory Press the Fax button. Press Phone Book. Press Enter when “Search&Dial” appears on the display. 8-16 Xerox Phaser 3200MFP... -
Page 161: Printing A Phonebook List
Press the Fax button. Press Phone Book. Press Phone Book or the scroll button ( or ) until “Print” appears on the bottom line and press Enter. A list showing your speed dial, and group dial entries prints out. Xerox Phaser 3200MFP 8-17... -
Page 162: Other Ways To Fax
To enter more fax numbers, press the scroll button ( or ) to display "Yes" and press Enter. Repeat steps 5 and 6. You can add up to 10 destinations. Note that you can input group dial numbers only once at first. 8-18 Xerox Phaser 3200MFP... -
Page 163: Sending A Delayed Fax
To enter more fax numbers, press the scroll button ( or ) to display "Yes" and press Enter. Repeat steps 5 and 6. You can add up to 10 destinations. Note that you can input group dial numbers only once at first. Xerox Phaser 3200MFP 8-19... -
Page 164: Sending A Priority Fax
For details about loading a document, see Loading a Document on page 8-4. Adjust the document resolution to suit your fax needs (see Adjusting the Document Resolution on page 8-5). If you need to change the brightness, see Lighten/Darken on page 8-2. 8-20 Xerox Phaser 3200MFP... -
Page 165: Adding Documents To A Scheduled Fax
Press Menu until “Fax Feature” appears on the top line of the display. Press the scroll button ( or ) to display “Add Page” on the bottom line and press Enter. The display shows the last job reserved in memory. Xerox Phaser 3200MFP 8-21... -
Page 166: Canceling A Scheduled Fax
Enter. Press the scroll button ( or ) to display “On” on the bottom line and press Enter. Enter a four-digit password you want to use, using the number keypad and press Enter. 8-22 Xerox Phaser 3200MFP... -
Page 167: Printing Reports
NOTE: You can print this Phonebook list using the Phone Book button: see Printing a Phonebook List on page 8-17. Sent Fax Report This report shows information on the faxes and email you have recently sent. Xerox Phaser 3200MFP 8-23... -
Page 168: System Data List
& date, the number of pages scanned, and result. This report is automatically printed when the report contains the 50 jobs and the records that are printed will be deleted. Multi-communication Report This report is printed automatically after sending documents from more than one location. 8-24 Xerox Phaser 3200MFP... -
Page 169: Using Advanced Fax Settings
When the option you want appears on the display, choose a status by pressing the scroll button ( or ) or enter a value using the number keypad. Press Enter to save the selection. You can exit from Setup mode at any time by pressing Stop/Clear. Xerox Phaser 3200MFP 8-25... -
Page 170: Forwarding Faxes
Press the scroll button ( or ) until “Email Setup” appears on the bottom line of the display and press Enter. Press Enter when “Email Forward” appears. Press the scroll button ( or ) until “[Tx Only]” appears on the bottom line of the display and press Enter. 8-26 Xerox Phaser 3200MFP... - Page 171 ( or ) until “[On]” appears on the bottom line of the display and press Enter. Press Stop/Clear to return to Standby mode. Subsequent received faxes will be forwarded to the specified email address. Xerox Phaser 3200MFP 8-27...
-
Page 172: Sending A Fax From A Pc
To send a fax from your PC, you need to install the PC-Fax software and customize the software’s settings. Installing PC-Fax Software To install the PC-Fax, insert the supplied Xerox Drivers CD. The CD-ROM should automatically run, and an installation window appears. -
Page 173: Configure Pc Fax
Open the document you want to send. Select Print from the File menu. The Print window displays. It may look slightly different depending on your application. Select Xerox PC Fax from the Print window. Click OK. Xerox Phaser 3200MFP 8-29... - Page 174 Select the number you want from the Phonebook and click to add it to the Recipients. To delete the selected number, click Add the recipients’ numbers directly. Add a new Remove a selected Phonebook entry. Phonebook entry. 8-30 Xerox Phaser 3200MFP...
- Page 175 8 Faxing Select the resolution and click Send Fax. You can see the preview image of the fax. Your PC begins to send the fax data and multi-function printer sends the fax. Xerox Phaser 3200MFP 8-31...
- Page 176 8 Faxing 8-32 Xerox Phaser 3200MFP...
-
Page 177: Maintenance
This chapter provides information for maintaining the machine and replacing the print cartridge. This chapter includes: • Clearing the Memory – page 9-2 • Cleaning Your Machine – page 9-3 • Maintaining the Print Cartridge – page 9-6 • Consumables Parts – page 9-10 Xerox Phaser 3200MFP... -
Page 178: Clearing The Memory
Clears the information on Network Scan sessions in the memory Press Enter. The selected memory is cleared and the display asks you to continue clearing the next item. To clear another item, repeat steps 3 and 4. To return to Standby mode, press Stop/Clear. Xerox Phaser 3200MFP... -
Page 179: Cleaning Your Machine
This buildup can cause print quality problems, such as toner specks or smearing. Cleaning the inside of the machine clears or reduces these problems. Turn the machine off and unplug the power cord. Wait for the machine to cool down. Open the front door. Xerox Phaser 3200MFP... - Page 180 Pull out and remove the Manual Tray. With a slightly damp lint-free cloth, wipe away any dust and spilled toner from the print cartridge area and the print cartridge cavity. CAUTION: Do not touch the black transfer roller inside the machine. Xerox Phaser 3200MFP...
-
Page 181: Cleaning The Scan Unit
Wipe the surface of the document glass and ADF glass until it is clean and dry. White bar Document cover ADF glass Document glass Wipe the underside of the white document cover and white bar until it is clean and dry. Close the document cover. Xerox Phaser 3200MFP... -
Page 182: Maintaining The Print Cartridge
The LCD displays the warning message, “Toner Low”. You can temporarily recover print quality by redistributing the remaining toner in the cartridge. In some case, white streaks or light printing still occurs even after you have redistributed the toner. Open the front door. Xerox Phaser 3200MFP... -
Page 183: Replacing The Print Cartridge
Empty” the print cartridge has run and the machine stops printing. At this stage, the print cartridges needs to be replaced. Remove the old print cartridge and install a new print cartridge. See Installing the Print Cartridge on page 2-4. Xerox Phaser 3200MFP... -
Page 184: Printing Continuously When The Toner Empty Replace Toner Message Appears
Enter.) Press the scroll button ( or ) to change the setting. Select “On” to enable this feature. Selecting “Off” disables this feature. Press Enter to save the selection. To return to Standby mode, press Stop/Clear. Xerox Phaser 3200MFP... -
Page 185: Cleaning The Drum
Press Enter. The first available menu item, “Yes” displays on the bottom line. Press Enter. The machine prints out a cleaning page. Toner particles on the drum surface adhere to the paper. If the problem remains, repeat steps 1 through 4. To return to Standby mode, press Stop/Clear. Xerox Phaser 3200MFP... -
Page 186: Consumables Parts
Yield (Average) ADF rubber pad Approx. 20,000 pages NOTE: If a ADF rubber pad is required, please contact your dealer or Xerox representative. For the ADF rubber pad refer to Replacing the ADF Rubber Pad on page 9-11. 9-10 Xerox Phaser 3200MFP... -
Page 187: Replacing The Adf Rubber Pad
You can purchase an ADF rubber pad from your Service Agent or the Retailer where you bought your machine. Open the ADF cover. Remove the ADF rubber pad from the ADF, as shown. Install a new ADF rubber pad. Close the ADF cover. Xerox Phaser 3200MFP 9-11... - Page 188 9 Maintenance 9-12 Xerox Phaser 3200MFP...
- Page 189 This chapter gives helpful information for what to do if you encounter an error. This chapter includes: • Clearing Document Jams – page 10-2 • Clearing Paper Jams – page 10-4 • Solving Other Problems – page 10-14 Xerox Phaser 3200MFP 10-1...
-
Page 190: Clearing Document Jams
Pull the document gently out of the ADF. Close the ADF cover. Then load the removed page(s), if any, back into the ADF. NOTE: To prevent document jams, use the document glass for thick, thin, or mixed paper-type documents. 10-2 Xerox Phaser 3200MFP... -
Page 191: Exit Misfeed
Open the ADF cover. Remove the misfed documents from the document output tray Close the ADF cover. Then load the removed page(s), if any, back into the ADF. NOTE: Document Jam warning does not clear until paper is reloaded. Xerox Phaser 3200MFP 10-3... -
Page 192: Clearing Paper Jams
See In the Fuser Area or Around the Print Cartridge – page 10-5. Open and close the front door to resume printing. 10-4 Xerox Phaser 3200MFP... -
Page 193: In The Manual Tray
In the Fuser Area or Around the Print Cartridge WARNING: The fuser area is hot. Take care when removing paper from the machine. Open the front door. Pull the print cartridge out, lightly pushing it down. If necessary, pull the manual tray out. Xerox Phaser 3200MFP 10-5... -
Page 194: In The Paper Exit Area
In the Paper Exit Area Open and close the front door. The jammed paper automatically exits the machine. If the paper does not exit, continue to step 2. Gently pull the paper out of the output tray 10-6 Xerox Phaser 3200MFP... - Page 195 Remove the jammed paper by gently pulling it straight out. WARNING: It is hot inside the machine. Take care when removing paper. Close the rear cover. Open and close the front door to resume printing Xerox Phaser 3200MFP 10-7...
-
Page 196: Tips For Avoiding Paper Jams
• Do not mix paper types in the tray. • Use only recommended print materials. Paper Specifications on page 11- • Ensure that the recommended print side of print materials is facing up in the tray. 10-8 Xerox Phaser 3200MFP... -
Page 197: Clearing Lcd Error Messages
Use a speed dial number or dial Available a group location a number manually using the number where only a number keypad. single location number can be used, such as when adding locations for a broadcast operation. Xerox Phaser 3200MFP 10-9... - Page 198 Alternatively, split the transmission into more than one operation. No Answer The receiving fax Try again. Make sure that the machine has not receiving machine is answered after several operational. redial attempts. 10-10 Xerox Phaser 3200MFP...
- Page 199 Stop/ interval to redial a Clear to cancel the redial previously busy station. operation. Scanner Locked The scanner module is Unplug the power cord and plug locked. it back in. Xerox Phaser 3200MFP 10-11...
- Page 200 Invalid account is Enter the correct acconut. Account entered. Authentication There is a problem in Configure the authentication Required SMTP authentication. setting. Send Stopped The Stop/Clear button Try again. has been pressed during a sending mail. 10-12 Xerox Phaser 3200MFP...
-
Page 201: Toner Cartridge-Related Messages
Suggested Solutions Install Toner A toner cartridge is not Install a toner cartridge. installed. Invalid Toner The toner cartridge you Install a Xerox-genuine toner have installed in not for cartridge, designed for your your machine. machine. NonGenuine Toner The toner cartridge... -
Page 202: Solving Other Problems
Use only transparencies specifically designed for laser together in the paper printers. Remove each transparency as it exits from the exit. machine. Envelopes skew or Ensure that the paper guides are against both sides of fail to feed correctly. the envelope. 10-14 Xerox Phaser 3200MFP... -
Page 203: Printing Problems
Repair the printer software. For Printing chapter be incorrectly installed. details, refer to on page 6-1 The machine is Check the display message on the malfunctioning. control panel to see if the machine is indicating a system error. Xerox Phaser 3200MFP 10-15... - Page 204 The software application Try printing a job from another is malfunctioning. application. The operating system is Exit Windows and reboot the malfunctioning. computer. Turn the machine off and then back on again. 10-16 Xerox Phaser 3200MFP...
- Page 205 PDF file Acrobat products. Image from the Acrobat printing correctly. Some options. parts of Note: It will take longer to print when graphics, text you print a PDF file as an image. or illustrations are missing. Xerox Phaser 3200MFP 10-17...
-
Page 206: Printing Quality Problems
Try a different kind or brand of paper. Vertical repetitive The print cartridge may be defective. defects on page 10-19 If these steps do not correct the problem, contact a service representative. 10-18 Xerox Phaser 3200MFP... - Page 207 Parts of the machine may have toner on them. If defects occur, the problem will likely correct itself after running five (5) blank sheets. The fusing assembly may be damaged. Contact a service representative. Cleaning the Drum on If you use inferior quality paper; page 9-9 Xerox Phaser 3200MFP 10-19...
- Page 208 Ensure that the paper is loaded properly. Paper Specifications on creases Check the paper type and quality. page 11-6 Turn over the stack of paper in the tray. Also try rotating the paper 180° in the tray. 10-20 Xerox Phaser 3200MFP...
- Page 209 Contact a service representative. Curl If the printed paper is curled or paper does not feed into the machine: Turn over the stack of paper in the tray. Also try rotating the paper 180° in the tray. Xerox Phaser 3200MFP 10-21...
-
Page 210: Copying Problems
The machine may be turned on and off frequently. The document cover may be left open while copies are being made. 10-22 Xerox Phaser 3200MFP... -
Page 211: Scanning Problems
Set your computer to the ECP printer mode through BIOS setting. It will help to increase the speed. For details about how to set BIOS, refer to your computer User Guide. Network Scan Problems (Phaser 3200MFP/N Only) Condition Suggested solutions I cannot find a You can check the scanned file’s destination in the... -
Page 212: Fax Problems
There may not be enough memory to store the stored in memory. document. If the display shows a “Memory Full” message, delete from memory any documents you no longer need and then try again to store the document. 10-24 Xerox Phaser 3200MFP... -
Page 213: Common Windows Problems
Exit all software applications. Remove all software from message appears the StartUp Group, then restart Windows. Reinstall the during installation. printer driver. NOTE: Refer to Microsoft Windows 98/Me/2000/XP(32/64bit)/2003(32/ 64bit)/Vista User’s Guide that came with your PC for further information on Windows error messages. Xerox Phaser 3200MFP 10-25... -
Page 214: Common Postscript Problems (Phaser 3200Mfp/N Only)
10 Troubleshooting Common PostScript Problems (Phaser 3200MFP/N Only) The following situations are PS language specific and may occur when several printer languages are being used. NOTE: To receive a printed or screen-displayed message when PostScript errors occur, open the Print Options window and click the desired selection... -
Page 215: Common Linux Problems
• Check if your application has special print option such as “- oraw”. If “-oraw” is specified in the command line parameter then remove it to print properly. For Gimp front-end, select “print” -> “Setup printer” and edit command line parameter in the command item. Xerox Phaser 3200MFP 10-27... - Page 216 If this is the case, you should wait for completion of the current job or you should press Release port button, if you are sure that the present port's owner is not functioning properly. 10-28 Xerox Phaser 3200MFP...
- Page 217 (cups-1.1.21) has a problem with ipp SuSE 9.2, the (Internet Printing Protocol) printing. Use the socket printing machine does instead of ipp or install later version of CUPS (cups-1.1.22 or not print. higher). Xerox Phaser 3200MFP 10-29...
-
Page 218: Common Macintosh Problems (Phaser 3200Mfp/N Only)
10 Troubleshooting Common Macintosh Problems (Phaser 3200MFP/N Only) Problems in Printer Setup Utility Problem Possible Cause and Solution The printer does not Incompatibility between the PDF file and the Acrobat products: print PDF file correctly. Printing the PDF file as an image may solve this problem. Turn Some parts of graphics, on Print as Image from the Acrobat printing options. -
Page 219: Specifications
Specifications This chapter includes: • General Specifications – page 11-2 • Scanner and Copier Specifications – page 11-3 • Printer Specifications – page 11-4 • Facsimile Specifications – page 11-5 • Paper Specifications – page 11-6 Xerox Phaser 3200MFP 11-1... -
Page 220: General Specifications
11 Specifications General Specifications Item Description Model Phaser 3200MFP/B, Phaser 3200MFP/N Automatic document Up to 30 sheets (20 lb, 75 g/m feeder ADF document size Width: 5.6 to 8.5 inches (142 to 216 mm) Length: 5.8 to 14 inches (148 to 356 mm) -
Page 221: Scanner And Copier Specifications
Print: 600 x 600 (Text, Text/Photo, Photo) Zoom rate Platen: 25 ~ 400 % ADF: 25 ~ 100 % Multiple copies 1-99 pages Gray scale 256 levels a.Copy Speed is based on Single Document Multiple Copy. Xerox Phaser 3200MFP 11-3... -
Page 222: Printer Specifications
First print out time Standby mode: 10 seconds Printer resolution Up to 1,200 x 1,200 dpi effective output Emulation PCL 6, PS 3 (Phaser 3200MFP/N only) OS Compatibility Windows 98/Me/2000/XP(32/64bit)/2003(32/64bit)/Vista, Various Linux OS (USB only), Macintosh 10.3 ~ 10.4 (Phaser 3200MFP/N only) -
Page 223: Facsimile Specifications
Photo: 203 x 196 dpi Color: 200 x 200 dpi Memory 4 MB Halftone 256 levels Auto dialer Group dialing (up to 200 numbers) a.DSL, Voice Over IP and Digitac converters (convert digital to analogue) are not supported applications. Xerox Phaser 3200MFP 11-5... -
Page 224: Paper Specifications
Some paper may meet all of the guidelines in this guide and still not produce satisfactory results. This may be the result of improper handling, unacceptable temperature and humidity levels, or other variables over which Xerox has no control. • Before purchasing large quantities of paper, make sure the paper meets the requirements specified in this User Guide. -
Page 225: Supported Sizes Of Paper
Labels 32 to 40 lb (120 to 1 sheet for the above. 150 g/m manual tray Cards 16 to 43 lb (90 to 1 sheet for the 165 g/m manual tray Xerox Phaser 3200MFP 11-7... -
Page 226: Guidelines For Using Paper
100 ~ feeding faulty paper lot 400 Sheffield, 4 ~ 5 % moisture content. Dropout, jamming, curl Stored improperly Store paper flat in its moisture-proof wrapping. Increased gray Too heavy Use lighter paper. background shading/ printer wear 11-8 Xerox Phaser 3200MFP... -
Page 227: Paper Specifications
Must not scorch, melt, offset or release hazardous emissions when heated to 392 °F (200 °C) for 0.1 second. Grain Long grain Moisture content 4 % ~ 6 % by weight Smoothness 100 ~ 400 Sheffield Xerox Phaser 3200MFP 11-9... -
Page 228: Paper Output Capacity
The best way to store an opened ream of paper is to rewrap it tightly in its moisture-proof wrapping. If the machine environment is subject to extremes, unwrap only the amount of paper to be used during the day’s operation to prevent unwanted moisture changes. 11-10 Xerox Phaser 3200MFP... -
Page 229: Envelopes
5.5 in. (140 mm). This may be caused by paper that has been affected by environmental conditions. For optimum performance, make sure you are storing and handling the paper correctly. Please refer to Paper Storage Environment on page 11-10.. Xerox Phaser 3200MFP 11-11... -
Page 230: Envelopes With Double Side Seams
Avoid printing over the area where the envelope’s seams meet. Envelope Storage Proper storage of envelopes helps contribute to print quality. Envelopes should be stored flat. If air is trapped in an envelope, creating an air bubble, then the envelope may wrinkle during printing. 11-12 Xerox Phaser 3200MFP... -
Page 231: Labels
Transparencies used in the machine must be able to withstand 356°F (180°C), the machine’s fusing temperature. NOTE: Load only 1 transparency at a time. CAUTION: To avoid damaging the machine, use only transparencies recommended for use in laser printers. Xerox Phaser 3200MFP 11-13... - Page 232 11 Specifications 11-14 Xerox Phaser 3200MFP...
- Page 233 Graphics properties, set consumables 6-11 9-10 group dial contrast, copy dialing 8-16 control panel editing 8-15 ControlCentre setting 8-14 installing tabs 2-23 help, use copying 6-14 6-29 collation contrast Image Mode 6-11 default setting, change 5-11 Information Sources Xerox Phaser 3200MFP Index-1...
- Page 234 6-19 scanning from Macintosh 6-49 timeout, set from Windows Network Scan program N-up adding scanners Macintosh 6-52 network setup Windows 6-16 EtherTalk overlay 6-23 operating systems poster 6-20 TCP/IP scaling 6-18 notifying toner watermark 6-20 Index-2 Xerox Phaser 3200MFP...
- Page 235 Fax mode 8-10 facsimile 11-5 in Secure Receiving mode 8-22 general 11-2 in Tel mode 8-10 paper 11-6 in the memory 8-12 printer 11-4 redialing scanner and copier 11-3 speed dial automatically manually dialing 8-14 Xerox Phaser 3200MFP Index-3...
- Page 236 2-21 create 6-21 toner save, set delete 6-22 6-11 edit 6-22 TWAIN, scan print 6-20 Welcome Center uninstall, software Canada Macintosh 6-47 uninstalling WIA, scan MFP driver Linux 6-34 zoom rate, copy connect 2-10 Index-4 Xerox Phaser 3200MFP...