Table of Contents
Advertisement
Quick Links
Explanation of symbols · · · · · · · · · · · · · · · · · · · · · · · · 4
For your safety! · · · · · · · · · · · · · · · · · · · · · · · · · · · · 4
Important - the correct system software! · · · · · · · · · · · · · · 6
Maintenance and care · · · · · · · · · · · · · · · · · · · · · · · · · 6
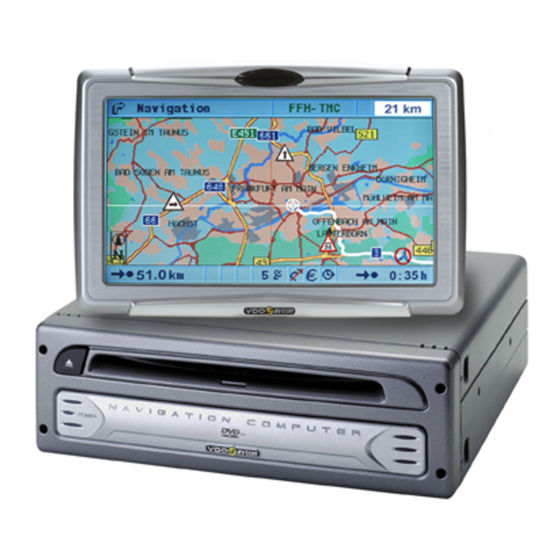
Functions of your navigation system · · · · · · · · · · · · · · · · · 6
Range of functions · · · · · · · · · · · · · · · · · · · · · · · · · 6
System expansion · · · · · · · · · · · · · · · · · · · · · · · · · · 7
Distance indications · · · · · · · · · · · · · · · · · · · · · · · · · 7
Operating restrictions (country-specific) · · · · · · · · · · · · · · 7
GPS reception · · · · · · · · · · · · · · · · · · · · · · · · · · · · 7
Start-up characteristics · · · · · · · · · · · · · · · · · · · · · · · 7
Automatic route re-calculation · · · · · · · · · · · · · · · · · · · 7
Areas with limited road information · · · · · · · · · · · · · · · · 8
Switching on / off · · · · · · · · · · · · · · · · · · · · · · · · · · · 8
Remote control· · · · · · · · · · · · · · · · · · · · · · · · · · · · · 8
Stand-by· · · · · · · · · · · · · · · · · · · · · · · · · · · · · · · · 10
Inserting/changing the map DVD/CD · · · · · · · · · · · · · · · · 10
C-IQ - Your key to map, traffic and travel information· · · · · · · 11
Activation options · · · · · · · · · · · · · · · · · · · · · · · · · 11
Reading the Navi ID · · · · · · · · · · · · · · · · · · · · · · · · 12
Code input · · · · · · · · · · · · · · · · · · · · · · · · · · · · · 12
C-IQ SMS list · · · · · · · · · · · · · · · · · · · · · · · · · · · · 13
My C-IQ · · · · · · · · · · · · · · · · · · · · · · · · · · · · · · · 13
Prepaid C-IQ · · · · · · · · · · · · · · · · · · · · · · · · · · · · 13
Preview · · · · · · · · · · · · · · · · · · · · · · · · · · · · · · · 14
Configuration· · · · · · · · · · · · · · · · · · · · · · · · · · · · 14
C-IQ Service · · · · · · · · · · · · · · · · · · · · · · · · · · · · · 15
Screen menu types · · · · · · · · · · · · · · · · · · · · · · · · · · 15
Popup menu · · · · · · · · · · · · · · · · · · · · · · · · · · · · 15
Pull-down menu (functions list) · · · · · · · · · · · · · · · · · · 16
List screen · · · · · · · · · · · · · · · · · · · · · · · · · · · · · · 16
Settings - adjusting the navigation system · · · · · · · · · · · · · 17
Day / night colours · · · · · · · · · · · · · · · · · · · · · · · · · 17
Screen configuration · · · · · · · · · · · · · · · · · · · · · · · · 18
Message selection · · · · · · · · · · · · · · · · · · · · · · · · · 19
Route criteria · · · · · · · · · · · · · · · · · · · · · · · · · · · · 19
Dynamic route · · · · · · · · · · · · · · · · · · · · · · · · · · · 20
Speed warning · · · · · · · · · · · · · · · · · · · · · · · · · · · 21
Remote control · · · · · · · · · · · · · · · · · · · · · · · · · · · 22
Favourite function · · · · · · · · · · · · · · · · · · · · · · · · · 22
General Settings · · · · · · · · · · · · · · · · · · · · · · · · · · 23
Language · · · · · · · · · · · · · · · · · · · · · · · · · · · · · · 23
Audible settings · · · · · · · · · · · · · · · · · · · · · · · · · · 23
Measuring units · · · · · · · · · · · · · · · · · · · · · · · · · · 24
CONTENTS
1
Advertisement
Table of Contents

Related Manuals for VDO MS 5400


Summary of Contents for VDO MS 5400
-
Page 1: Table Of Contents
CONTENTS GENERAL INFORMATION Explanation of symbols · · · · · · · · · · · · · · · · · · · · · · · · 4 For your safety! · · · · · · · · · · · · · · · · · · · · · · · · · · · · 4 Important –... - Page 2 CONTENTS Device configuration · · · · · · · · · · · · · · · · · · · · · · · · 25 Shut-Down timer · · · · · · · · · · · · · · · · · · · · · · · · · · 26 System configuration·...
- Page 3 CONTENTS TELEPHONE CI 3000 · · · · · · · · · · · · · · · · · · · · · · · · · · · · · · · · 50 CIX 3000 Blue · · · · · · · · · · · · · · · · · · · · · · · · · · · · · 50 Linking of mobile phone with CIX 3000 Blue ·...
-
Page 4: General Information
GENERAL INFORMATION Explanation of symbols The following symbols are used in this manual: This symbol is used to indicate safety instructions and warnings. These contain important information for the safe use of the unit. Failure to observe this information may result in a risk of damage or injury. - Page 5 GENERAL INFORMATION The current statutory speed limit on the road always takes priority over the values stored on the data CD/DVD. It is impossible to provide an assurance that the speed values of the navigation system will always match those of the current traffic regulations in every situation. In certain areas one-way streets, turn off and entry restrictions (e.g.
-
Page 6: Important - The Correct System Software
GENERAL INFORMATION Switch off the telephone at petrol stations, chemical plants, fuel depots or similar facilities, or leave it switched off. Operation of the telephone can cause malfunction of medical equipment in the vicinity of the GSM antenna, such as pacemakers or hearing aids. -
Page 7: System Expansion
GENERAL INFORMATION System expansion In conjunction with a TMC expansion, the system will show the current traffic situation along your route, and will guide you around road obstructions if desired. Numerous system expansions are available to upgrade to an information and entertainment system. Distance indications On main roads, the distances to exits indicated by the system deviate from those on road signs. -
Page 8: Areas With Limited Road Information
GENERAL INFORMATION Areas with limited road information In some areas, not all road information may be available on the map DVD/CD. Thus, for example, turn-off prohibitions, information on the direction of travel in a one-way street or prohibited entry into a pedestrian zone may be missing. - Page 9 GENERAL INFORMATION RC 5400 Ê FAVOURITE - This button is freely programmable to provide direct access to selected functions. (See also the section entitled “Settings”). Ë ENTERTAIN - Press the button < 1 second to access the entertainment source last used. Ì...
-
Page 10: Stand-By
GENERAL INFORMATION RC 5000 Ê MAP - Switch between the route guidance screens. Ë MENU - Call up the Main menu. Ì Set the volume. Í Cursor keys as well as OK confirmation key. Î ALT-R - Plan an alternative route. Ï... -
Page 11: C-Iq - Your Key To Map, Traffic And Travel Information
GENERAL INFORMATION Important: Only use original discs with a diameter of 12 cm. Do not insert 8 cm or specially shaped CDs. This could cause damage to the system. C-IQ - Your key to map, traffic and travel information Together with your system, you will have received a DVD/CD with current map, traffic and other travel information. -
Page 12: Reading The Navi Id
GENERAL INFORMATION for a specific period of time (see also the preview and Prepaid C-IQ in this chapter). Your C-IQ Service will be happy to provide more information about the various access options available. Reading the Navi ID Please have your Navi ID and your software code ready when establishing contact. -
Page 13: C-Iq Sms List
GENERAL INFORMATION The system can be operated in the 1000 km scale without activation. Destinations can be entered but navigation information will only be provided for activated areas and for activated services. C-IQ SMS list The system has been prepared to process the C-IQ Code by SMS. To use this function a suitable phone module is required. -
Page 14: Preview
GENERAL INFORMATION If you have paid to access travel information and/or road maps and want to activate them: Select “Prepaid C-IQ” under “C-IQ” and press the OK key. Select “Prepaid Map” or “Prepaid Travel Info”, and press the OK key. The screen shows how many prepaid days are still available. Select “Proceed”... -
Page 15: C-Iq Service
GENERAL INFORMATION C-IQ Service Here you will find the contact details for your C-IQ Service. Select “C-IQ Service” in the “C-IQ” menu. Press the OK key. Phone number and Internet address will be displayed. Select “OK” and press the OK key to return to the previous menu. The “Call C-IQ”... -
Page 16: Pull-Down Menu (Functions List)
GENERAL INFORMATION Pull-down menu (functions list) In guidance mode, “Function” will be displayed on the screen. Once the OK key has been pressed, the selectable functions will be displayed. If no function is selected, the menu will close after several seconds. List screen For several options, a list will be displayed on the right-hand side of the screen. -
Page 17: Settings - Adjusting The Navigation System
GENERAL INFORMATION Settings – adjusting the navigation system You can change several settings to adapt the navigation system to meet your personal requirements. The following functions are available in the “Settings” menu and can be selected from the Start menu: •... -
Page 18: Screen Configuration
GENERAL INFORMATION Screen configuration Here different colour combinations can be selected for the screen display, and the status line can also be configured: • “Day colour”: This setting is active if the headlights are switched off. Optimum contrast in daylight is provided by blue, red and green. •... -
Page 19: Message Selection
GENERAL INFORMATION The navigation system uses an average cruising speed to calculate the remaining travel time and the estimated time of arrival. If required, this speed can be adapted to your actual average speed by means of the option “System information/Speed correction”. Message selection After this function has been selected, a list will be displayed, from which a selection can be made as to which TMC information is to be displayed. -
Page 20: Dynamic Route
GENERAL INFORMATION Activate the Traffic Info option if you wish to be automatically routed around road obstructions (see also section TMC traffic information and Dynamic route in this chapter). If traffic information is not activated, the system will suggest detours. The driver must confirm these manually. The route criteria can also be changed in the “Navigation”... -
Page 21: Speed Warning
GENERAL INFORMATION Select “Dynamic route” in the “Settings” menu. Press the OK key. Select the criterion to be adjusted and press the OK key. Set the desired value with the cursor keys ƒ and „. Press the OK key. Select “Return” if all criteria have been adjusted as desired, and press the OK key. -
Page 22: Remote Control
GENERAL INFORMATION In the case of the vehicle speed warning you can enter an absolute value. If this value is reached, an audible signal is emitted and a popup screen appears, provided that you have activated this option. The vehicle speed warning is not based on the speed indicated by the speedometer but on the vehicle speed determined by the navigation system. -
Page 23: General Settings
GENERAL INFORMATION General Settings The following functions are available in the General settings: • Language • Audible settings • Measuring units • Device configuration • Shut-Down timer Language Selection of the national language for audible information and menu texts in the display. Currently, the following languages featuring a variety of male and female voices are available on the system software CD: •... -
Page 24: Measuring Units
GENERAL INFORMATION • Audible info.: To switch announcements on or off. With the audible announcements switched off, the respective symbol will be displayed in the status line. • “Turn now” instruction. To switch this announcement on or off. If you want to reduce the number of driving instructions, switch off the last “Turn now”... -
Page 25: Device Configuration
GENERAL INFORMATION Select “Time zone”, and press the OK key. Increase or decrease the value using the cursor keys ‚ƒ„. Confirm by pressing the OK key. Time zone Standard time Daylight saving time Central European Time + 1:00 + 2:00 (Paris, Berlin) Greenwich Mean Time 0:00... -
Page 26: Shut-Down Timer
GENERAL INFORMATION Shut-Down timer You can determine how long it takes for the system to shut down. This means that when making short stops, it is possible to maintain the current device status for up to 10 minutes. The system will only switch itself off after this time has elapsed. -
Page 27: Info Points
GENERAL INFORMATION Info Points Different providers of travel and traffic information have optimised these specifically for navigation systems. This includes information about fixed speed camera installations or other safety relevant information (e.g. schools, kindergartens, etc.) and places of interest to tourists. If a user has activated such information by means of a C-IQ access code the Info Points function can be switched on or off. -
Page 28: Default Settings
GENERAL INFORMATION Default settings This function is used to reset all settings to the factory default values. Select “System information” in the “Settings” menu. Press the OK key. Select “Default settings”, and press the OK key. Select “Yes” or “No”, and press the OK key. Settings for Factory-adjusted value Time zone... - Page 29 GENERAL INFORMATION Settings for Factory-adjusted value Minimize ferry usage Deactivated Minimize tunnel usage Deactivated Traffic info Activated Re-routing level Medium Delay time Automatic mode Speed correction 100% Info Points Deactivated Device config. Multimedia box deactivated TV tuner deactivated Rear view camera deactivated Remote control RC 5400...
-
Page 30: Navigation
NAVIGATION Destination input The following types of destination input can be used: • Direct address input, including postal code, Quick Access (QXS) and List • Input of special destinations • Transfer from the address book • Entry by means of the destination map •... -
Page 31: Function "List
NAVIGATION Function “List” If several towns or streets with the same name are available, the function “List” automatically displays all options with additional information. Select the desired town and press the OK button. The list of all suitable names can be displayed at any time using the function “List”. -
Page 32: Junction
NAVIGATION In the case of map DVD/CDs featuring additional travel information about points of interest, the line “Quit” in the list display will show an “i”. If additional information is available, this will be indicated by a provider-specific letter (e.g. “v” for Varta). Press the cursor button „, to display this additional information. -
Page 33: Address Book (See Also Chapter Address Book)
NAVIGATION Address book (see also chapter Address book) If the desired destination address is already in the address book, or happens to be one of the last 20 destinations entered, the address can easily be used as a destination address: In the “Navigation”... -
Page 34: Via Points (Intermediate Destinations)
NAVIGATION Co-ordinates Select “Destination map” under ”Navigation”. The map with the cursor will be displayed. Press the OK button. Select “Co-ordinates”, and press the OK button. Select “Longitude” or “Latitude”, press the OK button. Define each digit with the cursor buttons ‚ƒ„ on the remote control and confirm with OK. -
Page 35: Stop Guidance
NAVIGATION Storing a via point Select “Store via point” and press the OK button. Deleting via points Select “Delete via point” and press the OK button. A list of the stored via points appears. Select the via point to be deleted and press the OK button. A popup menu with the entry appears. -
Page 36: Points Of Interest
NAVIGATION this or any other provider of travel guide information. Following this define the search option. The following can be selected: • Search at destination • Search close to car (current location) • Search near a city (enter the city name via the keypad) •... -
Page 37: Travel Symbols
NAVIGATION Points of interest cannot be selected if the location has been entered via its postal code. Travel symbols Symbol Meaning Symbol Meaning Chemist Marina & Exhibition centre Cinema Automobile club Place of worship Car rental company Clinic Car repair Hospital Railway station Cultural centre... -
Page 38: Screen Displays
NAVIGATION Symbol Meaning Symbol Meaning Petrol station Community centre Theatre Court house Entertainment Golf course Amusement park Hotel Destination Industrial estate Screen displays With guidance activated, switch between the various guidance screens by pressing the MAP or Navigation button. Guidance display Once “Guidance”... -
Page 39: Map Display
NAVIGATION ¹ TMC symbol for the next road obstruction on the planned route (only with TMC source connected and TMC traffic information available). º Menu name » Distance to the next change of direction. ¼ Name of the street to turn into (next change of direction). Ñ... -
Page 40: Guidance In Non-Digitised Areas
NAVIGATION Guidance in non-digitised areas If the specified destination is not located on a digitised road, the directions will take you to the position (linear distance) closest to the destination. The display shows the note “The destination is outside the digitised map area”. -
Page 41: Tmc Traffic Information
NAVIGATION Set the value with the aid of the cursor buttons ‚ƒ and „. Press the OK button. Select the option “yes”, and press the OK button. Use ”Return” to return to the start menu. TMC traffic information Your Navigation System processes TMC traffic information, provided a TMC expansion, e.g. -
Page 42: Pay Tmc
NAVIGATION Pay TMC In some countries or regions extended TMC information might be available for an additional charge. These Pay TMC services are supported by your navigation system and are activated via the C-IQ service (www.C-IQ.net or 00800 99 33 33 33). You can see from the station list in the Info menu whether a Pay TMC station is available in your current region. -
Page 43: On The Guidance Display
NAVIGATION On the guidance display Gambacher Kreuz 14 km 34 km A 45, Linden Ê TMC symbol: Indicates the type of road obstruction. If a number of obstructions exist, this is indicated by means of a second TMC symbol which is partially obscured by the first. Ë... -
Page 44: Graphic Display Of A Road Obstruction
NAVIGATION Select “Next” and press the OK button to immediately select another TMC icon. “Quit”, followed by confirmation with the OK button, terminates the “Traffic view” function. The map display is shown again without the cursor field. Guidance screen In the guidance screen, press the OK button to open the “Information”... -
Page 45: Concurrent Dynamic Route Guidance
NAVIGATION Select “Detour” in the function list and press the OK button. In the subsequent popup menu, select the option “Plan detour” and press the OK button. The system plans a new route within seconds. Concurrent dynamic route guidance If a traffic station informs the system that the stationary traffic has dispersed while a detour is active and if automatic mode is not activated a popup menu will appear on the screen. -
Page 46: Tmc Symbols
NAVIGATION TMC symbols This list provides an overview of all the symbols used in the guidance and map displays. These will only be displayed if a TMC expansion is connected. Symbol Meaning Symbol Meaning For small scales Accidents > Road obstruction in the Slow or queuing traffic direction of travel indicated... -
Page 47: Info" Menu
NAVIGATION “Info” menu The Info menu can be selected from the Start menu and from all guidance screens. From a guidance screen: Press the OK button from one of the navigation screens. Select ”Info”, press the OK button. From the Start menu, select ”Info”, and press the OK button The following options are available: •... -
Page 48: The Address Book
NAVIGATION The address book The navigation system provides the capability to store at least 200 destination addresses in a personal address book. The address book is divided into “Home”, “Work”, “Private” and “Business”. ”Home” and ”Work” can each contain one address for quick access. Store addresses Select “Address book”... -
Page 49: Store Vehicle Position In Address Book
NAVIGATION Store vehicle position in address book Select “Address book” under “Navigation”. Press the OK button. Select “Store car position” and press the OK button. Select the address book category.Press the OK button. In order to edit the address (e.g. to add a name), it must first be loaded from the address book, edited and then stored in the address book again. -
Page 50: Cix 3000 Blue
TELEPHONE Telephone CI 3000 If a Communication Interface Module (e.g. CI 3000) is connected to the navigation system as an extension, you can use different standard hands-free units and current mobile phones with the system. Selected functions of your mobile phone are then available to you in a well laid-out and convenient manner via the monitor of your navigation system. -
Page 51: Linking Of Mobile Phone With Cix 3000 Blue
TELEPHONE Please note that the MO 5595 system software continues to support the MG 3000 phone connection, but with limited functionality compared to the CI 3000. For an overview of functions please read the operating instructions for the MO 5594 software. Linking of mobile phone with CIX 3000 Blue In order to be able to operate the mobile phone with the CIX 3000 Blue Hands-free terminal it must be registered with the CIX 3000 Blue. -
Page 52: Loading Phone Book
TELEPHONE Select ”Telephone” in the main menu and press the OK button. Select the folder and press the OK button. Select “Phone settings” and press the OK button. Select “SW download” and press the OK button. You will be prompted with the message “Start software download using CIM?”. -
Page 53: Telephone Functions
TELEPHONE Telephone functions Ê Establish connection, take call and direct call-up of the “Outgoing calls” list. Ë Deleting the last number. Ì Keypad for entering numbers. Í Mailbox – listen to incoming messages. Î Messages/SMS – write or read a text message. Ï... -
Page 54: Calling
TELEPHONE Calling Volume of call During a phone call, the volume can be adjusted via the + or - buttons on the remote control. The last setting selected is stored. Alternatively, the volume can be adjusted on the mobile phone itself. The ring volume for an incoming call can be lowered or increased. -
Page 55: Calls From The Phone Book
TELEPHONE Calls from the phone book Select the phone book in the Telephone menu and confirm with the OK button. Select the desired option and confirm with the OK button. Retrieving an entry from the phone book The desired phone number can be retrieved by entering the corresponding name via the keypad. -
Page 56: Adding An Entry (Only On Sim Card)
TELEPHONE Adding an entry (only on SIM card) Enter the desired phone number in the “Telephone” menu or select it from the call list. If a number has already been entered, you are prompted for the name as soon as the phone book button is pressed. -
Page 57: Receiving Sms Messages
TELEPHONE Receiving SMS messages When new SMS messages are received, the message “New SMS! … Read now?” will appear on the display. Select “Yes” and confirm with the OK button if you want to look at the message immediately. Select “No” and confirm with the OK button if you want to look at the message at a later stage (see below). -
Page 58: Writing Sms Messages
TELEPHONE Writing SMS messages Select the envelope in the Telephone menu and confirm with the OK button. Select “Write SMS” and confirm with the OK button. Enter the text using the keypad (max. 160 characters). Confirm by pressing the OK button. If you want to delete one or several elements select “Del”... -
Page 59: Telephone Settings
TELEPHONE Telephone Settings The following functions are available in the phone settings: • Phone Info • Phone Book • Store Mailbox No • SW download (see Software download chapter) • Bluetooth (only in conjunction with CIX 3000 Blue). The Bluetooth option can be used to start the mobile phone’s voice recognition feature. -
Page 60: Storing A Mailbox No
TELEPHONE Storing a mailbox no If you want to store your mailbox number in the system: In the main menu, select “Telephone“ Press the OK button. Enter the desired number. Use the OK button to confirm each of the digits selected. Select the folder and press the OK button. -
Page 61: Useful Extras
USEFUL EXTRAS Trip computer The trip computer is selected by means of the function “Trip computer” in the Start menu. The integrated trip computer displays the following information: • Current speed: Current speed • Avg. speed: Average speed (since reset) •... -
Page 62: Emergency
USEFUL EXTRAS Emergency The emergency menu displays the current vehicle position, the country-specific emergency number (under ’Help:’) as well as a freely programmable telephone number for an assistance centre. The vehicle’s position is accurate to within approx. 30m. The names of country, city and street for the vehicle’s current position are only displayed if the vehicle is located on a digitised road. -
Page 63: Entering An Assistance Number
USEFUL EXTRAS Entering an assistance number You can store a telephone number of your choice for help in an emergency, e.g. the number of an automobile club or an assistance centre. Select the function “Setting” in the Emergency menu, press the OK button. -
Page 64: Troubleshooting
TROUBLESHOOTING In very rare cases it can happen that your multimedia system does not function as you would expect. Before you contact customer service, please read the user manual and review the following checklist, as an apparent malfunction can possibly be quickly remedied. Symptoms Possible cause / remedy System does not... - Page 65 TROUBLESHOOTING Symptoms Possible cause / remedy System fails to plan Vehicle is not on a digitised road: Drive in the route despite direction of a digitised road. destination address being entered. Guidance Check whether “Audible information” has been information not activated in the ”Settings”...
- Page 66 TROUBLESHOOTING Symptoms Possible cause / remedy Displayed position Problems with GPS reception persist. The position is does not correspond corrected automatically as soon as satisfactory GPS to actual vehicle reception resumes: If necessary wait a few minutes; position. ask your installation workshop to check whether the installation angle of the navigation computer has been correctly entered in the diagnosis menu.
- Page 67 TROUBLESHOOTING Symptoms Possible cause / remedy After the phone has Problems with the mobile phone holder. been plugged in, the Remove the phone from the holder, check the Telephone menu contacts and clean. Put the phone back into the item does not holder.