VDO MS 5000 Fitting Instruction
For mazda 6
Hide thumbs
Also See for MS 5000:
- User manual (181 pages) ,
- Owner's manual (72 pages) ,
- Mode d'emploi (65 pages)
Advertisement
Quick Links
Navigationssystem
Navigation S S ystem
Système d d e n n avigation
Sistema d d i n n avigazione
Sistema de Navegación
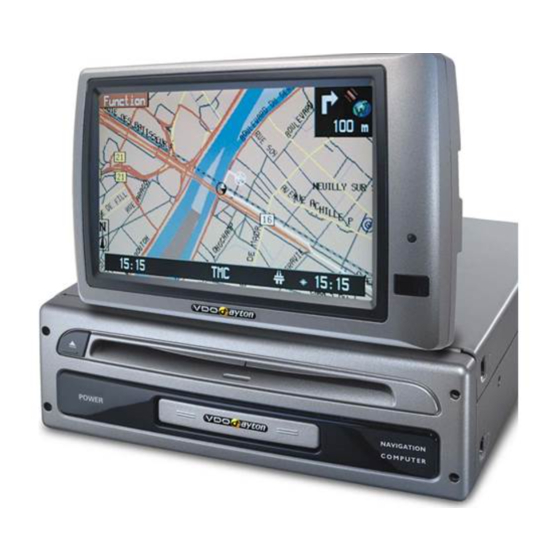
MS 5000
MS 5500 DVD
Einbauanleitung i i n M M azda 6 6
Fitting I I nstruction f f or M M azda 6 6
Instructions d d e m m ontage s s ur M M azda 6 6
Istruzioni d d i m m ontaggio p p er M M azda 6 6
Instrucciones d d e m m ontaje p p ara e e l M M azda 6 6
www.vdodayton.com
Advertisement

Related Manuals for VDO MS 5000


Summary of Contents for VDO MS 5000
- Page 1 Système d d e n n avigation Sistema d d i n n avigazione Sistema de Navegación MS 5000 MS 5500 DVD Einbauanleitung i i n M M azda 6 6 Fitting I I nstruction f f or M M azda 6 6...
- Page 2 Au cas où la voiture est équipée de l'option Bose Soundsystem il faut choisir un autre endroit d'installation (coffre ou sous le siège conducteur). Le istruzioni di montaggio descrivono il montaggio di un sistema di navigazione VDO Dayton con l'uso del kit di montaggio Mazda, art. 3600-78-339X.
- Page 3 VDO Dayton MS 5000 / 5500 DVD – Mazda 6 1. Vorarbeiten / Preparations / Préparation / Preparazione / Preparación Minuspol der Batterie abklemmen. Schalthebelabdeckung, Becherhalter und Aschenbecher ausbauen. Dazu Schaltknopf abschrauben. Alle Teile sind mit Klipsen befestigt. De-connect negative pole of the battery. Remove gear lever knob cover, cup holder and ashtray. Screw off the gear lever knob.
- Page 4 VDO Dayton MS 5000 / 5500 DVD – Mazda 6 1. Vorarbeiten / Preparations / Préparation / Preparazione / Preparación Radio-Lüftungseinheit mit Radio komplett ausbauen, dazu Schrauben am unteren Rand der Blende links und rechts lösen. Schraube rechts an der Radiohalterung lösen (zu erreichen durch die Öffnung des ausgebauten Handschuhfachs).
- Page 5 VDO Dayton MS 5000 / 5500 DVD – Mazda 6 1. Vorarbeiten / Preparations / Préparation / Preparazione / Preparación Ablagefach in der Mitte des Armaturenbretts ausbauen, dazu Schrauben an der Unterkante lösen. Remove stowage tray in the middle of the instrument panel. For this purpose loosen screws at the lower edge.
- Page 6 VDO Dayton MS 5000 / 5500 DVD – Mazda 6 3. Monitor-Montage / Monitor installation / Installation du moniteur / Montaggio del monitor / Instalación del monitor Nach Ausbau des oberen Ablagefaches seitliche Federn aushängen und seitliche Scharnierstifte mit passender Blechtreibschraube (ca.
- Page 7 VDO Dayton MS 5000 / 5500 DVD – Mazda 6 3. Monitor-Montage / Monitor installation / Installation du moniteur / Montaggio del monitor / Instalación del monitor Bohrschablonen ausschneiden und auf den Teilen mit Klebeband fixieren. Cut out drilling template and fix on the parts with adhesive tape.
- Page 8 VDO Dayton MS 5000 / 5500 DVD – Mazda 6 3. Monitor-Montage / Monitor installation / Installation du moniteur / Montaggio del monitor / Instalación del monitor Scharnier entsprechend Abbildung vormontieren. Prepare fitting of hinge according to graphic. Préparer le montage de la charnière comme indiqué...
- Page 9 VDO Dayton MS 5000 / 5500 DVD – Mazda 6 3. Monitor-Montage / Monitor installation / Installation du moniteur / Montaggio del monitor / Instalación del monitor M5 x 12 M5 x 10 Es ist darauf zu achten, dass die Sechskantschrauben...
- Page 10 VDO Dayton MS 5000 / 5500 DVD – Mazda 6 3. Monitor-Montage / Monitor installation / Installation du moniteur / Montaggio del monitor / Instalación del monitor Ausrichtung der vormontierten Monitoreinheit zum Einbau in das Ablagefach. Alignment of the pre-mounted monitor unit for installation in stowage tray.
- Page 11 VDO Dayton MS 5000 / 5500 DVD – Mazda 6 3. Monitor-Montage / Monitor installation / Installation du moniteur / Montaggio del monitor / Instalación del monitor 3.10 Monitorkabel mit geradem Anschlussstecker durch die vorgebohrte Öffnung führen und mit dem Mon- itor verbinden.
- Page 12 VDO Dayton MS 5000 / 5500 DVD – Mazda 6 3. Monitor-Montage / Monitor installation / Installation du moniteur / Montaggio del monitor / Instalación del monitor 3.12 Ablagefachdeckel in Führung einsetzen und die Scharnierstifte eindrücken. Im Anschluss werden die seitlichen Federn einge- hängt.
- Page 13 VDO Dayton MS 5000 / 5500 DVD – Mazda 6 4. Rechner-Einbau / Processor installation / Installation du module Istallazione del calcolatore / Instalación del procesador Den Rechner unter dem Beifahrersitz montieren. b) Optional mit Einbaurahmen MA 2400/00 a) Nur mit beiliegenden Haltern.
- Page 14 VDO Dayton MS 5000 / 5500 DVD – Mazda 6 4. Rechner-Einbau / Processor installation / Installation du module Istallazione del calcolatore / Instalación del procesador Ritagliare la moquette nella dimensione necessaria, ribaltandola verso il sedile posteriore. Rimuovere l'isolante, segnare i fori e trapanare.
- Page 15 VDO Dayton MS 5000 / 5500 DVD – Mazda 6 5. Bedienteil-Montage (Fernbedienung) / Control installation (Remote control) / Installation de la commande (à distance) / Montaggio del comando (telecomando) Montaje del elemento de mando (mando a distancia) Das Bedienteil links neben der Mittelkonsole mon- tieren.
- Page 16 VDO Dayton MS 5000 / 5500 DVD – Mazda 6 6. Kabelanschlüsse / Cable connections / Branchements des câbles Collegamento dei cavi / Conexiones de los cables Kabel wie folgt anschließen: Connect cable as described below: Brancher le câble comme décrit ci-dessous: Collegare il cavo come segue: Conectar el cable como se describe a continuación:...
- Page 17 VDO Dayton MS 5000 / 5500 DVD – Mazda 6 6. Kabelanschlüsse / Cable connections / Branchements des câbles Collegamento dei cavi / Conexiones de los cables = Dauerplus am Kabelstrang Zünd- schloss schwarz. violett Kl. 15 = Zündung am Kabelstrang Zündschloss blau.