Table of Contents
Advertisement
1. INSTRUCTIONS FOR USE .............................................................. 56
2. SAFETY PRECAUTIONS ................................................................. 58
3. ENVIRONMENTAL RESPONSIBILITY ............................................. 60
4. GET TO KNOW YOUR OVEN........................................................... 61
5. AVAILABLE ACCESSORIES ............................................................ 62
6. USING THE OVEN ........................................................................... 65
7. COOKING WITH THE OVEN............................................................ 79
8. CLEANING AND MAINTENANCE.................................................... 89
9. EXTRAORDINARY MAINTENANCE ................................................ 98
10. INSTALLING THE APPLIANCE ...................................................... 103
INSTRUCTIONS FOR THE USER: these instructions contain user
recommendations, a description of the controls and the correct
procedures for cleaning and maintenance of the appliance.
Instructions For The Installer: these are intended for the qualified
technician who must install the appliance, set it functioning and carry out
an inspection test.
@
Further product information is available from the website www.smeg.com
Contents
55
Advertisement
Table of Contents

Related Manuals for Smeg F610AN


Summary of Contents for Smeg F610AN
- Page 1 INSTRUCTIONS FOR THE INSTALLER: these are intended for the qualified technician who must install the appliance, set it functioning and carry out an inspection test. Further product information is available from the website www.smeg.com Contents...
-
Page 2: Instructions For Use
General instructions 1. INSTRUCTIONS FOR USE THIS MANUAL CONSTITUTES AN INTEGRAL PART OF THE APPLIANCE. IT SHOULD BE KEPT INTACT AND AT HAND FOR THE APPLIANCE’S ENTIRE LIFE CYCLE. IT IS IMPORTANT TO CAREFULLY READ THIS MANUAL AND ALL THE INSTRUCTIONS CONTAINED HEREIN... -
Page 3: General Instructions
General instructions DO NOT USE METALLIC SPONGES AND SHARP SCRAPERS AS THEY WILL DAMAGE THE SURFACES. USE NORMAL NON-ABRASIVE PRODUCTS, INCLUDING WOODEN OR PLASTIC UTENSILS IF NECESSARY. RINSE THOROUGHLY AND DRY USING A SOFT CLOTH OR CHAMOIS LEATHER. DO NOT ALLOW RESIDUES OF SUGARY FOODS (SUCH AS JAM) TO SET INSIDE THE OVEN. -
Page 4: Safety Precautions
General instructions 2. SAFETY PRECAUTIONS REFER TO THE INSTALLATION INSTRUCTIONS FOR THE SAFETY REGULATIONS FOR ELECTRIC OR GAS APPLIANCES AND VENTILATION FUNCTIONS. IN YOUR INTERESTS AND FOR YOUR SAFETY THE LAW REQUIRES THAT THE INSTALLATION AND SERVICING OF ALL ELECTRICAL APPLIANCES IS CARRIED OUT BY QUALIFIED PERSONNEL IN ACCORDANCE WITH THE REGULATIONS IN FORCE. - Page 5 General instructions DO NOT LET CHILDREN GO NEAR THE APPLIANCE WHEN IT IS IN OPERATION OR PLAY WITH IT AT ANY TIME. DO NOT INSERT POINTED METAL OBJECTS (CUTLERY OR UTENSILS) INTO THE SLITS IN THE APPLIANCE. DO NOT USE STEAM JETS FOR CLEANING THE APPLIANCE. THE STEAM COULD REACH THE ELECTRONICS, DAMAGING THEM AND CAUSING SHORT-CIRCUITS.
-
Page 6: Environmental Responsibility
Instructions for disposal 3. ENVIRONMENTAL RESPONSIBILITY Our environmental responsibility Pursuant to Directives 2002/95/EC, 2002/96/EC and 2003/108/EC relating to the reduction of the use of hazardous substances in electrical and electronic appliances, as well as to the disposal of refuse, the crossed out bin symbol on the appliance indicates that at the end of the useful life of the product, it must be collected separately from other refuse. -
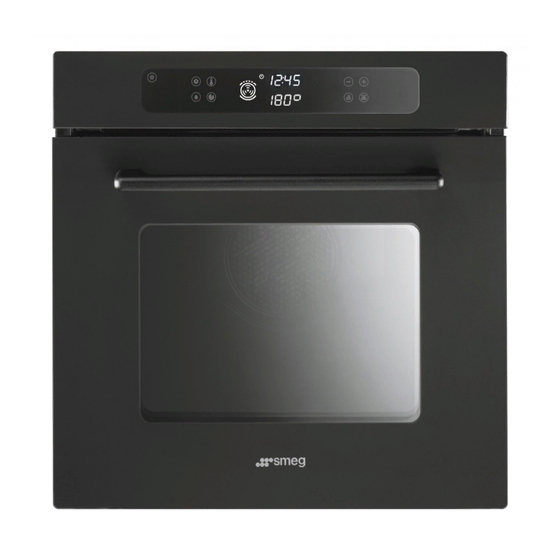
Page 7: Get To Know Your Oven
Instructions for the user 4. GET TO KNOW YOUR OVEN Control panel Roof liner Inside lights Rack and tray support frames Insert for the rotisserie rod (in pyrolytic models only) Oven fan Gasket... -
Page 8: Available Accessories
Instructions for the user 5. AVAILABLE ACCESSORIES NOTE: Rack: for holding cooking containers. Tray rack: to be placed over the top of the oven tray; for cooking foods which may drip. Oven tray: for collecting fat from foods placed on the rack above. Deep oven tray: for baking cakes, pizza and oven desserts. -
Page 9: Instructions For The User
Accessories available on request: Original supplied and optional accessories may be ordered from any Authorised Support Centre. • Use original SMEG accessories only. Using the rack or tray The racks and trays are equipped with a mechanical safety lock which prevents them from being taken out accidentally. - Page 10 Instructions for the user Using the rotisserie rod When cooking with the rotisserie, position the frame on the third runner (see 6.2.1 Oven runners). Once the frame is inserted, the shaped part must sit facing outwards (as shown in the figure). Then prepare the rotisserie rod with the food, using the clip forks provided.
-
Page 11: Using The Oven
Instructions for the user 6. USING THE OVEN Before using the appliance • Remove any labels (apart from the technical data plate) from trays, dripping pans and the cooking compartment. • Remove any protective film from the outside or inside of the appliance, including from accessories such as trays, dripping pans, the pizza plate or the base cover. - Page 12 Instructions for the user 6.2.3 Oven inside lights The oven lights come on when the door is opened or any function or recipe is selected, except for Vapor Clean (where present). When set to ON, the oven lights can be switched on/off by pressing Warnings and general advice for usage All cooking operations must be carried out with the door closed.
- Page 13 Instructions for the user Description of the controls on the front panel All the appliance’s control and monitoring devices are placed together on the front panel. ON/OFF knob Timer set key Temperature setting key Minute timer key Function selection key It indicates the current time, the remaining cooking time or Traditional completion time.
- Page 14 Instructions for the user When the symbol is lit on the display it means: If flashing, it indicates that the time is being set; if steady it shows the normal display. Timer countdown activated. Timed cooking activated. Delayed-start timed cooking activated. ECO function on, see “7.
- Page 15 Instructions for the user Operating modes This appliance has three operating modes which can be activated via STAND-BY position with clock display: The appliance displays the current time (activated as soon as the current time has been confirmed). ON setting: From the standby setting, with the clock displayed, press once.
- Page 16 Instructions for the user First use On the first use, or after a power failure, flashing on the oven’s main display. To be able to start any cooking function, the current time must be set. Setting the current time Press Hold down the symbol in question to increase or decrease rapidly.
- Page 17 Instructions for the user Multifunction models: Static Grill Fan-assisted static Fan-assisted grill Fan-assisted bottom Circular Turbo Thawing Rising Vapor Clean (see 8.8 VAPOR CLEAN: assisted oven cleaning (in some models only)). Pyrolitic models: Static Grill + Rotisserie Fan-assisted static Fan-assisted grill Fan-assisted bottom...
- Page 18 Instructions for the user Once the desired function has been selected, the oven will begin cooking at the pre-set temperature. Cooking itself is preceded by a preheating stage, which allows the oven to heat to the cooking temperature more quickly. flashes to indicate that this stage is in progress.
- Page 19 Instructions for the user 6.10 Using the timer Warning: the timer does not stop the cooking process. It only warns the user that the preset number of minutes have passed. The timer can only be used when the appliance is ON. Press ;...
- Page 20 Instructions for the user 6.11 Programmed cooking 6.11.1 Timed cooking Semi-automatic cooking is the function which allows a cooking operation to be started and then ended after a specific length of time set by the user. Select a cooking function as described in 6.8 Selecting a function.
- Page 21 Instructions for the user 6.11.2 Programmed cooking procedures Programmed cooking is the function which allows a cooking operation to be started at a set time and then ended after a specific length of time set by the user. Use of the programmed cooking function is not recommended for cooking operations that require a pre-heated oven, such as pizzas and cakes.
- Page 22 Instructions for the user To extend the cooking time manually (if the food has not been cooked properly), press . The appliance will resume its normal operation with the previously selected cooking settings. To completely switch off the appliance, press for 2 seconds.
- Page 23 Instructions for the user 6.12 Secondary menu The appliance also has a concealed secondary menu allowing the user to: • Activate or deactivate the child lock. • Activate or deactivate Showroom mode (which disables all the heating elements so that only the control panel works). •...
- Page 24 Instructions for the user Activating low power mode means that cooking times can be extended.
-
Page 25: Cooking With The Oven
Instructions for the user 7. COOKING WITH THE OVEN ECO: Using the grill and the bottom heating element alternately plus the fan is particularly suitable for cooking small quantities of food, as it provides low energy consumption. STATIC: As the heat comes from above and below at the same time, this system is particularly suitable for certain types of food. - Page 26 Instructions for the user FAN-ASSISTED BOTTOM: The combination of the fan with just the lower heating element allows cooking to be completed more rapidly. This system is recommended for sterilising or for finishing off the cooking of foods which are already well-cooked on the surface, but not inside, which therefore need a little more heat.
- Page 27 Instructions for the user Cooking advice and instructions 7.1.1 General advice We recommend preheating the oven before putting the food in. Do not place foods inside the oven until on the display stops flashing and the beep has sounded to confirm that the programmed temperature has been reached. For cooking on several levels, we recommend using a fan-assisted function to achieve uniform cooking at all heights.
- Page 28 Instructions for the user 7.1.4 Advice for defrosting and proving We recommend positioning frozen foods in a lidless container on the first runner of the oven. The food must be defrosted without its wrapping. Lay out the foodstuffs to be defrosted evenly, not overlapping. When defrosting meat, we recommend using a rack positioned on the second runner with the food on it and a tray positioned on the first runner.
- Page 29 Instructions for the user To save energy To save energy during use of the appliance, the following instructions may be followed: • Stop cooking a few minutes before the time normally used. Cooking will continue for the remaining minutes with the heat which has accumulated inside the oven.
- Page 30 Instructions for the user Cooking tables TYPES OF FOOD FIRST COURSES LASAGNE OVEN-BAKED PASTA MEAT ROAST VEAL LOIN OF PORK SHOULDER OF PORK ROAST RABBIT TURKEY BREAST ROAST NECK OF PORK ROAST CHICKEN GRILLED MEATS PORK CHOPS FILLET OF PORK FILLET OF BEEF LIVER SAUSAGES...
- Page 31 Instructions for the user RUNNER POSITION FROM BOTTOM TEMPERATURE °C 220 - 230 220 - 230 180 - 190 180 - 190 180 - 190 180 - 190 180 - 190 180 - 190 190 - 200 1ST SURFACE 2ND SURFACE 250 - 280 250 - 280 250 - 280...
- Page 32 Instructions for the user TYPES OF FOOD ROTISSERIE MEATS CHICKEN FISH SALMON TROUT PIZZA BREAD FOCACCIA DESSERTS DOUGHNUT FRUIT TART SHORT PASTRY JAM TARTS PARADISE CAKE ECLAIR LIGHT SPONGE CAKE RICE PUDDING CROISSANTS The times indicated in the following tables do not include the preheating times and are provided as a guide only.
- Page 33 Instructions for the user RUNNER POSITION FROM BOTTOM On a rotisserie rod TEMPERATURE °C 250 - 280 160 - 170 250 - 280 190 - 200 180 - 190 160 - 170 150 - 160 150 - 160 TIME IN MINUTES 60 - 70 35 - 40 6 -10...
- Page 34 Instructions for the user Proving and defrosting functions The choice of temperature determines whether defrosting or proving takes place based on the table below. Temperature (°C) Function Runner position from the bottom Defrosting Proving Time in minutes Depending on the quantity...
-
Page 35: Cleaning And Maintenance
Instructions for the user 8. CLEANING AND MAINTENANCE NEVER USE A STEAM JET FOR CLEANING THE APPLIANCE. We recommend the use of cleaning products distributed by SMEG. Cleaning stainless steel To keep stainless steel in good condition it should be cleaned regularly after use. - Page 36 Instructions for the user Cleaning the door glazing The glass in the door should always be kept thoroughly clean. Use absorbent kitchen roll; remove stubborn dirt with a damp sponge and an ordinary detergent. Do not use abrasive or corrosive cleaners for cleaning the door glazing. (e.g.
- Page 37 Instructions for the user 8.6.1 Removing guide frames Removing the guide frames makes it easier to clean the side parts, and it also needs to be done whenever the automatic cleaning cycle is used (only available on some models). • To remove the guide frames, pull the frame towards the inside of the oven to unhook it...
- Page 38 Instructions for the user Pyrolysis: automatic oven cleaning Pyrolysis is an automatic high-temperature cleaning procedure which causes dirt to dissolve. Thanks to this process, it is possible to clean the inside of the oven very easily. During the first automatic cleaning cycle, unpleasant smells may occur due to the normal evaporation of oil y manufacturing substances.
- Page 39 Instructions for the user • At the end of the cleaning cycle, when the oven has cooled down, reinsert the frames by repeating the previously used procedure in reverse order. • Make sure that the oven door is firmly closed. Refer to the following diagram for setting the cleaning cycle duration: CLEANING LIGHT DIRT...
- Page 40 Instructions for the user 8.7.2 Setting the cleaning cycle In ON mode (see 6.5 Operating modes), press the function selection key using either To start the cleaning cycle (Pyrolysis), to indicate that it is now possible to set the cycle duration. Press minimum of 1h 30m and a maximum of 3h 00m (apart from the The time remaining to the end of the cleaning cycle...
- Page 41 Instructions for the user VAPOR CLEAN: assisted oven cleaning VAPOR CLEAN is an assisted cleaning procedure which facilitates the removal of dirt. Thanks to this process, it is possible to clean the inside of the oven very easily. The dirt residues are softened by the heat and water vapour for easier removal afterwards.
- Page 42 Instructions for the user • Spray a water and washing up liquid solution inside the oven using a spray nozzle. Aim the spray towards the side walls, roof, floor and deflector (the coloured zone on the figure to the side shows where the solution can be sprayed).
- Page 43 Instructions for the user 8.8.3 End of the assisted cleaning cycle The water remaining at the end of the assisted cleaning cycle cannot be left inside the oven for long (for example overnight). You are advised to wear a pair of gloves during these processes. At the end of the cleaning cycle, open the door and wipe away the less stubborn dirt with a microfibre cloth.
-
Page 44: Extraordinary Maintenance
Instructions for the user 9. EXTRAORDINARY MAINTENANCE The oven may require extraordinary maintenance or replacement of parts subject to wear such as gaskets, bulbs, etc. The following instructions describe how to carry out these minor maintenance operations. Before any intervention that requires access to live parts, disconnect the appliance from the power supply. - Page 45 Instructions for the user Removing the door 9.2.1 With pins Open the door completely. Insert the two pins (supplied) into the holes marked A in the two hinges towards the back of them until they engage. Grasp the door on both sides with both hands, lift it forming an angle of around 30°...
- Page 46 Instructions for the user Removing the door seal For multifunction models only: To permit thorough cleaning of the oven, the door seal may be removed. There are fasteners on all four sides to attach it to the edge of the oven. Pull the edges of the seal outwards to detach the fasteners.
- Page 47 Instructions for the user Removing the internal glass panel: • Remove the internal glass panel by pulling upwards, movement indicated by the arrows. Doing this detaches the 4 pins attached to the glass from their slots in the oven door. Removing the middle glass panes: (pyrolytic models) •...
- Page 48 Instructions for the user What to do if... oven display completely off. The oven does not heat up. • cooking longer than those indicated in the table. After “pyrolysis” cleaning cycle (only on some models) it is not possible to select a function.
-
Page 49: Installing The Appliance
Instructions for the installer 10.INSTALLING THE APPLIANCE 10.1 Electrical connection The identification plate bearing the technical data, serial number and brand name is visibly positioned on the appliance. Do not remove this plate for any reason. The appliance must be connected to earth in compliance with electrical system safety regulations. -
Page 50: Instructions For The Installer
Instructions for the installer Operation at 220-240 V~: use a H05V2V2-F type three-core cable (3 x 1.5 mm The end to be connected to the appliance must have an earth wire (yellow-green) at least 20 mm longer than the others. WARNING: The values indicated above refer to the cross-section of the internal conductor. - Page 51 Instructions for the installer 10.3 Positioning the oven Never use the oven door to lever the oven into place when fitting. Avoid exerting too much pressure on the oven door when open. We recommend installing the oven with the help of a second person. The base on which the oven is resting must be complete as shown in the illustrations below.
- Page 52 Instructions for the installer 10.3.1 Positioning underneath worktops 10.3.2 Positioning in tall units 490-500 35-40...