Table of Contents
Advertisement
Advertisement
Table of Contents

Related Manuals for Smeg Oven FM38X


Summary of Contents for Smeg Oven FM38X
- Page 1 START START STOP STOP Manuale d'uso del vostro forno Le guide d'utilisation de votre four Gebruiksaanwijzing van uw oven Bedienungsanleitung Ihres Backofens Your oven's operating guide La guía de utilización de su horno O guia de utilizaçaõ de seu forno FM38X...
-
Page 2: Table Of Contents
ontents Introduction Recommendations Your oven Accessories Oven Installation Connection Dimensions for installation Oven use Setting the clock Microwave use Using the Microwave for automatic defrosting Using as a combination oven Using as a conventional oven Setting cooking temperature Delayed cooking Using the timer Using the child safety lock Putting the display in standby mode... - Page 3 Our design staff have produced a new generation of kitchen equipment, to make everyday cooking a pleasure. The clean lines and modern look of your SMEG oven will blend in perfectly with your kitchen décor. It is easy to use and performs to a high standard.
- Page 4 The manufacturer accepts no responsibility for any other inappropriate use of the oven. • Before you use your microwave oven, make sure that all the recipients and accessories are suitable for use with it (e.g. flameproof glass, porcelain, etc.).
-
Page 5: Your Oven
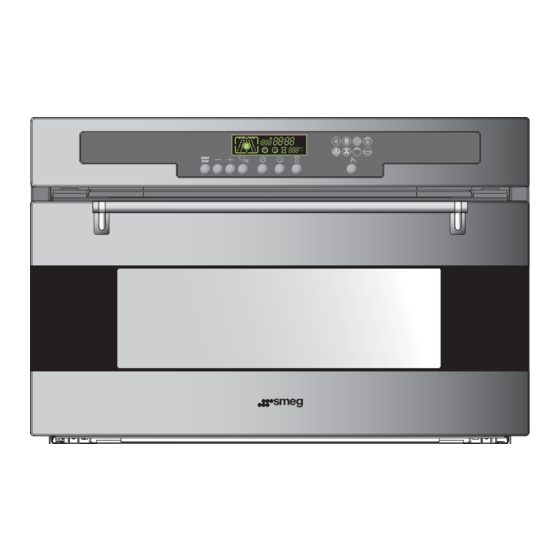
Your oven STAR STOP START/STOP button Time and temperature setting Temperature/power setting Cooking time he oven programmer Wattage indicator Clock and time display Temperature indicator End cooking Independent timer Programme selector Timer indicator End cooking indicator Cooking time indicator... - Page 6 Accessories Reversible oven shelf Inversing this shelf will let you gain extra height inside the oven. It may only be used for dual level reheating. The grid can only be used with metal recipients for the following functions You can, however, warm up food in an aluminium tray by putting it on a plate before it is placed on the grill.
-
Page 7: Oven Installation
Oven installation Connection Electrical connections must be made as per the connection plate fixed to the back of the appliance, by an electrical fitter, who must ensure that the appliance has been connected up in accordance with fitting instructions and local regulations. Where the appliance is not connected to the mains electricity supply by a plug, an omni polar cutout device (with a contacts gap of at least 3 mm) must be fitted on the supply side of the connection to meet safety requirements. -
Page 8: Dimensions For Installation
Dimensions for installation The oven has an high-performance air circulation system which gives remarkable results for cooking and cleaning, as long as the following points are applied: The oven may be fitted either underneath a work surface or in a suitable sized column unit. -
Page 9: Oven Use
Oven use Setting the clock W h e n t h e o v e n i s f i r s t . sw i t c h e d o n a t t h e m a i n s •... -
Page 10: Microwave Use
Oven use Microwave use YOUR OVEN HAS 2 MICROWAVE COOKING MODES: Modes Warning : Do not turn your oven on under any circumstances in either of these two modes if it is empty. With the , button, select cooking mode Setting the cooking time: - Press control which will start flashing. - Page 11 Microwave for automatic defrosting Thanks to your microwave oven, the hours of waiting for your food to defrost are over! The microwave is the deep-freeze's best ally, as it enables you to defrost your frozen food up to ten times quicker than by just leaving it in the open air.
- Page 12 sing the Microwave for automatic defrosting Food pain baguette Defrosting- bread and round loaves doughs pie crust Food scallops peeled shrimps Defrosting whole shrimp sea food gambas (10) prawns Food cod or haddock fillets whiting, codling Defrosting sole, plaice (2) fish fish steaks hake salmon...
- Page 13 sing as a combination oven Your oven has two modes that combine traditional and microwave cooking: Warning: Do not use your oven under any cir- cumstances in any of these two cooking modes if it is empty. - With touch control , select your cooking mode Setting the cooking time:...
- Page 14 sing as a conventional oven The resistors are the only source of energy in this mode. Modes: • Select the cooking mode Select the program of your choice with the E.g.: position " ". You can scroll through the cooking programs by keeping your finger on the touch control The proposed temperature is displayed: E.g.
-
Page 15: Traditional Cooking
Setting cooking temperature Traditional cooking You can change the temperature for traditio- nal cooking, either when you select your cooking mode or during cooking: Press control °C w (for about 2 seconds) until the temperature display starts to flash. Set the temperature you want to memo- rize using the +or - controls. - Page 16 Combined traditional and microwave cooking You can change temperatures and power for combined traditional and microwave cooking, either when you select your cooking mode or during cooking: Press control °C w (for about 2 seconds) until the power readout starts to flash. Set the power you want to memorize using the +or - controls.
-
Page 17: Delayed Cooking
Delayed cooking STAR STOP Set the chosen cooking mode and adjust the temperature if necessary. START STOP Example: ambient heat position Temperature: 200° C Press on the "Cooking time" button The cooking time begins flashing, showing 0:00, as does the symbol to show that START STOP... - Page 18 rogramming your chosen cooking end time This can only be done in the - Perform the same procedure as for pro- grammed cooking, and after setting the cooking time, - Press the "end cooking" control; the cooking end time is indicated and flashes, as does the symbol to indicate that it may be adjusted.
-
Page 19: Using The Timer
Using the timer Your oven has a separate timer, independant from the oven's programmes. It can be used as a kitchen timer. For this, the timer display makes the time temporarily disappear. • Press the hourglass symbol flashes; hourglass appears and flashes. •... -
Page 20: Cooking Settings
Putting the display in standby mode To reduce your oven's power consumption to a minimum when it is not in use, you can put the display in STANDBY MODE. To carry out this operation, proceed as follows: ACTIVATING STANDBY MODE - Your oven must be in normal time readout mode. - Page 21 Parts of the PROGRAMS oven in operation Cooking Power Min./ Preset / max 100w / 1000w / 1000w Heating Microwave Automatic defrost Temperature Min./ Preset / max 40° / 190° / 210° Power 100w / 200w / 350w Combined microwave 1 to 4 100w / 200w / 500w Combined grill...
-
Page 22: Cleaning The Oven
Cleaning the oven Let the oven to cool down before cleaning it manually. In general, don't use any type of scouring powder or metal-backed sponge, or any sharp objects for cleaning. - Turning over the grill unit: The grill can be turned over for cleaning the top of the oven. a) Pull the grill gently forward b) Turn the grill over c) The top surface of the oven can now be reached... -
Page 23: Troubleshooting
Troubleshooting if you're not sure that your oven is working properly, it doesn't necessarily mean that there's a problem. When in doubt, always check the following points: f you realize that The oven isn't heating The oven lamp isn't working. The cooling fan keeps working after the oven is turned off.